Difference between revisions of "Scream Fortress 2013/pt-br"
(this...is going to take a lot of work) |
|||
| Line 14: | Line 14: | ||
| width="60px" style="background: #6A5587;" rowspan="4" | {{icon class|Soldier}}<br/>'''[[Soldier|<span style="color: #FFF;">Soldier</span>]]''' | | width="60px" style="background: #6A5587;" rowspan="4" | {{icon class|Soldier}}<br/>'''[[Soldier|<span style="color: #FFF;">Soldier</span>]]''' | ||
| align="center" style="background: #AD9DC3;" | {{item icon|Cadaver's Capper|75px}} | | align="center" style="background: #AD9DC3;" | {{item icon|Cadaver's Capper|75px}} | ||
| − | | style="background: #F1ECF7;"| ''' | + | | style="background: #F1ECF7;"| '''{{item link|Cadaver's Capper}}''' |
|- | |- | ||
| align="center" style="background: #AD9DC3;" | {{item icon|Freedom Feathers|75px}} | | align="center" style="background: #AD9DC3;" | {{item icon|Freedom Feathers|75px}} | ||
| − | | style="background: #F1ECF7;"| ''' | + | | style="background: #F1ECF7;"| '''{{item link|Freedom Feathers}}''' |
|- | |- | ||
| align="center" style="background: #AD9DC3;" | {{item icon|Larval Lid|75px}} | | align="center" style="background: #AD9DC3;" | {{item icon|Larval Lid|75px}} | ||
| − | | style="background: #F1ECF7;"| ''' | + | | style="background: #F1ECF7;"| '''{{item link|Larval Lid}}''' |
|- | |- | ||
| align="center" style="background: #AD9DC3;" | {{item icon|Spellbinder's Bonnet|75px}} | | align="center" style="background: #AD9DC3;" | {{item icon|Spellbinder's Bonnet|75px}} | ||
| − | | style="background: #F1ECF7;"| ''' | + | | style="background: #F1ECF7;"| '''{{item link|Spellbinder's Bonnet}}''' |
|- | |- | ||
| width="60px" style="background: #6A5587;" rowspan="3" | {{icon class|Pyro}}<br/>'''[[Pyro|<span style="color: #FFF;">Pyro</span>]]''' | | width="60px" style="background: #6A5587;" rowspan="3" | {{icon class|Pyro}}<br/>'''[[Pyro|<span style="color: #FFF;">Pyro</span>]]''' | ||
| align="center" style="background: #AD9DC3;" | {{item icon|Macabre Mask|75px}} | | align="center" style="background: #AD9DC3;" | {{item icon|Macabre Mask|75px}} | ||
| − | | style="background: #F1ECF7;"| ''' | + | | style="background: #F1ECF7;"| '''{{item link|Macabre Mask}}''' |
|- | |- | ||
| align="center" style="background: #AD9DC3;" | {{item icon|Raven's Visage|75px}} | | align="center" style="background: #AD9DC3;" | {{item icon|Raven's Visage|75px}} | ||
| − | | style="background: #F1ECF7;"| ''' | + | | style="background: #F1ECF7;"| '''{{item link|Raven's Visage}}''' |
|- | |- | ||
| align="center" style="background: #AD9DC3;" | {{item icon|Spectralnaut|75px}} | | align="center" style="background: #AD9DC3;" | {{item icon|Spectralnaut|75px}} | ||
| − | | style="background: #F1ECF7;"| ''' | + | | style="background: #F1ECF7;"| '''{{item link|Spectralnaut}}''' |
|- | |- | ||
| width="60px" style="background: #6A5587;" rowspan="2" | {{icon class|Demoman}}<br/>'''[[Demoman|<span style="color: #FFF;">Demoman</span>]]''' | | width="60px" style="background: #6A5587;" rowspan="2" | {{icon class|Demoman}}<br/>'''[[Demoman|<span style="color: #FFF;">Demoman</span>]]''' | ||
| align="center" style="background: #AD9DC3;" | {{item icon|Mann-Bird of Aberdeen|75px}} | | align="center" style="background: #AD9DC3;" | {{item icon|Mann-Bird of Aberdeen|75px}} | ||
| − | | style="background: #F1ECF7;"| ''' | + | | style="background: #F1ECF7;"| '''{{item link|Mann-Bird of Aberdeen}}''' |
|- | |- | ||
| align="center" style="background: #AD9DC3;" | {{item icon|Squid's Lid|75px}} | | align="center" style="background: #AD9DC3;" | {{item icon|Squid's Lid|75px}} | ||
| − | | style="background: #F1ECF7;"| ''' | + | | style="background: #F1ECF7;"| '''{{item link|Squid's Lid}}''' |
|- | |- | ||
| width="60px" style="background: #6A5587;" rowspan="2" | {{icon class|Heavy}}<br/>'''[[Heavy|<span style="color: #FFF;">Heavy</span>]]''' | | width="60px" style="background: #6A5587;" rowspan="2" | {{icon class|Heavy}}<br/>'''[[Heavy|<span style="color: #FFF;">Heavy</span>]]''' | ||
| align="center" style="background: #AD9DC3;" | {{item icon|Chicken Kiev|75px}} | | align="center" style="background: #AD9DC3;" | {{item icon|Chicken Kiev|75px}} | ||
| − | | style="background: #F1ECF7;"| ''' | + | | style="background: #F1ECF7;"| '''{{item link|Chicken Kiev}}''' |
|- | |- | ||
| align="center" style="background: #AD9DC3;" | {{item icon|Horned Honcho|75px}} | | align="center" style="background: #AD9DC3;" | {{item icon|Horned Honcho|75px}} | ||
| − | | style="background: #F1ECF7;"| ''' | + | | style="background: #F1ECF7;"| '''{{item link|Horned Honcho}}''' |
|- | |- | ||
| width="60px" style="background: #6A5587;" rowspan="2" | {{icon class|Medic}}<br/>'''[[Medic|<span style="color: #FFF;">Medic</span>]]''' | | width="60px" style="background: #6A5587;" rowspan="2" | {{icon class|Medic}}<br/>'''[[Medic|<span style="color: #FFF;">Medic</span>]]''' | ||
| align="center" style="background: #AD9DC3;" | {{item icon|Medimedes|75px}} | | align="center" style="background: #AD9DC3;" | {{item icon|Medimedes|75px}} | ||
| − | | style="background: #F1ECF7;"| ''' | + | | style="background: #F1ECF7;"| '''{{item link|Medimedes}}''' |
|- | |- | ||
| align="center" style="background: #AD9DC3;" | {{item icon|Trepanabotomizer|75px}} | | align="center" style="background: #AD9DC3;" | {{item icon|Trepanabotomizer|75px}} | ||
| − | | style="background: #F1ECF7;"| ''' | + | | style="background: #F1ECF7;"| '''{{item link|Trepanabotomizer}}''' |
|- | |- | ||
| width="60px" style="background: #6A5587;" rowspan="2" | {{icon class|Sniper}}<br/>'''[[Sniper|<span style="color: #FFF;">Sniper</span>]]''' | | width="60px" style="background: #6A5587;" rowspan="2" | {{icon class|Sniper}}<br/>'''[[Sniper|<span style="color: #FFF;">Sniper</span>]]''' | ||
| align="center" style="background: #AD9DC3;" | {{item icon|Hallowed Headcase|75px}} | | align="center" style="background: #AD9DC3;" | {{item icon|Hallowed Headcase|75px}} | ||
| − | | style="background: #F1ECF7;"| ''' | + | | style="background: #F1ECF7;"| '''{{item link|Hallowed Headcase}}''' |
|- | |- | ||
| align="center" style="background: #AD9DC3;" | {{item icon|Sir Shootsalot|75px}} | | align="center" style="background: #AD9DC3;" | {{item icon|Sir Shootsalot|75px}} | ||
| − | | style="background: #F1ECF7;"| ''' | + | | style="background: #F1ECF7;"| '''{{item link|Sir Shootsalot}}''' |
|- | |- | ||
| width="60px" style="background: #6A5587;" rowspan="1" | {{icon class|Spy}}<br/>'''[[Spy|<span style="color: #FFF;">Spy</span>]]''' | | width="60px" style="background: #6A5587;" rowspan="1" | {{icon class|Spy}}<br/>'''[[Spy|<span style="color: #FFF;">Spy</span>]]''' | ||
| align="center" style="background: #AD9DC3;" | {{item icon|Hyperbaric Bowler|75px}} | | align="center" style="background: #AD9DC3;" | {{item icon|Hyperbaric Bowler|75px}} | ||
| − | | style="background: #F1ECF7;"| ''' | + | | style="background: #F1ECF7;"| '''{{item link|Hyperbaric Bowler}}''' |
|- | |- | ||
| width="60px" style="background:#6A5587;" rowspan = 1| {{icon class|Pyro}}<br/>'''[[Pyro|<span style="color: #FFF;">Pyro</span>]]'''<br/>{{icon class|Engineer}}<br/>'''[[Engineer|<span style="color: #FFF;">Engineer</span>]]'''<br/>{{icon class|Sniper}}<br/>'''[[Sniper|<span style="color: #FFF;">Sniper</span>]]''' | | width="60px" style="background:#6A5587;" rowspan = 1| {{icon class|Pyro}}<br/>'''[[Pyro|<span style="color: #FFF;">Pyro</span>]]'''<br/>{{icon class|Engineer}}<br/>'''[[Engineer|<span style="color: #FFF;">Engineer</span>]]'''<br/>{{icon class|Sniper}}<br/>'''[[Sniper|<span style="color: #FFF;">Sniper</span>]]''' | ||
| align="center" style="background: #AD9DC3;" | {{item icon|Snaggletoothed Stetson|75px}} | | align="center" style="background: #AD9DC3;" | {{item icon|Snaggletoothed Stetson|75px}} | ||
| − | | style="background: #F1ECF7;"| ''' | + | | style="background: #F1ECF7;"| '''{{item link|Snaggletoothed Stetson}}''' |
|- | |- | ||
| width="60px" style="background:#6A5587;" rowspan = 5| {{icon class|All Classes}}<br/>'''[[Classes|<span style="color: #FFF;">All Classes</span>]]''' | | width="60px" style="background:#6A5587;" rowspan = 5| {{icon class|All Classes}}<br/>'''[[Classes|<span style="color: #FFF;">All Classes</span>]]''' | ||
| align="center" style="background: #AD9DC3;" | {{item icon|Dark Helm|75px}} | | align="center" style="background: #AD9DC3;" | {{item icon|Dark Helm|75px}} | ||
| − | | style="background: #F1ECF7;"| ''' | + | | style="background: #F1ECF7;"| '''{{item link|Dark Helm}}''' |
|- | |- | ||
| align="center" style="background: #AD9DC3;" | {{item icon|Haunted Hat|75px}} | | align="center" style="background: #AD9DC3;" | {{item icon|Haunted Hat|75px}} | ||
| − | | style="background: #F1ECF7;"| ''' | + | | style="background: #F1ECF7;"| '''{{item link|Haunted Hat}}''' |
|- | |- | ||
| align="center" style="background: #AD9DC3;" | {{item icon|Manneater|75px}} | | align="center" style="background: #AD9DC3;" | {{item icon|Manneater|75px}} | ||
| − | | style="background: #F1ECF7;"| ''' | + | | style="background: #F1ECF7;"| '''{{item link|Manneater}}''' |
|- | |- | ||
| align="center" style="background: #AD9DC3;" | {{item icon|One-Way Ticket|75px}} | | align="center" style="background: #AD9DC3;" | {{item icon|One-Way Ticket|75px}} | ||
| − | | style="background: #F1ECF7;"| ''' | + | | style="background: #F1ECF7;"| '''{{item link|One-Way Ticket}}''' |
|- | |- | ||
| align="center" style="background: #AD9DC3;" | {{item icon|Tuque or Treat|75px}} | | align="center" style="background: #AD9DC3;" | {{item icon|Tuque or Treat|75px}} | ||
| − | | style="background: #F1ECF7;"| ''' | + | | style="background: #F1ECF7;"| '''{{item link|Tuque or Treat}}''' |
|- | |- | ||
|} | |} | ||
| Line 93: | Line 93: | ||
| width="60px" style="background: #6A5587;" rowspan="3" | {{icon class|Scout}}<br/>'''[[Scout|<span style="color: #FFF;">Scout</span>]]''' | | width="60px" style="background: #6A5587;" rowspan="3" | {{icon class|Scout}}<br/>'''[[Scout|<span style="color: #FFF;">Scout</span>]]''' | ||
| align="center" style="background: #AD9DC3;" | {{item icon|Face Plante|75px}} | | align="center" style="background: #AD9DC3;" | {{item icon|Face Plante|75px}} | ||
| − | | style="background: #F1ECF7;"| ''' | + | | style="background: #F1ECF7;"| '''{{item link|Face Plante}}''' |
|- | |- | ||
| align="center" style="background: #AD9DC3;" | {{item icon|Faun Feet|75px}} | | align="center" style="background: #AD9DC3;" | {{item icon|Faun Feet|75px}} | ||
| − | | style="background: #F1ECF7;"| ''' | + | | style="background: #F1ECF7;"| '''{{item link|Faun Feet}}''' |
|- | |- | ||
| align="center" style="background: #AD9DC3;" | {{item icon|Sprinting Cephalopod|75px}} | | align="center" style="background: #AD9DC3;" | {{item icon|Sprinting Cephalopod|75px}} | ||
| − | | style="background: #F1ECF7;"| ''' | + | | style="background: #F1ECF7;"| '''{{item link|Sprinting Cephalopod}}''' |
|- | |- | ||
| width="60px" style="background: #6A5587;" rowspan="2" | {{icon class|Soldier}}<br/>'''[[Soldier|<span style="color: #FFF;">Soldier</span>]]''' | | width="60px" style="background: #6A5587;" rowspan="2" | {{icon class|Soldier}}<br/>'''[[Soldier|<span style="color: #FFF;">Soldier</span>]]''' | ||
| align="center" style="background: #AD9DC3;" | {{item icon|Faux Manchu|75px}} | | align="center" style="background: #AD9DC3;" | {{item icon|Faux Manchu|75px}} | ||
| − | | style="background: #F1ECF7;"| ''' | + | | style="background: #F1ECF7;"| '''{{item link|Faux Manchu}}''' |
|- | |- | ||
| align="center" style="background: #AD9DC3;" | {{item icon|Lieutenant Bites the Dust|75px}} | | align="center" style="background: #AD9DC3;" | {{item icon|Lieutenant Bites the Dust|75px}} | ||
| − | | style="background: #F1ECF7;"| ''' | + | | style="background: #F1ECF7;"| '''{{item link|Lieutenant Bites the Dust}}''' |
|- | |- | ||
| width="60px" style="background: #6A5587;" rowspan="13" | {{icon class|Pyro}}<br/>'''[[Pyro|<span style="color: #FFF;">Pyro</span>]]''' | | width="60px" style="background: #6A5587;" rowspan="13" | {{icon class|Pyro}}<br/>'''[[Pyro|<span style="color: #FFF;">Pyro</span>]]''' | ||
| align="center" style="background: #AD9DC3;" | {{item icon|Beast From Below|75px}} | | align="center" style="background: #AD9DC3;" | {{item icon|Beast From Below|75px}} | ||
| − | | style="background: #F1ECF7;"| ''' | + | | style="background: #F1ECF7;"| '''{{item link|Beast From Below}}''' |
|- | |- | ||
| align="center" style="background: #AD9DC3;" | {{item icon|Carrion Companion|75px}} | | align="center" style="background: #AD9DC3;" | {{item icon|Carrion Companion|75px}} | ||
| − | | style="background: #F1ECF7;"| ''' | + | | style="background: #F1ECF7;"| '''{{item link|Carrion Companion}}''' |
|- | |- | ||
| align="center" style="background: #AD9DC3;" | {{item icon|Creature From The Heap|75px}} | | align="center" style="background: #AD9DC3;" | {{item icon|Creature From The Heap|75px}} | ||
| − | | style="background: #F1ECF7;"| ''' | + | | style="background: #F1ECF7;"| '''{{item link|Creature From The Heap}}''' |
|- | |- | ||
| align="center" style="background: #AD9DC3;" | {{item icon|External Organ|75px}} | | align="center" style="background: #AD9DC3;" | {{item icon|External Organ|75px}} | ||
| − | | style="background: #F1ECF7;"| ''' | + | | style="background: #F1ECF7;"| '''{{item link|External Organ}}''' |
|- | |- | ||
| align="center" style="background: #AD9DC3;" | {{item icon|Glob|75px}} | | align="center" style="background: #AD9DC3;" | {{item icon|Glob|75px}} | ||
| − | | style="background: #F1ECF7;"| ''' | + | | style="background: #F1ECF7;"| '''{{item link|Glob}}''' |
|- | |- | ||
| align="center" style="background: #AD9DC3;" | {{item icon|Grisly Gumbo|75px}} | | align="center" style="background: #AD9DC3;" | {{item icon|Grisly Gumbo|75px}} | ||
| − | | style="background: #F1ECF7;"| ''' | + | | style="background: #F1ECF7;"| '''{{item link|Grisly Gumbo}}''' |
|- | |- | ||
| align="center" style="background: #AD9DC3;" | {{item icon|Handhunter|75px}} | | align="center" style="background: #AD9DC3;" | {{item icon|Handhunter|75px}} | ||
| − | | style="background: #F1ECF7;"| ''' | + | | style="background: #F1ECF7;"| '''{{item link|Handhunter}}''' |
|- | |- | ||
| align="center" style="background: #AD9DC3;" | {{item icon|Hard-Headed Hardware|75px}} | | align="center" style="background: #AD9DC3;" | {{item icon|Hard-Headed Hardware|75px}} | ||
| − | | style="background: #F1ECF7;"| ''' | + | | style="background: #F1ECF7;"| '''{{item link|Hard-Headed Hardware}}''' |
|- | |- | ||
| align="center" style="background: #AD9DC3;" | {{item icon|Hollowhead|75px}} | | align="center" style="background: #AD9DC3;" | {{item icon|Hollowhead|75px}} | ||
| − | | style="background: #F1ECF7;"| ''' | + | | style="background: #F1ECF7;"| '''{{item link|Hollowhead}}''' |
|- | |- | ||
| align="center" style="background: #AD9DC3;" | {{item icon|Maniac's Manacles|75px}} | | align="center" style="background: #AD9DC3;" | {{item icon|Maniac's Manacles|75px}} | ||
| − | | style="background: #F1ECF7;"| ''' | + | | style="background: #F1ECF7;"| '''{{item link|Maniac's Manacles}}''' |
|- | |- | ||
| align="center" style="background: #AD9DC3;" | {{item icon|PY-40 Incinibot|75px}} | | align="center" style="background: #AD9DC3;" | {{item icon|PY-40 Incinibot|75px}} | ||
| − | | style="background: #F1ECF7;"| ''' | + | | style="background: #F1ECF7;"| '''{{item link|PY-40 Incinibot}}''' |
|- | |- | ||
| align="center" style="background: #AD9DC3;" | {{item icon|Rugged Respirator|75px}} | | align="center" style="background: #AD9DC3;" | {{item icon|Rugged Respirator|75px}} | ||
| − | | style="background: #F1ECF7;"| ''' | + | | style="background: #F1ECF7;"| '''{{item link|Rugged Respirator}}''' |
|- | |- | ||
| align="center" style="background: #AD9DC3;" | {{item icon|Up Pyroscopes|75px}} | | align="center" style="background: #AD9DC3;" | {{item icon|Up Pyroscopes|75px}} | ||
| − | | style="background: #F1ECF7;"| ''' | + | | style="background: #F1ECF7;"| '''{{item link|Up Pyroscopes}}''' |
|- | |- | ||
| width="60px" style="background: #6A5587;" rowspan="4" | {{icon class|Demoman}}<br/>'''[[Demoman|<span style="color: #FFF;">Demoman</span>]]''' | | width="60px" style="background: #6A5587;" rowspan="4" | {{icon class|Demoman}}<br/>'''[[Demoman|<span style="color: #FFF;">Demoman</span>]]''' | ||
| align="center" style="background: #AD9DC3;" | {{item icon|Cap'n Calamari|75px}} | | align="center" style="background: #AD9DC3;" | {{item icon|Cap'n Calamari|75px}} | ||
| − | | style="background: #F1ECF7;"| ''' | + | | style="background: #F1ECF7;"| '''{{item link|Cap'n Calamari}}''' |
|- | |- | ||
| align="center" style="background: #AD9DC3;" | {{item icon|Horsemann's Hand-Me-Down|75px}} | | align="center" style="background: #AD9DC3;" | {{item icon|Horsemann's Hand-Me-Down|75px}} | ||
| − | | style="background: #F1ECF7;"| ''' | + | | style="background: #F1ECF7;"| '''{{item link|Horsemann's Hand-Me-Down}}''' |
|- | |- | ||
| align="center" style="background: #AD9DC3;" | {{item icon|Parasight|75px}} | | align="center" style="background: #AD9DC3;" | {{item icon|Parasight|75px}} | ||
| − | | style="background: #F1ECF7;"| ''' | + | | style="background: #F1ECF7;"| '''{{item link|Parasight}}''' |
|- | |- | ||
| align="center" style="background: #AD9DC3;" | {{item icon|Polly Putrid|75px}} | | align="center" style="background: #AD9DC3;" | {{item icon|Polly Putrid|75px}} | ||
| − | | style="background: #F1ECF7;"| ''' | + | | style="background: #F1ECF7;"| '''{{item link|Polly Putrid}}''' |
|- | |- | ||
| width="60px" style="background: #6A5587;" rowspan="3" | {{icon class|Heavy}}<br/>'''[[Heavy|<span style="color: #FFF;">Heavy</span>]]''' | | width="60px" style="background: #6A5587;" rowspan="3" | {{icon class|Heavy}}<br/>'''[[Heavy|<span style="color: #FFF;">Heavy</span>]]''' | ||
| align="center" style="background: #AD9DC3;" | {{item icon|Ivan The Inedible|75px}} | | align="center" style="background: #AD9DC3;" | {{item icon|Ivan The Inedible|75px}} | ||
| − | | style="background: #F1ECF7;"| ''' | + | | style="background: #F1ECF7;"| '''{{item link|Ivan The Inedible}}''' |
|- | |- | ||
| align="center" style="background: #AD9DC3;" | {{item icon|Last Bite|75px}} | | align="center" style="background: #AD9DC3;" | {{item icon|Last Bite|75px}} | ||
| − | | style="background: #F1ECF7;"| ''' | + | | style="background: #F1ECF7;"| '''{{item link|Last Bite}}''' |
|- | |- | ||
| align="center" style="background: #AD9DC3;" | {{item icon|Monstrous Mandible|75px}} | | align="center" style="background: #AD9DC3;" | {{item icon|Monstrous Mandible|75px}} | ||
| − | | style="background: #F1ECF7;"| ''' | + | | style="background: #F1ECF7;"| '''{{item link|Monstrous Mandible}}''' |
|- | |- | ||
| width="60px" style="background: #6A5587;" rowspan="2" | {{icon class|Medic}}<br/>'''[[Medic|<span style="color: #FFF;">Medic</span>]]''' | | width="60px" style="background: #6A5587;" rowspan="2" | {{icon class|Medic}}<br/>'''[[Medic|<span style="color: #FFF;">Medic</span>]]''' | ||
| align="center" style="background: #AD9DC3;" | {{item icon|Archimedes the Undying|75px}} | | align="center" style="background: #AD9DC3;" | {{item icon|Archimedes the Undying|75px}} | ||
| − | | style="background: #F1ECF7;"| ''' | + | | style="background: #F1ECF7;"| '''{{item link|Archimedes the Undying}}''' |
|- | |- | ||
| align="center" style="background: #AD9DC3;" | {{item icon|Second Opinion|75px}} | | align="center" style="background: #AD9DC3;" | {{item icon|Second Opinion|75px}} | ||
| − | | style="background: #F1ECF7;"| ''' | + | | style="background: #F1ECF7;"| '''{{item link|Second Opinion}}''' |
|- | |- | ||
| width="60px" style="background: #6A5587;" rowspan="1" | {{icon class|Sniper}}<br/>'''[[Sniper|<span style="color: #FFF;">Sniper</span>]]''' | | width="60px" style="background: #6A5587;" rowspan="1" | {{icon class|Sniper}}<br/>'''[[Sniper|<span style="color: #FFF;">Sniper</span>]]''' | ||
| align="center" style="background: #AD9DC3;" | {{item icon|Carious Chameleon|75px}} | | align="center" style="background: #AD9DC3;" | {{item icon|Carious Chameleon|75px}} | ||
| − | | style="background: #F1ECF7;"| ''' | + | | style="background: #F1ECF7;"| '''{{item link|Carious Chameleon}}''' |
|- | |- | ||
| width="60px" style="background:#6A5587;" rowspan = 1| {{icon class|Scout}}<br/>'''[[Scout|<span style="color: #FFF;">Scout</span>]]'''<br/>{{icon class|Demoman}}<br/>'''[[Demoman|<span style="color: #FFF;">Demoman</span>]]''' | | width="60px" style="background:#6A5587;" rowspan = 1| {{icon class|Scout}}<br/>'''[[Scout|<span style="color: #FFF;">Scout</span>]]'''<br/>{{icon class|Demoman}}<br/>'''[[Demoman|<span style="color: #FFF;">Demoman</span>]]''' | ||
| align="center" style="background: #AD9DC3;" | {{item icon|Baphomet Trotters|75px}} | | align="center" style="background: #AD9DC3;" | {{item icon|Baphomet Trotters|75px}} | ||
| − | | style="background: #F1ECF7;"| ''' | + | | style="background: #F1ECF7;"| '''{{item link|Baphomet Trotters}}''' |
|- | |- | ||
| width="60px" style="background:#6A5587;" rowspan = 8| {{icon class|All Classes}}<br/>'''[[Classes|<span style="color: #FFF;">All Classes</span>]]''' | | width="60px" style="background:#6A5587;" rowspan = 8| {{icon class|All Classes}}<br/>'''[[Classes|<span style="color: #FFF;">All Classes</span>]]''' | ||
| align="center" style="background: #AD9DC3;" | {{item icon|Accursed Apparition|75px}} | | align="center" style="background: #AD9DC3;" | {{item icon|Accursed Apparition|75px}} | ||
| − | | style="background: #F1ECF7;"| ''' | + | | style="background: #F1ECF7;"| '''{{item link|Accursed Apparition}}''' |
|- | |- | ||
| align="center" style="background: #AD9DC3;" | {{item icon|Beacon from Beyond|75px}} | | align="center" style="background: #AD9DC3;" | {{item icon|Beacon from Beyond|75px}} | ||
| − | | style="background: #F1ECF7;"| ''' | + | | style="background: #F1ECF7;"| '''{{item link|Beacon from Beyond}}''' |
|- | |- | ||
| align="center" style="background: #AD9DC3;" | {{item icon|Cryptic Keepsake|75px}} | | align="center" style="background: #AD9DC3;" | {{item icon|Cryptic Keepsake|75px}} | ||
| − | | style="background: #F1ECF7;"| ''' | + | | style="background: #F1ECF7;"| '''{{item link|Cryptic Keepsake}}''' |
|- | |- | ||
| align="center" style="background: #AD9DC3;" | {{item icon|Guano|75px}} | | align="center" style="background: #AD9DC3;" | {{item icon|Guano|75px}} | ||
| − | | style="background: #F1ECF7;"| ''' | + | | style="background: #F1ECF7;"| '''{{item link|Guano}}''' |
|- | |- | ||
| align="center" style="background: #AD9DC3;" | {{item icon|Pocket Horsemann|75px}} | | align="center" style="background: #AD9DC3;" | {{item icon|Pocket Horsemann|75px}} | ||
| − | | style="background: #F1ECF7;"| ''' | + | | style="background: #F1ECF7;"| '''{{item link|Pocket Horsemann}}''' |
|- | |- | ||
| align="center" style="background: #AD9DC3;" | {{item icon|Quoth|75px}} | | align="center" style="background: #AD9DC3;" | {{item icon|Quoth|75px}} | ||
| − | | style="background: #F1ECF7;"| ''' | + | | style="background: #F1ECF7;"| '''{{item link|Quoth}}''' |
|- | |- | ||
| align="center" style="background: #AD9DC3;" | {{item icon|Sackcloth Spook|75px}} | | align="center" style="background: #AD9DC3;" | {{item icon|Sackcloth Spook|75px}} | ||
| − | | style="background: #F1ECF7;"| ''' | + | | style="background: #F1ECF7;"| '''{{item link|Sackcloth Spook}}''' |
|- | |- | ||
| align="center" style="background: #AD9DC3;" | {{item icon|Unidentified Following Object|75px}} | | align="center" style="background: #AD9DC3;" | {{item icon|Unidentified Following Object|75px}} | ||
| − | | style="background: #F1ECF7;"| ''' | + | | style="background: #F1ECF7;"| '''{{item link|Unidentified Following Object}}''' |
|- | |- | ||
|} | |} | ||
| Line 218: | Line 218: | ||
| width="60px" style="background: #6A5587;" rowspan="3" | {{icon class|Scout}}<br/>'''[[Scout|<span style="color: #FFF;">Scout</span>]]''' | | width="60px" style="background: #6A5587;" rowspan="3" | {{icon class|Scout}}<br/>'''[[Scout|<span style="color: #FFF;">Scout</span>]]''' | ||
| align="center" style="background: #AD9DC3;" | {{item icon|Halloweiner|75px}} | | align="center" style="background: #AD9DC3;" | {{item icon|Halloweiner|75px}} | ||
| − | | style="background: #F1ECF7;"| ''' | + | | style="background: #F1ECF7;"| '''{{item link|Halloweiner}}''' |
|- | |- | ||
| align="center" style="background: #AD9DC3;" | {{item icon|Horrific Head of Hare|75px}} | | align="center" style="background: #AD9DC3;" | {{item icon|Horrific Head of Hare|75px}} | ||
| − | | style="background: #F1ECF7;"| ''' | + | | style="background: #F1ECF7;"| '''{{item link|Horrific Head of Hare}}''' |
|- | |- | ||
| align="center" style="background: #AD9DC3;" | {{item icon|Hound's Hood|75px}} | | align="center" style="background: #AD9DC3;" | {{item icon|Hound's Hood|75px}} | ||
| − | | style="background: #F1ECF7;"| ''' | + | | style="background: #F1ECF7;"| '''{{item link|Hound's Hood}}''' |
|- | |- | ||
| width="60px" style="background: #6A5587;" rowspan="2" | {{icon class|Soldier}}<br/>'''[[Soldier|<span style="color: #FFF;">Soldier</span>]]''' | | width="60px" style="background: #6A5587;" rowspan="2" | {{icon class|Soldier}}<br/>'''[[Soldier|<span style="color: #FFF;">Soldier</span>]]''' | ||
| align="center" style="background: #AD9DC3;" | {{item icon|Hardium Helm|75px}} | | align="center" style="background: #AD9DC3;" | {{item icon|Hardium Helm|75px}} | ||
| − | | style="background: #F1ECF7;"| ''' | + | | style="background: #F1ECF7;"| '''{{item link|Hardium Helm}}''' |
|- | |- | ||
| align="center" style="background: #AD9DC3;" | {{item icon|Hidden Dragon|75px}} | | align="center" style="background: #AD9DC3;" | {{item icon|Hidden Dragon|75px}} | ||
| − | | style="background: #F1ECF7;"| ''' | + | | style="background: #F1ECF7;"| '''{{item link|Hidden Dragon}}''' |
|- | |- | ||
| width="60px" style="background: #6A5587;" rowspan="7" | {{icon class|Pyro}}<br/>'''[[Pyro|<span style="color: #FFF;">Pyro</span>]]''' | | width="60px" style="background: #6A5587;" rowspan="7" | {{icon class|Pyro}}<br/>'''[[Pyro|<span style="color: #FFF;">Pyro</span>]]''' | ||
| align="center" style="background: #AD9DC3;" | {{item icon|Bozo's Bouffant|75px}} | | align="center" style="background: #AD9DC3;" | {{item icon|Bozo's Bouffant|75px}} | ||
| − | | style="background: #F1ECF7;"| ''' | + | | style="background: #F1ECF7;"| '''{{item link|Bozo's Bouffant}}''' |
|- | |- | ||
| align="center" style="background: #AD9DC3;" | {{item icon|Burny's Boney Bonnet|75px}} | | align="center" style="background: #AD9DC3;" | {{item icon|Burny's Boney Bonnet|75px}} | ||
| − | | style="background: #F1ECF7;"| ''' | + | | style="background: #F1ECF7;"| '''{{item link|Burny's Boney Bonnet}}''' |
|- | |- | ||
| align="center" style="background: #AD9DC3;" | {{item icon|Corpsemopolitan|75px}} | | align="center" style="background: #AD9DC3;" | {{item icon|Corpsemopolitan|75px}} | ||
| − | | style="background: #F1ECF7;"| ''' | + | | style="background: #F1ECF7;"| '''{{item link|Corpsemopolitan}}''' |
|- | |- | ||
| align="center" style="background: #AD9DC3;" | {{item icon|Crispy Golden Locks|75px}} | | align="center" style="background: #AD9DC3;" | {{item icon|Crispy Golden Locks|75px}} | ||
| − | | style="background: #F1ECF7;"| ''' | + | | style="background: #F1ECF7;"| '''{{item link|Crispy Golden Locks}}''' |
|- | |- | ||
| align="center" style="background: #AD9DC3;" | {{item icon|Gothic Guise|75px}} | | align="center" style="background: #AD9DC3;" | {{item icon|Gothic Guise|75px}} | ||
| − | | style="background: #F1ECF7;"| ''' | + | | style="background: #F1ECF7;"| '''{{item link|Gothic Guise}}''' |
|- | |- | ||
| align="center" style="background: #AD9DC3;" | {{item icon|Mucous Membrain|75px}} | | align="center" style="background: #AD9DC3;" | {{item icon|Mucous Membrain|75px}} | ||
| − | | style="background: #F1ECF7;"| ''' | + | | style="background: #F1ECF7;"| '''{{item link|Mucous Membrain}}''' |
|- | |- | ||
| align="center" style="background: #AD9DC3;" | {{item icon|Vicious Visage|75px}} | | align="center" style="background: #AD9DC3;" | {{item icon|Vicious Visage|75px}} | ||
| − | | style="background: #F1ECF7;"| ''' | + | | style="background: #F1ECF7;"| '''{{item link|Vicious Visage}}''' |
|- | |- | ||
| width="60px" style="background: #6A5587;" rowspan="2" | {{icon class|Demoman}}<br/>'''[[Demoman|<span style="color: #FFF;">Demoman</span>]]''' | | width="60px" style="background: #6A5587;" rowspan="2" | {{icon class|Demoman}}<br/>'''[[Demoman|<span style="color: #FFF;">Demoman</span>]]''' | ||
| align="center" style="background: #AD9DC3;" | {{item icon|Headtaker's Hood|75px}} | | align="center" style="background: #AD9DC3;" | {{item icon|Headtaker's Hood|75px}} | ||
| − | | style="background: #F1ECF7;"| ''' | + | | style="background: #F1ECF7;"| '''{{item link|Headtaker's Hood}}''' |
|- | |- | ||
| align="center" style="background: #AD9DC3;" | {{item icon|Transylvania Top|75px}} | | align="center" style="background: #AD9DC3;" | {{item icon|Transylvania Top|75px}} | ||
| − | | style="background: #F1ECF7;"| ''' | + | | style="background: #F1ECF7;"| '''{{item link|Transylvania Top}}''' |
|- | |- | ||
| width="60px" style="background: #6A5587;" rowspan="4" | {{icon class|Medic}}<br/>'''[[Medic|<span style="color: #FFF;">Medic</span>]]''' | | width="60px" style="background: #6A5587;" rowspan="4" | {{icon class|Medic}}<br/>'''[[Medic|<span style="color: #FFF;">Medic</span>]]''' | ||
| align="center" style="background: #AD9DC3;" | {{item icon|Alternative Medicine Mann|75px}} | | align="center" style="background: #AD9DC3;" | {{item icon|Alternative Medicine Mann|75px}} | ||
| − | | style="background: #F1ECF7;"| ''' | + | | style="background: #F1ECF7;"| '''{{item link|Alternative Medicine Mann}}''' |
|- | |- | ||
| align="center" style="background: #AD9DC3;" | {{item icon|Das Blutliebhaber|75px}} | | align="center" style="background: #AD9DC3;" | {{item icon|Das Blutliebhaber|75px}} | ||
| − | | style="background: #F1ECF7;"| ''' | + | | style="background: #F1ECF7;"| '''{{item link|Das Blutliebhaber}}''' |
|- | |- | ||
| align="center" style="background: #AD9DC3;" | {{item icon|Shaman's Skull|75px}} | | align="center" style="background: #AD9DC3;" | {{item icon|Shaman's Skull|75px}} | ||
| − | | style="background: #F1ECF7;"| ''' | + | | style="background: #F1ECF7;"| '''{{item link|Shaman's Skull}}''' |
|- | |- | ||
| align="center" style="background: #AD9DC3;" | {{item icon|Teutonkahmun|75px}} | | align="center" style="background: #AD9DC3;" | {{item icon|Teutonkahmun|75px}} | ||
| − | | style="background: #F1ECF7;"| ''' | + | | style="background: #F1ECF7;"| '''{{item link|Teutonkahmun}}''' |
|- | |- | ||
| width="60px" style="background: #6A5587;" rowspan="1" | {{icon class|Spy}}<br/>'''[[Spy|<span style="color: #FFF;">Spy</span>]]''' | | width="60px" style="background: #6A5587;" rowspan="1" | {{icon class|Spy}}<br/>'''[[Spy|<span style="color: #FFF;">Spy</span>]]''' | ||
| align="center" style="background: #AD9DC3;" | {{item icon|Candyman's Cap|75px}} | | align="center" style="background: #AD9DC3;" | {{item icon|Candyman's Cap|75px}} | ||
| − | | style="background: #F1ECF7;"| ''' | + | | style="background: #F1ECF7;"| '''{{item link|Candyman's Cap}}''' |
|- | |- | ||
| width="60px" style="background:#6A5587;" rowspan = 1| {{icon class|Demoman}}<br/>'''[[Demoman|<span style="color: #FFF;">Demoman</span>]]'''<br/>{{icon class|Spy}}<br/>'''[[Spy|<span style="color: #FFF;">Spy</span>]]''' | | width="60px" style="background:#6A5587;" rowspan = 1| {{icon class|Demoman}}<br/>'''[[Demoman|<span style="color: #FFF;">Demoman</span>]]'''<br/>{{icon class|Spy}}<br/>'''[[Spy|<span style="color: #FFF;">Spy</span>]]''' | ||
| align="center" style="background: #AD9DC3;" | {{item icon|Ethereal Hood|75px}} | | align="center" style="background: #AD9DC3;" | {{item icon|Ethereal Hood|75px}} | ||
| − | | style="background: #F1ECF7;"| ''' | + | | style="background: #F1ECF7;"| '''{{item link|Ethereal Hood}}''' |
|- | |- | ||
| width="60px" style="background:#6A5587;" rowspan = 2| {{icon class|All Classes}}<br/>'''[[Classes|<span style="color: #FFF;">All Classes</span>]]''' | | width="60px" style="background:#6A5587;" rowspan = 2| {{icon class|All Classes}}<br/>'''[[Classes|<span style="color: #FFF;">All Classes</span>]]''' | ||
| align="center" style="background: #AD9DC3;" | {{item icon|Birdie Bonnet|75px}} | | align="center" style="background: #AD9DC3;" | {{item icon|Birdie Bonnet|75px}} | ||
| − | | style="background: #F1ECF7;"| ''' | + | | style="background: #F1ECF7;"| '''{{item link|Birdie Bonnet}}''' |
|- | |- | ||
| align="center" style="background: #AD9DC3;" | {{item icon|Magical Mercenary|75px}} | | align="center" style="background: #AD9DC3;" | {{item icon|Magical Mercenary|75px}} | ||
| − | | style="background: #F1ECF7;"| ''' | + | | style="background: #F1ECF7;"| '''{{item link|Magical Mercenary}}''' |
|- | |- | ||
|} | |} | ||
| Line 296: | Line 296: | ||
| width="60px" style="background: #6A5587;" rowspan="1" | {{icon class|Scout}}<br/>'''[[Scout|<span style="color: #FFF;">Scout</span>]]''' | | width="60px" style="background: #6A5587;" rowspan="1" | {{icon class|Scout}}<br/>'''[[Scout|<span style="color: #FFF;">Scout</span>]]''' | ||
| align="center" style="background: #AD9DC3;" | {{item icon|Terrier Trousers|75px}} | | align="center" style="background: #AD9DC3;" | {{item icon|Terrier Trousers|75px}} | ||
| − | | style="background: #F1ECF7;"| ''' | + | | style="background: #F1ECF7;"| '''{{item link|Terrier Trousers}}''' |
|- | |- | ||
| width="60px" style="background: #6A5587;" rowspan="4" | {{icon class|Soldier}}<br/>'''[[Soldier|<span style="color: #FFF;">Soldier</span>]]''' | | width="60px" style="background: #6A5587;" rowspan="4" | {{icon class|Soldier}}<br/>'''[[Soldier|<span style="color: #FFF;">Soldier</span>]]''' | ||
| align="center" style="background: #AD9DC3;" | {{item icon|Grub Grenades|75px}} | | align="center" style="background: #AD9DC3;" | {{item icon|Grub Grenades|75px}} | ||
| − | | style="background: #F1ECF7;"| ''' | + | | style="background: #F1ECF7;"| '''{{item link|Grub Grenades}}''' |
|- | |- | ||
| align="center" style="background: #AD9DC3;" | {{item icon|Jupiter Jumpers|75px}} | | align="center" style="background: #AD9DC3;" | {{item icon|Jupiter Jumpers|75px}} | ||
| − | | style="background: #F1ECF7;"| ''' | + | | style="background: #F1ECF7;"| '''{{item link|Jupiter Jumpers}}''' |
|- | |- | ||
| align="center" style="background: #AD9DC3;" | {{item icon|Shaolin Sash|75px}} | | align="center" style="background: #AD9DC3;" | {{item icon|Shaolin Sash|75px}} | ||
| − | | style="background: #F1ECF7;"| ''' | + | | style="background: #F1ECF7;"| '''{{item link|Shaolin Sash}}''' |
|- | |- | ||
| align="center" style="background: #AD9DC3;" | {{item icon|Space Bracers|75px}} | | align="center" style="background: #AD9DC3;" | {{item icon|Space Bracers|75px}} | ||
| − | | style="background: #F1ECF7;"| ''' | + | | style="background: #F1ECF7;"| '''{{item link|Space Bracers}}''' |
|- | |- | ||
| width="60px" style="background: #6A5587;" rowspan="6" | {{icon class|Pyro}}<br/>'''[[Pyro|<span style="color: #FFF;">Pyro</span>]]''' | | width="60px" style="background: #6A5587;" rowspan="6" | {{icon class|Pyro}}<br/>'''[[Pyro|<span style="color: #FFF;">Pyro</span>]]''' | ||
| align="center" style="background: #AD9DC3;" | {{item icon|Abhorrent Appendages|75px}} | | align="center" style="background: #AD9DC3;" | {{item icon|Abhorrent Appendages|75px}} | ||
| − | | style="background: #F1ECF7;"| ''' | + | | style="background: #F1ECF7;"| '''{{item link|Abhorrent Appendages}}''' |
|- | |- | ||
| align="center" style="background: #AD9DC3;" | {{item icon|Cauterizer's Caudal Appendage|75px}} | | align="center" style="background: #AD9DC3;" | {{item icon|Cauterizer's Caudal Appendage|75px}} | ||
| − | | style="background: #F1ECF7;"| ''' | + | | style="background: #F1ECF7;"| '''{{item link|Cauterizer's Caudal Appendage}}''' |
|- | |- | ||
| align="center" style="background: #AD9DC3;" | {{item icon|Death Support Pack|75px}} | | align="center" style="background: #AD9DC3;" | {{item icon|Death Support Pack|75px}} | ||
| − | | style="background: #F1ECF7;"| ''' | + | | style="background: #F1ECF7;"| '''{{item link|Death Support Pack}}''' |
|- | |- | ||
| align="center" style="background: #AD9DC3;" | {{item icon|Monster's Stompers|75px}} | | align="center" style="background: #AD9DC3;" | {{item icon|Monster's Stompers|75px}} | ||
| − | | style="background: #F1ECF7;"| ''' | + | | style="background: #F1ECF7;"| '''{{item link|Monster's Stompers}}''' |
|- | |- | ||
| align="center" style="background: #AD9DC3;" | {{item icon|Scorched Skirt|75px}} | | align="center" style="background: #AD9DC3;" | {{item icon|Scorched Skirt|75px}} | ||
| − | | style="background: #F1ECF7;"| ''' | + | | style="background: #F1ECF7;"| '''{{item link|Scorched Skirt}}''' |
|- | |- | ||
| align="center" style="background: #AD9DC3;" | {{item icon|Vicious Visage|75px}} | | align="center" style="background: #AD9DC3;" | {{item icon|Vicious Visage|75px}} | ||
| − | | style="background: #F1ECF7;"| ''' | + | | style="background: #F1ECF7;"| '''{{item link|Vicious Visage}}''' |
|- | |- | ||
| width="60px" style="background: #6A5587;" rowspan="1" | {{icon class|Demoman}}<br/>'''[[Demoman|<span style="color: #FFF;">Demoman</span>]]''' | | width="60px" style="background: #6A5587;" rowspan="1" | {{icon class|Demoman}}<br/>'''[[Demoman|<span style="color: #FFF;">Demoman</span>]]''' | ||
| align="center" style="background: #AD9DC3;" | {{item icon|Lordly Lapels|75px}} | | align="center" style="background: #AD9DC3;" | {{item icon|Lordly Lapels|75px}} | ||
| − | | style="background: #F1ECF7;"| ''' | + | | style="background: #F1ECF7;"| '''{{item link|Lordly Lapels}}''' |
|- | |- | ||
| width="60px" style="background: #6A5587;" rowspan="1" | {{icon class|Engineer}}<br/>'''[[Engineer|<span style="color: #FFF;">Engineer</span>]]''' | | width="60px" style="background: #6A5587;" rowspan="1" | {{icon class|Engineer}}<br/>'''[[Engineer|<span style="color: #FFF;">Engineer</span>]]''' | ||
| align="center" style="background: #AD9DC3;" | {{item icon|Grease Monkey|75px}} | | align="center" style="background: #AD9DC3;" | {{item icon|Grease Monkey|75px}} | ||
| − | | style="background: #F1ECF7;"| ''' | + | | style="background: #F1ECF7;"| '''{{item link|Grease Monkey}}''' |
|- | |- | ||
| width="60px" style="background: #6A5587;" rowspan="3" | {{icon class|Medic}}<br/>'''[[Medic|<span style="color: #FFF;">Medic</span>]]''' | | width="60px" style="background: #6A5587;" rowspan="3" | {{icon class|Medic}}<br/>'''[[Medic|<span style="color: #FFF;">Medic</span>]]''' | ||
| align="center" style="background: #AD9DC3;" | {{item icon|Ramses' Regalia|75px}} | | align="center" style="background: #AD9DC3;" | {{item icon|Ramses' Regalia|75px}} | ||
| − | | style="background: #F1ECF7;"| ''' | + | | style="background: #F1ECF7;"| '''{{item link|Ramses' Regalia}}''' |
|- | |- | ||
| align="center" style="background: #AD9DC3;" | {{item icon|Surgeon's Space Suit|75px}} | | align="center" style="background: #AD9DC3;" | {{item icon|Surgeon's Space Suit|75px}} | ||
| − | | style="background: #F1ECF7;"| ''' | + | | style="background: #F1ECF7;"| '''{{item link|Surgeon's Space Suit}}''' |
|- | |- | ||
| align="center" style="background: #AD9DC3;" | {{item icon|Vicar's Vestments|75px}} | | align="center" style="background: #AD9DC3;" | {{item icon|Vicar's Vestments|75px}} | ||
| − | | style="background: #F1ECF7;"| ''' | + | | style="background: #F1ECF7;"| '''{{item link|Vicar's Vestments}}''' |
|- | |- | ||
| width="60px" style="background: #6A5587;" rowspan="3" | {{icon class|Spy}}<br/>'''[[Spy|<span style="color: #FFF;">Spy</span>]]''' | | width="60px" style="background: #6A5587;" rowspan="3" | {{icon class|Spy}}<br/>'''[[Spy|<span style="color: #FFF;">Spy</span>]]''' | ||
| align="center" style="background: #AD9DC3;" | {{item icon|Bountiful Bow|75px}} | | align="center" style="background: #AD9DC3;" | {{item icon|Bountiful Bow|75px}} | ||
| − | | style="background: #F1ECF7;"| ''' | + | | style="background: #F1ECF7;"| '''{{item link|Bountiful Bow}}''' |
|- | |- | ||
| align="center" style="background: #AD9DC3;" | {{item icon|Bozo's Brogues|75px}} | | align="center" style="background: #AD9DC3;" | {{item icon|Bozo's Brogues|75px}} | ||
| − | | style="background: #F1ECF7;"| ''' | + | | style="background: #F1ECF7;"| '''{{item link|Bozo's Brogues}}''' |
|- | |- | ||
| align="center" style="background: #AD9DC3;" | {{item icon|Foul Cowl|75px}} | | align="center" style="background: #AD9DC3;" | {{item icon|Foul Cowl|75px}} | ||
| − | | style="background: #F1ECF7;"| ''' | + | | style="background: #F1ECF7;"| '''{{item link|Foul Cowl}}''' |
|- | |- | ||
| width="60px" style="background:#6A5587;" rowspan = 1| {{icon class|Soldier}}<br/>'''[[Soldier|<span style="color: #FFF;">Soldier</span>]]'''<br/>{{icon class|Pyro}}<br/>'''[[Pyro|<span style="color: #FFF;">Pyro</span>]]'''<br/>{{icon class|Demoman}}<br/>'''[[Demoman|<span style="color: #FFF;">Demoman</span>]]''' | | width="60px" style="background:#6A5587;" rowspan = 1| {{icon class|Soldier}}<br/>'''[[Soldier|<span style="color: #FFF;">Soldier</span>]]'''<br/>{{icon class|Pyro}}<br/>'''[[Pyro|<span style="color: #FFF;">Pyro</span>]]'''<br/>{{icon class|Demoman}}<br/>'''[[Demoman|<span style="color: #FFF;">Demoman</span>]]''' | ||
| align="center" style="background: #AD9DC3;" | {{item icon|Candleer|75px}} | | align="center" style="background: #AD9DC3;" | {{item icon|Candleer|75px}} | ||
| − | | style="background: #F1ECF7;"| ''' | + | | style="background: #F1ECF7;"| '''{{item link|Candleer}}''' |
|- | |- | ||
| width="60px" style="background:#6A5587;" rowspan = 1| {{icon class|Soldier}}<br/>'''[[Soldier|<span style="color: #FFF;">Soldier</span>]]'''<br/>{{icon class|Pyro}}<br/>'''[[Pyro|<span style="color: #FFF;">Pyro</span>]]''' | | width="60px" style="background:#6A5587;" rowspan = 1| {{icon class|Soldier}}<br/>'''[[Soldier|<span style="color: #FFF;">Soldier</span>]]'''<br/>{{icon class|Pyro}}<br/>'''[[Pyro|<span style="color: #FFF;">Pyro</span>]]''' | ||
| align="center" style="background: #AD9DC3;" | {{item icon|Pin Pals|75px}} | | align="center" style="background: #AD9DC3;" | {{item icon|Pin Pals|75px}} | ||
| − | | style="background: #F1ECF7;"| ''' | + | | style="background: #F1ECF7;"| '''{{item link|Pin Pals}}''' |
|- | |- | ||
|} | |} | ||
Revision as of 15:45, 30 October 2013
Este artigo refere-se especificamente ao conteúdo lançado na atualização. Para informações sobre a atualização, veja
Atualização de 29 de outubro de 2013.
| "Vai, vai, vai!" Este artigo documenta uma adição recente. Ele pode conter especulações, links quebrados ou erros. Você pode ajudar a melhorá-lo editando esta página para incluir novas informações. |
| "Você é tão pequeno! É muito engraçado!" Este artigo ou seção é um esboço. Logo, não está completo. Você pode ajudar a Wiki do Team Fortress expandindo o artigo original (em inglês). |
| “ | Claw your way through piles of musty books and skeletons while old people yell at each other about nonsense and get carried off to Hell! That's right, Team Feartress fans— we combined the terror of Halloween with the more muted and depressing terror of a retirement home, and accidentally invented an entirely new brand of horror! Then we realized listening to two old men bicker from beyond the grave isn't that horrifying, so we threw in a bunch of crazy spells you can cast at each other!
— Scream Fortress 2013 Update Page
|
” |
O Scream Fortress Fifth Annual Halloween Special é uma atualização de conteúdo lançada no dia 29 de Outubro de 2013.
Índice
cronograma
- O evento dura de Outubro 29 de 2013, até novembro 11 de 2013
Adições
Chapéus
Itens Misc
Peças de Fantasia
Chapéus
Itens Misc
Itens de Ação
| Revista de Feitiços |
Ferramentas
| Chave Apavorante | |
| Encantamento: Dia das Bruxas Instantâneo |
NPCs
- Esqueletos
Conquistas
- Helltower: Competitive Spirit [Win 142 Rounds]
- Helltower: Hell's Spells [Get and use a rare spell]
- Helltower: Hell on Wheels [Send Redmond/Blutarch to Hell 10 times]
- Helltower: Skeleton Coup [Kill 99 skeletons]
- Helltower: Spelling Spree [Use spells to kill 25 players]
- Helltower: Mine Games [Perform 17 enviormental kills in Hell]
- Hat Out Of Hell [Get the loot from Skull Island in Hell]
- The Mann-tastic Four [Earn 4 of the Helltower achievements]
Mapas
Curiosidades
- Severas mensages em códigos aparecem nas páginas da atualização, e eles usam os símbolos Agathodaimon
- Múltiplos nomes de conquistas são brincadeiras de palavras que se referem a ícones culturais ou frases.
Galeria
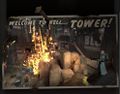
Postcard da Helltower
