Difference between revisions of "Scream Fortress 2013"
m (→Tools: Updated to new Eternaween.) |
m (→Additions: Alphabetized cosmetics, removed unnecessary item links, ordered set cosmetics by ingame order.) |
||
| Line 20: | Line 20: | ||
| align="center" style="background: #AD9DC3;" | {{item icon|Faun Feet|75px}} | | align="center" style="background: #AD9DC3;" | {{item icon|Faun Feet|75px}} | ||
| style="background: #F1ECF7;"| '''[[Faun Feet]]''' | | style="background: #F1ECF7;"| '''[[Faun Feet]]''' | ||
| − | |||
| − | |||
| − | |||
|- | |- | ||
| align="center" style="background: #AD9DC3;" | {{item icon|Halloweiner|75px}} | | align="center" style="background: #AD9DC3;" | {{item icon|Halloweiner|75px}} | ||
| Line 29: | Line 26: | ||
| align="center" style="background: #AD9DC3;" | {{item icon|Horrific Head of Hare|75px}} | | align="center" style="background: #AD9DC3;" | {{item icon|Horrific Head of Hare|75px}} | ||
| style="background: #F1ECF7;"| '''[[Horrific Head of Hare]]''' | | style="background: #F1ECF7;"| '''[[Horrific Head of Hare]]''' | ||
| + | |- | ||
| + | | align="center" style="background: #AD9DC3;" | {{item icon|Sprinting Cephalopod|75px}} | ||
| + | | style="background: #F1ECF7;"| '''[[Sprinting Cephalopod]]''' | ||
|- | |- | ||
| width="60px" style="background: #6A5587;" rowspan="6" | {{icon class|Soldier}}<br/>'''[[Soldier|<span style="color: #FFF;">Soldier</span>]]''' | | width="60px" style="background: #6A5587;" rowspan="6" | {{icon class|Soldier}}<br/>'''[[Soldier|<span style="color: #FFF;">Soldier</span>]]''' | ||
| − | |||
| − | |||
| − | |||
| − | |||
| − | |||
| − | |||
| align="center" style="background: #AD9DC3;" | {{item icon|Cadaver's Capper|75px}} | | align="center" style="background: #AD9DC3;" | {{item icon|Cadaver's Capper|75px}} | ||
| style="background: #F1ECF7;"| '''[[Cadaver's Capper]]''' | | style="background: #F1ECF7;"| '''[[Cadaver's Capper]]''' | ||
| Line 42: | Line 36: | ||
| align="center" style="background: #AD9DC3;" | {{item icon|Freedom Feathers|75px}} | | align="center" style="background: #AD9DC3;" | {{item icon|Freedom Feathers|75px}} | ||
| style="background: #F1ECF7;"| '''[[Freedom Feathers]]''' | | style="background: #F1ECF7;"| '''[[Freedom Feathers]]''' | ||
| + | |- | ||
| + | | align="center" style="background: #AD9DC3;" | {{item icon|Grub Grenades|75px}} | ||
| + | | style="background: #F1ECF7;"| '''[[Grub Grenades]]''' | ||
|- | |- | ||
| align="center" style="background: #AD9DC3;" | {{item icon|Larval Lid|75px}} | | align="center" style="background: #AD9DC3;" | {{item icon|Larval Lid|75px}} | ||
| style="background: #F1ECF7;"| '''[[Larval Lid]]''' | | style="background: #F1ECF7;"| '''[[Larval Lid]]''' | ||
| + | |- | ||
| + | | align="center" style="background: #AD9DC3;" | {{item icon|Lieutenant Bites the Dust|75px}} | ||
| + | | style="background: #F1ECF7;"| '''[[Lieutenant Bites the Dust]]''' | ||
|- | |- | ||
| align="center" style="background: #AD9DC3;" | {{item icon|Spellbinder's Bonnet|75px}} | | align="center" style="background: #AD9DC3;" | {{item icon|Spellbinder's Bonnet|75px}} | ||
| Line 52: | Line 52: | ||
| align="center" style="background: #AD9DC3;" | {{item icon|Beast From Below|75px}} | | align="center" style="background: #AD9DC3;" | {{item icon|Beast From Below|75px}} | ||
| style="background: #F1ECF7;"| '''[[Beast From Below]]''' | | style="background: #F1ECF7;"| '''[[Beast From Below]]''' | ||
| + | |- | ||
| + | | align="center" style="background: #AD9DC3;" | {{item icon|Bozo's Bouffant|75px}} | ||
| + | | style="background: #F1ECF7;"| '''[[Bozo's Bouffant]]''' | ||
|- | |- | ||
| align="center" style="background: #AD9DC3;" | {{item icon|Carrion Companion|75px}} | | align="center" style="background: #AD9DC3;" | {{item icon|Carrion Companion|75px}} | ||
| style="background: #F1ECF7;"| '''[[Carrion Companion]]''' | | style="background: #F1ECF7;"| '''[[Carrion Companion]]''' | ||
| + | |- | ||
| + | | align="center" style="background: #AD9DC3;" | {{item icon|Corpsemopolitan|75px}} | ||
| + | | style="background: #F1ECF7;"| '''[[Corpsemopolitan]]''' | ||
|- | |- | ||
| align="center" style="background: #AD9DC3;" | {{item icon|Creature From The Heap|75px}} | | align="center" style="background: #AD9DC3;" | {{item icon|Creature From The Heap|75px}} | ||
| Line 67: | Line 73: | ||
| align="center" style="background: #AD9DC3;" | {{item icon|Glob|75px}} | | align="center" style="background: #AD9DC3;" | {{item icon|Glob|75px}} | ||
| style="background: #F1ECF7;"| '''[[Glob]]''' | | style="background: #F1ECF7;"| '''[[Glob]]''' | ||
| + | |- | ||
| + | | align="center" style="background: #AD9DC3;" | {{item icon|Gothic Guise|75px}} | ||
| + | | style="background: #F1ECF7;"| '''[[Gothic Guise]]''' | ||
|- | |- | ||
| align="center" style="background: #AD9DC3;" | {{item icon|Grisly Gumbo|75px}} | | align="center" style="background: #AD9DC3;" | {{item icon|Grisly Gumbo|75px}} | ||
| Line 79: | Line 88: | ||
| align="center" style="background: #AD9DC3;" | {{item icon|Hollowhead|75px}} | | align="center" style="background: #AD9DC3;" | {{item icon|Hollowhead|75px}} | ||
| style="background: #F1ECF7;"| '''[[Hollowhead]]''' | | style="background: #F1ECF7;"| '''[[Hollowhead]]''' | ||
| + | |- | ||
| + | | align="center" style="background: #AD9DC3;" | {{item icon|Macabre Mask|75px}} | ||
| + | | style="background: #F1ECF7;"| '''[[Macabre Mask]]''' | ||
|- | |- | ||
| align="center" style="background: #AD9DC3;" | {{item icon|Maniac's Manacles|75px}} | | align="center" style="background: #AD9DC3;" | {{item icon|Maniac's Manacles|75px}} | ||
| style="background: #F1ECF7;"| '''[[Maniac's Manacles]]''' | | style="background: #F1ECF7;"| '''[[Maniac's Manacles]]''' | ||
| + | |- | ||
| + | | align="center" style="background: #AD9DC3;" | {{item icon|Mucous Membrain|75px}} | ||
| + | | style="background: #F1ECF7;"| '''[[Mucous Membrain]]''' | ||
|- | |- | ||
| align="center" style="background: #AD9DC3;" | {{item icon|PY-40 Incinibot|75px}} | | align="center" style="background: #AD9DC3;" | {{item icon|PY-40 Incinibot|75px}} | ||
| style="background: #F1ECF7;"| '''[[PY-40 Incinibot]]''' | | style="background: #F1ECF7;"| '''[[PY-40 Incinibot]]''' | ||
| + | |- | ||
| + | | align="center" style="background: #AD9DC3;" | {{item icon|Raven's Visage|75px}} | ||
| + | | style="background: #F1ECF7;"| '''[[Raven's Visage]]''' | ||
|- | |- | ||
| align="center" style="background: #AD9DC3;" | {{item icon|Rugged Respirator|75px}} | | align="center" style="background: #AD9DC3;" | {{item icon|Rugged Respirator|75px}} | ||
| style="background: #F1ECF7;"| '''[[Rugged Respirator]]''' | | style="background: #F1ECF7;"| '''[[Rugged Respirator]]''' | ||
| + | |- | ||
| + | | align="center" style="background: #AD9DC3;" | {{item icon|Spectralnaut|75px}} | ||
| + | | style="background: #F1ECF7;"| '''[[Spectralnaut]]''' | ||
|- | |- | ||
| align="center" style="background: #AD9DC3;" | {{item icon|Up Pyroscopes|75px}} | | align="center" style="background: #AD9DC3;" | {{item icon|Up Pyroscopes|75px}} | ||
| style="background: #F1ECF7;"| '''[[Up Pyroscopes]]''' | | style="background: #F1ECF7;"| '''[[Up Pyroscopes]]''' | ||
| − | |||
| − | |||
| − | |||
| − | |||
| − | |||
| − | |||
| − | |||
| − | |||
| − | |||
| − | |||
| − | |||
| − | |||
| − | |||
| − | |||
| − | |||
| − | |||
| − | |||
| − | |||
| − | |||
| − | |||
| − | |||
|- | |- | ||
| width="60px" style="background: #6A5587;" rowspan="5" | {{icon class|Demoman}}<br/>'''[[Demoman|<span style="color: #FFF;">Demoman</span>]]''' | | width="60px" style="background: #6A5587;" rowspan="5" | {{icon class|Demoman}}<br/>'''[[Demoman|<span style="color: #FFF;">Demoman</span>]]''' | ||
| align="center" style="background: #AD9DC3;" | {{item icon|Headtaker's Hood|75px}} | | align="center" style="background: #AD9DC3;" | {{item icon|Headtaker's Hood|75px}} | ||
| style="background: #F1ECF7;"| '''[[Headtaker's Hood]]''' | | style="background: #F1ECF7;"| '''[[Headtaker's Hood]]''' | ||
| + | |- | ||
| + | | align="center" style="background: #AD9DC3;" | {{item icon|Horsemann's Hand-Me-Down|75px}} | ||
| + | | style="background: #F1ECF7;"| '''[[Horsemann's Hand-Me-Down]]''' | ||
|- | |- | ||
| align="center" style="background: #AD9DC3;" | {{item icon|Mann-Bird of Aberdeen|75px}} | | align="center" style="background: #AD9DC3;" | {{item icon|Mann-Bird of Aberdeen|75px}} | ||
| style="background: #F1ECF7;"| '''[[Mann-Bird of Aberdeen]]''' | | style="background: #F1ECF7;"| '''[[Mann-Bird of Aberdeen]]''' | ||
| − | |||
| − | |||
| − | |||
|- | |- | ||
| align="center" style="background: #AD9DC3;" | {{item icon|Parasight|75px}} | | align="center" style="background: #AD9DC3;" | {{item icon|Parasight|75px}} | ||
| Line 150: | Line 150: | ||
|- | |- | ||
| width="60px" style="background: #6A5587;" rowspan="8" | {{icon class|Medic}}<br/>'''[[Medic|<span style="color: #FFF;">Medic</span>]]''' | | width="60px" style="background: #6A5587;" rowspan="8" | {{icon class|Medic}}<br/>'''[[Medic|<span style="color: #FFF;">Medic</span>]]''' | ||
| + | | align="center" style="background: #AD9DC3;" | {{item icon|Alternative Medicine Mann|75px}} | ||
| + | | style="background: #F1ECF7;"| '''[[Alternative Medicine Mann]]''' | ||
| + | |- | ||
| align="center" style="background: #AD9DC3;" | {{item icon|Archimedes the Undying|75px}} | | align="center" style="background: #AD9DC3;" | {{item icon|Archimedes the Undying|75px}} | ||
| style="background: #F1ECF7;"| '''[[Archimedes the Undying]]''' | | style="background: #F1ECF7;"| '''[[Archimedes the Undying]]''' | ||
| − | |||
| − | |||
| − | |||
| − | |||
| − | |||
| − | |||
| − | |||
| − | |||
| − | |||
|- | |- | ||
| align="center" style="background: #AD9DC3;" | {{item icon|Das Blutliebhaber|75px}} | | align="center" style="background: #AD9DC3;" | {{item icon|Das Blutliebhaber|75px}} | ||
| Line 167: | Line 161: | ||
| align="center" style="background: #AD9DC3;" | {{item icon|Medimedes|75px}} | | align="center" style="background: #AD9DC3;" | {{item icon|Medimedes|75px}} | ||
| style="background: #F1ECF7;"| '''[[Medimedes]]''' | | style="background: #F1ECF7;"| '''[[Medimedes]]''' | ||
| + | |- | ||
| + | | align="center" style="background: #AD9DC3;" | {{item icon|Second Opinion|75px}} | ||
| + | | style="background: #F1ECF7;"| '''[[Second Opinion]]''' | ||
|- | |- | ||
| align="center" style="background: #AD9DC3;" | {{item icon|Shaman's Skull|75px}} | | align="center" style="background: #AD9DC3;" | {{item icon|Shaman's Skull|75px}} | ||
| Line 173: | Line 170: | ||
| align="center" style="background: #AD9DC3;" | {{item icon|Trepanabotomizer|75px}} | | align="center" style="background: #AD9DC3;" | {{item icon|Trepanabotomizer|75px}} | ||
| style="background: #F1ECF7;"| '''[[Trepanabotomizer]]''' | | style="background: #F1ECF7;"| '''[[Trepanabotomizer]]''' | ||
| + | |- | ||
| + | | align="center" style="background: #AD9DC3;" | {{item icon|Vicar's Vestments|75px}} | ||
| + | | style="background: #F1ECF7;"| '''[[Vicar's Vestments]]''' | ||
|- | |- | ||
| width="60px" style="background: #6A5587;" rowspan="3" | {{icon class|Sniper}}<br/>'''[[Sniper|<span style="color: #FFF;">Sniper</span>]]''' | | width="60px" style="background: #6A5587;" rowspan="3" | {{icon class|Sniper}}<br/>'''[[Sniper|<span style="color: #FFF;">Sniper</span>]]''' | ||
| Line 185: | Line 185: | ||
|- | |- | ||
| width="60px" style="background: #6A5587;" rowspan="2" | {{icon class|Spy}}<br/>'''[[Spy|<span style="color: #FFF;">Spy</span>]]''' | | width="60px" style="background: #6A5587;" rowspan="2" | {{icon class|Spy}}<br/>'''[[Spy|<span style="color: #FFF;">Spy</span>]]''' | ||
| + | | align="center" style="background: #AD9DC3;" | {{item icon|Foul Cowl|75px}} | ||
| + | | style="background: #F1ECF7;"| '''[[Foul Cowl]]''' | ||
| + | |- | ||
| align="center" style="background: #AD9DC3;" | {{item icon|Hyperbaric Bowler|75px}} | | align="center" style="background: #AD9DC3;" | {{item icon|Hyperbaric Bowler|75px}} | ||
| style="background: #F1ECF7;"| '''[[Hyperbaric Bowler]]''' | | style="background: #F1ECF7;"| '''[[Hyperbaric Bowler]]''' | ||
| − | |||
| − | |||
| − | |||
|- | |- | ||
| width="60px" style="background:#6A5587;" rowspan = 1| {{icon class|Scout}}<br/>'''[[Scout|<span style="color: #FFF;">Scout</span>]]'''<br/>{{icon class|Demoman}}<br/>'''[[Demoman|<span style="color: #FFF;">Demoman</span>]]''' | | width="60px" style="background:#6A5587;" rowspan = 1| {{icon class|Scout}}<br/>'''[[Scout|<span style="color: #FFF;">Scout</span>]]'''<br/>{{icon class|Demoman}}<br/>'''[[Demoman|<span style="color: #FFF;">Demoman</span>]]''' | ||
| Line 217: | Line 217: | ||
| align="center" style="background: #AD9DC3;" | {{item icon|Beacon from Beyond|75px}} | | align="center" style="background: #AD9DC3;" | {{item icon|Beacon from Beyond|75px}} | ||
| style="background: #F1ECF7;"| '''[[Beacon from Beyond]]''' | | style="background: #F1ECF7;"| '''[[Beacon from Beyond]]''' | ||
| + | |- | ||
| + | | align="center" style="background: #AD9DC3;" | {{item icon|Birdie Bonnet|75px}} | ||
| + | | style="background: #F1ECF7;"| '''[[Birdie Bonnet]]''' | ||
|- | |- | ||
| align="center" style="background: #AD9DC3;" | {{item icon|Cryptic Keepsake|75px}} | | align="center" style="background: #AD9DC3;" | {{item icon|Cryptic Keepsake|75px}} | ||
| style="background: #F1ECF7;"| '''[[Cryptic Keepsake]]''' | | style="background: #F1ECF7;"| '''[[Cryptic Keepsake]]''' | ||
| + | |- | ||
| + | | align="center" style="background: #AD9DC3;" | {{item icon|Dark Helm|75px}} | ||
| + | | style="background: #F1ECF7;"| '''[[Dark Helm]]''' | ||
|- | |- | ||
| align="center" style="background: #AD9DC3;" | {{item icon|Guano|75px}} | | align="center" style="background: #AD9DC3;" | {{item icon|Guano|75px}} | ||
| style="background: #F1ECF7;"| '''[[Guano]]''' | | style="background: #F1ECF7;"| '''[[Guano]]''' | ||
| − | |||
| − | |||
| − | |||
| − | |||
| − | |||
| − | |||
| − | |||
| − | |||
| − | |||
| − | |||
| − | |||
| − | |||
| − | |||
| − | |||
| − | |||
| − | |||
| − | |||
| − | |||
|- | |- | ||
| align="center" style="background: #AD9DC3;" | {{item icon|Haunted Hat|75px}} | | align="center" style="background: #AD9DC3;" | {{item icon|Haunted Hat|75px}} | ||
| Line 253: | Line 241: | ||
| align="center" style="background: #AD9DC3;" | {{item icon|One-Way Ticket|75px}} | | align="center" style="background: #AD9DC3;" | {{item icon|One-Way Ticket|75px}} | ||
| style="background: #F1ECF7;"| '''[[One-Way Ticket]]''' | | style="background: #F1ECF7;"| '''[[One-Way Ticket]]''' | ||
| + | |- | ||
| + | | align="center" style="background: #AD9DC3;" | {{item icon|Pocket Horsemann|75px}} | ||
| + | | style="background: #F1ECF7;"| '''[[Pocket Horsemann]]''' | ||
| + | |- | ||
| + | | align="center" style="background: #AD9DC3;" | {{item icon|Quoth|75px}} | ||
| + | | style="background: #F1ECF7;"| '''[[Quoth]]''' | ||
| + | |- | ||
| + | | align="center" style="background: #AD9DC3;" | {{item icon|Sackcloth Spook|75px}} | ||
| + | | style="background: #F1ECF7;"| '''[[Sackcloth Spook]]''' | ||
|- | |- | ||
| align="center" style="background: #AD9DC3;" | {{item icon|Tuque or Treat|75px}} | | align="center" style="background: #AD9DC3;" | {{item icon|Tuque or Treat|75px}} | ||
| style="background: #F1ECF7;"| '''[[Tuque or Treat]]''' | | style="background: #F1ECF7;"| '''[[Tuque or Treat]]''' | ||
| + | |- | ||
| + | | align="center" style="background: #AD9DC3;" | {{item icon|Unidentified Following Object|75px}} | ||
| + | | style="background: #F1ECF7;"| '''[[Unidentified Following Object]]''' | ||
|- | |- | ||
|} | |} | ||
=== Costume Sets === | === Costume Sets === | ||
| − | |||
{| class="wikitable collapsible" cellpadding="2" style="text-align:center;" | {| class="wikitable collapsible" cellpadding="2" style="text-align:center;" | ||
| width="70px" style="background:#6A5587;" rowspan="2" | {{icon class|Scout}}<br/>'''[[Scout{{if lang}}|<span style="color:#FFF;">{{class name|scout}}</span>]]''' | | width="70px" style="background:#6A5587;" rowspan="2" | {{icon class|Scout}}<br/>'''[[Scout{{if lang}}|<span style="color:#FFF;">{{class name|scout}}</span>]]''' | ||
| − | | style="background:#E8E2F0;" rowspan="2" |''' | + | | style="background:#E8E2F0;" rowspan="2" |'''[[The Boston Bulldog]]'''<br/> |
| + | | align="center" style="background:#AD9DC3;" | {{icon item|Terrier Trousers|75px}} | ||
| + | | style="background:#F1ECF7;" | '''[[Terrier Trousers]]''' | ||
| + | |- | ||
| align="center" style="background:#AD9DC3;" | {{icon item|Hound's Hood|75px}} | | align="center" style="background:#AD9DC3;" | {{icon item|Hound's Hood|75px}} | ||
| − | | style="background:#F1ECF7;" | ''' | + | | style="background:#F1ECF7;" | '''[[Hound's Hood]]''' |
| − | |||
| − | |||
| − | |||
|- | |- | ||
| width="70px" style="background:#6A5587;" rowspan="6" | {{icon class|Soldier}}<br/>'''[[Soldier{{if lang}}|<span style="color:#FFF;">{{class name|soldier}}</span>]]''' | | width="70px" style="background:#6A5587;" rowspan="6" | {{icon class|Soldier}}<br/>'''[[Soldier{{if lang}}|<span style="color:#FFF;">{{class name|soldier}}</span>]]''' | ||
| − | | style="background:#E8E2F0;" rowspan="3" |''' | + | | style="background:#E8E2F0;" rowspan="3" |'''[[The Rocket Ranger]]'''<br/> |
| align="center" style="background:#AD9DC3;" | {{icon item|Hardium Helm|75px}} | | align="center" style="background:#AD9DC3;" | {{icon item|Hardium Helm|75px}} | ||
| − | | style="background:#F1ECF7;" | '''{{item | + | | style="background:#F1ECF7;" | '''[[Hardium Helm]]''' |
| + | |- | ||
| + | | align="center" style="background:#AD9DC3;" | {{icon item|Jupiter Jumpers|75px}} | ||
| + | | style="background:#F1ECF7;" | '''[[Jupiter Jumpers]]''' | ||
|- | |- | ||
| align="center" style="background:#AD9DC3;" | {{icon item|Space Bracers|75px}} | | align="center" style="background:#AD9DC3;" | {{icon item|Space Bracers|75px}} | ||
| − | | style="background:#F1ECF7;" | ''' | + | | style="background:#F1ECF7;" | '''[[Space Bracers]]''' |
|- | |- | ||
| − | + | | style="background:#E8E2F0;" rowspan="3" | '''[[The Terracotta Trooper]]'''<br/> | |
| − | |||
| − | |||
| − | | style="background:#E8E2F0;" rowspan="3" | ''' | ||
| align="center" style="background:#AD9DC3;" | {{icon item|Hidden Dragon|75px}} | | align="center" style="background:#AD9DC3;" | {{icon item|Hidden Dragon|75px}} | ||
| − | | style="background:#F1ECF7;" | ''' | + | | style="background:#F1ECF7;" | '''[[Hidden Dragon]]''' |
|- | |- | ||
| align="center" style="background:#AD9DC3;" | {{icon item|Faux Manchu|75px}} | | align="center" style="background:#AD9DC3;" | {{icon item|Faux Manchu|75px}} | ||
| − | | style="background:#F1ECF7;" | ''' | + | | style="background:#F1ECF7;" | '''[[Faux Manchu]]''' |
|- | |- | ||
| align="center" style="background:#AD9DC3;" | {{icon item|Shaolin Sash|75px}} | | align="center" style="background:#AD9DC3;" | {{icon item|Shaolin Sash|75px}} | ||
| − | | style="background:#F1ECF7;" | ''' | + | | style="background:#F1ECF7;" | '''[[Shaolin Sash]]''' |
|- | |- | ||
| width="70px" style="background:#6A5587;" rowspan="7" | {{icon class|Pyro}}<br/>'''[[Pyro{{if lang}}|<span style="color:#FFF;">Pyro</span>]]''' | | width="70px" style="background:#6A5587;" rowspan="7" | {{icon class|Pyro}}<br/>'''[[Pyro{{if lang}}|<span style="color:#FFF;">Pyro</span>]]''' | ||
| − | | style="background:#E8E2F0;" rowspan="3" | ''' | + | | style="background:#E8E2F0;" rowspan="3" | '''[[Burny the Pyrosaur]]'''<br/> |
| align="center" style="background:#AD9DC3;" | {{icon item|Burny's Boney Bonnet|75px}} | | align="center" style="background:#AD9DC3;" | {{icon item|Burny's Boney Bonnet|75px}} | ||
| − | | style="background:#F1ECF7;" | ''' | + | | style="background:#F1ECF7;" | '''[[Burny's Boney Bonnet]]''' |
|- | |- | ||
| align="center" style="background:#AD9DC3;" | {{icon item|Cauterizer's Caudal Appendage|75px}} | | align="center" style="background:#AD9DC3;" | {{icon item|Cauterizer's Caudal Appendage|75px}} | ||
| − | | style="background:#F1ECF7;" | ''' | + | | style="background:#F1ECF7;" | '''[[Cauterizer's Caudal Appendage]]''' |
|- | |- | ||
| align="center" style="background:#AD9DC3;" | {{icon item|Monster's Stompers|75px}} | | align="center" style="background:#AD9DC3;" | {{icon item|Monster's Stompers|75px}} | ||
| − | | style="background:#F1ECF7;" | ''' | + | | style="background:#F1ECF7;" | '''[[Monster's Stompers]]''' |
|- | |- | ||
| − | | style="background:#E8E2F0;" rowspan="2" | ''' | + | | style="background:#E8E2F0;" rowspan="2" | '''[[Malice in Pyroland]]'''<br/> |
| align="center" style="background:#AD9DC3;" | {{icon item|Crispy Golden Locks|75px}} | | align="center" style="background:#AD9DC3;" | {{icon item|Crispy Golden Locks|75px}} | ||
| − | | style="background:#F1ECF7;" | ''' | + | | style="background:#F1ECF7;" | '''[[Crispy Golden Locks]]''' |
|- | |- | ||
| align="center" style="background:#AD9DC3;" | {{icon item|Scorched Skirt|75px}} | | align="center" style="background:#AD9DC3;" | {{icon item|Scorched Skirt|75px}} | ||
| − | | style="background:#F1ECF7;" | '''{{item | + | | style="background:#F1ECF7;" | '''[[Scorched Skirt]]''' |
| + | |- | ||
| + | | style="background:#E8E2F0;" rowspan="2" | '''[[The Murky Lurker]]'''<br/> | ||
| + | | align="center" style="background:#AD9DC3;" | {{icon item|Abhorrent Appendages|75px}} | ||
| + | | style="background:#F1ECF7;" | '''[[Abhorrent Appendages]]''' | ||
|- | |- | ||
| − | |||
| align="center" style="background:#AD9DC3;" | {{icon item|Vicious Visage|75px}} | | align="center" style="background:#AD9DC3;" | {{icon item|Vicious Visage|75px}} | ||
| − | | style="background:#F1ECF7;" | ''' | + | | style="background:#F1ECF7;" | '''[[Vicious Visage]]''' |
| − | |||
| − | |||
| − | |||
|- | |- | ||
| width="70px" style="background:#6A5587;" rowspan="4" | {{icon class|Demoman}}<br/>'''[[Demoman{{if lang}}|<span style="color:#FFF;">{{class name|demoman}}</span>]]''' | | width="70px" style="background:#6A5587;" rowspan="4" | {{icon class|Demoman}}<br/>'''[[Demoman{{if lang}}|<span style="color:#FFF;">{{class name|demoman}}</span>]]''' | ||
| − | | style="background:#E8E2F0;" rowspan="2" | ''' | + | | style="background:#E8E2F0;" rowspan="2" | '''[[Count Tavish]]'''<br/> |
| align="center" style="background:#AD9DC3;" | {{icon item|Transylvania Top|75px}} | | align="center" style="background:#AD9DC3;" | {{icon item|Transylvania Top|75px}} | ||
| − | | style="background:#F1ECF7;" | ''' | + | | style="background:#F1ECF7;" | '''[[Transylvania Top]]''' |
|- | |- | ||
| align="center" style="background:#AD9DC3;" | {{icon item|Lordly Lapels|75px}} | | align="center" style="background:#AD9DC3;" | {{icon item|Lordly Lapels|75px}} | ||
| − | | style="background:#F1ECF7;" | ''' | + | | style="background:#F1ECF7;" | '''[[Lordly Lapels]]''' |
|- | |- | ||
| − | | style="background:#E8E2F0;" rowspan="2" | ''' | + | | style="background:#E8E2F0;" rowspan="2" | '''[[The Cursed Captain]]'''<br/> |
| align="center" style="background:#AD9DC3;" | {{icon item|Squid's Lid|75px}} | | align="center" style="background:#AD9DC3;" | {{icon item|Squid's Lid|75px}} | ||
| − | | style="background:#F1ECF7;" | ''' | + | | style="background:#F1ECF7;" | '''[[Squid's Lid]]''' |
|- | |- | ||
| align="center" style="background:#AD9DC3;" | {{icon item|Cap'n Calamari|75px}} | | align="center" style="background:#AD9DC3;" | {{icon item|Cap'n Calamari|75px}} | ||
| − | | style="background:#F1ECF7;" | ''' | + | | style="background:#F1ECF7;" | '''[[Cap'n Calamari]]''' |
|- | |- | ||
| style="background:#6A5587;" rowspan="4" | {{icon class|Medic}}<br/>'''[[Medic{{if lang}}|<span style="color:#FFF;">{{class name|medic}}</span>]]''' | | style="background:#6A5587;" rowspan="4" | {{icon class|Medic}}<br/>'''[[Medic{{if lang}}|<span style="color:#FFF;">{{class name|medic}}</span>]]''' | ||
| − | | style="background:#E8E2F0;" rowspan="2" | '''{{item | + | | style="background:#E8E2F0;" rowspan="2" | '''[[Doctor Galactic]]'''<br/> |
| + | | align="center" style="background:#AD9DC3;" | {{icon item|Lo-Grav Loafers|75px}} | ||
| + | | style="background:#F1ECF7;" | '''[[Lo-Grav Loafers]]''' | ||
| + | |- | ||
| + | | align="center" style="background:#AD9DC3;" | {{icon item|Surgeon's Space Suit|75px}} | ||
| + | | style="background:#F1ECF7;" | '''[[Surgeon's Space Suit]]''' | ||
| + | |- | ||
| + | | style="background:#E8E2F0;" rowspan="2" | '''[[The Sun King]]'''<br/> | ||
| align="center" style="background:#AD9DC3;" | {{icon item|Teutonkahmun|75px}} | | align="center" style="background:#AD9DC3;" | {{icon item|Teutonkahmun|75px}} | ||
| − | | style="background:#F1ECF7;" | ''' | + | | style="background:#F1ECF7;" | '''[[Teutonkahmun]]''' |
|- | |- | ||
| align="center" style="background:#AD9DC3;" | {{icon item|Ramses' Regalia|75px}} | | align="center" style="background:#AD9DC3;" | {{icon item|Ramses' Regalia|75px}} | ||
| − | | style="background:#F1ECF7;" | ''' | + | | style="background:#F1ECF7;" | '''[[Ramses' Regalia]]''' |
| − | |||
| − | |||
| − | |||
| − | |||
| − | |||
| − | |||
| − | |||
|- | |- | ||
| style="background:#6A5587;" rowspan="3" | {{icon class|Spy}}<br/>'''[[Spy{{if lang}}|<span style="color:#FFF;">{{class name|spy}}</span>]]''' | | style="background:#6A5587;" rowspan="3" | {{icon class|Spy}}<br/>'''[[Spy{{if lang}}|<span style="color:#FFF;">{{class name|spy}}</span>]]''' | ||
| − | | style="background:#E8E2F0;" rowspan="3" | ''' | + | | style="background:#E8E2F0;" rowspan="3" | '''[[The Gravelpit Emperor]]'''<br/> |
| align="center" style="background:#AD9DC3;" | {{icon item|Candyman's Cap|75px}} | | align="center" style="background:#AD9DC3;" | {{icon item|Candyman's Cap|75px}} | ||
| − | | style="background:#F1ECF7;" | ''' | + | | style="background:#F1ECF7;" | '''[[Candyman's Cap]]''' |
|- | |- | ||
| align="center" style="background:#AD9DC3;" | {{icon item|Bountiful Bow|75px}} | | align="center" style="background:#AD9DC3;" | {{icon item|Bountiful Bow|75px}} | ||
| − | | style="background:#F1ECF7;" | ''' | + | | style="background:#F1ECF7;" | '''[[Bountiful Bow]]''' |
|- | |- | ||
| align="center" style="background:#AD9DC3;" | {{icon item|Bozo's Brogues|75px}} | | align="center" style="background:#AD9DC3;" | {{icon item|Bozo's Brogues|75px}} | ||
| − | | style="background:#F1ECF7;" | ''' | + | | style="background:#F1ECF7;" | '''[[Bozo's Brogues]]''' |
|- | |- | ||
|} | |} | ||
| Line 362: | Line 361: | ||
{| class="wikitable collapsible" cellpadding=2 style="text-align:center;" | {| class="wikitable collapsible" cellpadding=2 style="text-align:center;" | ||
| align="center" style="background: #AD9DC3;" | {{Icon item|Fancy Spellbook|75px}} | | align="center" style="background: #AD9DC3;" | {{Icon item|Fancy Spellbook|75px}} | ||
| − | | ''' | + | | '''[[Fancy Spellbook]]''' |
|- | |- | ||
| align="center" style="background: #AD9DC3;" | {{Icon item|Spellbook Magazine|75px}} | | align="center" style="background: #AD9DC3;" | {{Icon item|Spellbook Magazine|75px}} | ||
| − | | ''' | + | | '''[[Spellbook Magazine]]''' |
|} | |} | ||
| Line 371: | Line 370: | ||
{| class="wikitable collapsible" cellpadding=2 style="text-align:center;" | {| class="wikitable collapsible" cellpadding=2 style="text-align:center;" | ||
| align="center" style="background: #AD9DC3;" | {{Icon item|Costume Transmogrifier|75px}} | | align="center" style="background: #AD9DC3;" | {{Icon item|Costume Transmogrifier|75px}} | ||
| − | | ''' | + | | '''[[Costume Transmogrifier]]''' |
|- | |- | ||
| align="center" style="background: #AD9DC3;" | {{Icon item|Eternaween|75px}} | | align="center" style="background: #AD9DC3;" | {{Icon item|Eternaween|75px}} | ||
| Line 377: | Line 376: | ||
|- | |- | ||
| align="center" style="background: #AD9DC3;" | {{Icon item|Spellbook Page|75px}} | | align="center" style="background: #AD9DC3;" | {{Icon item|Spellbook Page|75px}} | ||
| − | | ''' | + | | '''[[Spellbook Page]]''' |
|- | |- | ||
| align="center" style="background: #AD9DC3;" | {{Icon item|Spooky Key|75px}} | | align="center" style="background: #AD9DC3;" | {{Icon item|Spooky Key|75px}} | ||
| − | | ''' | + | | '''[[Spooky Key]]''' |
|- | |- | ||
| align="center" style="background: #AD9DC3;" | {{Icon item|Unfilled Fancy Spellbook|75px}} | | align="center" style="background: #AD9DC3;" | {{Icon item|Unfilled Fancy Spellbook|75px}} | ||
| − | | ''' | + | | '''[[Unfilled Fancy Spellbook]]''' |
|} | |} | ||
Revision as of 17:26, 24 October 2014
This article is for content released in the update. For the patch itself, see October 29, 2013 Patch.
| “ | Claw your way through piles of musty books and skeletons while old people yell at each other about nonsense and get carried off to Hell! That's right, Team Feartress fans— we combined the terror of Halloween with the more muted and depressing terror of a retirement home, and accidentally invented an entirely new brand of horror! Then we realized listening to two old men bicker from beyond the grave isn't that horrifying, so we threw in a bunch of crazy spells you can cast at each other!
— Update page
|
” |
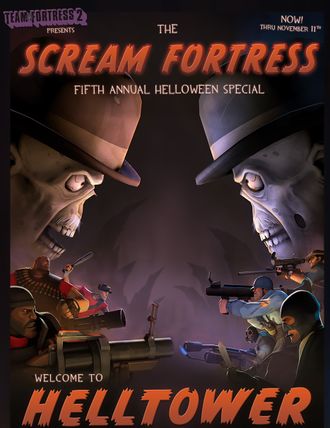
The Scream Fortress Fifth Annual Helloween Special is a major update released in the October 29, 2013 Patch. The fifth in the Scream Fortress series of updates, it added the Halloween event map Helltower, along with 102 Halloween-themed Cosmetics.
Contents
Timeline
Item submissions for the event were opened on September 18, 2013 via the Team Fortress 2 Official Blog.
The event was previewed on October 28, 2013 via the Grave Matters comic.
The event lasted from October 29, 2013 to November 11, 2013.
Additions
Cosmetic items
Costume Sets
Action Items
| Fancy Spellbook | |
| Spellbook Magazine |
Tools
| Costume Transmogrifier | |
| Eternaween | |
| Spellbook Page | |
| Spooky Key | |
| Unfilled Fancy Spellbook |
NPCs
Bereavements
|
|
Maps
Main article: List of maps
| Name | Picture | Game mode | File name |
|---|---|---|---|
| Helltower | 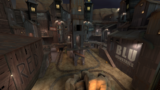
|
Payload Race |
plr_hightower_event
|
Trivia
- Several encoded messages appear on the update's pages, and they use Agathodaimon symbols.
- Two are found on ribbons that stretch across the page. The first says "Bazbo Bibbons", and the second "Abo alabazbus"
- Several sentences can be read within an illustration of a spell book
- FEAR NOT THOSE WHO SEEK TO DESTROY YOU. FOR WITH THIS BOOK YOU ARE GRANTED THE STRENGTH OF A GIANT.
- OR PERHAPS WHAT YOU SEEK IS A RAIN OF BURNING COMETS TO SMITE YOUR FOE.
- A RAIN OF COMMETS(sic) ISN'T GOOD ENOUGH FOR YOU
- FINE. YOU SHALL BE GIVEN THE SPEED OF CHEETAH.
- AND STILL NOT GOOD ENOUGH FOR YOU
- FINE. WELL LEAVE THIS TO CHANCE. TRY NOT TO BURN YOUR OWN FACE OFF.
Gallery
Helltower postcard.

External links
| ||||||||||||||||||||||||||||||||||||||||||||||||||||||||||||||||||||||||||||||||||||||||||||||||||