Difference between revisions of "User:Bojjob/Sandbox"
m |
m (saving what i got so far) |
||
| Line 1: | Line 1: | ||
<!--Nothing here... yet...--> | <!--Nothing here... yet...--> | ||
| + | This '''Cosmetic Images''' tutorial will show you how to create images for cosmetics. For this tutorial, we will be putting the [[Team Captain]] on the [[Soldier]]. | ||
| + | == Setting up HLMV == | ||
| + | Please see the [[Help:Model_Viewer|Model Viewer]] page for instructions on setting up your model viewer if you haven't already. | ||
| + | == Finding the models == | ||
| + | Once you have the model viewer open, you will first need to locate the correct class model. | ||
| + | You can do this by going to {{code|file > (Steam) Load Model...}} and then navigating to {{code|\models\player\hwm}} (You should always use HWM models for cosmetic images as they are much higher quality). | ||
| + | |||
| + | Select the Soldier model to open it up in the model viewer. | ||
| + | |||
| + | The model will most likely appear slightly off screen if this is the first time you have done this. If so, use {{key|MOUSE2}} to zoom and {{key|Shift}} + {{key|MOUSE1}} to pan the model so that you can get a better view. | ||
| + | |||
| + | Once the model is in view, you'll need to equip the correct cosmetic. | ||
| + | This is done by going to {{code|file > (Steam) Load Weapon...}}. | ||
| + | |||
| + | Valve-made cosmetics are found in {{code|\models\player\items}}. | ||
| + | |||
| + | Since we are using the Team Captain for this tutorial, go into the {{code|soldier}} folder and find {{code|soldier_officer.mdl}}. This will put the hat on soldier's head. | ||
| + | |||
| + | |||
== Examples == | == Examples == | ||
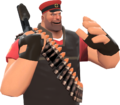
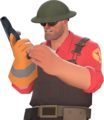
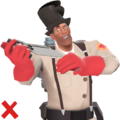
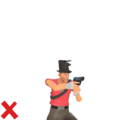
Below are examples of what to do and what not to do when making cosmetic images. | Below are examples of what to do and what not to do when making cosmetic images. | ||
Revision as of 05:34, 13 October 2017
This Cosmetic Images tutorial will show you how to create images for cosmetics. For this tutorial, we will be putting the Team Captain on the Soldier.
Setting up HLMV
Please see the Model Viewer page for instructions on setting up your model viewer if you haven't already.
Finding the models
Once you have the model viewer open, you will first need to locate the correct class model.
You can do this by going to file > (Steam) Load Model... and then navigating to \models\player\hwm (You should always use HWM models for cosmetic images as they are much higher quality).
Select the Soldier model to open it up in the model viewer.
The model will most likely appear slightly off screen if this is the first time you have done this. If so, use MOUSE2 to zoom and ⇧ Shift + MOUSE1 to pan the model so that you can get a better view.
Once the model is in view, you'll need to equip the correct cosmetic.
This is done by going to file > (Steam) Load Weapon....
Valve-made cosmetics are found in \models\player\items.
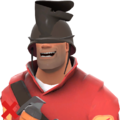
Since we are using the Team Captain for this tutorial, go into the soldier folder and find soldier_officer.mdl. This will put the hat on soldier's head.
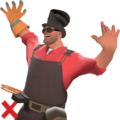
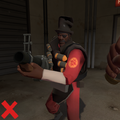
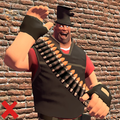
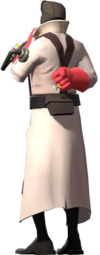
Examples
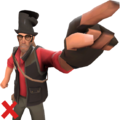
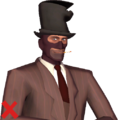
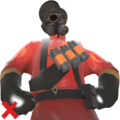
Below are examples of what to do and what not to do when making cosmetic images.
