Difference between revisions of "User:DevIIv/Barburbia"
| Line 17: | Line 17: | ||
}} | }} | ||
| − | + | =Introduction= | |
This mission is highly recommended to have all 6 players, actively fighting the bots, as well as getting the right upgrades, doing sometimes 1 small thing wrong on this mission can cause it to become a massacre, messing up the whole entire team in the progress. There are 3 boss giants (Excluding tanks) in this mission, and those three together need to be watched with extreme caution. | This mission is highly recommended to have all 6 players, actively fighting the bots, as well as getting the right upgrades, doing sometimes 1 small thing wrong on this mission can cause it to become a massacre, messing up the whole entire team in the progress. There are 3 boss giants (Excluding tanks) in this mission, and those three together need to be watched with extreme caution. | ||
| + | |||
| + | =Strategy= | ||
| + | The first and second wave are like warm-ups, these waves help get the players prepared for waves 3 - 9, as those waves cause better tatics, and specific upgrades.. | ||
| + | ==First Wave== | ||
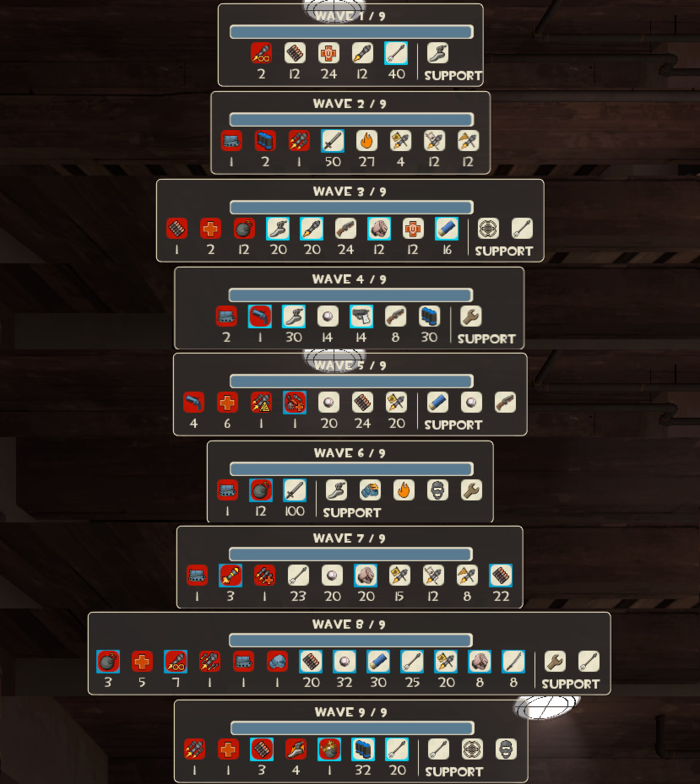
| + | This wave isn't too hard, but can become a problem if the crit bowman are not dealt with quickly.. The wave starts off with the 12 ''Brass Beast'' Heavies, and 12 uber medics with them. Then the wave will transition to the two giant rapid fire soldiers, one of the giant soldiers spawns where the Heavy/Medic squad came in, and the other giant will spawn on the "chief" side. Then a few seconds after, the crit bowman and the soldiers with their medics will come in. Sure enough, this wave isn't too difficult, but still needs a strategy before attempting it. | ||
| + | ==Second Wave== | ||
| + | The beginning of this wave starts off, which what should be easy, 27 un-critted demoknights, when the first 27 demoknights are all dead, the pyros and the tank will spawn in, it is highly recommended that only a phlog pyro should deal with the tank, and everybody else go after the pyros. When the pyros are dead, JUST the pyros, the critted demoknights will come in, following after the critted demoknights, then stuff starts to get a bit hard. The first giant burst fire demoman comes in with one rapid-fire extended buff soldier, one rapid-fire extended backup soldier, and one rapid-fire extended conchorer soldier. The rapid fire soldiers have increased fire rate, hence their name, and increased health and size, they are not giants, but are like a steel gauntlet, but more deadly! Players should go for the rapid-fire soldiers first, then go for the giant. After a few seconds, normal backup and conchorer soldiers will pop up, coming in 2 - 3 groups of both of them at a time. Once the giant and the burst-fire demoman are dead, in a few seconds a giant burst-fire demoman, giant burst-fire soldier, AND three rapid-fire buff soldiers, it is a lot harder than it sounds. | ||
Revision as of 07:14, 12 December 2015
| |||||||||||||
Introduction
This mission is highly recommended to have all 6 players, actively fighting the bots, as well as getting the right upgrades, doing sometimes 1 small thing wrong on this mission can cause it to become a massacre, messing up the whole entire team in the progress. There are 3 boss giants (Excluding tanks) in this mission, and those three together need to be watched with extreme caution.
Strategy
The first and second wave are like warm-ups, these waves help get the players prepared for waves 3 - 9, as those waves cause better tatics, and specific upgrades..
First Wave
This wave isn't too hard, but can become a problem if the crit bowman are not dealt with quickly.. The wave starts off with the 12 Brass Beast Heavies, and 12 uber medics with them. Then the wave will transition to the two giant rapid fire soldiers, one of the giant soldiers spawns where the Heavy/Medic squad came in, and the other giant will spawn on the "chief" side. Then a few seconds after, the crit bowman and the soldiers with their medics will come in. Sure enough, this wave isn't too difficult, but still needs a strategy before attempting it.
Second Wave
The beginning of this wave starts off, which what should be easy, 27 un-critted demoknights, when the first 27 demoknights are all dead, the pyros and the tank will spawn in, it is highly recommended that only a phlog pyro should deal with the tank, and everybody else go after the pyros. When the pyros are dead, JUST the pyros, the critted demoknights will come in, following after the critted demoknights, then stuff starts to get a bit hard. The first giant burst fire demoman comes in with one rapid-fire extended buff soldier, one rapid-fire extended backup soldier, and one rapid-fire extended conchorer soldier. The rapid fire soldiers have increased fire rate, hence their name, and increased health and size, they are not giants, but are like a steel gauntlet, but more deadly! Players should go for the rapid-fire soldiers first, then go for the giant. After a few seconds, normal backup and conchorer soldiers will pop up, coming in 2 - 3 groups of both of them at a time. Once the giant and the burst-fire demoman are dead, in a few seconds a giant burst-fire demoman, giant burst-fire soldier, AND three rapid-fire buff soldiers, it is a lot harder than it sounds.
