Difference between revisions of "Health"
Focusknock (talk | contribs) (use of 'you', too many large pictures and not enough information, strategy section is unneeded) |
m (General clean up. Cleaned up links that were being overused.) |
||
| Line 1: | Line 1: | ||
| − | |||
{{Pickup infobox | {{Pickup infobox | ||
|pickup-type=Health | |pickup-type=Health | ||
| Line 40: | Line 39: | ||
|175<br><small>263† | |175<br><small>263† | ||
|- | |- | ||
| − | |align="left"|'''{{Class link|Demoman}}'''<br><small>([[Eyelander]] or [[Horseless Headless Horsemann's Headtaker|HHHH]] equipped, 0 heads)</small><br><small>( | + | |align="left"|'''{{Class link|Demoman}}'''<br><small>([[Eyelander]] or [[Horseless Headless Horsemann's Headtaker|HHHH]] equipped, 0 heads)</small><br><small>(Eyelander or HHHH equipped, 1 head)</small><br><small>(Eyelander or HHHH equipped, 2 heads)</small><br><small>(Eyelander or HHHH equipped, 3 heads)</small><br><small>(Eyelander or HHHH equipped, 4+ heads)</small><br><small>([[Claidheamh Mòr]] equipped)</small><br><small> |
|36<br><small>31<br>34<br>37<br>40<br>43<br>33<br> | |36<br><small>31<br>34<br>37<br>40<br>43<br>33<br> | ||
|88<br><small>75<br>83<br>90<br>98<br>105<br>80<br> | |88<br><small>75<br>83<br>90<br>98<br>105<br>80<br> | ||
| Line 117: | Line 116: | ||
File:Healthpie.png|Halloween Edition Medium Health Pickup | File:Healthpie.png|Halloween Edition Medium Health Pickup | ||
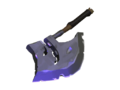
File:Health Cauldron.png|Halloween Edition Large Health Pickup | File:Health Cauldron.png|Halloween Edition Large Health Pickup | ||
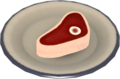
| − | File:Medieval Meat.png|Medium Health Pickup on | + | File:Medieval Meat.png|Medium Health Pickup on Medieval mode map [[DeGroot Keep]] |
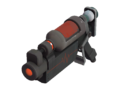
| − | File:Lvl1dispenser.png|Level 1 | + | File:Lvl1dispenser.png|Level 1 Dispenser |
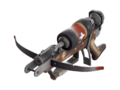
File:Lvl2dispenser.png|Level 2 Dispenser | File:Lvl2dispenser.png|Level 2 Dispenser | ||
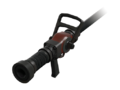
| − | File:Lvl3dispenser. | + | File:Lvl3dispenser.pngLevel 3 Dispenser |
| − | File:Resupplylocker.png | + | File:Resupplylocker.png|Resupply locker |
| − | File:Payloads.png|[[Payload]] | + | File:Payloads.png|[[Payload carts|Payload]] |
</gallery> | </gallery> | ||
| Line 128: | Line 127: | ||
{{see also|Weapons}} | {{see also|Weapons}} | ||
<gallery perrow="5"> | <gallery perrow="5"> | ||
| − | File:Item icon Mad Milk.png| | + | File:Item icon Mad Milk.png|Mad Milk |
| − | File:Item icon Candy Cane.png| | + | File:Item icon Candy Cane.png|Candy Cane |
| − | File:Item icon Black Box.png| | + | File:Item icon Black Box.png|Black Box |
| − | File:Item icon Concheror.png| | + | File:Item icon Concheror.png|Concheror |
| − | File:Item icon Half-Zatoichi.png| | + | File:Item icon Half-Zatoichi.png|Half-Zatoichi |
| − | File:Item icon Powerjack.png| | + | File:Item icon Powerjack.png|Powerjack |
| − | File:Item icon Back Scratcher.png| | + | File:Item icon Back Scratcher.png|Back Scratcher |
| − | File:Item icon Eyelander.png| | + | File:Item icon Eyelander.png|Eyelander |
| − | File:Item icon Horseless Headless Horsemann's Headtaker.png| | + | File:Item icon Horseless Headless Horsemann's Headtaker.png|Horseless Headless Horsemann's Headtaker |
| − | File:Item icon Sandvich.png| | + | File:Item icon Sandvich.png|Sandvich |
File:Sandvichplate.png|Dropped Sandvich | File:Sandvichplate.png|Dropped Sandvich | ||
| − | File:Item icon Dalokohs Bar.png| | + | File:Item icon Dalokohs Bar.png|Dalokohs Bar |
| − | File:Item icon Buffalo Steak Sandvich.png| | + | File:Item icon Buffalo Steak Sandvich.png|Buffalo Steak Sandvich |
File:Buffalo Steak Sandvich plate.png|Dropped Buffalo Steak Sandvich | File:Buffalo Steak Sandvich plate.png|Dropped Buffalo Steak Sandvich | ||
| − | File:Item icon Blutsauger.png| | + | File:Item icon Blutsauger.png|Blutsauger |
| − | File:Item icon Crusader's Crossbow.png| | + | File:Item icon Crusader's Crossbow.png|Crusader's Crossbow |
| − | File:Item icon Medi Gun.png| | + | File:Item icon Medi Gun.png|Medi Gun |
| − | File:Item icon Kritzkrieg.png| | + | File:Item icon Kritzkrieg.png|Kritzkrieg |
| − | File:Item icon Amputator.png| | + | File:Item icon Amputator.png|Amputator |
| − | File:Item icon Conniver's Kunai.png| | + | File:Item icon Conniver's Kunai.png|Conniver's Kunai |
</gallery> | </gallery> | ||
| Line 153: | Line 152: | ||
{{main|Particle effects}} | {{main|Particle effects}} | ||
<gallery perrow="5"> | <gallery perrow="5"> | ||
| − | File:Medic_Call.png| | + | File:Medic_Call.png|Medic Call |
File:Health_particle_red.png|The particle emitted from RED players picking up health | File:Health_particle_red.png|The particle emitted from RED players picking up health | ||
File:Health_particle_blu.png|The particle emitted from BLU players picking up health | File:Health_particle_blu.png|The particle emitted from BLU players picking up health | ||
| Line 162: | Line 161: | ||
*Use health pickups to instantly extinguish [[fire]]. | *Use health pickups to instantly extinguish [[fire]]. | ||
*Use health pickups to their full potential. If an item heals you for 50%, consider waiting until your health drops below 50% before picking it up. | *Use health pickups to their full potential. If an item heals you for 50%, consider waiting until your health drops below 50% before picking it up. | ||
| − | *Staying next to a | + | *Staying next to a Dispenser or cart in battle can give you a healing advantage. |
| − | *As a | + | *As a Spy, it is possible to use health pickups even at full health in order to change the displayed health of your disguise. Alternatively, try to discreetly take health pickups when injured and disguised; attentive players may notice the pickup being taken. |
| − | *Note that unlike the | + | *Note that unlike the Medi Gun, Kritzkrieg, Eyelander, Powerjack and Conniver's Kunai, health pickups will not overheal you. |
*The Heavy can recharge an alt-fire dropped Sandvich by picking up any health kit, assuming he already has full HP when he does so. Consider dropping the Sandvich for a teammate instead of letting them pick up a small health kit. This will recover 50% of their health instead of 20.5%. | *The Heavy can recharge an alt-fire dropped Sandvich by picking up any health kit, assuming he already has full HP when he does so. Consider dropping the Sandvich for a teammate instead of letting them pick up a small health kit. This will recover 50% of their health instead of 20.5%. | ||
Revision as of 18:01, 14 May 2011
| Health | ||
|---|---|---|
| ||
| Pickup Type: | Health | |

| “ | Thanks for the aid.
Click to listen
— The Soldier
|
” |
Health pickups are items that can be collected in the various maps during gameplay. They restore a set amount of the user's health when picked up and automatically regenerate after ten seconds. There are three different types of health pickups (small, medium, and large) that can be found with each restoring a different amount of hitpoints depending on the size of the pickup and the class you're currently playing. There are also Halloween variants of the health pickups, which can be seen below in the image gallery.
A player can be healed by several different methods, including healing by friendly Medics. Since these pickups are a vital item in combat be sure to use them wisely; consider letting a teammate who has less health than you grab it, or especially a nearby Medic who may need it. When healed by any source outside of a Medic's healing, a small green-colored cross is emitted in the lower-left HUD along with the number of hitpoints restored.
Contents
Health Kits
- Small (Pill Bottle/Chocolate Bar) 20.5% heal (10 second respawn time)
- Medium (First Aid Kit/Candy Tin/Meat) 50% heal (10 second respawn time)
- Large (Ice Cooler/Cauldron) 100% heal (10 second respawn time)
Health kit comparison table
| Class | Small |
Medium |
Large |
|---|---|---|---|
(Sandman equipped) (Special Delivery pack equipped) |
26 23 31 |
63 55 75 |
125 110 150 |
| 41 | 100 | 200 | |
(Back Scratcher equipped) |
36 54 |
88 132 |
175 263† |
(Eyelander or HHHH equipped, 0 heads) (Eyelander or HHHH equipped, 1 head) (Eyelander or HHHH equipped, 2 heads) (Eyelander or HHHH equipped, 3 heads) (Eyelander or HHHH equipped, 4+ heads) (Claidheamh Mòr equipped) |
36 31 34 37 40 43 33 |
88 75 83 90 98 105 80 |
175 150 165 180 195 210 160 |
(Dalokohs Bar for 30 seconds) (Warrior's Spirit equipped) |
62 72 57 |
150 175 140 |
300 350 280 |
(Gunslinger equipped) |
26 31 |
63 75 |
125 150 |
(Vita-Saw equipped) |
31 29 |
75 70 |
150 140 |
(Darwin's Danger Shield equipped) |
26 31 |
63 75 |
125 150 |
(Conniver's Kunai equipped) |
26 12 |
63 30 |
125 60 |
| Civilian | 11 | 25 | 50 |
- †Theoretical value. Heal received from pickups does not exceed the class' maximum health.
Other health sources
Health dispensers
- Dispensers Level 1 — 10HP/sec ; Level 2 - 15HP/sec ; Level 3 - 20HP/sec
- Resupply Lockers — 100% heal
- Carts — Same as Level 1 Dispenser: 10HP/sec
Dropped items
- Small health kit — Dropped by players that are killed by a Scout who has the Candy Cane equipped, or during Medieval Mode.
- Sandvich — If dropped by a Heavy upon death, a Sandvich will heal a Scout for 75 HP and all other classes for 50. If the Heavy drops the Sandvich using alt-fire, it heals 50% of total health.
- Dalokohs Bar — If dropped by a Heavy upon death, a Dalokohs Bar will heal a Scout for 75 HP and all other classes for 50.
- Buffalo Steak Sandvich — If dropped by a Heavy upon death, a Buffalo Steak Sandvich will heal a Scout for 75 HP and all other classes for 50. If the Heavy drops the Sandvich using alt-fire, it heals 50% of total health.
Weapons that give health
- Mad Milk restores health equal to 60% of the damage a friendly player inflicts on milk-coated enemies.
- The Candy Cane drops a small health pack after a kill.
- The Black Box restores 15 health per each player hit.
- The Concheror restores health equal to 35% of the damage the Soldier who activated the rally or a friendly player nearby inflicts.
- The Half-Zatoichi restores 100% health upon killing an enemy.
- The Powerjack restores 75 health upon killing an enemy and can overheal.
- The Back Scratcher increases health from pickups by 50%.
- The Eyelander and Horseless Headless Horsemann's Headtaker restore 15 health per kill.
- The Sandvich restores 300 health when eaten over 4 seconds.
- The Dalokohs Bar restores 60 health when eaten over 4 seconds, and grants the Heavy an extra 50 maximum health for 30 seconds.
- The Blutsauger restores 3 health per hit.
- The Crusader's Crossbow restores 75 health to the target at point blank, 112 health at medium range, and 150 health at long range.
- The Medi Gun and Kritzkrieg restore 24 health to 72 health to the target per second.
- The Kritzkrieg's Oktoberfest taunt restores 11 health over 4 seconds.
- The Amputator's Medicating Melody taunt puts a health restoring effect on all nearby allies, restoring from 105 up to 315 health over 4.2 seconds, depending on how long ago the healing target was last damaged.
- The Conniver's Kunai grants the victim's remaining health upon backstabbing.
Gallery
Pickups and dispensing units
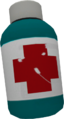
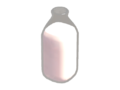
Small Health Pickup
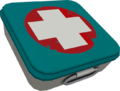
Medium Health Pickup
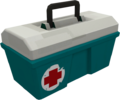
Large Health Pickup

Halloween Edition Small Health Pickup

Halloween Edition Medium Health Pickup
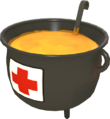
Halloween Edition Large Health Pickup
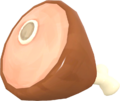
Medium Health Pickup on Medieval mode map DeGroot Keep
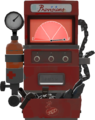
Level 1 Dispenser
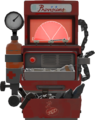
Level 2 Dispenser
- Lvl3dispenser.pngLevel 3 Dispenser
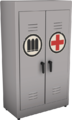
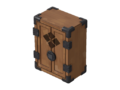
Resupply locker


Weapons that give health
Mad Milk
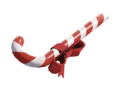
Candy Cane
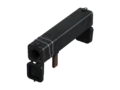
Black Box
Concheror
Half-Zatoichi
Powerjack
Back Scratcher
Eyelander
Horseless Headless Horsemann's Headtaker
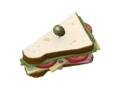
Sandvich
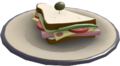
Dropped Sandvich
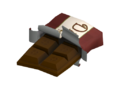
Dalokohs Bar

Buffalo Steak Sandvich
Dropped Buffalo Steak Sandvich
Blutsauger
Crusader's Crossbow
Medi Gun
Kritzkrieg
Amputator
Conniver's Kunai


Particle effects
Medic Call

The particle emitted from RED players picking up health

The particle emitted from BLU players picking up health
The team-colored particle emitted from players with a health-drain penalty (for example, the Gloves of Running Urgently)


Strategy
- Use health pickups to instantly extinguish fire.
- Use health pickups to their full potential. If an item heals you for 50%, consider waiting until your health drops below 50% before picking it up.
- Staying next to a Dispenser or cart in battle can give you a healing advantage.
- As a Spy, it is possible to use health pickups even at full health in order to change the displayed health of your disguise. Alternatively, try to discreetly take health pickups when injured and disguised; attentive players may notice the pickup being taken.
- Note that unlike the Medi Gun, Kritzkrieg, Eyelander, Powerjack and Conniver's Kunai, health pickups will not overheal you.
- The Heavy can recharge an alt-fire dropped Sandvich by picking up any health kit, assuming he already has full HP when he does so. Consider dropping the Sandvich for a teammate instead of letting them pick up a small health kit. This will recover 50% of their health instead of 20.5%.
Trivia
- The sound for picking up a health kit is the same for getting health in Half-Life, another Valve game.
See also
|