Difference between revisions of "Croissant"
m (Changed 'download-link' to 'link') |
m (Proper links) |
||
| Line 6: | Line 6: | ||
| file-name = cp_croissant_final | | file-name = cp_croissant_final | ||
| current-version = Final version | | current-version = Final version | ||
| − | | developer = [ | + | | developer = [https://tf2maps.net/members/arnold.1926/ Arnold] |
| − | | link = [ | + | | link = [https://tf2maps.net/threads/croissant.16755/ TF2Maps.net] |
| map-environment = Alpine / Spytech | | map-environment = Alpine / Spytech | ||
| map-setting = Daylight, sunny | | map-setting = Daylight, sunny | ||
| Line 19: | Line 19: | ||
{{Quotation|The developer, on the name of the map|It's called croissant because it's shaped like a banana.}} | {{Quotation|The developer, on the name of the map|It's called croissant because it's shaped like a banana.}} | ||
| − | '''Croissant''' is a community-made [[Control Point (game mode)# | + | '''Croissant''' is a community-made [[Control Point (game mode)#Symmetric|Symmetric Control Point]] map. It was the winner out of the 4 symmetrical entries to TF2Maps.net's [[(A)Symmetry CP Contest]]. |
== Locations == | == Locations == | ||
Revision as of 18:10, 7 May 2019
 | “I built that.” This page contains information about a custom map that is not an officially released Team Fortress 2 map. All released Valve and Community-made TF2 maps can be found on the list of maps. |
| Croissant | |
|---|---|

| |
| Basic Information | |
| Developer(s): | Unknown |
| Map Info | |
| Environment: | Alpine / Spytech |
| Setting: | Daylight, sunny |
| Hazards: | Pitfall |
| “ | It's called croissant because it's shaped like a banana.
— The developer, on the name of the map
|
” |
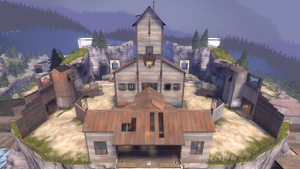
Croissant is a community-made Symmetric Control Point map. It was the winner out of the 4 symmetrical entries to TF2Maps.net's (A)Symmetry CP Contest.
Contents
Locations
Control Point 3
- Control point: The control point is located on a bridge spanning between the large barn and the house by the cliff.
- Entrances to the control point: The control point can be reached either by a slanted ladder on either side, through a tunnel leading through the large barn, or through the house closest to the edge of the map.
- Under the bridge: Under and around the perimeter of the bridge there is a large courtyard containing slanted ladders on either side to climb up onto the bridge. Under the bridge itself there is a tunnel which leads to either side's courtyard. There are two respawn rooms which are utilised whenever the advancing team captures Control Point 2/4.
Control Points 2 & 4
- Control point: The control point is located on a large overhang facing a courtyard.
- Entrances to the control point: Both control points have a direct patch leading in from Control Point 3 but also can be entered from behind using the underpass and stairs.
- Under the control points: Under the control point is a second respawn room which are utilised whenever the advancing team captures Control Point 3. It leads in to a small room with one door leading in from Control Points 1/5 and one door leading out towards Control Point 3. There are stairs that go up towards the control point.
Control Points 1 & 5
- Control point: Both control points are located in a large room on top of some stairs in each respective base of the teams.
- Entrances to the control point: Both control points can be reached by staircases to the left and right of the control point which stem from the bottom of the room. A third way to reach the control point is running straight from Control Points 2/4 and down the small flight of stairs.
- Under the control point: Under the control points is a small open-roofed room with a column separating two corridors. There are another set of corridors, one of which leads to the main respawn rooms, and the other leading to an underpass which has a staircase leading to Control Points 2/4 and an outside path leading to Control Point 3.
Trivia
- There are a set of presents hidden behind the BLU team's blast doors and can only be reached by utilising
noclip.
Bugs
- An additional small health pack and ammo box are hidden under the map.
Gallery
| ||||||||||||||||||||||||||||||||||||||||||||||||


