Difference between revisions of "Template:Infobox"
m |
(uses file instead of image now) |
||
| Line 5: | Line 5: | ||
! class="header" | '''{{{title|<missing:"title=">}}}''' | ! class="header" | '''{{{title|<missing:"title=">}}}''' | ||
|- | |- | ||
| − | | align="center" | {{#if:{{{image|}}} | [[ | + | | align="center" | {{#if:{{{image|}}} | [[File:{{{image}}}|{{{imagewidth|150px}}}]]<br> | }} |
|- | |- | ||
|{{{contents|}}} | |{{{contents|}}} | ||
Revision as of 03:18, 23 December 2020
|
Warning: Do NOT edit this Template directly.
An infobox can be added to give a visual lift to pages by displaying a box at the top right or left of any article. They have been designed to be a flexible and easy to use way of incorporating a picture and brief description of anything you are writing an article about. Various examples have been given, but only experimentation can surely determine success.
Contents
Usage
The default infobox will display at the top right of an page and have the text wrapped round it to the left. To include a default infobox type
{{Infobox|title=My Title}}
and replace the My Title with your own title. It is also possible (and highly recommended) to include a picture of the item you are describing by adding an image property by typing
{{Infobox|title=My Title|image=Myimage.jpg}}
and again, replacing Myimage.jpg with your own picture name.
Parameters
| Name | Requirement | Options |
|---|---|---|
| title | required | |
| image | optional | |
| imagewidth | optional | [Default:150px] |
| align | optional | left or right [Default:right] |
| width | optional | [Default:18em] |
| contents | optional | |
| style | optional | (takes any valid css style) |
Examples
|
{{Infobox
|title=My Title
|contents=This is a brief description.
}}
|
|
{{Infobox
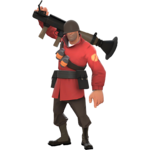
|title=Soldier
|align=left
|image=Soldier.png
|contents=This is a brief description for the [[Soldier]].
}}
|
|
{{Infobox
|title=Soldier
|align=right
|width=90px
|image=Soldier.png
|imagewidth=60px
|contents=This is a brief description for the [[Soldier]].
}}
|
| |||||||||||||
Note: It isn't recommended that you change the styling or use a standard infobox for something as complicated as this, it is only an example of how it is possible to mix css styles and html contents within an infobox. Creating a new template specifically for complex content would be better.
{{Infobox
|title=Soldier
|align=left
|width=100px
|image=Soldier.png
|imagewidth=100px
|style=text-align:left;padding:1em;text-transform:capitalize;
|contents=
<table class="transparent" width="100%" style="border-collapse:collapse">
<th colspan="2" class="header">Info</th>
<tr><td class="bold">class:</td><td>soldier</td></tr>
<tr><td class="bold">type:</td><td>offensive</td></tr>
<tr><td class="bold">health:</td><td>200</td></tr>
<tr><td class="bold">speed:</td><td>80%</td></tr>
</table>
}}
|
See also


