Difference between revisions of "Anti-Demoman strategy"
OxfordComma (talk | contribs) (→Secondary Weapons) |
OxfordComma (talk | contribs) (→Melee Weapons) |
||
| Line 97: | Line 97: | ||
| colspan="2" | | | colspan="2" | | ||
| − | *The | + | *The [[Eyelander]], [[Horseless Headless Horsemann's Headtaker]], [[Scotsman's Skullcutter]], and [[Claidheamh Mòr]] all have an extended melee range. Consider this when using melee weapons against the Demoman. |
|- | |- | ||
| class="small" align="center" valign="center" style="padding:0.5em" | {{Icon weapon|weapon=Bottle|icon-size=100x100px}} {{Icon weapon|weapon=Frying Pan|icon-size=100x100px}} | | class="small" align="center" valign="center" style="padding:0.5em" | {{Icon weapon|weapon=Bottle|icon-size=100x100px}} {{Icon weapon|weapon=Frying Pan|icon-size=100x100px}} | ||
<br>[[Bottle]] / [[Frying Pan]] | <br>[[Bottle]] / [[Frying Pan]] | ||
| | | | ||
| − | * | + | *A Demoman may use the Bottle or Frying Pan as a last resort at close range. Since the Demoman's speed is below average, back up while attacking him if he is chasing you with one of these weapons. |
|- | |- | ||
| class="small" align="center" valign="center" style="padding:0.5em" | {{Icon weapon|weapon=Eyelander|icon-size=100x100px}} {{Icon weapon|weapon=Horseless Headless Horsemann's Headtaker|icon-size=100x100px}} | | class="small" align="center" valign="center" style="padding:0.5em" | {{Icon weapon|weapon=Eyelander|icon-size=100x100px}} {{Icon weapon|weapon=Horseless Headless Horsemann's Headtaker|icon-size=100x100px}} | ||
| Line 112: | Line 112: | ||
<br>[[Scotsman's Skullcutter]] | <br>[[Scotsman's Skullcutter]] | ||
| | | | ||
| − | *This weapon | + | *This weapon reduces the Demoman's speed, making him an easier target. However, this weapon also has an increased melee range, so use a ranged weapon against the Demoman if possible. |
|- | |- | ||
| class="small" align="center" valign="center" style="padding:0.5em" | {{Icon weapon|weapon=Claidheamh Mòr|icon-size=100x100px}} | | class="small" align="center" valign="center" style="padding:0.5em" | {{Icon weapon|weapon=Claidheamh Mòr|icon-size=100x100px}} | ||
<br>[[Claidheamh Mòr]] | <br>[[Claidheamh Mòr]] | ||
| | | | ||
| − | * | + | *The Claidheamh Mòr increases the charge duration of the [[Chargin' Targe]] and gives the Demoman increased melee range. Any Demoman using the Claidheamh Mòr is also likely to be using the Targe, which gives resistance to explosion damage and fire damage, so try and stay back and inflict damage with bullets, if possible. |
|- | |- | ||
| class="small" align="center" valign="center" style="padding:0.5em" | {{Icon weapon|weapon=Pain Train|icon-size=100x100px}} | | class="small" align="center" valign="center" style="padding:0.5em" | {{Icon weapon|weapon=Pain Train|icon-size=100x100px}} | ||
<br>[[Pain Train]] | <br>[[Pain Train]] | ||
| | | | ||
| − | *The Demoman has a 10% vulnerability to bullets with the Pain Train equipped. Switch to a weapon that fires bullets for extra damage. | + | *The Demoman has a +10% vulnerability to bullets with the Pain Train equipped. Switch to a weapon that fires bullets for extra damage. |
|- | |- | ||
| class="small" align="center" valign="center" style="padding:0.5em" | {{Icon weapon|weapon=Ullapool Caber|icon-size=100x100px}} | | class="small" align="center" valign="center" style="padding:0.5em" | {{Icon weapon|weapon=Ullapool Caber|icon-size=100x100px}} | ||
<br>[[Ullapool Caber]] | <br>[[Ullapool Caber]] | ||
| | | | ||
| − | *This weapon explodes on contact with the world. Try to | + | *This weapon explodes on contact with the world. Try to keep your distance from a Demoman who has this weapon out. |
| − | * | + | *If you are within melee range of a Demoman using this weapon, try and cause the Demoman to miss and hit a wall, injuring himself. |
| − | *A Demoman using a Chargin' Targe in conjunction with this weapon can close the distance between you quickly and attack you with a guaranteed critical. Beware of | + | *A Demoman using a Chargin' Targe in conjunction with this weapon can close the distance between you quickly and attack you with a guaranteed critical. Beware of Demomen using this combination of weapons. |
|} | |} | ||
Revision as of 02:56, 4 January 2011
 | Notice: Please take a moment to read the Anti-Class Strategy Standard before editing this page. |
| “You are so small! Is funny to me!” This article is a stub. As such, it is not complete. You can help Team Fortress Wiki by expanding it. |
| “ | You are no match for me!
Click to listen
— The Heavy
|
” |
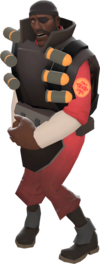
The Demoman, while an excellent ranged fighter, lacks an efficient means of self defense at close range.
Contents
General
| Attributes | Anti Demoman Strategy |
|---|---|
| |
| |
| |
|
Weapon Specific
A list of useful tidbits about the Demoman's tools, and how to counter them.
Primary Weapons
| Weapon | Anti Demoman Strategy |
|---|---|
Grenade Launcher |
|
Loch-n-Load |
|
Secondary Weapons
| Weapon | Anti Demoman Strategy |
|---|---|
Trap Weapons
Melee Weapons
| Weapon | Anti Demoman Strategy |
|---|---|
| |
| |
| |
| |
| |
| |
| |
Class Set
| Set | Anti Demoman Strategy |
|---|---|

|
See also
|
