Difference between revisions of "Sniper weapons (competitive)"
(→Huntsman: What do you mean by scoping with Huntsman? That bug was fixed. Tweaked the attributes and added more updated info..) |
(Cleanup. Also, how does the SMG deal "backlash"?) |
||
| Line 1: | Line 1: | ||
{{competitive}} | {{competitive}} | ||
| − | The [[Sniper (competitive)|Sniper]] specializes in long range area denial | + | |
| + | The [[Sniper (competitive)|Sniper]] specializes in long range area denial. He is frequently used to get a pick on a Medic in case of a stalemate. If confronted by a Scout, he will lose at close range. | ||
==Primary Weapon== | ==Primary Weapon== | ||
| − | The Sniper's primary weapons | + | |
| + | The Sniper's primary weapons are his main source of damage, and constitute his long-range damage. All of them can be charged up to deal increased damage, and all but the Sydney Sleeper can deal headshots for increased damage. All but the Huntsman provide a highly visible sniper dot. All of the Sniper Rifles except for the Machina and Huntsman can fire without scoping, dealing accurate but low damage. | ||
=== Sniper Rifle === | === Sniper Rifle === | ||
| Line 10: | Line 12: | ||
[[File:Sniper rifle.png|100px|right]] | [[File:Sniper rifle.png|100px|right]] | ||
| − | The | + | The stock Sniper Rifle provides the simplest source of damage. It can kill any enemy on a fully charged headshot, and can deal significant damage on a bodyshot. |
| − | |||
| − | |||
{| class="wikitable grid" | {| class="wikitable grid" | ||
| Line 36: | Line 36: | ||
* '''Full Charge Time:''' 4s | * '''Full Charge Time:''' 4s | ||
| style="background-color:#FFF4CC;" | | | style="background-color:#FFF4CC;" | | ||
| − | * Has no damage | + | * Has no damage fall-off or ramp-up. |
| − | * | + | * Charge damage does not increase for 1 second. |
| − | |||
|} | |} | ||
<br> | <br> | ||
| Line 46: | Line 45: | ||
[[File:Huntsman.png|100px|right]] | [[File:Huntsman.png|100px|right]] | ||
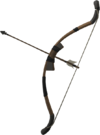
| − | The | + | The Huntsman is designed for medium range combat. It is affected by gravity, but fires faster than the stock Sniper Rifle. It has a limit on the time it can maintain charge, and has reduced ammunition from the stock Sniper Rifle. |
| − | |||
| − | |||
| − | |||
{| class="wikitable grid" | {| class="wikitable grid" | ||
| Line 60: | Line 56: | ||
! style="background-color:#FFF4CC;" | [[Huntsman]] <br>[[Image:Huntsman.png|70x39px]] | ! style="background-color:#FFF4CC;" | [[Huntsman]] <br>[[Image:Huntsman.png|70x39px]] | ||
| style="background-color:#FFF4CC;" | | | style="background-color:#FFF4CC;" | | ||
| − | * '''Uncharged:''' | + | * '''Uncharged:''' 50 |
* '''Charged:''' 120 | * '''Charged:''' 120 | ||
| style="background-color:#FFF4CC;" | | | style="background-color:#FFF4CC;" | | ||
| − | * '''Critical, Uncharged:''' | + | * '''Critical, Uncharged:''' 150 |
* '''Critical, Charged:''' 360 | * '''Critical, Charged:''' 360 | ||
| − | * '''Mini-Crit, Uncharged:''' | + | * '''Mini-Crit, Uncharged:''' 68 |
* '''Mini-Crit, Charged:''' 162 | * '''Mini-Crit, Charged:''' 162 | ||
| style="background-color:#FFF4CC;" | | | style="background-color:#FFF4CC;" | | ||
| Line 72: | Line 68: | ||
* '''Full Charge Time:''' 1.0s | * '''Full Charge Time:''' 1.0s | ||
| style="background-color:#FFF4CC;" | | | style="background-color:#FFF4CC;" | | ||
| − | * Has no damage | + | * Has no damage fall-off or ramp-up. |
| − | * | + | * Projectiles are affected by gravity. |
| − | * | + | * Arrows can be uncharged with alt-fire. |
| + | * Arrows can be ignited to deal fire damage to the target. | ||
| + | * Provides the [[Skewer]] taunt. | ||
| + | * Enemies which are killed with an arrow near a wall may be pinned to it. | ||
|} | |} | ||
<br> | <br> | ||
| Line 84: | Line 83: | ||
[[File:Sydney Sleeper.png|100px|right]] | [[File:Sydney Sleeper.png|100px|right]] | ||
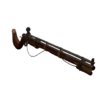
| − | The Sydney Sleeper | + | The Sydney Sleeper provides a stronger support basis for the team. It sacrifices the ability to deal headshots at the benefit of applying jarate to the target after a short charge time, for a duration of 8 seconds. |
| − | |||
| − | |||
{| class="wikitable grid" | {| class="wikitable grid" | ||
| Line 106: | Line 103: | ||
| style="background-color:#FFF4CC;" | | | style="background-color:#FFF4CC;" | | ||
* '''Attack:''' 1.5s | * '''Attack:''' 1.5s | ||
| + | * '''Charge | ||
* '''Jarate Delay:''' 1.06s | * '''Jarate Delay:''' 1.06s | ||
| + | * '''Jarate Effect Duration:''' 8s | ||
| style="background-color:#FFF4CC;" | | | style="background-color:#FFF4CC;" | | ||
| − | * Has no damage | + | * Has no damage fall-off or ramp-up. |
| − | * | + | * Cannot headshot. |
| − | |||
* +25% charge rate | * +25% charge rate | ||
|} | |} | ||
| Line 119: | Line 117: | ||
[[File:Backpack Bazaar Bargain.png|100px|right]] | [[File:Backpack Bazaar Bargain.png|100px|right]] | ||
| − | The Bazaar Bargain | + | The Bazaar Bargain has an initially slowed charge time, which increases with each accurate headshot. It counts "heads obtained", up to a maximum of 7. A miss or body shot will lower the number, but a no-scope will not. |
{| class="wikitable grid" | {| class="wikitable grid" | ||
| Line 141: | Line 139: | ||
* '''Afterscope Delay:''' 0.2s | * '''Afterscope Delay:''' 0.2s | ||
* '''Charge Delay:''' 1.0s | * '''Charge Delay:''' 1.0s | ||
| − | * '''Full Charge Time:''' 5. | + | * '''Full Charge Time:''' 5.26s (0 Heads) 1.78s (7 Heads) |
| style="background-color:#FFF4CC;" | | | style="background-color:#FFF4CC;" | | ||
| − | * Has no damage | + | * Has no damage fall-off or ramp-up. |
| − | * | + | * Initially charges at 120% time of the stock Sniper Rifle. |
| − | * | + | ** Decreases by 10% for each additional head, up to 7. |
| − | * Each | + | * Head count is only affected by scoped shots. |
| − | * | + | ** Each headshot adds one head. |
| + | ** Any other scoped shot loses one head. | ||
|} | |} | ||
| + | <br> | ||
| + | |||
| + | ===Machina=== | ||
| + | |||
| + | [[File:Machina.png|100px|right]] | ||
| + | |||
| + | The Machina adds damage and piercing on full charge, but reveals the Sniper's location and prevents no-scopes. | ||
| + | |||
| + | {| class="wikitable grid" | ||
| + | ! class="header" | Weapon | ||
| + | ! class="header" | Damage | ||
| + | ! class="header" | [[Critical hits|Critical]] Damage | ||
| + | ! class="header" | Function Times | ||
| + | ! class="header" | Special | ||
| + | |- | ||
| + | ! style="background-color:#FFF4CC;" | [[Machina]] <br>[[Image:Machina.png|70x39px]] | ||
| + | | style="background-color:#FFF4CC;" | | ||
| + | * '''Uncharged:''' 50 | ||
| + | * '''Charged:''' 173 | ||
| + | | style="background-color:#FFF4CC;" | | ||
| + | * '''Critical, Uncharged:''' 150 | ||
| + | * '''Critical, Charged:''' 518 | ||
| + | * '''Mini-Crit, Uncharged:''' 68 | ||
| + | * '''Mini-Crit, Charged:''' 233 | ||
| + | | style="background-color:#FFF4CC;" | | ||
| + | * '''Attack:''' 1.5s | ||
| + | * '''Afterscope Delay:''' 0.2s | ||
| + | * '''Charge Delay:''' 1.0s | ||
| + | * '''Full Charge Time:''' 4s | ||
| + | | style="background-color:#FFF4CC;" | | ||
| + | * Has no damage fall-off or ramp-up. | ||
| + | * Fires tracer rounds which leave visual trails. | ||
| + | * Piercing damage is dealt to all targets in line, regardless if it kills any of them. | ||
| + | ** Maximum of 50 targets.<!--Needs Confirmation!--> | ||
| + | * Deals 15% extra damage on full charge. | ||
| + | |} | ||
| + | |||
<br> | <br> | ||
=== Primary Weapon Usage === | === Primary Weapon Usage === | ||
| − | + | ||
| + | The Sydney Sleeper and the Huntsman are uncommon choices, due to an overall reduced damage output, but can be useful to assist the team. The stock Sniper Rifle deals consistant long-range damage, and can kill most classes with a quick headshot. The Bazaar Bargain is good for a sniper who is looking to take down a few high-health classes quickly, and the Machina is useful for dealing increased damage, or for getting a pair of kills. Snipers, due to their situational use, tend to go for the stock Sniper Rifle for quick and consistant damage without revealing their location. | ||
==Secondary Weapon== | ==Secondary Weapon== | ||
| − | The Sniper | + | |
| + | The Sniper deals the majority of his damage with his primary, but his secondary weapon can provide some key medium range combat damage. | ||
=== SMG === | === SMG === | ||
| Line 161: | Line 199: | ||
[[File:SMG IMG.png|100px|right]] | [[File:SMG IMG.png|100px|right]] | ||
| − | The | + | The stock Submachine Gun deals strong damage at medium and close range, and can help the sniper survive an encounter with a Scout. |
{| class="wikitable grid" | {| class="wikitable grid" | ||
| Line 170: | Line 208: | ||
! class="header" | Special | ! class="header" | Special | ||
|- | |- | ||
| − | ! style="background-color:# | + | ! style="background-color:#FFF4CC;" | [[SMG]] <br>[[Image:SMG IMG.png|70x39px]] |
| − | | style="background-color:# | + | | style="background-color:#FFF4CC;" | |
* '''Point-Blank:''' 12 | * '''Point-Blank:''' 12 | ||
* '''512 units:''' 8 | * '''512 units:''' 8 | ||
| − | * ''' Over 1024 units:''' 4 | + | * '''Over 1024 units:''' 4 |
| − | + | | style="background-color:#FFF4CC;" | | |
| − | | style="background-color:# | ||
* '''Critical:''' 24 | * '''Critical:''' 24 | ||
| − | * '''Point-Blank | + | * '''Point-Blank Mini-crit:''' 16 |
| − | * '''Over 512 units:''' | + | * '''Over 512 units: Mini-crit:''' 11 |
| − | | style="background-color:# | + | | style="background-color:#FFF4CC;" | |
* '''Attack:''' 0.1s | * '''Attack:''' 0.1s | ||
* '''Reload:''' 1.1s | * '''Reload:''' 1.1s | ||
| − | | style="background-color:# | + | | style="background-color:#FFF4CC;" | |
| − | * If unfired in the past 1.25 seconds, shot has perfect accuracy. | + | * If unfired in the past 1.25 seconds, the next shot has perfect accuracy. |
|} | |} | ||
<br> | <br> | ||
| Line 192: | Line 229: | ||
[[File:Jarate cropped.png|100px|right]] | [[File:Jarate cropped.png|100px|right]] | ||
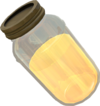
| − | Jarate | + | Jarate does not deal any immediate damage, but makes any normal damage dealt to coated players become mini-crits. |
{| class="wikitable grid" | {| class="wikitable grid" | ||
| Line 201: | Line 238: | ||
! class="header" | Special | ! class="header" | Special | ||
|- | |- | ||
| − | ! style="background-color:# | + | ! style="background-color:#FFF4CC;" | [[Jarate]] <br>[[Image:Jarate cropped.png|70x39px]] |
| − | | style="background-color:# | + | | style="background-color:#FFF4CC;" | N/A |
| − | + | | style="background-color:#FFF4CC;" | N/A | |
| − | | style="background-color:# | + | | style="background-color:#FFF4CC;" | |
| − | |||
| − | | style="background-color:# | ||
* '''Effect Duration:''' 10s | * '''Effect Duration:''' 10s | ||
* '''Refill Time:''' 20s | * '''Refill Time:''' 20s | ||
| − | | style="background-color:# | + | | style="background-color:#FFF4CC;" | |
| − | * | + | * Normal damage against coated players is upgraded to mini-crit damage. |
| − | + | * Extinguishes fire. | |
| − | * Extinguishes fire | + | * Removable in water. |
| − | * | + | * Visible on cloaked or disguised spies. |
| − | * | ||
|} | |} | ||
<br> | <br> | ||
| Line 222: | Line 256: | ||
[[File:Razorback.png|100px|right]] | [[File:Razorback.png|100px|right]] | ||
| − | The Razorback | + | The Razorback saves the sniper from one backstab attempt from a Spy. It temporarily disables the Spy's knife after the stab. |
{| class="wikitable grid" | {| class="wikitable grid" | ||
| Line 231: | Line 265: | ||
! class="header" | Special | ! class="header" | Special | ||
|- | |- | ||
| − | ! style="background-color:# | + | ! style="background-color:#FFF4CC;" | [[Razorback]] <br>[[Image:Razorback.png|70x39px]] |
| − | | style="background-color:# | + | | style="background-color:#FFF4CC;" | N/A |
| − | + | | style="background-color:#FFF4CC;" | N/A | |
| − | | style="background-color:# | + | | style="background-color:#FFF4CC;" | |
| − | + | * '''Time Restriction on Spy Knife:''' 2s | |
| − | | style="background-color:# | + | | style="background-color:#FFF4CC;" | |
| − | * ''' | + | * Can be replaced at a resupply cabinet. |
| − | | style="background-color:# | ||
| − | * | ||
| − | |||
| − | |||
|} | |} | ||
<br> | <br> | ||
=== Darwin's Danger Shield === | === Darwin's Danger Shield === | ||
| − | |||
| − | |||
[[File:Darwin's Danger Shield.png|100px|right]] | [[File:Darwin's Danger Shield.png|100px|right]] | ||
| − | : '''Note:''' | + | : '''Note:''' The Darwin's Danger Shield is banned or restricted in some leagues for acquisition time. |
| − | The Darwin's Danger Shield | + | The Darwin's Danger Shield provides the Sniper with 25 additional health. |
{| class="wikitable grid" | {| class="wikitable grid" | ||
| Line 262: | Line 290: | ||
! class="header" | Special | ! class="header" | Special | ||
|- | |- | ||
| − | ! style="background-color:# | + | ! style="background-color:#FFF4CC;" | [[Darwin's Danger Shield]] <br>[[Image:Darwin's Danger Shield.png|140x78px]] |
| − | | style="background-color:# | + | | style="background-color:#FFF4CC;" | N/A |
| − | + | | style="background-color:#FFF4CC;" | N/A | |
| − | | style="background-color:# | + | | style="background-color:#FFF4CC;" | N/A |
| − | + | | style="background-color:#FFF4CC;" | | |
| − | | style="background-color:# | + | * Sniper gains 25 maximum health, for a total of 150. |
| − | + | ** Maximum overheal is increased to 225 from 185. | |
| − | | style="background-color:# | ||
| − | * | ||
| − | * | ||
|} | |} | ||
<br> | <br> | ||
===Secondary Weapon Usage=== | ===Secondary Weapon Usage=== | ||
| − | The | + | |
| + | The stock Submachine Gun provides actual damage output, making it a strong option to deal with enemies. Jarate can help a push if it hits multiple enemies, but the Razorback and Darwin's Danger Shield provide more passive effects which are rarely useful in competitive play. | ||
== Melee Weapon == | == Melee Weapon == | ||
| − | The melee weapon is | + | |
| + | The Sniper's melee weapon is rarely used, but deals damage in a pinch. | ||
=== Kukri === | === Kukri === | ||
| Line 285: | Line 312: | ||
[[File:Kukri IMG.png|100px|right]] | [[File:Kukri IMG.png|100px|right]] | ||
| − | The Kukri | + | The stock Kukri deals standard damage, and can have use if out of ammo. |
{| class="wikitable grid" | {| class="wikitable grid" | ||
| Line 299: | Line 326: | ||
| style="background-color:#FFF4CC;" | | | style="background-color:#FFF4CC;" | | ||
* '''Critical:''' 195 | * '''Critical:''' 195 | ||
| − | * ''' | + | * '''Mini-crit:''' 88 |
| style="background-color:#FFF4CC;" | | | style="background-color:#FFF4CC;" | | ||
* '''Attack:''' 0.8s | * '''Attack:''' 0.8s | ||
| style="background-color:#FFF4CC;" | | | style="background-color:#FFF4CC;" | | ||
| − | * | + | * Stock melee weapon. |
|} | |} | ||
<br> | <br> | ||
| Line 311: | Line 338: | ||
[[File:Tribalman's shiv.png|100px|right]] | [[File:Tribalman's shiv.png|100px|right]] | ||
| − | The | + | The Tribalman's Shiv deals reduced initial damage, with bleeding. |
{| class="wikitable grid" | {| class="wikitable grid" | ||
| Line 322: | Line 349: | ||
! style="background-color:#FFF4CC;" | [[Tribalman's Shiv]] <br>[[File:Tribalman's shiv.png|70x39px]] | ! style="background-color:#FFF4CC;" | [[Tribalman's Shiv]] <br>[[File:Tribalman's shiv.png|70x39px]] | ||
| style="background-color:#FFF4CC;" | | | style="background-color:#FFF4CC;" | | ||
| − | * '''Melee:''' | + | * '''Melee:''' 33 |
| − | * '''Bleed:''' | + | * '''Bleed:''' 8 per second (48 total) |
| style="background-color:#FFF4CC;" | | | style="background-color:#FFF4CC;" | | ||
| − | * '''Critical:''' | + | * '''Critical:''' 98 |
| − | * ''' | + | * '''Mini-crit:''' 44 |
| − | * ''' | + | * '''Mini-crit Bleeding:''' 10.8 per second (64.8 total) |
| style="background-color:#FFF4CC;" | | | style="background-color:#FFF4CC;" | | ||
* '''Attack:''' 0.8s | * '''Attack:''' 0.8s | ||
| − | |||
| − | |||
| style="background-color:#FFF4CC;" | | | style="background-color:#FFF4CC;" | | ||
| − | * | + | * Deals more damage overall than the stock Kukri. |
| − | |||
|} | |} | ||
<br> | <br> | ||
| Line 344: | Line 368: | ||
[[File:Bushwacka.png|100px|right]] | [[File:Bushwacka.png|100px|right]] | ||
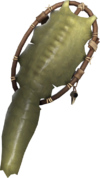
| − | The Bushwacka | + | The Bushwacka deals critical damage where it would normally deal mini-crit damage. The Sniper takes an additional 20% fire damage. |
| − | |||
| − | The | ||
{| class="wikitable grid" | {| class="wikitable grid" | ||
| Line 364: | Line 386: | ||
* '''Attack:''' 0.8s | * '''Attack:''' 0.8s | ||
| style="background-color:#FFF4CC;" | | | style="background-color:#FFF4CC;" | | ||
| − | * Crits | + | * Crits where it would normally mini-crit. |
| − | * | + | * +20% fire damage. |
|} | |} | ||
<br> | <br> | ||
| Line 373: | Line 395: | ||
[[File:Backpack Shahanshah.png|100px|right]] | [[File:Backpack Shahanshah.png|100px|right]] | ||
| − | The Shahanshah | + | The Shahanshah deals increased damage when the Sniper is below 50% health, and reduced damage when he is above 50% health. |
| − | |||
{| class="wikitable grid" | {| class="wikitable grid" | ||
! class="header" | Weapon | ! class="header" | Weapon | ||
| Line 384: | Line 405: | ||
! style="background-color:#FFF4CC;" | [[Shahanshah]] <br>[[File:Backpack Shahanshah.png|140x78px]] | ! style="background-color:#FFF4CC;" | [[Shahanshah]] <br>[[File:Backpack Shahanshah.png|140x78px]] | ||
| style="background-color:#FFF4CC;" | | | style="background-color:#FFF4CC;" | | ||
| − | * '''Melee:''' | + | * '''Melee when below 50%:''' 49 |
| + | * '''Melee when above 50%:''' 81 | ||
| style="background-color:#FFF4CC;" | | | style="background-color:#FFF4CC;" | | ||
| − | * '''Critical:''' | + | * '''Critical when below 50%:''' 146 |
| − | * '''Minicrit:''' | + | * '''Critical when above 50%:''' 244 |
| + | * '''Minicrit when below 50%:''' 66 | ||
| + | * '''Minicrit when above 50%:''' 110 | ||
| style="background-color:#FFF4CC;" | | | style="background-color:#FFF4CC;" | | ||
* '''Attack:''' 0.8s | * '''Attack:''' 0.8s | ||
| style="background-color:#FFF4CC;" | | | style="background-color:#FFF4CC;" | | ||
| − | * | + | * Deals 25% additional damage when below 50% health. |
| − | * | + | * Deals 25% less damage when above 50% health. |
| + | ** Effects melee only. | ||
|} | |} | ||
<br> | <br> | ||
===Melee Weapon Usage=== | ===Melee Weapon Usage=== | ||
| − | The | + | |
| + | Sniper melee is rare, but often effective. The stock Kukri deals not much additional damage, and is rarely useful. The Tribalman's Shiv can deal great damage to a Scout or Soldier who cannot get back to their Medic in time, whereas the Bushwacka deals immense damage in combination with Jarate, but means the sniper dies very fast to a Pyro. The Shahanshah can deal immense damage to an unsuspecting player if the Sniper is at low health, but if confronted when at high health is a detriment. Most Snipers use the Shiv for increased overall damage, or use the Bushwacka, counting on the rarity of Pyros. | ||
==See also== | ==See also== | ||
Revision as of 22:46, 23 February 2012
The community competitive scene changes frequently. Some or all info may be outdated.
The Sniper specializes in long range area denial. He is frequently used to get a pick on a Medic in case of a stalemate. If confronted by a Scout, he will lose at close range.
Primary Weapon
The Sniper's primary weapons are his main source of damage, and constitute his long-range damage. All of them can be charged up to deal increased damage, and all but the Sydney Sleeper can deal headshots for increased damage. All but the Huntsman provide a highly visible sniper dot. All of the Sniper Rifles except for the Machina and Huntsman can fire without scoping, dealing accurate but low damage.
Sniper Rifle
The stock Sniper Rifle provides the simplest source of damage. It can kill any enemy on a fully charged headshot, and can deal significant damage on a bodyshot.
| Weapon | Damage | Critical Damage | Function Times | Special |
|---|---|---|---|---|
| Sniper Rifle |
|
|
|
|
Huntsman
The Huntsman is designed for medium range combat. It is affected by gravity, but fires faster than the stock Sniper Rifle. It has a limit on the time it can maintain charge, and has reduced ammunition from the stock Sniper Rifle.
| Weapon | Damage | Critical Damage | Function Times | Special |
|---|---|---|---|---|
| Huntsman |
|
|
|
|
Sydney Sleeper
- Note: The Sydney Sleeper is banned or restricted in some leagues for acquisition time.
The Sydney Sleeper provides a stronger support basis for the team. It sacrifices the ability to deal headshots at the benefit of applying jarate to the target after a short charge time, for a duration of 8 seconds.
| Weapon | Damage | Critical Damage | Function Times | Special |
|---|---|---|---|---|
| Sydney Sleeper 70x39px |
|
|
|
|
Bazaar Bargain
The Bazaar Bargain has an initially slowed charge time, which increases with each accurate headshot. It counts "heads obtained", up to a maximum of 7. A miss or body shot will lower the number, but a no-scope will not.
| Weapon | Damage | Critical Damage | Function Times | Special |
|---|---|---|---|---|
Bazaar Bargain 
|
|
|
|
|
Machina
The Machina adds damage and piercing on full charge, but reveals the Sniper's location and prevents no-scopes.
| Weapon | Damage | Critical Damage | Function Times | Special |
|---|---|---|---|---|
| Machina |
|
|
|
|
Primary Weapon Usage
The Sydney Sleeper and the Huntsman are uncommon choices, due to an overall reduced damage output, but can be useful to assist the team. The stock Sniper Rifle deals consistant long-range damage, and can kill most classes with a quick headshot. The Bazaar Bargain is good for a sniper who is looking to take down a few high-health classes quickly, and the Machina is useful for dealing increased damage, or for getting a pair of kills. Snipers, due to their situational use, tend to go for the stock Sniper Rifle for quick and consistant damage without revealing their location.
Secondary Weapon
The Sniper deals the majority of his damage with his primary, but his secondary weapon can provide some key medium range combat damage.
SMG
The stock Submachine Gun deals strong damage at medium and close range, and can help the sniper survive an encounter with a Scout.
| Weapon | Damage | Critical Damage | Function Times | Special |
|---|---|---|---|---|
| SMG |
|
|
|
|
Jarate
Jarate does not deal any immediate damage, but makes any normal damage dealt to coated players become mini-crits.
| Weapon | Damage | Critical Damage | Function Times | Special |
|---|---|---|---|---|
| Jarate |
N/A | N/A |
|
|
Razorback
The Razorback saves the sniper from one backstab attempt from a Spy. It temporarily disables the Spy's knife after the stab.
| Weapon | Damage | Critical Damage | Function Times | Special |
|---|---|---|---|---|
| Razorback |
N/A | N/A |
|
|
Darwin's Danger Shield
- Note: The Darwin's Danger Shield is banned or restricted in some leagues for acquisition time.
The Darwin's Danger Shield provides the Sniper with 25 additional health.
| Weapon | Damage | Critical Damage | Function Times | Special |
|---|---|---|---|---|
| Darwin's Danger Shield |
N/A | N/A | N/A |
|
Secondary Weapon Usage
The stock Submachine Gun provides actual damage output, making it a strong option to deal with enemies. Jarate can help a push if it hits multiple enemies, but the Razorback and Darwin's Danger Shield provide more passive effects which are rarely useful in competitive play.
Melee Weapon
The Sniper's melee weapon is rarely used, but deals damage in a pinch.
Kukri
The stock Kukri deals standard damage, and can have use if out of ammo.
| Weapon | Damage | Critical Damage | Function Times | Special |
|---|---|---|---|---|
| Kukri |
|
|
|
|
Tribalman's Shiv
The Tribalman's Shiv deals reduced initial damage, with bleeding.
| Weapon | Damage | Critical Damage | Function Times | Special |
|---|---|---|---|---|
| Tribalman's Shiv |
|
|
|
|
Bushwacka
- Note: The Bushwacka is banned or restricted in some leagues for acquisition time.
The Bushwacka deals critical damage where it would normally deal mini-crit damage. The Sniper takes an additional 20% fire damage.
| Weapon | Damage | Critical Damage | Function Times | Special |
|---|---|---|---|---|
| Bushwacka |
|
|
|
|
Shahanshah
The Shahanshah deals increased damage when the Sniper is below 50% health, and reduced damage when he is above 50% health.
| Weapon | Damage | Critical Damage | Function Times | Special |
|---|---|---|---|---|
Shahanshah 
|
|
|
|
|
Melee Weapon Usage
Sniper melee is rare, but often effective. The stock Kukri deals not much additional damage, and is rarely useful. The Tribalman's Shiv can deal great damage to a Scout or Soldier who cannot get back to their Medic in time, whereas the Bushwacka deals immense damage in combination with Jarate, but means the sniper dies very fast to a Pyro. The Shahanshah can deal immense damage to an unsuspecting player if the Sniper is at low health, but if confronted when at high health is a detriment. Most Snipers use the Shiv for increased overall damage, or use the Bushwacka, counting on the rarity of Pyros.
See also
| |||||

