Furnace Creek/ru
| Furnace Creek | |
|---|---|
| |
| Информация | |
| Автор(-ы): | Неизвестно |
| Вид на карту сверху | |
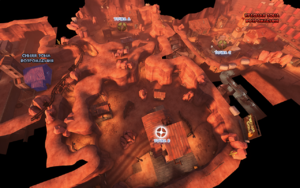
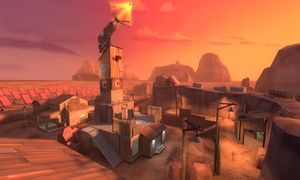
Furnace Creek is a capture point map where RED always plays defense and BLU always plays offense. Once the BLU team has captured a point, it is locked and can never be retaken by RED. There are three control points, A, B, and C. A and B are directly accessible from the BLU base, but you must cross through one of them in order to reach C. RED's base is located near point C.
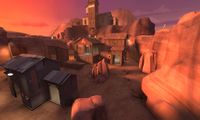
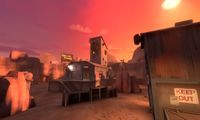
Furnace Creek features a custom desert environment built around the orange sunset sky. Smaller details such as new cacti and a dried, cracked ground texture add its separation from other desert maps.
BLU must capture all three points. A and B must be captured before C can be. RED attempts to defend the points. RED wins if any of the points are uncaptured when time runs out. Time is added to the countdown if BLU captures any of the points.
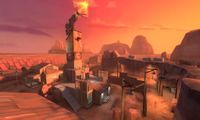
The "Solar Laser Unbuilding Gun", or S.L.U.G., is a custom spytech weapon which RED has mounted on top of the tower by C. Power is fed to the S.L.U.G. by the field of heliostats which make up the parabolic solar array behind RED's spawn. The S.L.U.G. reaches maximum power at sunset. BLU must stop RED from firing the S.L.U.G. by capturing the final point before the time runs out.
Introduction Video
Locations
BLU Base
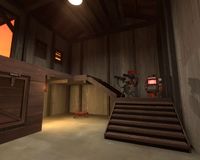
Located on one side of the map, the BLU Base has two exits, one for each capture point. The left exit gate leads to two separate paths to capture point A, while the right exit gate leads to two separate paths to capture point B. The BLU spawn building has one door that opens facing the cliff wall which the exit gates are set in. The resupply cabinet is located in a small attachment to the building on the right side.
Capture Point A
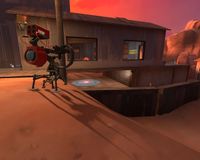
Capture Point A is to the left as you exit the BLU base. The point is on an exposed platform that can only be accessed through the wooden building it is part of. Downhill from the cap building is a metal shed. Various rocky outcroppings are strewn across the area, and there is a wooden shed next to the cap building.
There are three doorways into the capture point building, one on the side by the cliff wall, and two back by RED's exit tunnels. The point can be accessed directly by rocket jumping, sticky jumping, double jumping from BLU's exit tunnel to the shed roof and then onto the point, or by any class using a tire and barrel on side of the cap point platform by RED's tunnels. Inside the capture point building, there is a platform next to the capture point, which has stairs on both sides.
The capture point building contains a full ammo pack and a small health kit. The small shed contains a medium health kit and small ammo pack. Another small health kit is located behind a rock near the RED entrances to the area.
Capture Point B
Capture Point B is to the right as you exit the BLU base. The point is underneath the large structure in the center of the area. The large building surrounding the point has a hole in the floor which gives a high ground for defense. On the point are a few barrels to hide behind. The area surrounding the building above the capture point is relatively open. There are stairs to the building above the capture point on the left side of it when exiting BLU's exit tunnels, as well as a set of stairs on the right side leading up to a small ledge outside the building. The terrain slopes upwards by RED's tunnels to the area, giving access to the capture point building by one route from behind.
The roof of B is accessible to soldiers by rocket jumping, Demomen by sticky jumping, and Scouts using rocks and other props in the area.
There is a small health and medium ammo located nearby both sets of stairs which lead up to the building above the capture point, as well as a small health kit and small ammo pack on the side of the building near RED's entrance to the area. A single small health kit is located by a rock near RED's entrances to the area, and a medium ammo is located inside a small shed.
Capture Point C
Capture Point C is past the first two points, and adjacent to the RED base. The tunnels leading to the other CPs are on a higher level than the ground in this area. The Capture Point is located on the large platform-like roof of the building, next to the tower on top of which is the solar powered laser. There are three doors into the capture point building, one in the front and one on each side, as well as a ramp on each side that leads directly to the capture point. Inside of the capture point building is a set of stairs that splits halfway up, leading to the capture point.
The leftmost tunnel from RED's spawn curves around and exits directly overlooking capture point B. At the end of the tunnel is a small room. The two middle tunnels are short, with the one to B covered by a small shed. The rightmost tunnel is covered by a building, and leads into a mine cart tunnel, which is connected to a small room leading into a rock tunnel which opens up behind the capture point A building.
On the bottom floor of this building are two small ammo packs. Outside the building is a small health kit and medium ammo pack. Inside the building that houses the large tunnel to A, there is a small health kit and small ammo pack. There is a medium health kit and medium ammo pack in the small room at the end of the leftmost tunnel to B coming from RED's spawn, and a medium health kit and medium ammo pack at one end of the middle area of the rightmost tunnel to A coming from RED's spawn.
RED Base
The RED base is directly adjacent to CP C, on the opposite side of the area from the tunnels to CPs A and B. It has two covered exits that open in opposite directions.
Strategy
Capture Point A
Offense
It is important for BLU to have Soldiers and Demomen for this capture point. Defense usually sets up inside the building, and having explosives classes makes removal of defense easier. Pyros can help flush out the building or keep RED from coming back in. After the point is cleared, having Scouts on the point helps speed up the capture. Demomen can lob stickies into the building over the capture point platform from outside, a good way to destroy sentries without being seen.
An offensive Engineer can quickly set up a sentry by the medium ammo pack outside the capture point building on their side, which keeps RED from moving out and towards BLU's entrance to the area.
Defense
With the full ammo pack inside the A building, setting up sentries inside the building is the easiest move. Placing one sentry on the platform halfway up the stairs inside the building allows it to cover the main entrance and the capture point at the same time. Having another sentry at the opposite end of the building keeps soldiers from destroying the sentry on the stairs from outside of its range. Teleporters are usually built in the covered area underneath the stairs. A good Engineer defense on this point can win the map.
Snipers tend to stay near the entrance tunnels to the area and pick off BLU if they get onto the capture point or try and flank. Heavies and Pyros inside the capture point building can help keep the Engineer defense intact.
Capture Point B
Offense
Snipers are good for this area due to its openness. Because the capture point is a tight space, Pyros are always good for clearing out defense. The roof of the building above the capture point can be accessed by soldiers, Demomen, and Scouts. The hole in the roof allows Demomen and soldiers to easily destroy sentries built inside. The roof also allows soldiers and Demomen to cut off access to the area for RED by firing rockets or placing stickies around the RED's entrances to the area.
Defense
Sentries can be placed inside the building, above the hole through which the capture point is visible, behind the building, or on the ground next to the capture point. All sentry positions are susceptible to be destroyed by BLU soldiers and Demomen on the building roof, which is why it is vital to have Snipers which can kill BLU classes on the roof, or RED soldiers, Demomen, or Scouts on the roof. Pyros and Heavies are good for dropping through the hole and delivering massive amounts of damage to BLU players which attempt to capture the point.
Capture Point C
Offense
For this point, soldiers and Demomen are key to success. Which multiple sentry locations which can easily lock down the point, having these classes, as well as Medics with ubercharges, are necessary for sentry removal. An Engineer can set up a forward base in any of the tunnels to C, providing a level three teleporter to the point greatly aids in attacking.
Defense
Sentry positions are vital to defense at this capture point. Good sentry positions are as follows:
- Behind the metal sheets on the capture point
- On the stairs inside the tower
- By the small health and medium ammo outside the building
- In the windows underneath the capture point
However, with the many sentry positions, BLU is likely to have a couple Spies. Pyros are needed to check for Spies.
The balcony on the tower above the capture point is accessible, and a Demoman or Soldier and hide up there and fire down at BLU players who attempt to capture the point. However, they are easy targets for BLU Snipers.
Changelog
- Fixed hole in clipping at blue spawn.
- Adjusted certain lights to remove bright areas of red colour.
- Removed a few more vis problems.
- Fixed various playerclipping issues
- Restructured tunnels from A to C and from B to C into one three way tunnel connecting all points.
- Minor detailing tweaks.
- Added an aditional two rubber duckies for keen eyed players to seek out.
Trivia
- Rocket or sticky jumping in front of power core at the C tower will ignite and kill the player.
- If RED wins, the laser at C fires.
- There are 7 rubber ducks hidden in the map.
Additional Links
- Furnace Creek WIP Thread: http://forums.tf2maps.net/showthread.php?t=5889
- Furnace Creek Promotional Site: http://furnace.tf2maps.net
| Язык: | English · español · français · português do Brasil · русский |
