Community Hassle Castle strategy
| “Sun Tzu's got nothing on us!” This article is a Community strategy stub. As such, it is not complete. You can help the Team Fortress Wiki Community Strategy Project by expanding it. |
Hassle Castle has a non-Halloween version, Upward.
| Community Hassle Castle strategy | |
|---|---|

| |
| Basic Information | |
| Developer(s): | Unknown |
| Map Info | |
| Environment: | Halloween |
| Setting: | Night |
| Hazards: | Skeletons, Pitfalls |
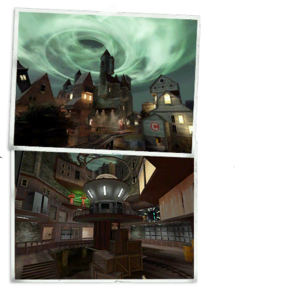
| Map Photos | |
This article is about Community Hassle Castle strategy.
General Strategy (All Classes)
See also: Community Payload strategy
The Hassle Castle map is a modification of the Upward Payload map.
For much of the original Upward Community strategy that still applies to this map, see Community Upward strategy.
Magic spells
- See also: Community magic spells strategy
This map has a unique characteristic of spawning no rare magic spells, however, remember, the many regular spells respawn very rapidly and can still, rarely, as normal, give the player the following rare magic spells: Power Up, Meteor Shower, and Ball O' Lightning.
- The more magic spells you pick up, the better your chances of getting better spells for pushes.
- Save up the better/rare magic spells for making or stopping pushes, especially on rollout of First Spawn and pushes on Final.
- Importantly, there are two, count them, two of the fast spawning spell pickups within BLU First Spawn; BLU should really use those, especially during Setup.
- Upwards is noted for BLU getting stuck in their first spawn, making whole-team use of the magic spells all that much more important for pushing out of spawn.
- It can be worth it a stuck BLU Team to farm their magic spell spawns for push spells.
- A full team with plenty of map behind it might afford dedicating a Scout or two to farming for better magic spells, or players can take turns farming for the rare spells.
- An organized team might pause from pushing the cart for collection of better magic spells before pushing on chokes or Final.
Skeletons
See also: Community Skeletons strategy
- Naturally, the Healing and Ammo resupply of the cart is important to BLU pushes.
- Skeletons Spawn at each point capture and at locations midway between each point.
- The Skeleton spawns are particularly located to knock small BLU cart escorts of the cart.
- Regaining the cart once driven off can be problematic, especially in the Mine.
- BLU should have plans for capping the known Spawn points sufficient force for dealing with the Skeleton Spawns without loosing the cart.
- The actual Spawn locations are generally ahead of the cart and to one side.
- RED can consider avoiding the Skeleton Spawn locations when BLU capture of the trigger is imminent.
Class-specific strategy
 Scout
Scout
 Soldier
 Pyro
Pyro
 Demoman
 Heavy
Heavy
 Engineer
Offense
- When playing as Engineer, as with all Payload maps, you may find yourself having to move your buildings and setting up new nests closer to the cart's position as your team progresses. Here is a list of potential places to leave your buildings as your team moves the cart.
- After capturing Checkpoint A: When moving the cart up the ramp out of the mine towards checkpoint B, it could be wise to place your buildings in front of BLU's second spawn at the bottom of the tunnel hill. Leave a teleporter entrance outside BLU's first spawn, and set up an exit in front of BLU's second spawn. Put a Dispenser next to the door leading the cart up the hill, and a sentry tucked away in the back near the entrance to the tunnel.
- After capturing Checkpoint B: Leave a teleporter entrance outside BLU's second spawn, and set up the rest of your buildings in RED's first spawn/ BLU's third spawn. Place a teleporter exit between the fireplace and the staircase balcony, a Dispenser by the left side of the ground floor exit, and a Sentry Gun overlooking the rest of your setup in front of the spawn room door. Make sure to get them upgraded, especially the Sentry Gun, if you wish to fend off any attacks from enemy forces pushing towards your nest.
- After capturing Checkpoint C: Build an entrance outside BLU's third spawn, and build your other buildings in the area below the final checkpoint. Put your exit below the staircase up to the across buildings, your sentry facing the doorway to the pit overlook, and your Dispenser behind the wall next to your Sentry Gun. As usual, get your stuff upgraded, especially the Sentry Gun.
Defense
- Just as much as if you were playing on offense, as an Engineer, you may find yourself having to move your buildings to different positions as BLU gains ground in order to support your teammates. Here is a list of potential locations to set up shop as your team attempts to stop the cart.
- Before Checkpoint A is captured: The house adjacent to Checkpoint A is a common place for Engineers to set up, and for good reason. It's close to the cart, there's plenty of cover, and it's easy to maintain. Place a Dispenser under the canopy by the tracks, a teleporter exit behind the building by the spellbook, and a sentry on the second floor overlooking Checkpoint A.
- Before Checkpoint B is captured: Since the cart is moving closer to your spawn, there's no real need to set up any Teleporters. Instead, place a Dispenser behind the wall by the spellbook on the platform, and a sentry in the open air to its left, aimed directly at Checkpoint B. Make sure to get everything upgraded before BLU gets out of the tunnel.
