Difference between revisions of "User:TheJohns"
| Line 113: | Line 113: | ||
|- | |- | ||
| class="small" align="center" valign="center" style="padding:0.5em" | [[Image:Pyro.png|200x200px|link=Pyro]]<br>[[Pyro]] | | class="small" align="center" valign="center" style="padding:0.5em" | [[Image:Pyro.png|200x200px|link=Pyro]]<br>[[Pyro]] | ||
| − | | {{Pro}} | + | | {{Pro}} Can Airblast<br/> |
{{Pro}} Lots of weapon choices<br/> | {{Pro}} Lots of weapon choices<br/> | ||
{{Pro}} Flexible builds<br/> | {{Pro}} Flexible builds<br/> | ||
| Line 170: | Line 170: | ||
| While its use is limited, it does have one trick: If crit boosted, it will eliminate a Medic in one hit. You can use this to take out a group of Uber Medics all healing the same giant if you lack any other way to eliminate them in one hit. | | While its use is limited, it does have one trick: If crit boosted, it will eliminate a Medic in one hit. You can use this to take out a group of Uber Medics all healing the same giant if you lack any other way to eliminate them in one hit. | ||
<br/>Rating: '''Situational''' | <br/>Rating: '''Situational''' | ||
| + | |} | ||
| + | <br/><br/> | ||
| + | {| class="wikitable grid" cellpadding="0" cellspacing="0" | ||
| + | ! class="header" width="200"| Class | ||
| + | ! class="header" | Assessment | ||
| + | |- | ||
| + | | class="small" align="center" valign="center" style="padding:0.5em" | [[Image:Demoman.png|200x200px|link=Demoman]]<br>[[Demoman]] | ||
| + | | {{Pro}}High AoE damage<br/> | ||
| + | {{Pro}}Good vs. Tanks & Uber Medics<br/> | ||
| + | {{Pro}}''(Demoknight)'' Natural resistances<br/> | ||
| + | {{Pro}}''(Demoknight)'' Good vs. Steel Gauntlets<br/> | ||
| + | {{Con}}''(Both)'' Very money-dependent<br/> | ||
| + | {{Con}}''(Demoknight)'' Melee-range effectiveness<br/> | ||
| + | {{Con}}''(Demoknight)'' No Sticky Launcher<br/> | ||
| + | Similar to the Soldier, the Demoman also excels in dealing heavy AoE damage. Unlike the Soldier who deals damage in a "spray and pray" style, the Demoman needs a little more time to prep his shots. The Demoman's ability to stack Sticky Bombs means that he has little trouble dealing with Uber Medics. Should he decide to swap his Sticky Launcher for the board, the Demoknight has some powerful advantages, although it means he will often the the brunt of the attack. | ||
| + | |- | ||
| + | ! class="header" width="200"| Weapon | ||
| + | ! class="header" | Assessment | ||
| + | |- | ||
| + | | | ||
| + | | | ||
| + | |} | ||
| + | <br/><br/> | ||
| + | {| class="wikitable grid" cellpadding="0" cellspacing="0" | ||
| + | ! class="header" width="200"| Class | ||
| + | ! class="header" | Assessment | ||
| + | |- | ||
| + | | class="small" align="center" valign="center" style="padding:0.5em" | [[Image:Heavy.png|200x200px|link=Heavy]]<br>[[Heavy]] | ||
| + | | {{Pro}}Consistent damage<br/> | ||
| + | {{Pro}}Great at mid range<br/> | ||
| + | {{Pro}}Has some defensive capabilities<br/> | ||
| + | {{Con}}Not the best damage dealer<br/> | ||
| + | The Heavy's main strength is his never-ending source of damage, as long as he's near an ammo supply. His Minigun allows him to endlessly mow down a wave of robots, and buying upgrades such as Destroy Projectiles and Knockback Rage lets him diminish the effectiveness of the robot's all-out offense. While he lacks pure damage compared to the Soldier or Demoman, he is nevertheless a welcome addition to any team. | ||
| + | |- | ||
| + | ! class="header" width="200"| Weapon | ||
| + | ! class="header" | Assessment | ||
| + | |- | ||
| + | | | ||
| + | | | ||
| + | |} | ||
| + | <br/><br/> | ||
| + | {| class="wikitable grid" cellpadding="0" cellspacing="0" | ||
| + | ! class="header" width="200"| Class | ||
| + | ! class="header" | Assessment | ||
| + | |- | ||
| + | | class="small" align="center" valign="center" style="padding:0.5em" | [[Image:Engineer.png|200x200px|link=Engineer]]<br>[[Engineer]] | ||
| + | | {{Pro}}Practically a ''requirement'' in MvM<br/> | ||
| + | {{Con}}Attracts Sentry Busters<br/> | ||
| + | Due to the fact that Mann vs. Machine involves playing defense, the Engineer naturally shines in this mode. His Teleporter let his teammates get to the front lines faster, the Dispenser heals and restocks ammo for him and his teammates, and the Sentry Gun excels against groups of robots and giants. The Engineer's sheer effectiveness means that you will need at least one Engineer in any MvM game. | ||
| + | |- | ||
| + | ! class="header" width="200"| Weapon | ||
| + | ! class="header" | Assessment | ||
| + | |- | ||
| + | | | ||
| + | | | ||
| + | |} | ||
| + | <br/><br/> | ||
| + | {| class="wikitable grid" cellpadding="0" cellspacing="0" | ||
| + | ! class="header" width="200"| Class | ||
| + | ! class="header" | Assessment | ||
| + | |- | ||
| + | | class="small" align="center" valign="center" style="padding:0.5em" | [[Image:Medic.png|200x200px|link=Medic]]<br>[[Medic]] | ||
| + | | {{Pro}}Heals his teammates<br/> | ||
| + | {{Pro}}Gives his teammates Ubers & Crits<br/> | ||
| + | {{Con}}Little to no direct damage<br/> | ||
| + | Just like in the base game, the Medic's primary goal is to keep his teammates alive. A powerful feature of the Medic is his ability to share his Canteens, further increasing the effectiveness of his teammates. While he won't be dealing much damage directly, the Medic's indirect power makes him a powerful asset. | ||
| + | |- | ||
| + | ! class="header" width="200"| Weapon | ||
| + | ! class="header" | Assessment | ||
| + | |- | ||
| + | | | ||
| + | | | ||
| + | |} | ||
| + | <br/><br/> | ||
| + | {| class="wikitable grid" cellpadding="0" cellspacing="0" | ||
| + | ! class="header" width="200"| Class | ||
| + | ! class="header" | Assessment | ||
| + | |- | ||
| + | | class="small" align="center" valign="center" style="padding:0.5em" | [[Image:Sniper.png|200x200px|link=Sniper]]<br>[[Sniper]] | ||
| + | | {{Pro}}Has Jarate<br/> | ||
| + | {{Pro}}Excels vs. Giants & Snipers<br/> | ||
| + | {{Pro}}Explosive Headshot can clear waves<br/> | ||
| + | {{Con}}High skill cap<br/> | ||
| + | {{Con}}Highly situational<br/> | ||
| + | {{Con}}Very money-dependent<br/> | ||
| + | {{Con}}Weak vs. Tanks<br/> | ||
| + | The Sniper's effectiveness fluctuates greatly depending on several factors such as wave composition and has a high skill cap, which is why playing Sniper tends to draw hate from teammates. In no way does this mean the Sniper is useless. His Jarate is a very accessible source of mini-crits, and once his Sniper Rifle is significantly upgraded, he can deal an extreme amount of damage to giants and deal heavy AoE damage to clusters of robots surrounding the giant with Explosive Headshots. On the down side, the Sniper is weak against tanks. | ||
| + | |- | ||
| + | ! class="header" width="200"| Weapon | ||
| + | ! class="header" | Assessment | ||
| + | |- | ||
| + | | | ||
| + | | | ||
| + | |} | ||
| + | <br/><br/> | ||
| + | {| class="wikitable grid" cellpadding="0" cellspacing="0" | ||
| + | ! class="header" width="200"| Class | ||
| + | ! class="header" | Assessment | ||
| + | |- | ||
| + | | class="small" align="center" valign="center" style="padding:0.5em" | [[Image:Spy.png|200x200px|link=Spy]]<br>[[Spy]] | ||
| + | | {{Pro}}Versatile role<br/> | ||
| + | {{Pro}}Sapper is the only source of hard disable<br/> | ||
| + | {{Pro}}Can deal great damage to giants<br/> | ||
| + | {{Pro}}Good vs. Steel Gauntlets, Uber Medics & Engineers<br/> | ||
| + | {{Con}}Situational effectiveness<br/> | ||
| + | {{Con}}Weak vs. Tanks<br/> | ||
| + | The Spy fulfills a variety of roles in MvM, including it's money collecting, disabling a group of robots and slowing giants to a crawl or backstabbing a giant halfway to death. While the Sapper has a significant cooldown time, it completely disables regular robots, making it a valuable weapon against a dangerous group of robots. The Spy is very ineffective when dealing with Tanks, however. | ||
| + | |- | ||
| + | ! class="header" width="200"| Weapon | ||
| + | ! class="header" | Assessment | ||
| + | |- | ||
| + | | | ||
| + | | | ||
|} | |} | ||
Revision as of 06:43, 6 January 2013
MvM Assessments
| Class | Assessment |
|---|---|
 Scout |
|
| Weapon | Assessment |
Scattergun |
Probably the best choice for Scouts going for an offensive build. Buying Projectile Penetration early lets Scout provide a bit of "chip damage" early, and once you have enough money for damage, reload speed and clip size, he can dish out significant damage on his own.
|
Force-A-Nature |
The Force-a-Nature is suited for a more support type build. While the pushback is somewhat difficult to control, pushback in general is useful, particularly in stalling giants in the FaN's case. While it can be built for damage like the Scattergun, its small clip size makes it somewhat less efficient than the Scattergun.
|
Shortstop |
|
Soda Popper |
Similar in the FaN's capabilities, except it swaps out pushback for mini-crits. The constant mini-crit boosts lets the Scout deal more damage at certain periods and also lets the Scout be a threat at mid-range, thanks to the lack of damage falloff. While still not as good in terms of raw damage as the Scattergun, the Soda Popper is more effective against waves of regular robots.
|
Baby Face's Blaster |
While the speed boost can be useful at times, the disadvantages often overshadows its advantage. The damage reduction means it's much weaker offensively, and the reduced speed without damage dealt often makes the Scout less effective at collecting money than without it, especially in cases where the Scout died before he can collect a lone pile of money far from the Teleporter.
|
Mad Milk |
Arguably the "best" secondary for the Scout. The Mad Milk's healing grant sustainability that allows the class to tank hits while damaging the robots, and is particularly useful against giants. The slowdown is also a nice addition to the Mad Milk's already powerful debuff. Generally, Mad Milk should be fully upgraded first, regardless of build.
|
Bonk! Atomic Punch |
If money is sitting on or behind a highly dangerous area, Bonk allows the Scout to bypass that danger, especially in situations where the Scout just respawned or doesn't have enough health. It can also be used to tank incoming fire for a few seconds. While by no means bad, it's overshadowed by the Mad Milk's sheer effectiveness, and the invulnerability can be substituted with an Uber canteen, even though it costs money.
|
Crit-a-Cola |
Gives the Scout more damage and is one of the only sources of mini-crits against Tanks. However, taking mini-crits is very dangerous for Scouts, and is much more limited in its capabilities compared to his other secondaries. Can be used as a last-ditch effort against a Tank that's giving the team a very hard time.
|
Fan O'War |
Mark for death is a very powerful debuff against giants and the like. What makes the Fan O'War truly shine is it requires no credit investment to use it effectively. Later in the game, it can be substituted for a Sandman, or you can just stick to the Fan O'War if you don't plan on investing money on the Sandman.
|
Sandman |
While it reduces the Scout's max health, marking an enemy at a range is far more safer than making a "suicide run" to mark a robot using the Fan O'War. Even then, as long as you continue to collect money the health penalty should be rather negligible.
|
| Class | Assessment |
|---|---|
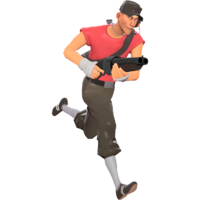
 Soldier |
|
| Weapon | Assessment |
Rocket Launcher |
High damage, large splash radius and ease of aim means the Rocket Launcher is just as powerful as it is in the base game. Although the default Rocket Launcher is an acceptable option, the other primaries have bonuses that will outweigh its disadvantage pretty fast, particularly clip size.
|
Direct Hit |
|
Black Box |
|
Cow Mangler 5000 |
While slightly weaker than the default Rocket Launcher, the Cow Mangler's main strength is its infinite ammo, which by itself is a big advantage, as it removes the need to retreat to collect ammo and saves money. However, the Cow Mangler comes with a huge disadvantage of not being able to be crit boosted at all, thus greatly reducing its effectiveness against Tanks. The alt-fire charge shot also useless, since it uses up all the ammo regardless of clip size.
|
Beggar's Bazooka |
Many Soldiers swear by the Begger's Bazooka as their choice of primary in MvM, and for a good reason. Firing multiple rockets means the Soldier can take out a wave of robots or a giant very quickly, and it makes the most out of a crit boost Canteen once reload and firing speed are fully upgraded. It does have its disadvantages, as ammo is a constant issue and you can't gain ammo from dispensers, range deviation means you have to get close to make sure all the rockets hit, and the Begger's Bazooka requires a lot of money to reach its peak.
|
Buff Banner |
The best secondary for the Soldier in MvM, period. You won't be relying on your secondaries for damage in MvM, and compared to the Battalion's Backup or the Concheror, the mini-crit boost from the Buff Banner is the most useful out of the three. It is the most accessible source of mini-crits in general, and practically the only source of mini-crits against Tanks.
|
Battalion's Backup |
The damage resistance aid you and your team's survivability, plus it makes crit-boosted robots a much lower threat for a few seconds. Unfortunately, the fact that it can only be charged by taking damage makes charging it a hassle. The start-up times makes using it cumbersome if you don't use it ahead of time.
|
Concheror |
While healing increases survivability against constant fire, it's not as generally useful as mini-crits and is often overshadowed by the Mad Milk. The startup makes using it in an emergency cumbersome.
|
Escape Plan |
Probably the only viable melee weapon choice for the Soldier. Thanks to the effectiveness of his primary after upgrades (as well as its dependency on upgrades), there will only be few cases where you use your Melee for damage. The Escape Plan's speed boost makes it a great weapon for retreating.
|
| Class | Assessment |
|---|---|
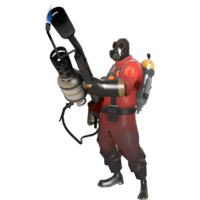 Pyro |
|
| Weapon | Assessment |
Flame Thrower |
Typically, the dedicated "pusher" Pyro will simply upgrade his airblast force and ammo capacity, and dump the rest on resistances and Uber Canteens. However, the damage capabilities of the Flamethrower should not be overlooked. If you can manage to upgrade the damage, the Flamethrower can burn through waves of robots, giants and even Tanks.
|
Degreaser |
Although slightly weaker than the default Flamethrower, the reduced damage is almost negligible in case of pure "pusher" Pyros, as they are not focused on dealing damage in the first place. The Degreaser is more suitable if you plan on relying on another weapon for damage.
|
Backburner |
|
Phlogistinator |
|
Flare Gun |
The Flare Gun allows the Pyro to be a threat at long range, particularly against giants. If you can manage to upgrade it, it allows the Pyro to deal a constant 120 damage per hit after the first shot while being out of harm's way. While not as powerful as the Flamethrower, it's also cheaper to upgrade.
|
Detonator |
If used the same way as the Flare Gun, it's inferior in every way. It only mini-crits burning enemies, so its power is greatly diminished. Detonating it to light multiple enemies has little point, since the burn damage is rather negligible.
|
Manmelter |
Pyro robots are an uncommon sight, so there are few opportunities to charge it, and even then you are not likely to deliberately extinguish a teammate, let alone find a burning one. It deals no bonus damage against burning enemies, which makes it already inferior to the Flare Gun. Even when charged, you are limited to how many times you can charge it, while the condition required to crit with the Flare Gun is to simply hit the target once.
|
Scorch Shot |
|
Axtinguisher |
The Axtinguisher is perfect for Pyros who don't plan on upgrading the Flamethrower's damage. It allows you to conserve your ammo for airblasts and does not require heavy investment to use it effectively. You can use it to take out Uber Medics in desperate situations, but you need to do it fast.
|
Back Scratcher |
|
Powerjack |
|
Third Degree |
While its use is limited, it does have one trick: If crit boosted, it will eliminate a Medic in one hit. You can use this to take out a group of Uber Medics all healing the same giant if you lack any other way to eliminate them in one hit.
|
| Class | Assessment |
|---|---|
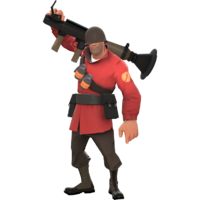
 Demoman |
|
| Weapon | Assessment |
| Class | Assessment |
|---|---|
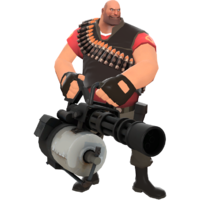 Heavy |
|
| Weapon | Assessment |
| Class | Assessment |
|---|---|
 Engineer |
|
| Weapon | Assessment |
| Class | Assessment |
|---|---|
 Medic |
|
| Weapon | Assessment |
| Class | Assessment |
|---|---|
 Sniper |
|
| Weapon | Assessment |
| Class | Assessment |
|---|---|
 Spy |
|
| Weapon | Assessment |