Difference between revisions of "Health/ko"
(Created page with '{{Pickup infobox |pickup-type=Health |pickup-image=Healthico.png }} {{hatnote|This page refers to health pickups. Health may also refer to the hitpoints that govern the survivabi…') |
|||
| (28 intermediate revisions by 8 users not shown) | |||
| Line 1: | Line 1: | ||
| + | {{DISPLAYTITLE:체력 보급품}} | ||
{{Pickup infobox | {{Pickup infobox | ||
| − | |pickup-type= | + | | pickup-type = 체력 |
| − | |pickup-image=Healthico.png | + | | pickup-image = Healthico.png |
}} | }} | ||
| − | {{hatnote| | + | {{hatnote|본 항목은 체력 보급품에 대해서 설명하고 있습니다. 생존존을 위한 체력(hitpoints)은 [[classes/ko|병과]]항목을 참고하세요.}} |
| − | {{Quotation|''' | + | {{Quotation|'''솔저'''|치료 고맙다.|sound=Soldier_thanksfortheheal02.wav|en-sound=yes}} |
| − | ''' | + | '''체력''' 보급품은 게임 플레이 도중에 여러 맵에서 얻을 수 있는 아이템입니다. 유저는 체력 보급품을 습득시 일정량의 체력을 회복할수 있고, 체력 보급품은 10초마다 자동으로 재생성됩니다. 체력 보급품은 3가지 종류(소형과 중형, 그리고 대형)가 있으며, 체력 보급품의 크기와 현재 병과에 따라 각기 다른 회복량을 지닙니다. 핼러윈판의 체력 보급품은 이미지 갤러리에서 보실 수 있습니다. |
| − | + | 플레이어는 각기 다른 방법으로 회복을 할 수 있는데, 이중에는 아군 [[Medic/ko|메딕]]의 치료 또한 포함됩니다([[Disguise/ko|변장]]한 스파이는 적 메딕에게서도 치료받을 수 있습니다). 치료제는 중요한 전략적 요소이므로 현명하게 사용하십시오. 예를 들어 당신보다 체력이 낮은 팀원, 특히 메딕이 있다면 팀원에게 양보하는 것이 좋습니다. 메딕의 치료 이외의 방법으로 회복했을 때에는 초록색의 작은 십자가 표시가 왼쪽 하단의 [[HUD/ko|HUD]]에서 회복량과 함께 나타납니다. | |
| − | == | + | == 치료원 == |
| − | * | + | ;치료제 |
| + | 모든 치료제는 사용 후 10 초가 지나면 재생성되며, 사용한 플레이어만 들을 수 있는 [[Media:Smallmedkit1.wav|고유의 효과음]]이 재생됩니다. | ||
| + | * 소형 치료제: 사용자 체력의 5분의 1(20.5%)을 치료합니다. 또한 [[Medieval Mode/ko|중세 모드]]에서 죽은 모든 플레이어는 소형 치료제를 떨어트립니다. | ||
| + | * 중형 치료제: 사용자 체력의 절반(50%)을 치료합니다. | ||
| + | * 대형 치료제: 사용자 체력의 전체(100%)를 치료합니다. | ||
| − | * | + | ;기타 치료원 |
| + | *[[Dispenser/ko|디스펜서]] | ||
| + | ** 레벨 1: 초당 10 체력 | ||
| + | ** 레벨 2: 초당 15 체력 | ||
| + | ** 레벨 3: 초당 20 체력 | ||
| + | * [[Cart/ko|수레]]: 초당 10 체력 | ||
| + | * [[Respawn/ko#재보급 지역|재보급 사물함]]: 100% 치료 | ||
| − | + | ; 체력을 회복할 수 있는 무기 | |
| + | {{List of weapons that provide health}} | ||
| − | == | + | == 치료제 회복량 비교표 == |
| − | + | {{Class health pack and overheal table}} | |
| − | |||
| − | |||
| − | |||
| − | |||
| − | |||
| − | |||
| − | |||
| − | |||
| − | |||
| − | |||
| − | |||
| − | |||
| − | |||
| − | |||
| − | |||
| − | |||
| − | |||
| − | |||
| − | |||
| − | |||
| − | |||
| − | |||
| − | |||
| − | |||
| − | |||
| − | |||
| − | |||
| − | |||
| − | |||
| − | |||
| − | |||
| − | |||
| − | |||
| − | |||
| − | |||
| − | |||
| − | |||
| − | |||
| − | |||
| − | |||
| − | |||
| − | |||
| − | |||
| − | |||
| − | |||
| − | |||
| − | |||
| − | |||
| − | |||
| − | |||
| − | |||
| − | |||
| − | |||
| − | |||
| − | |||
| − | |||
| − | |||
| − | == | + | == 업데이트 내역 == |
| − | + | '''{{Patch name|10|9|2012}}''' | |
| − | *[[ | + | * [[Healing/ko#과치료|과치료]] 상태인 플레이어가 [[bleeding/ko|출혈]] 혹은 [[fire/ko|화상]] 상태에서 치료제로 해당 상태를 제거할 수 있도록 수정하였습니다. |
| − | |||
| − | |||
| − | == | + | == 갤러리 == |
| − | + | === 치료제와 기타 치료원 === | |
| − | |||
| − | |||
| − | |||
| − | |||
| − | |||
| − | |||
| − | |||
| − | |||
| − | |||
| − | |||
| − | |||
| − | |||
| − | |||
| − | |||
| − | |||
| − | |||
| − | |||
| − | |||
| − | |||
| − | |||
| − | |||
| − | |||
| − | === | ||
<gallery perrow="5"> | <gallery perrow="5"> | ||
| − | File:Smallhealth.png| | + | File:Smallhealth.png|소형 치료제 |
| − | File:Mediumhealth.png| | + | File:Mediumhealth.png|중형 치료제 |
| − | File:Largehealth.png| | + | File:Largehealth.png|대형 치료제 |
| − | File:Healthbar. | + | File:Healthbar.png|소형 치료제 ([[Halloween mode/ko|핼러윈 모드]]) |
| − | File:Healthpie.png| | + | File:Healthpie.png|중형 치료제 (핼러윈 모드) |
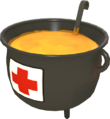
| − | File:Health Cauldron.png| | + | File:Health Cauldron.png|대형 치료제 (핼러윈 모드) |
| − | File:Medieval Meat.png| | + | File:Medieval Meat.png|중형 치료제 ([[Medieval mode/ko|중세 모드]]) |
| − | File:Lvl1dispenser.png| | + | File:Bday medpack small.png|소형 치료제 ([[Birthday mode/ko|생일 모드]], [[Pyroland/ko|파이로 동산]]) |
| − | File:Lvl2dispenser.png| | + | File:Bday medpack medium.png|중형 치료제 (생일 모드, 파이로 동산) |
| − | File:Lvl3dispenser.png| | + | File:Bday medpack large.png|대형 치료제 (생일 모드, 파이로 동산) |
| − | File:Resupplylocker.png|[[ | + | File:Lvl1dispenser.png|레벨 1 [[Dispenser/ko|디스펜서]] |
| − | File: | + | File:Lvl2dispenser.png|레벨 2 디스펜서 |
| + | File:Lvl3dispenser.png|레벨 3 디스펜서 | ||
| + | File:Resupplylocker.png|[[Respawn/ko#재보급 지역|재보급 사물함]] | ||
| + | File:Medieval resupply locker closed.png|[[Medieval Mode/ko|중세 모드]]의 재보급 사물함 | ||
| + | File:BLU_Bombcart.png|[[BLU/ko|블루]] [[Payload/ko#수레|수레]] | ||
| + | File:RED_Bombcart.png|[[RED/ko|레드]] 수레 | ||
</gallery> | </gallery> | ||
| − | === | + | === 회복 무기 === |
| − | {{see also|Weapons}} | + | {{see also|Weapons/ko|l1=무기}} |
| − | <gallery perrow=" | + | <gallery perrow="3"> |
| − | File: | + | File:Buffalo Steak Sandvich plate.png|땅에 떨어진 버팔로 스테이크 샌드비치 |
| − | File: | + | File:Festive Sandvich plate red.png|땅에 떨어진 레드 축제장식 샌드비치 |
| − | + | File:Festive Sandvich plate blu.png|땅에 떨어진 블루 축제장식 샌드비치 | |
| − | File: | + | File:Robo-Sandvich plate red.png|땅에 떨어진 레드 로봇 샌드비치 |
| − | File: | + | File:Robo-Sandvich plate blu.png|땅에 떨어진 블루 로봇 샌드비치 |
| − | + | File:Sandvichplate.png|땅에 떨어진 샌드비치 | |
| − | |||
| − | |||
| − | |||
| − | |||
| − | File: | ||
| − | |||
| − | |||
| − | |||
| − | |||
| − | |||
| − | File: | ||
</gallery> | </gallery> | ||
| − | === | + | === 입자 효과 === |
| − | {{main|Particle effects}} | + | {{main|Particle effects/ko|l1=입자 효과}} |
| + | |||
<gallery perrow="5"> | <gallery perrow="5"> | ||
| − | File:Medic_Call.png | + | File:Medic_Call.png|메딕 호출 |
| − | File:Health_particle_red.png| | + | File:Health_particle_red.png|치료시 나타나는 레드 플레이어 입자 효과 |
| − | File:Health_particle_blu.png| | + | File:Health_particle_blu.png|치료시 나타나는 블루 플레이어 입자 효과 |
| − | File:GRU skulls.png| | + | File:GRU skulls.png|체력 감소 효과시 나타나는 입자 효과 |
</gallery> | </gallery> | ||
| − | == | + | == 전략 == |
| − | * [[fire/ko|불]]이 | + | * [[fire/ko|불]]이 붙었을 때 치료제를 획득하여 소화하십시오. |
| − | * | + | * 치료제를 습득할 때 가급적 많은 양을 회복하도록 하십시오. 예를 들어 50%의 체력을 회복하는 치료제는 체력이 50% 이하로 떨어진 후 습득하는 것이 유용합니다. |
| − | * | + | * 디스펜서 혹은 수레의 옆에서 전투를 하면 체력적인 이득을 얻을 수 있습니다. |
| − | * | + | * 부상당한 상대로 변장한 스파이는 (스파이의 체력이 가득 차 있더라도) 치료제를 습득할 수 있습니다. 이 때 치료제를 습득하면 스파이의 진짜 체력과 변장으로 보이는 가짜 체력이 모두 회복됩니다. |
| − | * | + | * 치료제로는 과치료가 불가능합니다. |
| − | * | + | * 헤비가 투척한 샌드비치는 중형 치료제와 같은 효과를 냅니다. 헤비의 체력이 가득 차 있을 경우 아무 치료제나 습득하여도 샌드비치가 재충전됩니다. |
| + | * 누가 치료제를 사용하는 것이 더 좋을지 고려하십시오. 당신의 체력이 높고 팀원의 체력이 낮을 경우 치료제를 양보하십시오. | ||
| + | * 모든 치료제는 매 10 초마다 다시 출현합니다. 따라서 누군가가 치료제를 사용하거나 여러 치료제가 필요할 경우 머리 속으로 10 초를 세면 치료제를 다시 사용할 수 있게 되는 때를 알 수 있습니다. | ||
| − | == | + | ==상식== |
| − | * | + | * 치료제를 습득할 때의 효과음은 Valve 사의 다른 게임인 [[w:Half-Life|Half-Life]]{{lang icon|en}}의 효과음과 동일합니다. |
==그 외== | ==그 외== | ||
| − | *[[Healing/ko| | + | *[[Healing/ko|치료]] |
| − | *[[Pickups/ko| | + | *[[Pickups/ko|습득]] |
{{Pickup_Nav}} | {{Pickup_Nav}} | ||
| − | [[Category:Halloween]] | + | [[Category:Halloween/ko]] |
Latest revision as of 06:14, 8 July 2023
| Health | ||
|---|---|---|
| ||
| 보급품 종류 | 체력 | |

| “ | 치료 고맙다.
클릭하시면 들을 수 있습니다 (영어로)
— 솔저
|
” |
체력 보급품은 게임 플레이 도중에 여러 맵에서 얻을 수 있는 아이템입니다. 유저는 체력 보급품을 습득시 일정량의 체력을 회복할수 있고, 체력 보급품은 10초마다 자동으로 재생성됩니다. 체력 보급품은 3가지 종류(소형과 중형, 그리고 대형)가 있으며, 체력 보급품의 크기와 현재 병과에 따라 각기 다른 회복량을 지닙니다. 핼러윈판의 체력 보급품은 이미지 갤러리에서 보실 수 있습니다.
플레이어는 각기 다른 방법으로 회복을 할 수 있는데, 이중에는 아군 메딕의 치료 또한 포함됩니다(변장한 스파이는 적 메딕에게서도 치료받을 수 있습니다). 치료제는 중요한 전략적 요소이므로 현명하게 사용하십시오. 예를 들어 당신보다 체력이 낮은 팀원, 특히 메딕이 있다면 팀원에게 양보하는 것이 좋습니다. 메딕의 치료 이외의 방법으로 회복했을 때에는 초록색의 작은 십자가 표시가 왼쪽 하단의 HUD에서 회복량과 함께 나타납니다.
치료원
- 치료제
모든 치료제는 사용 후 10 초가 지나면 재생성되며, 사용한 플레이어만 들을 수 있는 고유의 효과음이 재생됩니다.
- 소형 치료제: 사용자 체력의 5분의 1(20.5%)을 치료합니다. 또한 중세 모드에서 죽은 모든 플레이어는 소형 치료제를 떨어트립니다.
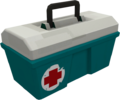
- 중형 치료제: 사용자 체력의 절반(50%)을 치료합니다.
- 대형 치료제: 사용자 체력의 전체(100%)를 치료합니다.
- 기타 치료원
- 체력을 회복할 수 있는 무기
| 체력 회복을 지원하는 무기 목록 | |||||
|---|---|---|---|---|---|
| 보조무기 |
| ||||
| 미치광이 우유 | 돌연변이 우유 | ||||
| |||||
| 계집애같은 사내의 소형 권총 | |||||
| 근접무기 |
| ||||
| 지팡이 사탕 | |||||
| 주무기 |
| ||||
| 블랙박스† | |||||
| 보조무기 |
| ||||
| 전복자 | |||||
| 주무기 |
| ||||
| 압축 공기 분사 | |||||
| 보조무기 |
| ||||
| 인간 융해 장치 | |||||
| 근접무기 |
| ||||
| 전원 잭 | |||||
| |||||
| 효자손 | |||||
| 근접무기 |
| ||||
| 아이랜더† | 말도 없고 머리도 없는 기만병의 목따개 | ||||
| 네시의 9번 아이언 | |||||
| 보조무기 |
| ||||
| 샌드비치† | 로봇 샌드비치 | ||||
| |||||
| 달로코스 바 | 어육완자 | ||||
| |||||
| 버팔로 스테이크 샌드비치 | |||||
| |||||
| 2인자의 바나나 | |||||
| 근접무기 |
| ||||
| 전사의 혼 | |||||
| 주무기 |
| ||||
| 블루트자우거 | |||||
| |||||
| 십자군의 쇠뇌† | |||||
| 보조무기 |
| ||||
| 메디 건† | 예방접종기 | ||||
| |||||
| 크리츠크리크† | |||||
| |||||
| 응급조치† | |||||
| 근접무기 |
| ||||
| 절단기 | |||||
| 보조무기 |
| ||||
| 안락한 야영 장비 | |||||
| 보조무기 |
| ||||
| 묵인자의 쿠나이 | |||||
| 근접무기 |
| ||||
| 반맹인검객 | |||||
| 주석 | |||||
치료제 회복량 비교표
| 병과 | 소형 |
중형 |
대형 |
|---|---|---|---|
| 26 | 63 | 125 | |
| 샌드맨을 장착했을 때 | 23 | 55 | 110 |
| 41 | 100 | 200 | |
| 부대 지원을 장착했을 때 | 45 | 110 | 220 |
| 36 | 88 | 175 | |
| 효자손를 장착했을 때 | 54 | 131 | 263† |
| 36 | 88 | 175 | |
| 무기 칸 신발을 신었을 때 | 41 | 100 | 200 |
| 목따개 근접무기를 장착하고 머리를 0개 소지했을 때 | 31 | 75 | 150 |
| 목따개 근접무기를 장착하고 머리를 1개 소지했을 때 | 34 | 83 | 165 |
| 목따개 근접무기를 장착하고 머리를 2개 소지했을 때 | 37 | 90 | 180 |
| 목따개 근접무기를 장착하고 머리를 3개 소지했을 때 | 40 | 98 | 195 |
| 목따개 근접무기를 장착하고 머리를 4개 소지했을 때 | 43 | 105 | 210 |
| 무기 칸 신발과 목따개 근접무기를 장착하고 머리를 0개 소지했을 때 | 36 | 88 | 175 |
| 무기 칸 신발과 목따개 근접무기를 장착하고 머리를 1개 소지했을 때 | 39 | 95 | 190 |
| 무기 칸 신발과 목따개 근접무기를 장착하고 머리를 2개 소지했을 때 | 42 | 103 | 205 |
| 무기 칸 신발과 목따개 근접무기를 장착하고 머리를 3개 소지했을 때 | 45 | 110 | 220 |
| 무기 칸 신발과 목따개 근접무기를 장착하고 머리를 4개 소지했을 때 | 48 | 118 | 235 |
| 62 | 150 | 300 | |
| 달로코스 바나 어육완자의 효과를 받고 있을 때 | 72 | 175 | 350 |
| With the 강철 주먹 equipped | 62 | 150 | 300 |
| With the 강철 주먹 equipped and while under the effects of the 달로코스 바 or 어육완자 | 72 | 175 | 350 |
| 26 | 63 | 125 | |
| 총잡이를 장착했을 때 | 31 | 75 | 150 |
| 31 | 75 | 150 | |
| 비타톱을 장착했을 때 | 29 | 70 | 140 |
| 26 | 63 | 125 | |
| 26 | 63 | 125 | |
| 재력가를 장착했을 때 | 21 | 50 | 100 |
| 묵인자의 쿠나이를 장착했을 때 | 14 | 35 | 70 |
†모든 값은 이론치입니다. 습득으로 얻은 체력은 병과의 최대 체력을 초과할 수 없습니다.
업데이트 내역
갤러리
치료제와 기타 치료원

소형 치료제

중형 치료제
대형 치료제

소형 치료제 (핼러윈 모드)

중형 치료제 (핼러윈 모드)
대형 치료제 (핼러윈 모드)

중형 치료제 (중세 모드)
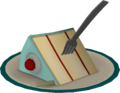
중형 치료제 (생일 모드, 파이로 동산)

대형 치료제 (생일 모드, 파이로 동산)
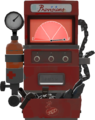
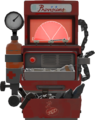
레벨 1 디스펜서
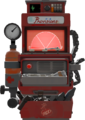
레벨 2 디스펜서
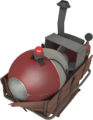
레벨 3 디스펜서
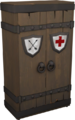
중세 모드의 재보급 사물함
레드 수레


회복 무기
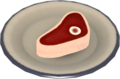
땅에 떨어진 버팔로 스테이크 샌드비치
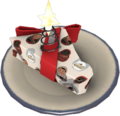
땅에 떨어진 레드 축제장식 샌드비치
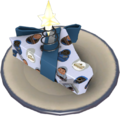
땅에 떨어진 블루 축제장식 샌드비치

땅에 떨어진 레드 로봇 샌드비치

땅에 떨어진 블루 로봇 샌드비치

땅에 떨어진 샌드비치


입자 효과
메딕 호출

치료시 나타나는 레드 플레이어 입자 효과

치료시 나타나는 블루 플레이어 입자 효과

체력 감소 효과시 나타나는 입자 효과


전략
- 불이 붙었을 때 치료제를 획득하여 소화하십시오.
- 치료제를 습득할 때 가급적 많은 양을 회복하도록 하십시오. 예를 들어 50%의 체력을 회복하는 치료제는 체력이 50% 이하로 떨어진 후 습득하는 것이 유용합니다.
- 디스펜서 혹은 수레의 옆에서 전투를 하면 체력적인 이득을 얻을 수 있습니다.
- 부상당한 상대로 변장한 스파이는 (스파이의 체력이 가득 차 있더라도) 치료제를 습득할 수 있습니다. 이 때 치료제를 습득하면 스파이의 진짜 체력과 변장으로 보이는 가짜 체력이 모두 회복됩니다.
- 치료제로는 과치료가 불가능합니다.
- 헤비가 투척한 샌드비치는 중형 치료제와 같은 효과를 냅니다. 헤비의 체력이 가득 차 있을 경우 아무 치료제나 습득하여도 샌드비치가 재충전됩니다.
- 누가 치료제를 사용하는 것이 더 좋을지 고려하십시오. 당신의 체력이 높고 팀원의 체력이 낮을 경우 치료제를 양보하십시오.
- 모든 치료제는 매 10 초마다 다시 출현합니다. 따라서 누군가가 치료제를 사용하거나 여러 치료제가 필요할 경우 머리 속으로 10 초를 세면 치료제를 다시 사용할 수 있게 되는 때를 알 수 있습니다.
상식
- 치료제를 습득할 때의 효과음은 Valve 사의 다른 게임인 Half-Life(영어)의 효과음과 동일합니다.
그 외
|