Difference between revisions of "Horseless Headless Horsemann match-ups"
(Writing style issue fixed.) |
(Changed the Syntax of some sentences, kept "ÜberCharge" consistent, made style consistent with other match-ups.) |
||
| Line 9: | Line 9: | ||
{| class="wikitable grid" cellpadding="0" cellspacing="0" | {| class="wikitable grid" cellpadding="0" cellspacing="0" | ||
| − | ! class="header" width="200"| Class | + | ! class="header" colspan="3" width="200"| Class |
! class="header" | Strategy | ! class="header" | Strategy | ||
|- | |- | ||
| class="small" align="center" valign="center" style="padding:0.5em" | [[Image:Scout.png|100x100px|link=Scout]]<br>[[Scout]] | | class="small" align="center" valign="center" style="padding:0.5em" | [[Image:Scout.png|100x100px|link=Scout]]<br>[[Scout]] | ||
| − | | | + | | class="xsmall" | vs |
| − | {{Info}}Playing as [[Scout]] while being | + | | class="small" align="center" valign="center" style="padding:0.5em" | [[Image:HHH.png|100x100px|link=Scout]]<br>[[Horseless Headless Horsemann]] |
| + | |{{Info}}Playing as [[Scout]] while being "it" allows you to evade the Horsemann more easily than other classes due to your agility and ability to double and triple jump. | ||
| − | {{Info}}Luring the Horsemann if you are | + | {{Info}}Luring the Horsemann if you are "it" towards the enemy team's spawn room will provide a much needed distraction. |
{{Pro}}[[Bonk!]] will allow you to survive the Horsemann's axe hits for a short time and even allow you to use the knock-back to your advantage. | {{Pro}}[[Bonk!]] will allow you to survive the Horsemann's axe hits for a short time and even allow you to use the knock-back to your advantage. | ||
| Line 24: | Line 25: | ||
{{Con}}The [[Sandman]] baseball and [[Fan O' War]] are ineffective against the undead horseman. | {{Con}}The [[Sandman]] baseball and [[Fan O' War]] are ineffective against the undead horseman. | ||
|- | |- | ||
| − | | class="small" align="center" valign="center" style="padding:0.5em" | [[Image:Soldier.png|100x100px|link=Soldier]]<br>[[Soldier]] | + | | class="small" align="center" valign="center" style="padding:0.5em" | [[Image:Soldier.png|100x100px|link=Soldier]]<br>[[Soldier match-ups|Soldier]] |
| + | | class="xsmall" | vs | ||
| + | | class="small" align="center" valign="center" style="padding:0.5em" | [[Image:HHH.png|100x100px|link=Scout]]<br>[[Horseless Headless Horsemann]] | ||
| | | | ||
| − | {{Info}} [[Jumping#Rocket jump|Rocket jumping]] over the Horsemann while " | + | {{Info}} [[Jumping#Rocket jump|Rocket jumping]] over the Horsemann while "it" will cause him to hesitate briefly while changing directions. It can also keep you well outside of the reach of his attacks, thus giving you the opportunity to either make an escape or draw the Horsemann into a group of enemies. |
{{Info}}The [[Buff Banner]] will not charge while doing damage to the Horsemann and thus is not recommended. Use the [[Shotgun]] instead, making the switch when you run out of ammo for your primary weapon. This loadout allows you to deal the most damage to the Horsemann. | {{Info}}The [[Buff Banner]] will not charge while doing damage to the Horsemann and thus is not recommended. Use the [[Shotgun]] instead, making the switch when you run out of ammo for your primary weapon. This loadout allows you to deal the most damage to the Horsemann. | ||
| − | {{Info}}Charging a busy Horsemann with the [[Equalizer]] at very low health can be effective if the enemy team is | + | {{Info}}Charging a busy Horsemann with the [[Equalizer]] at very low health can be effective if the enemy team is not around, as your crits will deal around 300 damage. |
{{Pro}}The [[Gunboats]] will allow a skilled Soldier to entirely kill a Horsemann on his own, should the Horsemann be properly kited. | {{Pro}}The [[Gunboats]] will allow a skilled Soldier to entirely kill a Horsemann on his own, should the Horsemann be properly kited. | ||
| Line 40: | Line 43: | ||
{{Con}}The [[Half-Zatoichi]] does not behave properly against a Horsemann kill, and should not be utilized. | {{Con}}The [[Half-Zatoichi]] does not behave properly against a Horsemann kill, and should not be utilized. | ||
|- | |- | ||
| − | | class="small" align="center" valign="center" style="padding:0.5em" | [[Image:Pyro.png|100x100px|link=Pyro]]<br>[[Pyro]] | + | | class="small" align="center" valign="center" style="padding:0.5em" | [[Image:Pyro.png|100x100px|link=Pyro]]<br>[[Pyro match-ups|Pyro]] |
| + | | class="xsmall" | vs | ||
| + | | class="small" align="center" valign="center" style="padding:0.5em" | [[Image:HHH.png|100x100px|link=Scout]]<br>[[Horseless Headless Horsemann]] | ||
| | | | ||
{{Info}}Because the Horsemann does not suffer afterburn damage, using the [[Pyro]] against the Horseless Headless Horsemann is inadvisable. In addition, the Pyro's short range of effectiveness makes attacking head-on a very deadly prospect. | {{Info}}Because the Horsemann does not suffer afterburn damage, using the [[Pyro]] against the Horseless Headless Horsemann is inadvisable. In addition, the Pyro's short range of effectiveness makes attacking head-on a very deadly prospect. | ||
| Line 48: | Line 53: | ||
{{Con}}The [[Flare Gun]] and the [[Detonator]] are possibly some of the worst weapons to use against the Horsemann as it cannot catch on fire. Only the minimal flare impact damage will register. | {{Con}}The [[Flare Gun]] and the [[Detonator]] are possibly some of the worst weapons to use against the Horsemann as it cannot catch on fire. Only the minimal flare impact damage will register. | ||
|- | |- | ||
| − | | class="small" align="center" valign="center" style="padding:0.5em" | [[Image:Demoman.png|100x100px|link=Demoman]]<br>[[Demoman]] | + | | class="small" align="center" valign="center" style="padding:0.5em" | [[Image:Demoman.png|100x100px|link=Demoman]]<br>[[Demoman match-ups|Demoman]] |
| + | | class="xsmall" | vs | ||
| + | | class="small" align="center" valign="center" style="padding:0.5em" | [[Image:HHH.png|100x100px|link=Scout]]<br>[[Horseless Headless Horsemann]] | ||
| | | | ||
{{Info}}It is possible to briefly outrun him by charging with the [[Chargin' Targe]] or [[Splendid Screen]] in a single direction across open ground. | {{Info}}It is possible to briefly outrun him by charging with the [[Chargin' Targe]] or [[Splendid Screen]] in a single direction across open ground. | ||
| Line 56: | Line 63: | ||
{{Pro}}A full stickybomb trap can deal a large considerable amount of damage to the Horsemann. This strategy is especially effective with a [[Kritzkrieg]] charge. | {{Pro}}A full stickybomb trap can deal a large considerable amount of damage to the Horsemann. This strategy is especially effective with a [[Kritzkrieg]] charge. | ||
|- | |- | ||
| − | | class="small" align="center" valign="center" style="padding:0.5em" | [[Image:Heavy.png|100x100px|link=Heavy]]<br>[[Heavy]] | + | | class="small" align="center" valign="center" style="padding:0.5em" | [[Image:Heavy.png|100x100px|link=Heavy]]<br>[[Heavy match-ups|Heavy]] |
| + | | class="xsmall" | vs | ||
| + | | class="small" align="center" valign="center" style="padding:0.5em" | [[Image:HHH.png|100x100px|link=Scout]]<br>[[Horseless Headless Horsemann]] | ||
| | | | ||
| − | {{Info}}The [[Heavy]] is the best head-on class against the Horsemann, should he not be " | + | {{Info}}The [[Heavy]] is the best head-on class against the Horsemann, should he not be "it." Any Minigun will shred the boss in a matter of seconds at short range, even without [[crits]]. |
{{Info}}Be aware that the [[Heavy]] has no real means of getting away from an angered undead horsemann, and should be relying on the [[Gloves of Running Urgently]] in such situations. | {{Info}}Be aware that the [[Heavy]] has no real means of getting away from an angered undead horsemann, and should be relying on the [[Gloves of Running Urgently]] in such situations. | ||
| Line 66: | Line 75: | ||
{{Pro}}A [[Heavy]]/[[Medic]] pair should camp the control point where it will spawn next, while building up a [[Kritzkrieg]] charge. The damage resulting from such an attack is usually enough to kill the Horsemann almost immediately following its spawn animation. | {{Pro}}A [[Heavy]]/[[Medic]] pair should camp the control point where it will spawn next, while building up a [[Kritzkrieg]] charge. The damage resulting from such an attack is usually enough to kill the Horsemann almost immediately following its spawn animation. | ||
|- | |- | ||
| − | | class="small" align="center" valign="center" style="padding:0.5em" | [[Image:Engineer.png|100x100px|link=Engineer]]<br>[[Engineer]] | + | | class="small" align="center" valign="center" style="padding:0.5em" | [[Image:Engineer.png|100x100px|link=Engineer]]<br>[[Engineer match-ups|Engineer]] |
| + | | class="xsmall" | vs | ||
| + | | class="small" align="center" valign="center" style="padding:0.5em" | [[Image:HHH.png|100x100px|link=Scout]]<br>[[Horseless Headless Horsemann]] | ||
| | | | ||
{{Info}}Since the Horsemann is not affected by knockback, the player should never rely on his sentry to keep the monster away. Note that the [[Wrangler]]'s slight auto-aim will not activate on the boss, rendering it slightly more difficult to keep the Sentry Gun's fire on target. | {{Info}}Since the Horsemann is not affected by knockback, the player should never rely on his sentry to keep the monster away. Note that the [[Wrangler]]'s slight auto-aim will not activate on the boss, rendering it slightly more difficult to keep the Sentry Gun's fire on target. | ||
| − | {{Info}}The Horsemann will attack anything blocking his path - this includes | + | {{Info}}The Horsemann will attack anything blocking his path - this includes players and buildings that are in the way. Keep in mind wrangled [[Sentry Gun]]s can survive a few axe hits, allowing you and your team to profit from the distraction. |
{{Pro}}[[Sentry Gun]]s will target the Horsemann even when it is outside their normal range. | {{Pro}}[[Sentry Gun]]s will target the Horsemann even when it is outside their normal range. | ||
|- | |- | ||
| − | | class="small" align="center" valign="center" style="padding:0.5em" | [[Image:Medic.png|100x100px|link=Medic]]<br>[[Medic]] | + | | class="small" align="center" valign="center" style="padding:0.5em" | [[Image:Medic.png|100x100px|link=Medic]]<br>[[Medic match-ups|Medic]] |
| + | | class="xsmall" | vs | ||
| + | | class="small" align="center" valign="center" style="padding:0.5em" | [[Image:HHH.png|100x100px|link=Scout]]<br>[[Horseless Headless Horsemann]] | ||
| | | | ||
| − | {{Info}}Use your [[ÜberCharge]] on a teammate so they can attack the Horsemann. While the Horsemann will ignore | + | {{Info}}Use your [[ÜberCharge]] on a teammate so they can attack the Horsemann. While the Horsemann will ignore ubercharged individuals for as long as possible, keep in mind that it will attempt to bat you out of his path, should you be in it. |
| − | {{Info}}The Horsemann can also easily counter an | + | {{Info}}The Horsemann can also easily counter an ÜberCharged pair by stunning them with its special scare ability. |
{{Info}}If you do not have an ÜberCharge or [[Kritzkrieg]] charge, it is best advised to stay away and build one up. | {{Info}}If you do not have an ÜberCharge or [[Kritzkrieg]] charge, it is best advised to stay away and build one up. | ||
| Line 84: | Line 97: | ||
{{Con}}Your [[Übersaw]] is ineffective against the boss as the close quarters combat will likely get you killed, and should not be used. | {{Con}}Your [[Übersaw]] is ineffective against the boss as the close quarters combat will likely get you killed, and should not be used. | ||
|- | |- | ||
| − | | class="small" align="center" valign="center" style="padding:0.5em" | [[Image:Sniper.png|100x100px|link=Sniper]]<br>[[Sniper]] | + | | class="small" align="center" valign="center" style="padding:0.5em" | [[Image:Sniper.png|100x100px|link=Sniper]]<br>[[Sniper match-ups|Sniper]] |
| + | | class="xsmall" | vs | ||
| + | | class="small" align="center" valign="center" style="padding:0.5em" | [[Image:HHH.png|100x100px|link=Scout]]<br>[[Horseless Headless Horsemann]] | ||
| | | | ||
{{Info}}The basic Sniper is very limited against the Horsemann, as headshots from the standard [[Sniper Rifle]] do not deal extra damage. However, charging shots is still worthwhile as the damage will properly scale against the Horsemann. | {{Info}}The basic Sniper is very limited against the Horsemann, as headshots from the standard [[Sniper Rifle]] do not deal extra damage. However, charging shots is still worthwhile as the damage will properly scale against the Horsemann. | ||
| Line 96: | Line 111: | ||
{{Con}}[[Jarate]] does not affect the Horsemann. | {{Con}}[[Jarate]] does not affect the Horsemann. | ||
|- | |- | ||
| − | | class="small" align="center" valign="center" style="padding:0.5em" | [[Image:Spy_RED.png|100x100px|link=Spy]]<br>[[Spy]] | + | | class="small" align="center" valign="center" style="padding:0.5em" | [[Image:Spy_RED.png|100x100px|link=Spy]]<br>[[Spy match-ups|Spy]] |
| + | | class="xsmall" | vs | ||
| + | | class="small" align="center" valign="center" style="padding:0.5em" | [[Image:HHH.png|100x100px|link=Scout]]<br>[[Horseless Headless Horsemann]] | ||
| | | | ||
{{Info}}The [[Ambassador]] does not contribute extra damage via headshots. | {{Info}}The [[Ambassador]] does not contribute extra damage via headshots. | ||
Revision as of 19:31, 26 July 2011
| “Oh dear, I've made quite a mess.” This page has been marked for general cleanup. Reason given: The writing style is terrible and has spelling and syntax errors. Please see Team Fortress Wiki style guide for information on how to improve this article. |
| “ | This is my world! You are not welcome in my world!
Click to listen
— The Soldier to the Horseless Headless Horsemann
|
” |
Note: Wearing the Horseless Headless Horsemann's Head or the Saxton Hale Mask will make you immune to the Horseless Headless Horsemann's scare ability. Use these if you plan on hunting multiple incarnations of the Horseless Headless Horsemann .
| Class | Strategy | ||
|---|---|---|---|
 Scout |
vs | 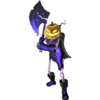 Horseless Headless Horsemann |
|
 Soldier |
vs |  Horseless Headless Horsemann |
|
 Pyro |
vs |  Horseless Headless Horsemann |
|
 Demoman |
vs |  Horseless Headless Horsemann |
|
 Heavy |
vs |  Horseless Headless Horsemann |
|
 Engineer |
vs |  Horseless Headless Horsemann |
|
 Medic |
vs |  Horseless Headless Horsemann |
|
 Sniper |
vs |  Horseless Headless Horsemann |
|
 Spy |
vs |  Horseless Headless Horsemann |
|
See also
|