Difference between revisions of "Horseless Headless Horsemann match-ups"
(I think I got everything, grammar new weapons etc etc.) |
|||
| Line 1: | Line 1: | ||
| − | |||
| − | |||
{{Quotation|'''The Soldier''' to the Horseless Headless Horsemann|This is my world! You are not welcome in my world!|sound=Soldier_taunts17.wav}} | {{Quotation|'''The Soldier''' to the Horseless Headless Horsemann|This is my world! You are not welcome in my world!|sound=Soldier_taunts17.wav}} | ||
| − | ''Note: Wearing the [[Horseless Headless Horsemann's Head]] or the [[Saxton Hale Mask]] will make you immune to the Horseless Headless Horsemann's scare ability. | + | ''Note: Wearing the [[Horseless Headless Horsemann's Head]] or the [[Saxton Hale Mask]] will make you immune to the Horseless Headless Horsemann's scare ability. This will assist in defeating him at close range or defeating multiple incarnations of the Horsemann.'' |
| Line 23: | Line 21: | ||
{{Pro}}The [[Shortstop]] remains the Scout's best weapon choice in case a head-on assault against the Horsemann is required. | {{Pro}}The [[Shortstop]] remains the Scout's best weapon choice in case a head-on assault against the Horsemann is required. | ||
| − | {{Con}}The [[Sandman]] baseball and [[Fan O' War]] are ineffective against the undead horseman. | + | {{Con}}The [[Sandman]] baseball and [[Fan O' War]] are ineffective against the undead horseman as he cannot be [[stun|stunned]] or marked for death respectively. |
|- | |- | ||
| class="small" align="center" valign="center" style="padding:0.5em" | [[Image:Soldier.png|100x100px|link=Soldier]]<br>[[Soldier match-ups|Soldier]] | | class="small" align="center" valign="center" style="padding:0.5em" | [[Image:Soldier.png|100x100px|link=Soldier]]<br>[[Soldier match-ups|Soldier]] | ||
| Line 31: | Line 29: | ||
{{Info}} [[Jumping#Rocket jump|Rocket jumping]] over the Horsemann while "it" will cause him to hesitate briefly while changing directions. It can also keep you well outside of the reach of his attacks, thus giving you the opportunity to either make an escape or draw the Horsemann into a group of enemies. | {{Info}} [[Jumping#Rocket jump|Rocket jumping]] over the Horsemann while "it" will cause him to hesitate briefly while changing directions. It can also keep you well outside of the reach of his attacks, thus giving you the opportunity to either make an escape or draw the Horsemann into a group of enemies. | ||
| − | {{Info}}The [[Buff Banner]] will not charge while doing damage to the Horsemann and thus is not recommended. Use the [[Shotgun]] instead, making the switch when you run out of ammo for your primary weapon. This loadout allows you to deal the most damage to the Horsemann. | + | {{Info}}The [[Buff Banner]], [[Battalion's Backup]] and [[Concheror]] will not charge while doing damage to the Horsemann and thus is not recommended. Use the [[Shotgun]] instead, making the switch when you run out of ammo for your primary weapon. This loadout allows you to deal the most damage to the Horsemann. |
{{Info}}Charging a busy Horsemann with the [[Equalizer]] at very low health can be effective if the enemy team is not around, as your crits will deal around 300 damage. | {{Info}}Charging a busy Horsemann with the [[Equalizer]] at very low health can be effective if the enemy team is not around, as your crits will deal around 300 damage. | ||
| − | |||
| − | |||
{{Pro}}A friendly [[Kritzkrieg]] Medic will allow a skilled Soldier to make short work of the Horsemann, as a pack of critical rockets and Shotgun shells will take a large chunk of his health away. | {{Pro}}A friendly [[Kritzkrieg]] Medic will allow a skilled Soldier to make short work of the Horsemann, as a pack of critical rockets and Shotgun shells will take a large chunk of his health away. | ||
| − | {{Con}}The [[Black Box]] does not | + | {{Con}}The [[Black Box]] does not award health upon hitting the Horsemann and is a considerable drawback when the reduced ammo is taken into account. |
{{Con}}The [[Half-Zatoichi]] does not behave properly against a Horsemann kill, and should not be utilized. | {{Con}}The [[Half-Zatoichi]] does not behave properly against a Horsemann kill, and should not be utilized. | ||
| Line 49: | Line 45: | ||
{{Info}}Because the Horsemann does not suffer afterburn damage, using the [[Pyro]] against the Horseless Headless Horsemann is inadvisable. In addition, the Pyro's short range of effectiveness makes attacking head-on a very deadly prospect. | {{Info}}Because the Horsemann does not suffer afterburn damage, using the [[Pyro]] against the Horseless Headless Horsemann is inadvisable. In addition, the Pyro's short range of effectiveness makes attacking head-on a very deadly prospect. | ||
| − | {{Pro}}The [[Backburner]] while he is distracted can be moderately effective in defeating | + | {{Pro}}The [[Backburner]] while he is distracted can be moderately effective in defeating him. |
| − | {{Con}}The [[Flare Gun]] and the [[Detonator]] are possibly some of the worst weapons to use against the Horsemann as | + | {{Con}}The [[Flare Gun]] and the [[Detonator]] are possibly some of the worst weapons to use against the Horsemann as he cannot catch on fire. Only the minimal flare impact damage will register. |
|- | |- | ||
| class="small" align="center" valign="center" style="padding:0.5em" | [[Image:Demoman.png|100x100px|link=Demoman]]<br>[[Demoman match-ups|Demoman]] | | class="small" align="center" valign="center" style="padding:0.5em" | [[Image:Demoman.png|100x100px|link=Demoman]]<br>[[Demoman match-ups|Demoman]] | ||
| Line 69: | Line 65: | ||
{{Info}}The [[Heavy]] is the best head-on class against the Horsemann, should he not be "it." Any Minigun will shred the boss in a matter of seconds at short range, even without [[crits]]. | {{Info}}The [[Heavy]] is the best head-on class against the Horsemann, should he not be "it." Any Minigun will shred the boss in a matter of seconds at short range, even without [[crits]]. | ||
| − | {{Info}}Be aware that the [[Heavy]] has no real means of getting away from | + | {{Info}}Be aware that the [[Heavy]] has no real means of getting away from the Horsemann, and should be relying on the [[Gloves of Running Urgently]] in such situations. |
| − | {{Info}}The [[ | + | {{Info}} The [[Buffalo Steak Sandvich]] is not recommended, except to attempt quick getaways. The [[Brass Beast]], even with a [[Kritzkrieg]], is only recommended if the Horsemann is already busy, as your extremely sluggish movement will tempt even the enemy team to focus on you. |
| − | {{Pro}}A [[Heavy]]/[[Medic]] pair | + | {{Pro}}A [[Heavy]]/[[Medic]] pair can camp the control point where it will spawn next, while building up a [[Kritzkrieg]] charge. The damage resulting from such an attack is usually enough to kill the Horsemann almost immediately following its spawn animation. |
| + | |||
| + | {{Con}}The [[Shotgun]] should never be used, as the time between shots and damage spread mean you will always get more damage from your primary weapon. | ||
|- | |- | ||
| class="small" align="center" valign="center" style="padding:0.5em" | [[Image:Engineer.png|100x100px|link=Engineer]]<br>[[Engineer match-ups|Engineer]] | | class="small" align="center" valign="center" style="padding:0.5em" | [[Image:Engineer.png|100x100px|link=Engineer]]<br>[[Engineer match-ups|Engineer]] | ||
| Line 79: | Line 77: | ||
| class="small" align="center" valign="center" style="padding:0.5em" | [[Image:HHH.png|100x100px|link=Scout]]<br>[[Horseless Headless Horsemann]] | | class="small" align="center" valign="center" style="padding:0.5em" | [[Image:HHH.png|100x100px|link=Scout]]<br>[[Horseless Headless Horsemann]] | ||
| | | | ||
| − | {{Info}}Since the Horsemann is not affected by knockback, the player should never rely on his sentry to keep the monster away | + | {{Info}}Since the Horsemann is not affected by knockback, the player should never rely on his sentry to keep the monster away. |
{{Info}}The Horsemann will attack anything blocking his path - this includes players and buildings that are in the way. Keep in mind wrangled [[Sentry Gun]]s can survive a few axe hits, allowing you and your team to profit from the distraction. | {{Info}}The Horsemann will attack anything blocking his path - this includes players and buildings that are in the way. Keep in mind wrangled [[Sentry Gun]]s can survive a few axe hits, allowing you and your team to profit from the distraction. | ||
| Line 90: | Line 88: | ||
| | | | ||
{{Info}}Use your [[ÜberCharge]] on a teammate so they can attack the Horsemann. While the Horsemann will ignore Übercharged individuals for as long as possible, keep in mind that it will attempt to bat you out of his path, should you be in it. | {{Info}}Use your [[ÜberCharge]] on a teammate so they can attack the Horsemann. While the Horsemann will ignore Übercharged individuals for as long as possible, keep in mind that it will attempt to bat you out of his path, should you be in it. | ||
| − | |||
| − | |||
{{Info}}If you do not have an ÜberCharge or [[Kritzkrieg]] charge, it is best advised to stay away and build one up. | {{Info}}If you do not have an ÜberCharge or [[Kritzkrieg]] charge, it is best advised to stay away and build one up. | ||
{{Con}}Your [[Übersaw]] is ineffective against the boss as the close quarters combat will likely get you killed, and should not be used. | {{Con}}Your [[Übersaw]] is ineffective against the boss as the close quarters combat will likely get you killed, and should not be used. | ||
| + | |||
| + | {{Con}}The Horsemann can also easily counter an ÜberCharged pair by stunning them with its special scare ability. | ||
| + | |||
|- | |- | ||
| class="small" align="center" valign="center" style="padding:0.5em" | [[Image:Sniper.png|100x100px|link=Sniper]]<br>[[Sniper match-ups|Sniper]] | | class="small" align="center" valign="center" style="padding:0.5em" | [[Image:Sniper.png|100x100px|link=Sniper]]<br>[[Sniper match-ups|Sniper]] | ||
| Line 103: | Line 102: | ||
{{Info}}The basic Sniper is very limited against the Horsemann, as headshots from the standard [[Sniper Rifle]] do not deal extra damage. However, charging shots is still worthwhile as the damage will properly scale against the Horsemann. | {{Info}}The basic Sniper is very limited against the Horsemann, as headshots from the standard [[Sniper Rifle]] do not deal extra damage. However, charging shots is still worthwhile as the damage will properly scale against the Horsemann. | ||
| − | {{Pro}}The [[Huntsman]] deals extra damage on headshots against the | + | {{Pro}}The [[Huntsman]] deals extra damage on headshots against the Horsemann, effectively rendering a skilled bow Sniper able to defeat the boss on his own in a short matter of time. |
{{Pro}}The [[Sydney Sleeper]]'s faster charge rate makes it more useful than the standard Sniper Rifle, as he is immune to headshot's. | {{Pro}}The [[Sydney Sleeper]]'s faster charge rate makes it more useful than the standard Sniper Rifle, as he is immune to headshot's. | ||
| − | {{Con}}The Horsemann | + | {{Con}}The Horsemann does not bleed, and so the [[Tribalman's Shiv]] is very inadvisable. |
{{Con}}[[Jarate]] does not affect the Horsemann. | {{Con}}[[Jarate]] does not affect the Horsemann. | ||
| Line 115: | Line 114: | ||
| class="small" align="center" valign="center" style="padding:0.5em" | [[Image:HHH.png|100x100px|link=Scout]]<br>[[Horseless Headless Horsemann]] | | class="small" align="center" valign="center" style="padding:0.5em" | [[Image:HHH.png|100x100px|link=Scout]]<br>[[Horseless Headless Horsemann]] | ||
| | | | ||
| − | {{Info}}The [[ | + | {{Info}}The [[Dead Ringer]]'s feign death ability will allow you to survive one hit per use, giving the Spy more survivability against the Horsemann. |
| + | |||
| + | {{Pro}}The [[Revolver]] and the [[Enforcer]] are the most worthwhile weapons, although it should only be used against the Horsemann if he is focused on another player. | ||
| − | {{ | + | {{Con}}The [[Spy]] is rather ineffective against the Horsemann as a [[Backstab]] will not result in an instant death or a critical hit and does not contribute significant damage. |
| − | {{ | + | {{Con}}As with any other on-hit effect weapons, [[Your Eternal Reward]], [[Conniver's Kunai]] and the [[Big Earner]] will not grant you a bonus upon getting the last hit on a Horsemann and should be avoided. |
| − | {{ | + | {{Con}}The Horseless Headless Horsemann is not fooled by disguises or invisibility. |
| − | {{Con}}The [[ | + | {{Con}}The [[Ambassador]] does not contribute extra damage via headshots. |
| − | {{Con}} | + | {{Con}}The [[L'Etranger]] will not provide Cloak upon a successful hit. |
| − | |||
|} | |} | ||
Revision as of 15:50, 5 August 2011
| “ | This is my world! You are not welcome in my world!
Click to listen
— The Soldier to the Horseless Headless Horsemann
|
” |
Note: Wearing the Horseless Headless Horsemann's Head or the Saxton Hale Mask will make you immune to the Horseless Headless Horsemann's scare ability. This will assist in defeating him at close range or defeating multiple incarnations of the Horsemann.
| Class | Strategy | ||
|---|---|---|---|
 Scout |
vs | 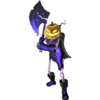 Horseless Headless Horsemann |
|
 Soldier |
vs |  Horseless Headless Horsemann |
|
 Pyro |
vs |  Horseless Headless Horsemann |
|
 Demoman |
vs |  Horseless Headless Horsemann |
|
 Heavy |
vs |  Horseless Headless Horsemann |
|
 Engineer |
vs |  Horseless Headless Horsemann |
|
 Medic |
vs |  Horseless Headless Horsemann |
|
 Sniper |
vs |  Horseless Headless Horsemann |
|
 Spy |
vs |  Horseless Headless Horsemann |
|
See also
|