Difference between revisions of "Manniversary Update & Sale"
(close but no cigar) |
(split hats & misc, overwriting changes by someone but i will re-add them in like 30 seconds) |
||
| Line 6: | Line 6: | ||
== Additions == | == Additions == | ||
| − | === Hats | + | === Hats === |
| + | {{main|Hats}} | ||
{| class="wikitable collapsible" cellpadding=2 style="text-align:center;" | {| class="wikitable collapsible" cellpadding=2 style="text-align:center;" | ||
| − | | width="60px" style="background | + | |- |
| − | | align="center" style="background | + | | width="60px" style="background:#F3A957;" rowspan="4" | '''{{Class link|scout|br=yes}}''' |
| + | | align="center" style="background:#F9D483;" | {{Icon item|Backwards Ballcap|75px}} | ||
| '''[[Backwards Ballcap]]''' | | '''[[Backwards Ballcap]]''' | ||
|- | |- | ||
| − | | align="center" style="background | + | | align="center" style="background:#F9D483;" | {{Icon item|Ball-Kicking Boots|75px}} |
| '''[[Ball-Kicking Boots]]''' | | '''[[Ball-Kicking Boots]]''' | ||
|- | |- | ||
| − | | align="center" style="background | + | | align="center" style="background:#F9D483;" | {{Icon item|Hermes|75px}} |
| '''[[Hermes]]''' | | '''[[Hermes]]''' | ||
|- | |- | ||
| − | | align="center" style="background | + | | align="center" style="background:#F9D483;" | {{Icon item|Stereoscopic Shades|75px}} |
| '''[[Stereoscopic Shades]]''' | | '''[[Stereoscopic Shades]]''' | ||
|- | |- | ||
| − | | | + | | style="background:#F3A957;" rowspan="1" | '''{{Class link|soldier|br=yes}}''' |
| − | | align="center" style="background | + | | align="center" style="background:#F9D483;" | {{Icon item|Hat With No Name|75px}} |
| '''[[Hat With No Name]]''' | | '''[[Hat With No Name]]''' | ||
|- | |- | ||
| − | | | + | | style="background:#F3A957;" rowspan="2" | '''{{Class link|pyro|br=yes}}''' |
| − | + | | align="center" style="background:#F9D483;" | {{Icon item|Birdcage|75px}} | |
| − | |||
| − | |||
| − | |||
| − | | align="center" style="background | ||
| '''[[Birdcage]]''' | | '''[[Birdcage]]''' | ||
|- | |- | ||
| − | | align="center" style="background | + | | align="center" style="background:#F9D483;" | {{Icon item|Flamboyant Flamenco|75px}} |
| − | |||
| − | |||
| − | |||
| '''[[Flamboyant Flamenco]]''' | | '''[[Flamboyant Flamenco]]''' | ||
|- | |- | ||
| − | | | + | | style="background:#F3A957;" rowspan="1" | '''{{Class link|demoman|br=yes}}''' |
| − | | align="center" style="background | + | | align="center" style="background:#F9D483;" | {{Icon item|Tavish DeGroot Experience|75px}} |
| '''[[Tavish DeGroot Experience]]''' | | '''[[Tavish DeGroot Experience]]''' | ||
|- | |- | ||
| − | | | + | | style="background:#F3A957;" rowspan="1" | '''{{Class link|heavy|br=yes}}''' |
| − | + | | align="center" style="background:#F9D483;" | {{Icon item|Gym Rat|75px}} | |
| − | |||
| − | |||
| − | | align="center" style="background | ||
| '''[[Gym Rat]]''' | | '''[[Gym Rat]]''' | ||
|- | |- | ||
| − | | | + | | style="background:#F3A957;" rowspan="2" | '''{{Class link|engineer|br=yes}}''' |
| − | | align="center" style="background | + | | align="center" style="background:#F9D483;" | {{Icon item|Builder's Blueprints|75px}} |
| '''[[Builder's Blueprints]]''' | | '''[[Builder's Blueprints]]''' | ||
|- | |- | ||
| − | | align="center" style="background | + | | align="center" style="background:#F9D483;" | {{Icon item|Pencil Pusher|75px}} |
| '''[[Pencil Pusher]]''' | | '''[[Pencil Pusher]]''' | ||
|- | |- | ||
| − | | | + | | style="background:#F3A957;" rowspan="1" | '''{{Class link|medic|br=yes}}''' |
| − | | align="center" style="background | + | | align="center" style="background:#F9D483;" | {{Icon item|Surgeon's Stahlhelm|75px}} |
| − | |||
| − | |||
| − | |||
| '''[[Surgeon's Stahlhelm]]''' | | '''[[Surgeon's Stahlhelm]]''' | ||
|- | |- | ||
| − | | | + | | style="background:#F3A957;" rowspan="1" | '''{{Class link|sniper|br=yes}}''' |
| − | + | | align="center" style="background:#F9D483;" | {{Icon item|Your Worst Nightmare|75px}} | |
| − | |||
| − | |||
| − | | align="center" style="background | ||
| '''[[Your Worst Nightmare]]''' | | '''[[Your Worst Nightmare]]''' | ||
|- | |- | ||
| − | | | + | | style="background:#F3A957;" rowspan="2" | '''{{Class link|spy|br=yes}}''' |
| − | | align="center" style="background | + | | align="center" style="background:#F9D483;" | {{Icon item|Counterfeit Billycock|75px}} |
| '''[[Counterfeit Billycock]]''' | | '''[[Counterfeit Billycock]]''' | ||
|- | |- | ||
| − | | align="center" style="background | + | | align="center" style="background:#F9D483;" | {{Icon item|L'Inspecteur|75px}} |
| '''[[L'Inspecteur]]''' | | '''[[L'Inspecteur]]''' | ||
| + | |- | ||
| + | |} | ||
| + | |||
| + | === Miscellaneous items === | ||
| + | {{main|Miscellaneous items}} | ||
| + | {| class="wikitable collapsible" cellpadding=2 style="text-align:center;" | ||
| + | |- | ||
| + | | style="background:#F3A957;" rowspan="1" | '''{{Class link|demoman|br=yes}}''' | ||
| + | | width="60px" align="center" style="background:#F9D483;" | {{Icon item|A Whiff of the Old Brimstone|75px}} | ||
| + | | '''[[A Whiff of the Old Brimstone]]''' | ||
| + | |- | ||
| + | | style="background:#F3A957;" rowspan="2" | '''{{Class link|pyro|br=yes}}''' | ||
| + | | align="center" style="background:#F9D483;" | {{Icon item|Cremator's Conscience|75px}} | ||
| + | | '''[[Cremator's Conscience]]''' | ||
| + | |- | ||
|} | |} | ||
=== Maps === | === Maps === | ||
| + | {{main|List of maps}} | ||
{| class="wikitable" cellpadding=2 style="text-align:center;" | {| class="wikitable" cellpadding=2 style="text-align:center;" | ||
|- style="height: 20px;" | |- style="height: 20px;" | ||
| Line 87: | Line 89: | ||
! class="header" | File name | ! class="header" | File name | ||
|- | |- | ||
| − | |style="background:#F9D483;" width="120px" |'''[[Gullywash]]''' | + | | style="background:#F9D483;" width="120px" |'''[[Gullywash]]''' |
| − | |[[File:CP Gullywash 3.jpg|250px|link=Gullywash]] | + | | [[File:CP Gullywash 3.jpg|250px|link=Gullywash]] |
| align="center" | '''[[Control Point (game mode)|Control Point]]'''<br />[[File:Controlpoint.png|50px|link=Control Point (game mode)]] | | align="center" | '''[[Control Point (game mode)|Control Point]]'''<br />[[File:Controlpoint.png|50px|link=Control Point (game mode)]] | ||
| − | + | | {{code|cp_gullywash_final1}} | |
|- | |- | ||
|} | |} | ||
Revision as of 00:44, 14 October 2011
| “Let's go, let's go, let's go!” This article documents a recent addition. It may contain speculation, broken links or errors. You can help improve it by editing this page to include new information. |
The Manniversary Update & Sale was a major update released on October 13, 2011. It included several new hats, added a second misc. slot, a new high-five taunt, loadout presets, and the Manniversary Package with free items for 200,000 players.
Additions
Hats
Main article: Hats
Miscellaneous items
Main article: Miscellaneous items
| A Whiff of the Old Brimstone | ||
| Cremator's Conscience |
Maps
Main article: List of maps
| Name | Picture | Game mode | File name |
|---|---|---|---|
| Gullywash | 250px | Control Point |
cp_gullywash_final1
|
Update gallery
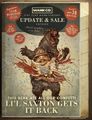
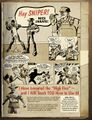
Page 1 Cover of the update
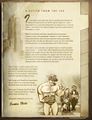
Page 2 A letter from Saxton Hale
Page 3 Introduction to Steam Workshop
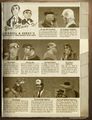
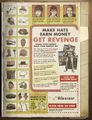
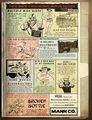
Page 4 Description of new hats
Page 5 New taunt
Page 6 New features added


