Difference between revisions of "Robots"
(Update images; Add new Robots; Cleanup; Fixing; Using Robot Icon template; Reorganize) |
|||
| Line 14: | Line 14: | ||
Robots receive certain buffs after a period of time carrying the bomb, with new buffs stacking with the previous ones. A graphic on the [[HUD]] indicates which stage the bomb carrier is on and how long until it receives the next buff. Upon receiving a buff, the robot carrying the bomb will taunt with [[Media:Mvm warning.wav|an accompanying sound cue]], and surrounding robots will halt to wait for the carrier. The defending team can and should use this as a window of opportunity to kill the bomb carrier, especially if the robot is getting the third upgrade. These buffs will not occur if the bomb carrier is a Giant, though the HUD graphic shows a full meter. | Robots receive certain buffs after a period of time carrying the bomb, with new buffs stacking with the previous ones. A graphic on the [[HUD]] indicates which stage the bomb carrier is on and how long until it receives the next buff. Upon receiving a buff, the robot carrying the bomb will taunt with [[Media:Mvm warning.wav|an accompanying sound cue]], and surrounding robots will halt to wait for the carrier. The defending team can and should use this as a window of opportunity to kill the bomb carrier, especially if the robot is getting the third upgrade. These buffs will not occur if the bomb carrier is a Giant, though the HUD graphic shows a full meter. | ||
| + | |||
{| class="wikitable grid" style="text-align:center;" | {| class="wikitable grid" style="text-align:center;" | ||
|- style="height: 20px;" | |- style="height: 20px;" | ||
| Line 29: | Line 30: | ||
|} | |} | ||
| − | + | == Types == | |
| + | The standard robot set is designed off of each of the [[Classes|mercenaries]] employed under [[Non-player characters#Blutarch and Redmond Mann|Blutarch and Redmond Mann]], excluding the [[Engineer]], and share their basic abilities. Regular robots are equipped with the stock loadout of the classes. Über Medics are not noted as regular robots, despite the fact that they use their Stock weapons. | ||
| + | |||
| + | === Regular Robots === | ||
{| class="wikitable grid" style="border:1px solid #333;" | {| class="wikitable grid" style="border:1px solid #333;" | ||
| − | ! class="header" width="150px" style="background: #333; color: white; border:1px solid #333;" | Machine | + | ! class="header" width="150px" style="background: #333; color: white; border:1px solid #333;" | Machine Class |
! class="header" width="150px" style="background: #333; color: white; border:1px solid #333;" | Equipped with | ! class="header" width="150px" style="background: #333; color: white; border:1px solid #333;" | Equipped with | ||
! class="header" width="350px" style="background: #333; color: white; border:1px solid #333;" | Abilities/Notes | ! class="header" width="350px" style="background: #333; color: white; border:1px solid #333;" | Abilities/Notes | ||
| − | ! class="header width=" | + | ! class="header" width="150px" style="background: #333; color: white; border:1px solid #333;" | Health |
| − | |||
| − | |||
|- | |- | ||
| − | | style="border:1px solid #333;" | | + | | style="border:1px solid #333;" | {{Robot icon|Scout|link=Scout Robot}} '''[[Scout Robot#Scout|Scout]]''' |
| − | | style="border:1px solid #333;" | [[Scattergun | + | | style="border:1px solid #333;" | [[Scattergun]]<br>[[Bat]] |
| style="border:1px solid #333;" | | | style="border:1px solid #333;" | | ||
* Runs faster than other robots (133% speed). | * Runs faster than other robots (133% speed). | ||
* Attacks in groups. | * Attacks in groups. | ||
* Can use [[Bat]] or [[Scattergun]], but only one. Cannot switch weapons. | * Can use [[Bat]] or [[Scattergun]], but only one. Cannot switch weapons. | ||
| − | |||
| style="border:1px solid #333;" | 125 | | style="border:1px solid #333;" | 125 | ||
|- | |- | ||
| − | | style="border:1px solid #333;" | | + | | style="border:1px solid #333;" | {{Robot icon|Soldier|link=Soldier Robot}} '''[[Soldier Robot#Soldier|Soldier]]''' |
| style="border:1px solid #333;" | [[Rocket Launcher]] | | style="border:1px solid #333;" | [[Rocket Launcher]] | ||
| style="border:1px solid #333;" | | | style="border:1px solid #333;" | | ||
| Line 56: | Line 57: | ||
| style="border:1px solid #333;" | 200 | | style="border:1px solid #333;" | 200 | ||
|- | |- | ||
| − | | style="border:1px solid #333;" | | + | | style="border:1px solid #333;" | {{Robot icon|Pyro|link=Pyro Robot}} '''[[Pyro Robot#Pyro|Pyro]]''' |
| style="border:1px solid #333;" | [[Flame Thrower]] | | style="border:1px solid #333;" | [[Flame Thrower]] | ||
| style="border:1px solid #333;" | | | style="border:1px solid #333;" | | ||
| Line 64: | Line 65: | ||
| style="border:1px solid #333;" | 175 | | style="border:1px solid #333;" | 175 | ||
|- | |- | ||
| − | | style="border:1px solid #333;" | | + | | style="border:1px solid #333;" | {{Robot icon|Demoman|link=Demoman Robot}} '''[[Demoman Robot#Demoman|Demoman]]''' |
| style="border:1px solid #333;" | [[Grenade Launcher]] | | style="border:1px solid #333;" | [[Grenade Launcher]] | ||
| style="border:1px solid #333;" | | | style="border:1px solid #333;" | | ||
| Line 71: | Line 72: | ||
| style="border:1px solid #333;" | 175 | | style="border:1px solid #333;" | 175 | ||
|- | |- | ||
| − | | style="border:1px solid #333;" | | + | | style="border:1px solid #333;" | {{Robot icon|Heavy|link=Heavy Robot}} '''[[Heavy Robot#Heavy|Heavy]]''' |
| style="border:1px solid #333;" | [[Minigun]] | | style="border:1px solid #333;" | [[Minigun]] | ||
| style="border:1px solid #333;" | | | style="border:1px solid #333;" | | ||
| Line 78: | Line 79: | ||
| style="border:1px solid #333;" | 300 | | style="border:1px solid #333;" | 300 | ||
|- | |- | ||
| − | | style="border:1px solid #333;" | | + | | style="border:1px solid #333;" | {{Robot icon|Sniper|link=Sniper Robot}} '''[[Sniper Robot#Sniper|Sniper]]''' |
| style="border:1px solid #333;" | [[Sniper Rifle]]<br>[[Kukri]] | | style="border:1px solid #333;" | [[Sniper Rifle]]<br>[[Kukri]] | ||
| style="border:1px solid #333;" | | | style="border:1px solid #333;" | | ||
| Line 87: | Line 88: | ||
| style="border:1px solid #333;" | 125 | | style="border:1px solid #333;" | 125 | ||
|- | |- | ||
| − | | style="border:1px solid #333;" | | + | | style="border:1px solid #333;" | {{Robot icon|Spy|link=Spy Robot}} '''[[Spy Robot|Spy]]''' |
| style="border:1px solid #333;" | [[Revolver]]<br>[[Sapper]]<br>[[Knife]]<br>[[Disguise Kit]]<br>[[Invisibility Watch]] | | style="border:1px solid #333;" | [[Revolver]]<br>[[Sapper]]<br>[[Knife]]<br>[[Disguise Kit]]<br>[[Invisibility Watch]] | ||
| style="border:1px solid #333;" | | | style="border:1px solid #333;" | | ||
| Line 100: | Line 101: | ||
|} | |} | ||
| − | === | + | ==== Variants ==== |
| − | A number of | + | A number of variants based on the standard robots exist; their defining characteristics are based on other unlockable weapons rather than the signature Stock weapons. They are represented by a unique name and icon. Each special robot has the advantages and disadvantages of the original class it is based on, unless noted. |
{| class="wikitable grid" style="border:1px solid #333;" | {| class="wikitable grid" style="border:1px solid #333;" | ||
| − | ! class="header" width="150px" style="background: #333; color: white; border:1px solid #333;" | Machine | + | ! class="header" width="150px" style="background: #333; color: white; border:1px solid #333;" | Machine Class |
| − | ! class="header" width="100px" style="background: #333; color: white; border:1px solid #333;" | | + | ! class="header" width="100px" style="background: #333; color: white; border:1px solid #333;" | Name |
| − | ! class="header" width="175px" style="background: #333; color: white; border:1px solid #333;" | | + | ! class="header" width="175px" style="background: #333; color: white; border:1px solid #333;" | Special Weapon |
! class="header" width="350px" style="background: #333; color: white; border:1px solid #333;" | Abilities/Notes | ! class="header" width="350px" style="background: #333; color: white; border:1px solid #333;" | Abilities/Notes | ||
! class="header" width="50px" style="background: #333; color: white; border:1px solid #333;" | Health | ! class="header" width="50px" style="background: #333; color: white; border:1px solid #333;" | Health | ||
|- | |- | ||
| − | | style="border:1px solid #333;" | | + | | style="border:1px solid #333;" rowspan="2"| {{Robot icon|Scout|link=Scout Robot}} '''Scout''' |
| − | | style="border:1px solid #333;" | {{ | + | | style="border:1px solid #333;" | {{Robot icon|Scout stun|alt=Minor League Scout|link=Scout Robot#Minor League Scout}} '''[[Scout Robot#Minor League Scout|Minor League Scout]]''' |
| style="border:1px solid #333;" | [[Sandman]]<br>[[Batter's Helmet]] | | style="border:1px solid #333;" | [[Sandman]]<br>[[Batter's Helmet]] | ||
| style="border:1px solid #333;" | | | style="border:1px solid #333;" | | ||
* Uses [[Sandman|baseballs]] to temporarily stun players. | * Uses [[Sandman|baseballs]] to temporarily stun players. | ||
| − | | style="border:1px solid #333;" | 125 | + | | style="border:1px solid #333;" rowspan="2"| 125 |
| + | |- | ||
| + | | style="border:1px solid #333;" | {{Robot icon|Scout|alt=Bonk Scout|link=Scout Robot#Bonk Scout}} '''[[Scout Robot#Bonk Scout|Bonk Scout]]''' | ||
| + | | style="border:1px solid #333;" | [[Bonk! Atomic Punch]] | ||
| + | | style="border:1px solid #333;" | | ||
| + | * Able to bypass defenses without taking damage. | ||
|- | |- | ||
| − | | style="border:1px solid #333;" | | + | | style="border:1px solid #333;" rowspan="4"| {{Robot icon|Soldier|link=Soldier Robot}} '''Soldier''' |
| − | | style="border:1px solid #333;" | {{ | + | | style="border:1px solid #333;" | {{Robot icon|Soldier buff|alt=Buff Soldier|link=Soldier Robot#Buff Soldier}} '''[[Soldier Robot#Buff Soldier|Buff Soldier]]''' |
| style="border:1px solid #333;" | [[Buff Banner]] | | style="border:1px solid #333;" | [[Buff Banner]] | ||
| style="border:1px solid #333;" | | | style="border:1px solid #333;" | | ||
* Will start with full rage and buff immediately. | * Will start with full rage and buff immediately. | ||
| − | | style="border:1px solid #333;" | 200 | + | | style="border:1px solid #333;" rowspan="4"| 200 |
| + | |- | ||
| + | | style="border:1px solid #333;" | {{Robot icon|Soldier buff|alt=Extended Buff Soldier|link=Soldier Robot#Extended Buff Soldier}} '''[[Soldier Robot#Extended Buff Soldier|Extended Buff Soldier]]''' | ||
| + | | style="border:1px solid #333;" |[[Buff Banner]] | ||
| + | | style="border:1px solid #333;" rowspan="3"| | ||
| + | * Will start with full rage and buff immediately. | ||
| + | * 10x buff duration. | ||
| + | |- | ||
| + | | style="border:1px solid #333;" | {{Robot icon|Soldier backup|alt=Extended Buff Soldier|link=Soldier Robot#Extended Backup Soldier}} '''[[Soldier Robot#Extended Backup Soldier|Extended Backup Soldier]]''' | ||
| + | | style="border:1px solid #333;" | [[Battalion's Backup]] | ||
| + | |- | ||
| + | | style="border:1px solid #333;" | {{Robot icon|Soldier conch|alt=Extended Conch Soldier|link=Soldier Robot#Extended Conch Soldier}} '''[[Soldier Robot#Extended Conch Soldier|Extended Conch Soldier]]''' | ||
| + | | style="border:1px solid #333;" | [[Concheror]] | ||
| + | |- | ||
| + | | style="border:1px solid #333;" rowspan="2"| {{Robot icon|Pyro|link=Pyro Robot}} '''Pyro''' | ||
| + | | style="border:1px solid #333;" | {{Robot icon|Pyro flare|alt=Flare Pyro|link=Pyro Robot#Flare Pyro}} '''[[Pyro Robot#Flare Pyro|Flare Pyro]]''' | ||
| + | | style="border:1px solid #333;" | [[Flare Gun]] | ||
| + | | style="border:1px solid #333;" | | ||
| + | * Able to attack outside of flamethrower range. | ||
| + | * Deals crits against a burning target. | ||
| + | | style="border:1px solid #333;" rowspan="2"| 175 | ||
| + | |- | ||
| + | | style="border:1px solid #333;" | {{Robot icon|Pyro flare|alt=Pyro Pusher|link=Pyro Robot#Pyro Pusher}} '''[[Pyro Robot#Pyro Pusher|Pyro Pusher]]''' | ||
| + | | style="border:1px solid #333;" | [[Scorch Shot]] | ||
| + | | style="border:1px solid #333;" | | ||
| + | * 100% crit chance. | ||
| + | * 25% faster reload time. | ||
| + | * Flares are only 35% of normal speed. | ||
|- | |- | ||
| − | | style="border:1px solid #333;" | | + | | style="border:1px solid #333;" | {{Robot icon|Demoman|link=Demoman Robot}} '''Demoman''' |
| − | | style="border:1px solid #333;" | {{ | + | | style="border:1px solid #333;" | {{Robot icon|Demoknight|link=Demoman Robot#Demoknight}} '''[[Demoman Robot#Demoknight|Demoknight]]''' |
| style="border:1px solid #333;" | [[Eyelander]]<br>[[Chargin' Targe]] | | style="border:1px solid #333;" | [[Eyelander]]<br>[[Chargin' Targe]] | ||
| style="border:1px solid #333;" | | | style="border:1px solid #333;" | | ||
| Line 133: | Line 166: | ||
| style="border:1px solid #333;" | 175 | | style="border:1px solid #333;" | 175 | ||
|- | |- | ||
| − | | style="border:1px solid #333;" | | + | | style="border:1px solid #333;" rowspan="4" | {{Robot icon|Heavy|link=Heavy Robot}} '''Heavy''' |
| − | | style="border:1px solid #333; | + | | style="border:1px solid #333;" | {{Robot icon|Heavy steelfist|alt=Steel Gauntlet|link=Heavy Robot#Steel Gauntlet}} '''[[Heavy Robot#Steel Gauntlet|Steel Gauntlet]]''' |
| style="border:1px solid #333;" | [[Fists of Steel]] | | style="border:1px solid #333;" | [[Fists of Steel]] | ||
| style="border:1px solid #333;" | | | style="border:1px solid #333;" | | ||
| Line 142: | Line 175: | ||
| style="border:1px solid #333;" | 900 | | style="border:1px solid #333;" | 900 | ||
|- | |- | ||
| − | | style="border:1px solid #333;" | + | | style="border:1px solid #333;" | {{Robot icon|heavy champ|alt=Heavyweight Champ|link=Heavy Robot#Heavyweight Champ}} '''[[Heavy Robot#Heavyweight Champ|Heavyweight Champ]]''' <small>'''(Type 1)'''</small> |
| style="border:1px solid #333;" | [[Killing Gloves of Boxing]]<br>[[Pugilist's Protector]] | | style="border:1px solid #333;" | [[Killing Gloves of Boxing]]<br>[[Pugilist's Protector]] | ||
| style="border:1px solid #333;" | | | style="border:1px solid #333;" | | ||
| Line 150: | Line 183: | ||
| style="border:1px solid #333;" rowspan="2"| 300 | | style="border:1px solid #333;" rowspan="2"| 300 | ||
|- | |- | ||
| − | | style="border:1px solid #333;" | [[ | + | | style="border:1px solid #333;"| {{Robot icon|Heavy gru|alt=Heavyweight Champ|link=Heavy Robot#Heavyweight Champ}} '''[[Heavy Robot#Heavyweight Champ|Heavyweight Champ]]''' <small>'''(Type 2)'''</small> |
| + | | style="border:1px solid #333;" | [[Gloves of Running Urgently]] | ||
| style="border:1px solid #333;" | | | style="border:1px solid #333;" | | ||
* Runs faster than other Heavy robots, at 99.67% speed. | * Runs faster than other Heavy robots, at 99.67% speed. | ||
* All damage taken is in the form of mini-crits. | * All damage taken is in the form of mini-crits. | ||
| − | * Attacks alongside Heavyweight Champs, in smaller quantities. | + | * Attacks alongside Heavyweight Champs (Type 1), in smaller quantities. |
* Attacks only with melee. | * Attacks only with melee. | ||
|- | |- | ||
| − | | style="border:1px solid #333;"| | + | | style="border:1px solid #333;"| {{Robot icon|Heavy mittens|alt=Heavy Mittens Champ|link=Heavy Robot#Heavy Mittens}} '''[[Heavy Robot#Heavy Mittens|Heavy Mittens]]''' |
| style="border:1px solid #333;" | [[Holiday Punch]] | | style="border:1px solid #333;" | [[Holiday Punch]] | ||
| style="border:1px solid #333;" | | | style="border:1px solid #333;" | | ||
| Line 166: | Line 200: | ||
| style="border:1px solid #333;" rowspan="1"| 60 | | style="border:1px solid #333;" rowspan="1"| 60 | ||
|- | |- | ||
| − | | style="border:1px solid #333;" | | + | | style="border:1px solid #333;" rowspan="2" | {{Robot icon|Medic|link=Medic Robot}} '''Medic''' |
| − | | style="border:1px solid #333; | + | | style="border:1px solid #333;" | {{Robot icon|Medic|alt=Quick-Fix Medic|link=Medic Robot#Quick-Fix Medic}} '''[[Medic Robot#Quick-Fix Medic|Quick-Fix Medic]]''' |
| style="border:1px solid #333;" | [[Quick-Fix]]<br>[[Syringe Gun]] | | style="border:1px solid #333;" | [[Quick-Fix]]<br>[[Syringe Gun]] | ||
| style="border:1px solid #333;" | | | style="border:1px solid #333;" | | ||
| Line 176: | Line 210: | ||
| style="border:1px solid #333;" | 150 | | style="border:1px solid #333;" | 150 | ||
|- | |- | ||
| − | | style="border:1px solid #333;" | | + | | style="border:1px solid #333;" | {{Robot icon|Medic uber|alt=Über Medic|link=Medic Robot#Über Medic}} '''[[Medic Robot#Über Medic|Über Medic]]''' |
| style="border:1px solid #333;" | [[Medi Gun]]<br>[[Syringe Gun]] | | style="border:1px solid #333;" | [[Medi Gun]]<br>[[Syringe Gun]] | ||
| style="border:1px solid #333;" | | | style="border:1px solid #333;" | | ||
| Line 185: | Line 219: | ||
| style="border:1px solid #333;" | 150 | | style="border:1px solid #333;" | 150 | ||
|- | |- | ||
| − | | style="border:1px solid #333;" | | + | | style="border:1px solid #333;" rowspan="3" | {{Robot icon|Sniper|link=Sniper Robot}} '''Sniper''' |
| − | | style="border:1px solid #333; | + | | style="border:1px solid #333;" | {{Robot icon|Sniper bow|alt=Bowman|link=Sniper Robot#Bowman}} '''[[Sniper Robot#Bowman|Bowman]]''' |
| style="border:1px solid #333;" | [[Huntsman]] | | style="border:1px solid #333;" | [[Huntsman]] | ||
| style="border:1px solid #333;" | | | style="border:1px solid #333;" | | ||
| Line 194: | Line 228: | ||
| style="border:1px solid #333;" rowspan=3| 125 | | style="border:1px solid #333;" rowspan=3| 125 | ||
|- | |- | ||
| − | | style="border:1px solid #333;" | | + | | style="border:1px solid #333;" | {{Robot icon|Sniper sydneysleeper|alt=Sydney Sniper|link=Sniper Robot#Sydney Sniper}} '''[[Sniper Robot#Sydney Sniper|Sydney Sniper]]''' |
| style="border:1px solid #333;" | [[Sydney Sleeper]] | | style="border:1px solid #333;" | [[Sydney Sleeper]] | ||
| | | | ||
| Line 200: | Line 234: | ||
* Cannot headshot. | * Cannot headshot. | ||
|- | |- | ||
| − | | style="border:1px solid #333;" | | + | | style="border:1px solid #333;" | {{Robot icon|Sniper|alt=Razorback Sniper|link=Sniper Robot#Razorback Sniper}} '''[[Sniper Robot#Razorback Sniper|Razorback Sniper]]''' |
| style="border:1px solid #333;" | [[Razorback]] | | style="border:1px solid #333;" | [[Razorback]] | ||
| | | | ||
| Line 206: | Line 240: | ||
|} | |} | ||
| − | |||
| − | |||
| − | |||
| − | |||
| − | |||
| − | |||
| − | |||
| − | |||
| − | |||
| − | |||
| − | |||
| − | |||
| − | |||
| − | |||
| − | |||
| − | |||
| − | |||
| − | |||
| − | |||
===Giant Robots=== | ===Giant Robots=== | ||
| Line 232: | Line 247: | ||
{| class="wikitable grid" | {| class="wikitable grid" | ||
| − | ! class="header" width="150px" style="background: #333; color: white; border:1px solid #333;" | Machine | + | ! class="header" width="150px" style="background: #333; color: white; border:1px solid #333;" | Machine Class |
| − | ! class="header" width="100px" style="background: #333; color: white; border:1px solid #333;" | | + | ! class="header" width="100px" style="background: #333; color: white; border:1px solid #333;" | Name |
! class="header" width="150px" style="background: #333; color: white; border:1px solid #333;" | Equipped with | ! class="header" width="150px" style="background: #333; color: white; border:1px solid #333;" | Equipped with | ||
! class="header" width="525px" style="background: #333; color: white; border:1px solid #333;" | Abilities | ! class="header" width="525px" style="background: #333; color: white; border:1px solid #333;" | Abilities | ||
! class="header" width="50px" style="background: #333; color: white; border:1px solid #333;" | Health | ! class="header" width="50px" style="background: #333; color: white; border:1px solid #333;" | Health | ||
|- | |- | ||
| − | | style="border:1px solid #333;" | | + | | style="border:1px solid #333;" rowspan="2"| {{Robot icon|Scout|link=Scout Robot}} '''Scout''' |
| − | | style="border:1px solid #333; | + | | style="border:1px solid #333;" | {{Robot icon|Scout stun|giant|alt=Major League Scout|link=Scout Robot#Major League Scout}} '''[[Scout Robot#Major League Scout|Major League Scout]]''' |
| style="border:1px solid #333;" | [[Sandman]]<br>[[Batter's Helmet]]<br>[[Essential Accessories]] | | style="border:1px solid #333;" | [[Sandman]]<br>[[Batter's Helmet]]<br>[[Essential Accessories]] | ||
| style="border:1px solid #333;" | | | style="border:1px solid #333;" | | ||
| Line 246: | Line 261: | ||
| style="border:1px solid #333;" | 1600 | | style="border:1px solid #333;" | 1600 | ||
|- | |- | ||
| − | | style="border:1px solid #333;" | | + | | style="border:1px solid #333;" | {{Robot icon|Scout giant fast|giant|alt=Super Scout|link=Scout Robot#Super Scout}} '''[[Scout Robot#Super Scout|Super Scout]]''' |
| style="border:1px solid #333;" | [[Holy Mackerel]]<br>[[Bonk Boy]] | | style="border:1px solid #333;" | [[Holy Mackerel]]<br>[[Bonk Boy]] | ||
| style="border:1px solid #333;" | | | style="border:1px solid #333;" | | ||
| Line 252: | Line 267: | ||
| style="border:1px solid #333;" | 1600 | | style="border:1px solid #333;" | 1600 | ||
|- | |- | ||
| − | | style="border:1px solid #333;" | | + | | style="border:1px solid #333;" rowspan="3"| {{Robot icon|Soldier|link=Soldier Robot}} '''Soldier''' |
| − | | style="border:1px solid #333; | + | | style="border:1px solid #333;" | {{Robot icon|Soldier|giant|alt=Giant Soldier|link=Soldier Robot#Giant Soldier}} '''[[Soldier Robot#Giant Soldier|Giant Soldier]]''' |
| style="border:1px solid #333;" | [[Rocket Launcher]] | | style="border:1px solid #333;" | [[Rocket Launcher]] | ||
| style="border:1px solid #333;" | | | style="border:1px solid #333;" | | ||
| − | * | + | * No special abilities. |
| style="border:1px solid #333;" | 3300 | | style="border:1px solid #333;" | 3300 | ||
|- | |- | ||
| − | | style="border:1px solid #333;" | | + | | style="border:1px solid #333;" | {{Robot icon|Soldier spammer|giant|alt=Giant Rapid Fire Soldier|link=Soldier Robot#Giant Rapid Fire Soldier}} '''[[Soldier Robot#Giant Rapid Fire Soldier|Giant Rapid Fire Soldier]]''' |
| style="border:1px solid #333;" | [[Rocket Launcher]] | | style="border:1px solid #333;" | [[Rocket Launcher]] | ||
| style="border:1px solid #333;" | | | style="border:1px solid #333;" | | ||
| Line 265: | Line 280: | ||
| style="border:1px solid #333;" | 3300 | | style="border:1px solid #333;" | 3300 | ||
|- | |- | ||
| − | | style="border:1px solid #333;" | | + | | style="border:1px solid #333;" | {{Robot icon|Soldier crit|giant|alt=Giant Charged Soldier|link=Soldier Robot#Giant Charged Soldier}} '''[[Soldier Robot#Giant Charged Soldier|Giant Charged Soldier]]''' |
| style="border:1px solid #333;" | [[Original]] | | style="border:1px solid #333;" | [[Original]] | ||
| style="border:1px solid #333;" | | | style="border:1px solid #333;" | | ||
| Line 272: | Line 287: | ||
| style="border:1px solid #333;" | 3800 | | style="border:1px solid #333;" | 3800 | ||
|- | |- | ||
| − | | style="border:1px solid #333;" | | + | | style="border:1px solid #333;" rowspan="2"| {{Robot icon|Pyro|link=Pyro Robot}} '''Pyro''' |
| − | | style="border:1px solid #333; | + | | style="border:1px solid #333;" | {{Robot icon|Pyro|giant|alt=Giant Pyro|link=Pyro Robot#Giant Pyro}} '''[[Pyro Robot#Giant Pyro|Giant Pyro]]''' |
| style="border:1px solid #333;" | [[Flamethrower]] | | style="border:1px solid #333;" | [[Flamethrower]] | ||
| style="border:1px solid #333;" | | | style="border:1px solid #333;" | | ||
| Line 279: | Line 294: | ||
| style="border:1px solid #333;" | 3000 | | style="border:1px solid #333;" | 3000 | ||
|- | |- | ||
| − | | style="border:1px solid #333;" | | + | | style="border:1px solid #333;" | {{Robot icon|Pyro flare|giant|alt=Giant Flare Pyro|link=Pyro Robot#Giant Flare Pyro}} '''[[Pyro Robot#Giant Flare Pyro|Giant Flare Pyro]]''' |
| style="border:1px solid #333;" | [[Detonator]]<br>[[Old Guadalajara]] | | style="border:1px solid #333;" | [[Detonator]]<br>[[Old Guadalajara]] | ||
| style="border:1px solid #333;" | | | style="border:1px solid #333;" | | ||
| Line 285: | Line 300: | ||
| style="border:1px solid #333;" | 3000 | | style="border:1px solid #333;" | 3000 | ||
|- | |- | ||
| − | | style="border:1px solid #333;" | | + | | style="border:1px solid #333;" rowspan="2"| {{Robot icon|Demoman|link=Demoman Robot}} '''Demoman''' |
| − | | style="border:1px solid #333; | + | | style="border:1px solid #333;" | {{Robot icon|Demoman|giant|alt=Giant Rapid Fire Demoman|link=Demoman Robot#Giant Rapid Fire Demoman}} '''[[Demoman Robot#Giant Rapid Fire Demoman|Giant Rapid Fire Demoman]]''' |
| style="border:1px solid #333;" | [[Grenade Launcher]] | | style="border:1px solid #333;" | [[Grenade Launcher]] | ||
| style="border:1px solid #333;" | | | style="border:1px solid #333;" | | ||
| Line 292: | Line 307: | ||
| style="border:1px solid #333;" | 3000 or 3300 | | style="border:1px solid #333;" | 3000 or 3300 | ||
|- | |- | ||
| − | | style="border:1px solid #333;" | | + | | style="border:1px solid #333;" | {{Robot icon|Demoknight|giant|alt=Giant Demoknight|link=Demoman Robot#Giant Demoknight}} '''[[Demoman Robot#Giant Demoknight|Giant Demoknight]]''' |
| style="border:1px solid #333;" | [[Ali Baba's Wee Booties]]<br>[[Chargin' Targe]]<br>[[Eyelander]]<br>[[Prince Tavish's Crown]] | | style="border:1px solid #333;" | [[Ali Baba's Wee Booties]]<br>[[Chargin' Targe]]<br>[[Eyelander]]<br>[[Prince Tavish's Crown]] | ||
| style="border:1px solid #333;" | | | style="border:1px solid #333;" | | ||
| Line 298: | Line 313: | ||
| style="border:1px solid #333;" | 3300 | | style="border:1px solid #333;" | 3300 | ||
|- | |- | ||
| − | | style="border:1px solid #333;" | | + | | style="border:1px solid #333;" rowspan="3"| {{Robot icon|Heavy|link=Heavy Robot}} '''Heavy''' |
| − | | style="border:1px solid #333; | + | | style="border:1px solid #333;" | {{Robot icon|Heavy|giant|alt=Giant Heavy|link=Heavy Robot#Giant Heavy}} '''[[Heavy Robot#Giant Heavy|Giant Heavy]]''' |
| style="border:1px solid #333;" | [[Minigun]] | | style="border:1px solid #333;" | [[Minigun]] | ||
| style="border:1px solid #333;" | | | style="border:1px solid #333;" | | ||
| − | * | + | * 50% Damage Bonus |
| − | | style="border:1px solid #333;" | 5000 | + | * 70% Knockback resistance |
| + | * Moves at half speed | ||
| + | * Limited sight range | ||
| + | | style="border:1px solid #333;" rowspan="3"| 5000 | ||
|- | |- | ||
| − | | style="border:1px solid #333;" | | + | | style="border:1px solid #333;" | {{Robot icon|Heavy deflector|giant|alt=Giant Deflector Heavy|link=Heavy Robot#Giant Deflector Heavy}} '''[[Heavy Robot#Giant Deflector Heavy|Giant Deflector Heavy]]''' |
| style="border:1px solid #333;" | [[Deflector]]<br>[[U-clank-a]] | | style="border:1px solid #333;" | [[Deflector]]<br>[[U-clank-a]] | ||
| style="border:1px solid #333;" | | | style="border:1px solid #333;" | | ||
| − | * In | + | * In addition to regular Giant Heavy abilities, can shoot down projectiles such as rockets and grenades. |
| − | | style="border:1px solid #333;" | | + | |- |
| + | | style="border:1px solid #333;" | {{Robot icon|Heavy heater|giant|alt=Giant Heater Heavy|link=Heavy Robot#Giant Heater Heavy}} '''[[Heavy Robot#Giant Heater Heavy|Giant Heater Heavy]]''' | ||
| + | | style="border:1px solid #333;" | [[Huo-Long Heater]] | ||
| + | | style="border:1px solid #333;" | | ||
| + | * Nearly identical regular Giant Heavy abilities, but has unlimited sight range. | ||
| + | * Impossible to get close to without getting set on fire. | ||
| + | |} | ||
| + | |||
| + | |||
| + | ===[[Sentry Buster]]=== | ||
| + | The Sentry Buster is literally a bomb on legs. It is never predetermined to spawn during a wave, and only spawns if an Engineer is doing significant damage with his Sentry Gun to the robot horde. Its arrival is announced by a ticking theme, a [[HUD|HUD notification]], and an announcement the Administrator. If the team has multiple Engineers with Sentry Guns, a Sentry Buster can spawn for each problematic Sentry Gun. | ||
| + | |||
| + | {| class="wikitable grid" | ||
| + | ! class="header" width="150px" style="background: #333; color: white; border:1px solid #333;" | Machine | ||
| + | ! class="header" width="100px" style="background: #333; color: white; border:1px solid #333;" | Based on | ||
| + | ! class="header" width="525px" style="background: #333; color: white; border:1px solid #333;" | Notes | ||
| + | ! class="header" width="40px" style="background: #333; color: white; border:1px solid #333;" | Health | ||
| + | |- | ||
| + | | style="border:1px solid #333;" | {{Robot icon|sentry buster||alt=Sentry Buster|link=Sentry Buster}} '''[[Sentry Buster]]''' | ||
| + | | style="border:1px solid #333;" | {{Class link|Demoman}} | ||
| + | | style="border:1px solid #333;" | | ||
| + | * Detects Sentry Guns that are dealing significant damage to the horde and runs at the offending Sentry Gun, exploding two seconds after deploying. | ||
| + | * Cannot carry bombs like ordinary robots. | ||
| + | * Cannot be backstabbed or headshotted. | ||
| + | * Will always explode: either upon reaching the Sentry or the Engineer hauling it or upon running out of health. | ||
| + | | style="border:1px solid #333;" | 2500 | ||
|} | |} | ||
| + | |||
===[[Tank Robot|Tank]]=== | ===[[Tank Robot|Tank]]=== | ||
Noted as "???" in the official Mann vs. Machine update page, the tank is a rare enemy that usually appears for one or two waves per mission, rarely more than once in one wave. It has a large amount of health, but no attack method, yet can kill players via crushing between walls or props while turning. It does, however, carry a bomb, and it cannot be stopped by any means other than its destruction. | Noted as "???" in the official Mann vs. Machine update page, the tank is a rare enemy that usually appears for one or two waves per mission, rarely more than once in one wave. It has a large amount of health, but no attack method, yet can kill players via crushing between walls or props while turning. It does, however, carry a bomb, and it cannot be stopped by any means other than its destruction. | ||
| + | {| class="wikitable grid" | ||
| + | ! class="header" width="150px" style="background: #333; color: white; border:1px solid #333;" | Machine | ||
| + | ! class="header" width="100px" style="background: #333; color: white; border:1px solid #333;" | Notes | ||
| + | ! class="header" width="40px" style="background: #333; color: white; border:1px solid #333;" | Health | ||
| + | |- | ||
| + | | style="border:1px solid #333;" | {{Robot icon|Tank|alt=Tank|link=Tank Robot}} '''[[Tank Robot|Tank]]''' | ||
| + | | style="border:1px solid #333;" | | ||
| + | * Extremely large amount of health. | ||
| + | * Deals no damage. | ||
| + | * Will deploy a bomb once at the bomb hatch. | ||
| + | | style="border:1px solid #333;" | Varies | ||
| + | |} | ||
| + | |||
== Related achievements == | == Related achievements == | ||
| Line 345: | Line 402: | ||
==Trivia== | ==Trivia== | ||
| − | *Unlike the regular classes, who face the direction they're aiming and walk sideways or backwards, most robots are split across the waist so that their top half is facing the way they're aiming but their bottom half is facing the way they're moving. | + | * Unlike the regular classes, who face the direction they're aiming and walk sideways or backwards, most robots are split across the waist so that their top half is facing the way they're aiming but their bottom half is facing the way they're moving. |
| − | *All robots have voice lines, robotic versions of the voice lines used by the class they are modeled on. All lack facial animations while doing so, save for the Heavy Robot, whose jaw moves up and down. | + | * All robots have voice lines, robotic versions of the voice lines used by the class they are modeled on. All lack facial animations while doing so, save for the Heavy Robot, whose jaw moves up and down. |
| − | **All voice lines are available in robotic form, despite many of them being impossible to hear (e.g. lines relating to capping points or Payload carts). | + | ** All voice lines are available in robotic form, despite many of them being impossible to hear (e.g. lines relating to capping points or Payload carts). |
| − | *Giant robots use different models with slightly skewed proportions (most notably a smaller head and larger torso) and more detail to make up for their larger size. It appears the models themselves are the same size as the normal robots' but are scaled up in-game. All hitboxes are the same for these gigantic robots despite these proportions. | + | * Giant robots use different models with slightly skewed proportions (most notably a smaller head and larger torso) and more detail to make up for their larger size. It appears the models themselves are the same size as the normal robots' but are scaled up in-game. All hitboxes are the same for these gigantic robots despite these proportions. |
| − | **They also have separate, more heavily-distorted voice lines, which are notably deeper and more mechanical-sounding than their human-sized counterparts. | + | ** They also have separate, more heavily-distorted voice lines, which are notably deeper and more mechanical-sounding than their human-sized counterparts. |
| − | * | + | * Robot Engineers appear in the game files, but are unused by Valve for unknown reasons. |
== External links == | == External links == | ||
Revision as of 08:33, 10 October 2012
This article is about Gray Mann's mechanical army. For the music track, see ROBOTS!.
| “ | The robots are at our doorstep, men, and trust me – they are not going to be asking for a cup of sugar. No! These monsters are going to break down our doors, take our sugar, and sprinkle it on our graves!
— The Soldier
|
” |

Robots are the enemies fought in Mann vs. Machine, during missions. They were created by Gray Mann in order to destroy everything created by Mann Co. .
Contents
Gameplay
Regular robots function nearly identically to the players, being operated by bots, whilst special robots exist that use non-Stock weapons, and other forms of robots exist with abilities and directives that no class normally possesses. Unlike players, robots can notably be sapped, temporarily disabling them often in groups, or in the case of giant robots, slowing them. As noted by Miss Pauling, they run on money, and they drop it when destroyed, allowing players to use that money to upgrade their weapons or buy a Power Up Canteen. Robots follow a set path to the bomb hole, marked by glowing blue arrows before each wave, though they may stray off that path if the bomb carrier is pushed away or to pursue a player. Robots will occasionally taunt after killing a player, and the bomb carrier will always taunt to receive its buff. Robots have an infinite supply of ammo and do not drop their weapons as pickups on death.
One robot per wave will enter the field armed with a bomb. The primary directive of the robots is to transport this bomb to the hatch at the end of the map, and the Defenders must stop them. After the bomb is dropped, another robot can pick it up. Any robot can carry the bomb, excluding the Sentry Buster and the Tank (although the Tank carries a separate bomb). Spies and Snipers won't actively try to pick up the bomb, but will if forced on to it via knockback. Carrying a bomb will slow a robot to about half speed, except Giant Robots. After all robots in a wave are killed, the wave is completed, while if the bomb is transported to the hatch and detonated, the wave is lost.
Robots have rudimentary behaviour. Their main objective is to either pick up the bomb and follow the preset path to the bomb hatch, or escort whichever robot is already doing so. On the whole, they do not take alternate routes to the bomb unless the sub-wave is programmed to flank, or the bomb has been dropped in a location off the main path. Robots generally do not care about destroying Dispensers and Teleporters if they are not in the way. They are also completely oblivious to cloaked and disguised Spies: they ignore flickering cloaks, collisions with "teammates", uncloaking noises, and possible Dead Ringers. They can detect if a nearby teammate has been backstabbed, but not with regularity. They do however always notice when a Spy is on fire.
Robots receive certain buffs after a period of time carrying the bomb, with new buffs stacking with the previous ones. A graphic on the HUD indicates which stage the bomb carrier is on and how long until it receives the next buff. Upon receiving a buff, the robot carrying the bomb will taunt with an accompanying sound cue, and surrounding robots will halt to wait for the carrier. The defending team can and should use this as a window of opportunity to kill the bomb carrier, especially if the robot is getting the third upgrade. These buffs will not occur if the bomb carrier is a Giant, though the HUD graphic shows a full meter.
| Stages | Upgrades |
|---|---|
| Defensive buff, shared with all nearby robots | |
| Health regeneration | |
| Full crits all the time |
Types
The standard robot set is designed off of each of the mercenaries employed under Blutarch and Redmond Mann, excluding the Engineer, and share their basic abilities. Regular robots are equipped with the stock loadout of the classes. Über Medics are not noted as regular robots, despite the fact that they use their Stock weapons.
Regular Robots
| Machine Class | Equipped with | Abilities/Notes | Health |
|---|---|---|---|
| Scattergun Bat |
|
125 | |
| Rocket Launcher |
|
200 | |
| Flame Thrower |
|
175 | |
| Grenade Launcher |
|
175 | |
| Minigun |
|
300 | |
| Sniper Rifle Kukri |
|
125 | |
| Revolver Sapper Knife Disguise Kit Invisibility Watch |
|
125 |
Variants
A number of variants based on the standard robots exist; their defining characteristics are based on other unlockable weapons rather than the signature Stock weapons. They are represented by a unique name and icon. Each special robot has the advantages and disadvantages of the original class it is based on, unless noted.
| Machine Class | Name | Special Weapon | Abilities/Notes | Health |
|---|---|---|---|---|
| Sandman Batter's Helmet |
|
125 | ||
| Bonk! Atomic Punch |
| |||
| Buff Banner |
|
200 | ||
| Buff Banner |
| |||
| Battalion's Backup | ||||
| Concheror | ||||
| Flare Gun |
|
175 | ||
| Scorch Shot |
| |||
| Eyelander Chargin' Targe |
|
175 | ||
| Fists of Steel |
|
900 | ||
| Killing Gloves of Boxing Pugilist's Protector |
|
300 | ||
| Gloves of Running Urgently |
| |||
| Holiday Punch |
|
60 | ||
| Quick-Fix Syringe Gun |
|
150 | ||
| Medi Gun Syringe Gun |
|
150 | ||
| Huntsman |
|
125 | ||
| Sydney Sleeper |
| |||
| Razorback |
|
Giant Robots
Giant Robots are notably larger than other robots. They can only be slowed by a Sapper rather than destroyed by it, and they cannot be killed at full health by a backstab unless the knife is fully upgraded. They sport significantly more health than other robots, but move at half-speed. Unlike regular robots, they are not slowed at all while carrying the bomb. Their presence in a wave is noted by a red background behind their class symbol in the pre-wave overhead. Giant Robots that carry the bomb do not receive buffs for it. All Giant Robots also have resistance to knock back.
Giant Robot versions exist of the Scout, Soldier, Pyro, Demoman, and Heavy. Multiple Giant Robots can occur in a single wave, either of the same class or not.
| Machine Class | Name | Equipped with | Abilities | Health |
|---|---|---|---|---|
| Sandman Batter's Helmet Essential Accessories |
|
1600 | ||
| Holy Mackerel Bonk Boy |
|
1600 | ||
| Rocket Launcher |
|
3300 | ||
| Rocket Launcher |
|
3300 | ||
| Original |
|
3800 | ||
| Flamethrower |
|
3000 | ||
| Detonator Old Guadalajara |
|
3000 | ||
| Grenade Launcher |
|
3000 or 3300 | ||
| Ali Baba's Wee Booties Chargin' Targe Eyelander Prince Tavish's Crown |
|
3300 | ||
| Minigun |
|
5000 | ||
| Deflector U-clank-a |
| |||
| Huo-Long Heater |
|
Sentry Buster
The Sentry Buster is literally a bomb on legs. It is never predetermined to spawn during a wave, and only spawns if an Engineer is doing significant damage with his Sentry Gun to the robot horde. Its arrival is announced by a ticking theme, a HUD notification, and an announcement the Administrator. If the team has multiple Engineers with Sentry Guns, a Sentry Buster can spawn for each problematic Sentry Gun.
| Machine | Based on | Notes | Health |
|---|---|---|---|
|
2500 |
Tank
Noted as "???" in the official Mann vs. Machine update page, the tank is a rare enemy that usually appears for one or two waves per mission, rarely more than once in one wave. It has a large amount of health, but no attack method, yet can kill players via crushing between walls or props while turning. It does, however, carry a bomb, and it cannot be stopped by any means other than its destruction.
| Machine | Notes | Health |
|---|---|---|
|
Varies |
Related achievements
 Mann vs. Machievements
|
|
Gallery
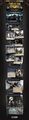
The full Mann vs. Machine Day 1: Machines update page.
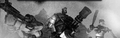
Giant Robots, seen on the Mann vs. Machine Day 1: Machines page.
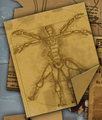
A diagram of a robotic Scout, seen in the Engineer Update.

Trivia
- Unlike the regular classes, who face the direction they're aiming and walk sideways or backwards, most robots are split across the waist so that their top half is facing the way they're aiming but their bottom half is facing the way they're moving.
- All robots have voice lines, robotic versions of the voice lines used by the class they are modeled on. All lack facial animations while doing so, save for the Heavy Robot, whose jaw moves up and down.
- All voice lines are available in robotic form, despite many of them being impossible to hear (e.g. lines relating to capping points or Payload carts).
- Giant robots use different models with slightly skewed proportions (most notably a smaller head and larger torso) and more detail to make up for their larger size. It appears the models themselves are the same size as the normal robots' but are scaled up in-game. All hitboxes are the same for these gigantic robots despite these proportions.
- They also have separate, more heavily-distorted voice lines, which are notably deeper and more mechanical-sounding than their human-sized counterparts.
- Robot Engineers appear in the game files, but are unused by Valve for unknown reasons.
External links
| |||||
| ||||||||||||||||||||||||||||||||||||||