Difference between revisions of "Anti-Pyro strategy"
NihonTiger (talk | contribs) m (→Primary Weapons: Spelling and grammar.) |
NihonTiger (talk | contribs) m (Additional, small, page-wide fixes) |
||
| Line 11: | Line 11: | ||
{| class="wikitable grid" cellpadding="0" cellspacing="0" | {| class="wikitable grid" cellpadding="0" cellspacing="0" | ||
! class="header" colspan="1" width="200"| Attributes | ! class="header" colspan="1" width="200"| Attributes | ||
| − | ! class="header" colspan="1" width="800"| Anti Pyro Strategy | + | ! class="header" colspan="1" width="800"| Anti-Pyro Strategy |
|- | |- | ||
| class="small" align="center" valign="center" style="padding:0.5em" |[[Image:Pyro_badge_RED.png|40px]] [[Classes|Role]] | | class="small" align="center" valign="center" style="padding:0.5em" |[[Image:Pyro_badge_RED.png|40px]] [[Classes|Role]] | ||
| Line 32: | Line 32: | ||
==Weapon Specific== | ==Weapon Specific== | ||
| − | A list of useful tidbits about the Pyro's tools, and how to counter them | + | A list of useful tidbits about the Pyro's tools, and how to counter them: |
===Primary Weapons=== | ===Primary Weapons=== | ||
| Line 38: | Line 38: | ||
{| class="wikitable grid" cellpadding="0" cellspacing="0" | {| class="wikitable grid" cellpadding="0" cellspacing="0" | ||
! class="header" colspan="1" width="200"| Weapon | ! class="header" colspan="1" width="200"| Weapon | ||
| − | ! class="header" colspan="1" width="800"| Anti Pyro Strategy | + | ! class="header" colspan="1" width="800"| Anti-Pyro Strategy |
|- | |- | ||
| class="small" align="center" valign="center" style="padding:0.5em" | {{Icon weapon|weapon=Flamethrower|icon-size=100x100px}} {{Icon weapon|weapon=Degreaser|icon-size=100x100px}}<br>[[Flamethrower]] / [[Degreaser]] | | class="small" align="center" valign="center" style="padding:0.5em" | {{Icon weapon|weapon=Flamethrower|icon-size=100x100px}} {{Icon weapon|weapon=Degreaser|icon-size=100x100px}}<br>[[Flamethrower]] / [[Degreaser]] | ||
| Line 61: | Line 61: | ||
{| class="wikitable grid" cellpadding="0" cellspacing="0" | {| class="wikitable grid" cellpadding="0" cellspacing="0" | ||
! class="header" colspan="1" width="200"| Weapon | ! class="header" colspan="1" width="200"| Weapon | ||
| − | ! class="header" colspan="1" width="800"| Anti Pyro Strategy | + | ! class="header" colspan="1" width="800"| Anti-Pyro Strategy |
|- | |- | ||
| class="small" align="center" valign="center" style="padding:0.5em" | {{Icon weapon|weapon=Shotgun|icon-size=100x100px}}<br>[[Shotgun]] | | class="small" align="center" valign="center" style="padding:0.5em" | {{Icon weapon|weapon=Shotgun|icon-size=100x100px}}<br>[[Shotgun]] | ||
| Line 78: | Line 78: | ||
{| class="wikitable grid" cellpadding="0" cellspacing="0" | {| class="wikitable grid" cellpadding="0" cellspacing="0" | ||
! class="header" colspan="1" width="200"| Weapon | ! class="header" colspan="1" width="200"| Weapon | ||
| − | ! class="header" colspan="1" width="800"| Anti Pyro Strategy | + | ! class="header" colspan="1" width="800"| Anti-Pyro Strategy |
|- | |- | ||
| class="small" align="center" valign="center" style="padding:0.5em" | {{Icon weapon|weapon=Fire Axe|icon-size=100x100px}}<br>[[Fire Axe]] | | class="small" align="center" valign="center" style="padding:0.5em" | {{Icon weapon|weapon=Fire Axe|icon-size=100x100px}}<br>[[Fire Axe]] | ||
| Line 106: | Line 106: | ||
*The Back Scratcher makes it harder for a Pyro/Medic combo to be effective because the Pyro will heal much slower. This makes it a lot easier to take out the Pyro first rather than trying to get around him to kill the Medic. | *The Back Scratcher makes it harder for a Pyro/Medic combo to be effective because the Pyro will heal much slower. This makes it a lot easier to take out the Pyro first rather than trying to get around him to kill the Medic. | ||
*Keep in mind, however, that it does more damage than normal melee weapons with the addition of Critical hits. | *Keep in mind, however, that it does more damage than normal melee weapons with the addition of Critical hits. | ||
| − | *If there are medkits around the area, take them as soon as you get damaged, as the the health of the Pyro is replenished more quickly when he takes a medkit with the | + | *If there are medkits around the area, take them as soon as you get damaged, as the the health of the Pyro is replenished more quickly when he takes a medkit with the Back Scratcher equipped. |
|} | |} | ||
| Line 113: | Line 113: | ||
{| class="wikitable grid" cellpadding="0" cellspacing="0" | {| class="wikitable grid" cellpadding="0" cellspacing="0" | ||
! class="header" colspan="1" width="200"| Set | ! class="header" colspan="1" width="200"| Set | ||
| − | ! class="header" colspan="1" width="800"| Anti Pyro Strategy | + | ! class="header" colspan="1" width="800"| Anti-Pyro Strategy |
|- | |- | ||
| class="small" align="center" valign="center" style="padding:0.5em" | [[File:Backpack Pyro Bundle.png|100px|The Gas Jockey's Gear Set]] | | class="small" align="center" valign="center" style="padding:0.5em" | [[File:Backpack Pyro Bundle.png|100px|The Gas Jockey's Gear Set]] | ||
Revision as of 21:31, 15 January 2011
 | Notice: Please take a moment to read the Anti-Class Strategy Standard before editing this page. |
| “ | Y'all might be flame retardant, but ya sure ain't bulletproof.
Click to listen
— The Engineer
|
” |
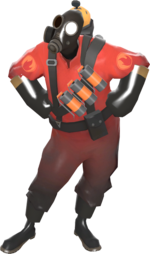
The Pyro is a class that is extremely dangerous at close range. Generally, the best way to engage a Pyro is from a distance because the Pyro lacks substantial ranged weaponry. The Pyro excels in close-quarters combat so try and fight him in the open, away from areas where he can trap you. Keep in mind that a Pyro can use his compression blast ability to deflect projectiles back at you, assuming he is not using a Backburner.
Contents
General
| Attributes | Anti-Pyro Strategy |
|---|---|
| |
| |
| |
|
Weapon Specific
A list of useful tidbits about the Pyro's tools, and how to counter them:
Primary Weapons
| Weapon | Anti-Pyro Strategy |
|---|---|
Flamethrower / Degreaser |
|
Backburner |
|
Secondary Weapons
| Weapon | Anti-Pyro Strategy |
|---|---|
Shotgun |
|
|
Melee Weapons
| Weapon | Anti-Pyro Strategy |
|---|---|
Fire Axe |
|
| |
| |
| |
|
Class Set
See also
|

