Difference between revisions of "Horseless Headless Horsemann match-ups"
(Saving progress. Bringing this in line.) |
|||
| Line 44: | Line 44: | ||
| class="xsmall" | vs | | class="xsmall" | vs | ||
| class="small" align="center" valign="center" style="padding:0.5em" | [[Image:HHH.png|100x100px|link=Scout]]<br>[[Horseless Headless Horsemann]] | | class="small" align="center" valign="center" style="padding:0.5em" | [[Image:HHH.png|100x100px|link=Scout]]<br>[[Horseless Headless Horsemann]] | ||
| − | | | + | | The Medic is faster than the Horsemann and is thus capable of kiting him around the map. The standard [[ÜberCharge]] can be used to allow a teammate to freely attack the Horsemann, while the [[Kritzkrieg]] can deployed on a high-firepower class to deal massive damage. Although ÜberCharged players cannot be killed by the Horsemann, they can still be stunned by his "Boo!" taunt. |
| − | |||
| − | |||
| − | |||
| − | |||
| − | |||
| − | |||
| − | |||
| − | |||
|- | |- | ||
| class="small" align="center" valign="center" style="padding:0.5em" | [[Image:Sniper.png|100x100px|link=Sniper]]<br>[[Sniper match-ups|Sniper]] | | class="small" align="center" valign="center" style="padding:0.5em" | [[Image:Sniper.png|100x100px|link=Sniper]]<br>[[Sniper match-ups|Sniper]] | ||
| class="xsmall" | vs | | class="xsmall" | vs | ||
| class="small" align="center" valign="center" style="padding:0.5em" | [[Image:HHH.png|100x100px|link=Scout]]<br>[[Horseless Headless Horsemann]] | | class="small" align="center" valign="center" style="padding:0.5em" | [[Image:HHH.png|100x100px|link=Scout]]<br>[[Horseless Headless Horsemann]] | ||
| − | | | + | | The Horsemann is immune to all headshots except those from the [[Huntsman]], so the Sniper is best off firing charged shots from afar. The Horsemann is immune to debuffs, so weapons such as [[Jarate]] or [[Tribalman's Shiv]] are ineffective. |
| − | |||
| − | |||
| − | |||
| − | |||
| − | |||
| − | |||
| − | |||
| − | |||
| − | |||
|- | |- | ||
| class="small" align="center" valign="center" style="padding:0.5em" | [[Image:Spy_RED.png|100x100px|link=Spy]]<br>[[Spy match-ups|Spy]] | | class="small" align="center" valign="center" style="padding:0.5em" | [[Image:Spy_RED.png|100x100px|link=Spy]]<br>[[Spy match-ups|Spy]] | ||
| class="xsmall" | vs | | class="xsmall" | vs | ||
| class="small" align="center" valign="center" style="padding:0.5em" | [[Image:HHH.png|100x100px|link=Scout]]<br>[[Horseless Headless Horsemann]] | | class="small" align="center" valign="center" style="padding:0.5em" | [[Image:HHH.png|100x100px|link=Scout]]<br>[[Horseless Headless Horsemann]] | ||
| − | | | + | | The Spy is rather ineffective against the Horsemann; his standard weapons are weak while [[backstab]]s will only deal normal Knife damage. While the Horsemann is not fooled by disguises or invisiblity, the [[Dead Ringer]] can be used to take heavily reduced damage for a short period of time. |
| − | |||
| − | |||
| − | |||
| − | |||
| − | |||
| − | |||
| − | |||
| − | |||
| − | |||
| − | |||
| − | |||
| − | |||
| − | |||
| − | |||
|} | |} | ||
Revision as of 19:00, 23 November 2011
| “ | This is my world! You are not welcome in my world!
Click to listen
— The Soldier to the Horseless Headless Horsemann
|
” |
Note: Wearing the Horseless Headless Horsemann's Head or the Saxton Hale Mask will make you immune to the Horseless Headless Horsemann's scare ability. This will assist in defeating him at close range or defeating multiple incarnations of the Horsemann.
| Class | Strategy | ||
|---|---|---|---|
 Scout |
vs | 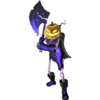 Horseless Headless Horsemann |
If marked as "It", the Scout's speed and mobility allows him to evade the Horsemann and lure him towards enemies. His weapons deal consistent damage while Bonk! Atomic Punch can be used to negate the Horsemann's damage for a short time. |
 Soldier |
vs |  Horseless Headless Horsemann |
The Soldier's Rocket Launcher and Shotgun will deal consistent damage against the Horsemann. If marked as "It", the Soldier can rocket jump to stay out of reach of the Horsemann. |
 Pyro |
vs |  Horseless Headless Horsemann |
The Pyro typically fights at close range and is almost always in danger when directly attacking the Horsemann. the Horsemann is not affected by afterburn, meaning that typical hit-and-run tactics are ineffective. |
 Demoman |
vs |  Horseless Headless Horsemann |
The Demoman's explosive weapons are capable of dealing great damage to the Horsemann. Although slower than the Horsemann, the Demoman can create a distance gap by using his shield charge or Sticky jumping. |
 Heavy |
vs |  Horseless Headless Horsemann |
As long as a Heavy is not marked as "It", his Minigun can quickly shred the Horsemann's large health pool. However, the Heavy has no real means to escape from the Horsemann; the Buffalo Steak Sandvich and Gloves of Running Urgently take some time to prepare, especially if he is still firing upon being marked as "It". |
 Engineer |
vs |  Horseless Headless Horsemann |
Without a Sentry Gun, the Engineer is like the Scout, but slower, relying on his Shotgun for defense. The Engineer's Sentry Gun will still target the Horsemann, even if he is outside the normal targeting range. Although the Horsemann does not target buildings, he will still destroy any that are in his way; a Sentry Gun shielded by the Wrangler can provide a distraction for a moderate amount of time. |
 Medic |
vs |  Horseless Headless Horsemann |
The Medic is faster than the Horsemann and is thus capable of kiting him around the map. The standard ÜberCharge can be used to allow a teammate to freely attack the Horsemann, while the Kritzkrieg can deployed on a high-firepower class to deal massive damage. Although ÜberCharged players cannot be killed by the Horsemann, they can still be stunned by his "Boo!" taunt. |
 Sniper |
vs |  Horseless Headless Horsemann |
The Horsemann is immune to all headshots except those from the Huntsman, so the Sniper is best off firing charged shots from afar. The Horsemann is immune to debuffs, so weapons such as Jarate or Tribalman's Shiv are ineffective. |
 Spy |
vs |  Horseless Headless Horsemann |
The Spy is rather ineffective against the Horsemann; his standard weapons are weak while backstabs will only deal normal Knife damage. While the Horsemann is not fooled by disguises or invisiblity, the Dead Ringer can be used to take heavily reduced damage for a short period of time. |
See also
|