Difference between revisions of "Demoman weapons (competitive)"
GianAwesome (talk | contribs) m (→Loch-n-Load) |
|||
| Line 15: | Line 15: | ||
! class="header" | Weapon | ! class="header" | Weapon | ||
! class="header" | Damage | ! class="header" | Damage | ||
| − | ! class="header" | [[Critical]] Damage | + | ! class="header" | [[Critical hits|Critical]] Damage |
! class="header" | Function Times | ! class="header" | Function Times | ||
! class="header" | Special | ! class="header" | Special | ||
| Line 86: | Line 86: | ||
! class="header" | Weapon | ! class="header" | Weapon | ||
! class="header" | Damage | ! class="header" | Damage | ||
| − | ! class="header" | [[Critical]] Damage | + | ! class="header" | [[Critical hits|Critical]] Damage |
! class="header" | Function Times | ! class="header" | Function Times | ||
! class="header" | Special | ! class="header" | Special | ||
| Line 124: | Line 124: | ||
! class="header" | Weapon | ! class="header" | Weapon | ||
! class="header" | Damage | ! class="header" | Damage | ||
| − | ! class="header" | [[Critical]] Damage | + | ! class="header" | [[Critical hits|Critical]] Damage |
! class="header" | Function Times | ! class="header" | Function Times | ||
! class="header" | Special | ! class="header" | Special | ||
| Line 160: | Line 160: | ||
! class="header" | Weapon | ! class="header" | Weapon | ||
! class="header" | Damage | ! class="header" | Damage | ||
| − | ! class="header" | [[Critical]] Damage | + | ! class="header" | [[Critical hits|Critical]] Damage |
! class="header" | Function Times | ! class="header" | Function Times | ||
! class="header" | Special | ! class="header" | Special | ||
| Line 193: | Line 193: | ||
! class="header" | Weapon | ! class="header" | Weapon | ||
! class="header" | Damage | ! class="header" | Damage | ||
| − | ! class="header" | [[Critical]] Damage | + | ! class="header" | [[Critical hits|Critical]] Damage |
! class="header" | Function Times | ! class="header" | Function Times | ||
! class="header" | Special | ! class="header" | Special | ||
| Line 232: | Line 232: | ||
! class="header" | Weapon | ! class="header" | Weapon | ||
! class="header" | Damage | ! class="header" | Damage | ||
| − | ! class="header" | [[Critical]] Damage | + | ! class="header" | [[Critical hits|Critical]] Damage |
! class="header" | Function Times | ! class="header" | Function Times | ||
! class="header" | Special | ! class="header" | Special | ||
| Line 262: | Line 262: | ||
! class="header" | Weapon | ! class="header" | Weapon | ||
! class="header" | Damage | ! class="header" | Damage | ||
| − | ! class="header" | [[Critical]] Damage | + | ! class="header" | [[Critical hits|Critical]] Damage |
! class="header" | Function Times | ! class="header" | Function Times | ||
! class="header" | Special | ! class="header" | Special | ||
| Line 290: | Line 290: | ||
! class="header" | Weapon | ! class="header" | Weapon | ||
! class="header" | Damage | ! class="header" | Damage | ||
| − | ! class="header" | [[Critical]] Damage | + | ! class="header" | [[Critical hits|Critical]] Damage |
! class="header" | Function Times | ! class="header" | Function Times | ||
! class="header" | Special | ! class="header" | Special | ||
| Line 319: | Line 319: | ||
! class="header" | Weapon | ! class="header" | Weapon | ||
! class="header" | Damage | ! class="header" | Damage | ||
| − | ! class="header" | [[Critical]] Damage | + | ! class="header" | [[Critical hits|Critical]] Damage |
! class="header" | Function Times | ! class="header" | Function Times | ||
! class="header" | Special | ! class="header" | Special | ||
| Line 354: | Line 354: | ||
! class="header" | Weapon | ! class="header" | Weapon | ||
! class="header" | Damage | ! class="header" | Damage | ||
| − | ! class="header" | [[Critical]] Damage | + | ! class="header" | [[Critical hits|Critical]] Damage |
! class="header" | Function Times | ! class="header" | Function Times | ||
! class="header" | Special | ! class="header" | Special | ||
| Line 383: | Line 383: | ||
! class="header" | Weapon | ! class="header" | Weapon | ||
! class="header" | Damage | ! class="header" | Damage | ||
| − | ! class="header" | [[Critical]] Damage | + | ! class="header" | [[Critical hits|Critical]] Damage |
! class="header" | Function Times | ! class="header" | Function Times | ||
! class="header" | Special | ! class="header" | Special | ||
| Line 409: | Line 409: | ||
! class="header" | Weapon | ! class="header" | Weapon | ||
! class="header" | Damage | ! class="header" | Damage | ||
| − | ! class="header" | [[Critical]] Damage | + | ! class="header" | [[Critical hits|Critical]] Damage |
! class="header" | Function Times | ! class="header" | Function Times | ||
! class="header" | Special | ! class="header" | Special | ||
| Line 430: | Line 430: | ||
! class="header" | Weapon | ! class="header" | Weapon | ||
! class="header" | Damage | ! class="header" | Damage | ||
| − | ! class="header" | [[Critical]] Damage | + | ! class="header" | [[Critical hits|Critical]] Damage |
! class="header" | Function Times | ! class="header" | Function Times | ||
! class="header" | Special | ! class="header" | Special | ||
Revision as of 00:44, 29 January 2012
The arsenal at the disposal of the Demoman is arguably the largest damage dealing of the standard competitive lineup. This with the ability to deny access to choke points; blocking enemy retreats and being able to get on the front line potentially quicker than Scouts also makes him a very versatile class: being extremely useful on offense and defense.
One of the main issues with the Demoman is the inability to defend himself at close quarters, with both his standard weapons resulting in damaging himself as well as his target if set off within close proximity. Although there is a "close range combat kit" for the Demoman to utilize, the kit itself takes away the Demoman's main ability for areal denial and his sticky jumping function, denying him the ability to get to the front line quickly.
Primary Weapon
Grenade Launcher
The Grenade Launcher is the only available primary weapon for the Demoman besides the Loch-n-Load. The weapon itself is quite powerful being able to seriously cripple enemies if they are hit directly with it. The weapon also can be used effectively to injure enemies within a confined space, such as on a control point or taking up defensive positions at a choke point, such as Badlands choke which is quite a popular position to see Demomen spam grenades in order to discourage his enemy from attempting to hold the choke point.
Despite it's power, the launcher requires a great deal of aim and prediction -- more so than with the rocket launcher. Also, like the rocket launcher, if fired at an enemy point blank the Demoman will receive damage as well making this weapon very good at medium to long range but ineffective and counterproductive, at times, in close quarter combat.
| Weapon | Damage | Critical Damage | Function Times | Special |
|---|---|---|---|---|
| Grenade Launcher |
|
|
|
|
Loch-n-Load
The Loch-n-Load is the only other grenade launcher for the Demoman. It does slightly more damage than the Grenade Launcher and only holds two shots instead of four giving you an immense disadvantage. The weapon itself is quite powerful being able to seriously cripple enemies if they are hit directly with it. Unlike the Grenade Launcher the Loch-n-Load only carries two shots and the grenades will shatter harmlessly upon hitting anything other than an enemy player or building, causing no damage whatsoever. The grenades additionally deal increased self-damage to the Demoman who fired them, making close combat riskier. Making the Loch-n-Load more favorable in mid to long range combat.
| Weapon | Damage | Function Times | Special |
|---|---|---|---|
| Loch-n-Load |
|
|
|
Primary Weapon Usage
Seeing as the Loch N Load is banned the Grenade Launcher is the only primary weapon that can be used. The Grenade Launcher has the advantage that it can lay down spam, whereas the Loch N Load's grenades shatter as soon as they hit a surface, this takes a large chunk out of the Demoman's ability to deal out spam and deny areas to the enemy.
Secondary Weapon
The Demoman's secondary weapons comprise mostly of his main areal denial tools, his sticky bomb launchers, as well as part of his close combat kit.
Stickybomb Launcher
The second secondary weapon and arguably the weapon that makes the Demoman a very versatile class. The primary use of the sticky bomb launcher is to setup traps or hold choke points with traps. Demomen do this in two different ways: traps which the Demo would like his enemy to walk through are usually hidden from sight, above a doorway for instance, whilst if he is attempting to hold a choke point he will most likely place his stickies in plain sight of the enemy in order to either delay them or discourage them to pushing.
As well as it's denial capabilities, the launcher can get the Demoman to the front line extremely quickly through sticky jumps. On some maps such as Badlands and Granary, the Demoman is more than capable of arriving to mid a couple of seconds before his Scouts can. As discussed with the grenade launcher, however, the setting off a sticky within close proximity of himself will result in a damage backlash. Although the backlash tends to be a lot more aggressive, Demomen prefer the use of sticky bomb launchers at close quarters so they can control where their foe will move.
| Weapon | Damage | Critical Damage | Function Times | Special |
|---|---|---|---|---|
| Stickybomb Launcher |
|
|
|
|
Scottish Resistance
The Scottish Resistance, often abbreviated as "SR", is a much more defensive weapon that it's counterpart. With the ability to lay more stickies and with a higher attack speed, it allows Demomen to lay more traps a lot quicker. Another niche with the SR is the ability to select which Stickies should be set off so Demomen can have a number of traps without fearing that setting one trap off will set off the others he has placed. The launcher is usually only employed when teams wish to have extra defensive capabilities when defending last. SR Stickies also have the capabilities of destroying enemy stickies, both normal and SR ones, when they explode near them.
The one of the weaknesses with the Scottish Resistance however is the inability to Sticky Jump effectively, this along with the longer arm time make them fairly weak in the heat of battle and requires quite a lot of anticipation from the Demoman.
| Weapon | Damage | Critical Damage | Function Times | Special |
|---|---|---|---|---|
| Scottish Resistance |
|
|
|
|
Sticky Jumper
The Sticky Jumper deals no damage to any player, including its wielder, and, as its name suggests, is good for performing sticky-jumps across a map. However, it robs the Demoman using it of main area denial weapon. A possible use of the sticky jumper is to facilitate a back-cap attempt while using the Pain Train.
| Weapon | Damage | Critical Damage | Function Times | Special |
|---|---|---|---|---|
| Sticky Jumper |
All: 0 |
All: 0 |
|
Banned in most leagues for acquisition time. |
Chargin' Targe
- Note: This weapon is either limited or banned in some Team Fortress 2 leagues. Please check your league's rule page for details on their weapon restrictions.
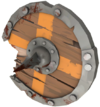
Part of the Demoman's "Close Combat Kit", the Chargin' Targe allows the Demoman to perform a charge for up to two seconds which grants him movement of 750 units per seconds, almost double that of the Scout. When one sixth of the way through his Charge the next melee attack will be a mini-crit and at half charge the attack will be a full crit, these must be used during the charge. Note that use of a melee attack during a charge will stop the charge. Enemies that are unfortunate to be in the way of a charge will receive between 50-100 damage, based on how many heads the Demoman has acquired.
The shield almost absorbs 50% of explosive and fire damage making him an effective counter to Soldiers.
| Weapon | Damage | Critical Damage | Function Times | Special |
|---|---|---|---|---|
| Chargin' Targe |
|
|
|
|
Secondary Weapon Usage
It is commonplace for Demoman to use the standard Stickybomb Launcher as their secondary weapon. The ability to get to the front line very quickly, lay traps and defend choke points make it an effective defensive weapon and its ability to cripple opponents and block off retreats makes it an effect offensive weapon as well. The SR is usually used by extremely defensive Demoman, usually at last point on a 5CP map, where getting into a defensive position won't be the main concern. That along with being able to cover as many entrances to the point as possible and selectively activating traps can be seen as a huge defensive boost.
The use of the Chargin' Targe is not unheard of in competitive play, but because the previous two weapons compliment the Demo's area denial capabilities it is rarely used. Solid Snake is possibly the only top Demoman to use the Chargin' Targe in a competitive game and do well with it. Even though he used it, it wasn't as effective as the Sticky Launcher and it has been banned in all the major leagues anyway.
Melee Weapon
The Demoman boasts a wide range of melee weapons, from standard weapons to ones which can transform his class entirely.
Bottle
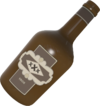
The Bottle is the Demoman’s standard melee weapon. Like other standard melee weapons, it deals moderate damage. It is seen as a last resort in close range combat although some Demos prefer to use it rather than the Grenade Launcher and Stickybomb Launcher as it can deal decent damage but has no backlash.
The Frying Pan and the Scottish Handshake are reskins of the Bottle and therefore have the same stats as the Bottle.
| Weapon | Damage | Critical Damage | Function Times | Special |
|---|---|---|---|---|
| Bottle |
|
|
|
|
Eyelander
- Note: This weapon is either limited or banned in some Team Fortress 2 leagues. Please check your league's rule page for details on their weapon restrictions
Another part of the close combat kit, the Eyelander enjoys a much larger attack range than any other melee weapon. Kills with the Eyelander will result in a health and speed boost, capped at 210hp and 369 u/s. With the Targe, heads collected will also increase the damage the shield's attack will do, capped at 100. When the Demoman dies the kills with the Eyelander will be reset. The drawback to using the Eyelander is the Demos will start on 150hp, 25 less than normal, and only after two kills will he have increased health.
The Horseless Headless Horsemann's Headtaker and the Nessie's Nine Iron are reskins of the Eyelander and therefore have the same stats as the Eyelander.
| Weapon | Damage | Critical Damage | Function Times | Special |
|---|---|---|---|---|
| Eyelander |
|
|
|
|
Claidheamh Mòr
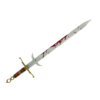
Like the Eyelander, the Claidheamh Mòr has an increased melee range. However, it extends charge time by 0.5 seconds, and only reduces health by 15, contrary to the 25 health reduction of the Eyelander. The only bad note is that it does not collect heads and increase stats, in the fashion of the Eyelander.
| Weapon | Damage | Critical Damage | Function Times | Special |
|---|---|---|---|---|
| Claidheamh Mòr |
|
|
|
|
Persian Persuader
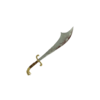
The Persian Persuader, like the other swords, does not deal crits. However, all collected ammo becomes health. It also doubles the recharge rate of charge.
| Weapon | Damage | Critical Damage | Function Times | Special |
|---|---|---|---|---|
| Persian Persuader |
|
|
|
|
Pain Train
- Note: This weapon is either limited or banned in some Team Fortress 2 leagues. Please check your league's rule page for details on their weapon restrictions
The Pain Train is designed for the more offensive Demoman. The item doubles his capture rate allowing him to support Scouts capping points and can be used to fool enemies that a Scout is capping one of their points when it is a Demoman. The downside is that the Demoman is 10% more susceptible to bullet damage. Demos should take care in trying not to reveal his item and also should remember his extra vulnerability to Scouts and stickies covering his back maybe an option.
The Pain Train is the only viable alternative melee weapon for the competitive Demoman as it allows him to keep the same speed and starting health but gives him a quicker cap speed. The 10% extra bullet damage is only really a problem if the enemy Scouts are better than yours and are running amok.
Attack wise, the Pain Train is a standard melee weapon. Dealing moderate damage at the usual 0.8 seconds a swing.
| Weapon | Damage | Critical Damage | Function Times | Special |
|---|---|---|---|---|
| Pain Train |
|
|
|
|
Scotman's Skullcutter
- Note: This weapon is either limited or banned in some Team Fortress 2 leagues. Please check your league's rule page for details on their weapon restrictions
At the sacrifice of movement speed, now decreased by 15% to 238 u/s, the Skullcutter has increased damage output. Apart from this, the Skullcutter has a standard swing rate and radius.
| Weapon | Damage | Critical Damage | Function Times | Special |
|---|---|---|---|---|
| Scotman's Skullcutter |
|
|
|
|
Half-Zatoichi
- Note: Half-Zatoichi is banned in some leagues for acquisition time.
Once the Half-Zatoichi has been selected it is impossible to change to another weapon until you kill an enemy. When you have killed someone you regain all of your lost health. If you encounter an enemy Demoman or Soldier also using this weapon then it is a one hit kill.
| Weapon | Damage | Critical Damage | Function Times | Special |
|---|---|---|---|---|
| Half-Zatoichi |
Melee: 65 | Critical: 195/Instant Mini-Crit: 88 |
Attack: 0.8s | Banned in some leagues for acquisition time. On kill: restores you to 100% health This weapon is Honorbound and once drawn cannot be sheathed until it kills. |
Ullapool Caber
While the Ullapool Caber deals less damage than other melee weapons, and does not deal random crits, it explodes upon contact, dealing in excess of 170 damage, useful for clearing a small area. The explosion also provides an alternate method of sticky jumping, just in case the user is equipped with a Chargin' Targe or a Splendid Screen.
| Weapon | Damage | Critical Damage | Function Times | Special |
|---|---|---|---|---|
| Ullapool Caber |
|
|
|
|
Melee Weapon Usage
The use of the different melee weapons is limited by the unlocks that the different leagues use, mostly they choose to ban the following: the Scotmans Skullcutter, the Eyelander and the Half-Zatoichi. This only leaves the Demoman with a choice of two melee weapons: the vanilla Bottle, or the Pain Train. This is largely a matter of playstyle and how the other team are. If your Scouts have their opposite numbers under control and you aren't being completely focused by the enemy team then the Pain Train is a viable choice. However, if you find over the course of the match that you need the extra health because the enemy scouts are attacking you a lot then the Bottle is a safer choice.
It also depends on whether you cap a lot of points or not, if you don't then it's silly to be taking more damage against bullets when you don't use it enough. In this case the Bottle is also your best choice.
See Also
| |||||


