Difference between revisions of "Freak Fortress 2"
(Cleaned up Gabe Newell, added The Rock.) |
m |
||
| Line 217: | Line 217: | ||
{{Quotation|Gabe Newell|Welcome to Team Fortress 2. After 9 years in development, hopefully it will have been worth the wait. Thanks and have fun.|sound=Welcome to Team Fortress 2.mp3}} | {{Quotation|Gabe Newell|Welcome to Team Fortress 2. After 9 years in development, hopefully it will have been worth the wait. Thanks and have fun.|sound=Welcome to Team Fortress 2.mp3}} | ||
[[File:Gabe_newell_FF2.png|right|thumb|200px|One of two forms of Gabe Newell in-game]] | [[File:Gabe_newell_FF2.png|right|thumb|200px|One of two forms of Gabe Newell in-game]] | ||
| − | |||
*This is based upon the well-known CEO of Valve Corporation, Gabe Newell, who is well known throughout the Steam community as Gaben. The boss in-game will either be a [[Pyro]] using a custom-rigged skin or a [[Heavy]] that is wearing several cosmetics and a grey shirt. The music used during this boss is a playlist of music remixes using "Gaben" in the song. | *This is based upon the well-known CEO of Valve Corporation, Gabe Newell, who is well known throughout the Steam community as Gaben. The boss in-game will either be a [[Pyro]] using a custom-rigged skin or a [[Heavy]] that is wearing several cosmetics and a grey shirt. The music used during this boss is a playlist of music remixes using "Gaben" in the song. | ||
Revision as of 17:39, 22 August 2016
| “ | The world will thank me for this, you monster!
Click to listen
— The Spy on fighting freaks
|
” |
Freak Fortress 2 is a modification that extends the concept of VS Saxton Hale Mode. Like the original Saxton Hale mod, the mod changes the rules of Arena maps, making all players fight against a single, but very powerful boss.
Bosses are based on Community fads. Each has different abilities, but they share similar concepts and rules. All of them have relatively large amounts of health points, which varies, depending on the amount of opposing players. They are restricted to using melee attacks, though they deal a large amount of damage -- 210±10 points per hit -- enough to kill most classes in a single hit.
Bosses can also have forms of advanced movement, such as super-jump. They can also build "Rage" when damaged. When their rage meter is full, they can unleash a powerful attack, which causes an effect that varies depending on the boss they are playing as.
Contents
Gameplay demonstration
Strategy
Strategies against FF2 bosses are almost the same as strategies in VS Saxton Hale Mode.
Balance
Similar to VSH mode, Freak Fortress 2 has some weapon attributes changed.
All classes
 Scout
Scout
- The Shortstop's reload time penalty is removed.
- The Baby Face's Blaster will fill the Boost meter normally, but when it reaches 100 percent, it will drain and the player grants mini-crits for a short amount of time.
- The Crit-a-Cola grants full Crits instead of Mini-crits.
- The Candy Cane causes a small health pack to appear on hit.
- All pistols deal mini-crits.
- The Fan O' War removes 5% of the enemy character's rage per hit.
- The Wrap Assassin bauble can now be thrown twice before having to recharge.
 Soldier
- All Soldier primary and secondary weapons (excluding the Cow Mangler 5000 and the Righteous Bison) will perform Mini-crits against an airborne boss (the weapons Mini-crit airborne targets for up to 99999 seconds after weapon switch).
- The Direct Hit performs Crits instead of Mini-crits.
- The Rocket Jumper is not allowed and is replaced with the Rocket Launcher.
- The Air Strike gain clip sizes on every 200 damage instead of on kill.
- The Gunboats reduce fall damage by 90%..
- The Battalion's Backup's meter will completely fill upon being hit. When used, will block a massive amount of damage from bosses against the player and teammates within the buff radius.
- The Mantreads reduce fall damage by 90% and increase rocket jump distance.
- The Reserve Shooter has slightly increased damage and weapon switching speed.
- The Half-Zatoichi heals 35 health on hit and can overheal the player by up to 25 health. The weapon can be sheathed after a hit.
 Pyro
Pyro
- The Phlogistinator's buff will cause the player to become invulnerable and take great knock back during the taunt.
- The Flare Gun and Detonator are replaced with a "Mega-Detonator", a customized Flare Gun that behaves like a Detonator, but allows for a very large Flare Jump at the expense of greater self-damage from explosions. The flare jump will propel the user a large distance regardless of whether it is detonated via alt-fire or via the flare exploding on contact with an object.
- The Reserve Shooter has slightly increased damage and weapon switching speed.
- The Axtinguisher and Postal Pummeler are not allowed and are replaced with the Fire Axe.
 Demoman
- The Chargin' Targe, Splendid Screen and Tide Turner block one hit from any boss, after which they are removed from the player for the duration of the round. All shields also grant the user Crits on primary weapons.
- The Sticky Jumper is not allowed and is replaced with the Stickybomb Launcher.
- The Tide Turner recharges after each hit, instead of each kill.
- The Eyelander, Horseless Headless Horsemann's Headtaker, and Nessie's Nine Iron collect a head from each hit, instead of each kill.
- The Half-Zatoichi heals 35 health on hit and can overheal the player by up to 25 health. The weapon can be sheathed after a hit.
 Heavy
Heavy
- The Natascha is not allowed and is replaced with the Minigun.
- The Killing Gloves of Boxing, the Gloves of Running Urgently and the Bread Bite are modified to allow the Heavy to run at 50% greater speed, but deal 7 damage per second while active. They do not add Mini-crits.
- The Fists of Steel are not allowed and are replaced with Fists.
 Engineer
- Metal from pickups is limited, as only small ammo pickups are available. The player may also gets metal from Dispenser.
- The Frontier Justice deals Crits as long as the Engineer's Sentry Gun is targeting the boss.
- All pistols deal mini-crits.
- The Short Circuit's beam will temporarily stun the boss.
- The Eureka Effect is not allowed and is replaced with the Wrench
 Medic
Medic
- The Medic spawns with 40% ÜberCharge, and after each ÜberCharge, gains 40% Übercharge automatically.
- All syringe guns are replaced with custom Syringe Gun, which grants +5% ÜberCharge on hit.
- The Crusader's Crossbow always performs Critical hits, deals 50% extra damage, and gains 10% ÜberCharge on each successful hit.
- All secondary weapons are replaced with custom Kritzkrieg that has a 25% faster Übercharge rate and gain the Disciplinary Action speed boost effect while healing the Scout. ÜberCharge grants both invulnerability and critical hits to both the Medic and the patient, and lasts 50% longer than a normal Übercharge.
 Sniper
- All Sniper's primary weapons do 2.9x damage.
- The Sniper Rifle outlines the boss (so that other players can locate him) for several seconds. The time added to the glow timer scales based on the charge of the shot.
- The Huntsman and the Fortified Compound deal 50% extra damage.
- The Sydney Sleeper does 2.4x damage against the boss when the boss's rage is less than 90 percent. When it goes over 90 percent, it does 2.9x damage.
- The Bazaar Bargain is not allowed and is replaced with the Sniper Rifle.
- The Hitman's Heatmaker gains Focus on hit. The amount of Focus gained varies by the charge of the shot.
- SMG always performs Critical hits.
- The Jarate and Self-Aware Beauty Mark removes 8% of the enemy character's rage.
- The Razorback, Darwin's Danger Shield and Cozy Camper are not allowed and are replaced with the SMG.
- The Cozy Camper, along with its attributes, also gives the player a custom SMG that deals 15% less damage and does not randomly Crit. It is also not granted Critical hits by the gamemode.
 Spy
Spy
- A backstab from any melee weapon deals roughly 10% of the enemy character's max health in damage.
- Upon a successful backstab, both the Spy and the boss are alerted, and a Razorback effect is applied to the Spy, disabling attack for two seconds.
- All secondary weapons deal Mini-crits.
- A successful backstab with the Your Eternal Reward or Wanga Prick disguises the Spy as a random teammate.
- A successful backstab with the Conniver's Kunai adds 60 health to the Spy, and overheals up to 250 health.
- The Invis Watch, Enthusiast's Timepiece and Quäckenbirdt provides damage resistance while cloaked and also reduce the player's Cloak meter to 40% while uncloaked.
- The Cloak and Dagger is not allowed and is replaced with the Enthusiast's Timepiece.
- The Dead Ringer does not provide damage resistance while cloaked. When activated by an attack by any boss, will cause the player to take approximately 62 damage, instead of 10% of the boss's punch damage. Uncloaking with the Dead Ringer will not reduce the player's Cloak meter to 40%.
Bosses
Bosses have several advantages over regular players, assisting them with taking on entire teams. Some abilities are specific to certain bosses, but they all have the following:
- Super Jump: To use the super jump, hold down the right mouse button while looking upwards and then release it. The Super Jump is a very high jump, giving similar height to a rocket jump. This allows the boss to reach certain areas, or to surprise players by attacking from an unexpected angle. The longer the button is held down, the higher the jump will be. This also allows the boss to escape pits that would normally kill a player. When in such a hazard, the jump becomes much stronger, and is called a Super Duper Jump.
- Weighdown: To use this ability, crouch and look down while in mid-air. Causes the boss to fall much faster than normal players. This makes it much harder to juggle the boss.
- Speed up: Most bosses have a similar ability to The Escape Plan, causing them to speed up as they are injured. By default, bosses begin the round with the movement rate of a Medic (107%), which increases to that of a Scout (133%) when severely injured.
- Rage: Bosses have a rage meter, which builds when they take damage. When the rage meter is full, the boss can execute a taunt with a devastating effect. The effect is different for each boss, but all taunts will scare players within a certain radius. Rage requires 1900 damage by default to build a full charge.
- Health: Bosses have a massive amount of health, which increases with the number of players. The basic health formula is:
[(460+n)×n]1.075 where n is the number of players.
Certain bosses may have more or less health than the default. For example, the Ninja Spy has a third of the health of other bosses, using the formula: [(460+n)×n]1.075/3
Christian Brutal Sniper
| “ | It's like Christmas morning...
Click to listen
— Christian Brutal Sniper on the hunt.
|
” |
- Health formula: [(460+n)×n]1.075
- Super Jump & Weighdown
- Rage: The Sniper gets a Huntsman and 9 arrows.
- Scare radius — ~9 meters.
- 1900 damage to activate.
Demopan
| “ | Stout Shako for two refined!
Click to listen
— Demopan on effective trading.
|
” |
- Health formula: [(460+n)×n]1.075
- Super Jump & Weighdown
- Rage: The Demopan's rage fills every opponent's screen temporarily with fake trade requests, blocking their screen.
- Scare radius — 15 meters.
- 1900 damage to activate.
- Charge: The Demopan charges. This is the same as the ability of the Chargin Targe. This is used by reloading as the RMB is already bound to the rage taunt. This ability drains rage and is only possible if the Demopan has between 10% and 90% rage.
- Unlike other bosses, the Demopan has the move speed of a regular Demoman (93%).
- An enemy killed by the Demopan turns into a Stout Shako.
Vagineer
| “ | Grrrrr...!
Click to listen
— Vagineer on everything.
|
” |
- Health formula: [(460+n)×n]1.075
- Super Jump & Weighdown
- Rage: The Vagineer is Übercharged for 10 seconds.
- Scare radius — 10 meters.
- 1900 damage to activate.
- Enemies killed by the Vagineer are vaporized - the same death effect as the Cow Mangler 5000's.
Seeman and Seeldier
| “ | See?
Click to listen
— Seeman asking Seeldier about all the dead bodies around
|
” |
- Seeman and Seeldier appear together, played by different players. They are individually weaker than the other bosses, but they make up for this by working together.
- Health formula: [(460+n)×n]1.075/2.8 : Seeman and Seeldier each have a little more than a third of the health of another boss.
- Super Jump & Weighdown
- Rage (Seeman): Seeman stuns nearby players and then kills them in a large series of explosions. The boss cannot move, and, visually, the Seeman's limbs spin rapidly out of control for the duration of the rage.
- Scare/Blast radius — 13 meters.
- 1900 damage to activate.
- Rage (Seeldier): All players who have been previously killed are resurrected as clones of the Seeman, but with much less health and no special abilities. If Seeldier dies, all these minions die.
- Scare radius — 15 meters
Ninja Spy
| “ | I'm Ninja Spy... and you SUCK!
Click to listen
— Ninja Spy on your skill.
|
” |
- Health formula: [(460+n)×n]1.075/3 : Ninja Spy has a third of the health of other bosses, but makes up for it with his 3 lives.
- Super Jump & Weighdown
- Rage: Ninja Spy's rage only scares players, but has a longer range than most other bosses. It also builds slower; a full charge takes 2500 damage instead of 1900.
- Scare radius — 18 meters.
- 1900 damage to activate.
- 3 lives: The Spy has three lives. When he would be killed on his first and second, he is restored to full health and time slows down for 10 seconds. During this time, he can teleport to players.
VS Saxton Hale Mode bosses
Saxton Hale
| “ | The name's Saxton Hale! Australian, C.E.O. of MANN Co. and the man who's gonna burn this place to the ground!
Click to listen
— Saxton Hale
|
” |
- Health formula: [(460+n)×n]1.075
- Super Jump & Weighdown
- Rage: Nearby Enemies are scared.
- Scare radius — 20 meters
- Hale has the largest scare radius of any default boss.
- 1900 damage to activate.
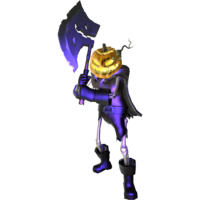
Headless Horseless Horsemann Jr.
- Health formula: [(460+n)×n]1.075
- Teleportation & Weighdown
- Rage: Nearby Enemies are scared
- Scare radius — 17 meters.
- 1900 damage to activate.
- Teleportation: Instead of a superjump, the Horsemann can teleport to the last person that damaged him. The teleport requires a much longer time to recharge, which scales with use. The Horsemann is temporarily stunned after teleporting.
The Easter Bunny
| “ | It's on! It's on like... huh? Wha-?
Click to listen
— The Easter Bunny
|
” |
- Health formula: [(460+n)xn]1.075
- Super Jump & Weighdown
- Rage: Nearby Enemies are scared, and the Easter Bunny projects around him several explosive eggs (Loose Cannon grenades) that do the same amount of damage as a Demoman's crit grenade.
- Scare radius — ~10 meters.
- 1900 damage to activate.
- The Easter Bunny is affected by Sentry Gun bullets' projection, whereas the other Hales can stand in front of them.
Community bosses
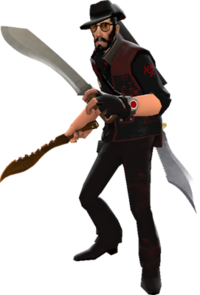
Freak Fortress 2 was created to make the possibility of creating your own bosses easier, allowing server administration to add content inside the mod without ruining the system itself. Instructions on how to add bosses can be found here
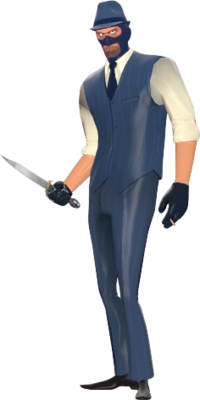
GentleSpy
| “ | Gentlemen.
Click to listen
— The Spy
|
” |
- Health formula: [(760+n)×n]1.04
- Teleportation & Weighdown
- No Super Jump
- Rage: Nearby Enemies are changed to other team for about 5 seconds. Ubercharge for 5 seconds. Instant teleportation to the random enemy. Ambassador with 3 bullets.
- Scare radius — 12 meters.
- 2500 damage to activate.
Gabe Newell
| “ | ” |
- This is based upon the well-known CEO of Valve Corporation, Gabe Newell, who is well known throughout the Steam community as Gaben. The boss in-game will either be a Pyro using a custom-rigged skin or a Heavy that is wearing several cosmetics and a grey shirt. The music used during this boss is a playlist of music remixes using "Gaben" in the song.
- Health formula: [(460+n)×n]1.04
- Super Jump & Weighdown
- Rage: Valve Time (Slowdown): Gabe Newell slows down time while melee attacks launches him to a nearby player. This is a reference to the extreme delay of many Valve products/games.
- Scare radius — 12 meters.
- 2500 damage to activate.
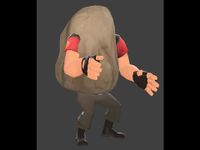
The Rock
- Can you stop The Rock?
- Health formula: [(460+n)×n]1.075
- Super Jump & Weighdown
- Rage: Nearby Enemies are scared.
Bugs
- In certain editions, bosses will drop the corpse of a "real" class after death.
- In other editions, bosses with two color variants (Bosses that have skins for both RED and BLU, such as the Vagineer) drop the corpse of the other teams' skin of that boss.
- The items Schadenfreude, Director's Vision, High Five!, and Shred Alert can be used by the bosses but lack facial animations when used.
- Demopan's Trade Spam ability may conflict with other server plugins using the in-game command r_screenoverlay. If this is the case, it may display incorrectly.
- If by the time Seeldier performs rage Seeman is dead, he will respawn with 1 hp.
- On exceedingly rare occasions the boss will appear to have a negative amount of health.
Trivia
- This mod was created by RainBolt Dash in April 2012, based on VS Saxton Hale Mode's 1.38 version, which he also created. Versus Saxton mode is now under development by FlaminSarge.
- All of the default bosses are based on community fads, excluding Saxton Hale and Headless Horseless Horsemann Jr.
See also
External links
- Freak Fortress 2 mod on AlliedMods
- Updated Freak Fortress 2 mod on AlliedMods
- VSH mod on AlliedMods
- Random Fortress, the birthplace of the VSH and FF2 mods. (Archived 29/3/2013)
- Official VSH and FF2 Steam group
| |||||


