|
|
| Line 23: |
Line 23: |
| | | class="small" align="center" valign="center" style="padding:0.5em" |[[Image:Leaderboard_class_scout.png|40px]] [[Speed]] | | | class="small" align="center" valign="center" style="padding:0.5em" |[[Image:Leaderboard_class_scout.png|40px]] [[Speed]] |
| | | | | | |
| − | *The Pyro is only useful at close range, so he will try to get close to you by chasing you down. If you are retreating, don't try to backtrack as much since he can catch up with ease. | + | *The Pyro is only useful at close range, so he will try to get close to you by chasing you down. The Pyro moves at the standard speed, so you can retreat while attacking in order to avoid damage. |
| | |- | | |- |
| | | class="small" align="center" valign="center" style="padding:0.5em" |[[Image:Leaderboard_class_soldier.png|40px]] [[Weapons|Power]] | | | class="small" align="center" valign="center" style="padding:0.5em" |[[Image:Leaderboard_class_soldier.png|40px]] [[Weapons|Power]] |
Revision as of 20:53, 7 January 2011
The Pyro is a class that is extremely dangerous at close range. Generally, the best way to engage a Pyro is from a distance because the Pyro lacks substantial ranged weaponry. The Pyro excels in close-quarters combat so try and fight him in the open, away from areas where he can trap you. Keep in mind that a Pyro can use his compression blast ability to deflect projectiles back at you, assuming he is not using a Backburner.
General
 Role Role
|
- Pyros are most successful when they ambush their opponents. If you see them coming, prepare for them! Set up your own ambush, position yourself in a spot with a good escape route if things go awry, or retreat to a more suitable location.
|
 Health Health
|
- The Pyro has an above average amount of health, and with their excellence at close range combat they can be a hassle to take down if you attract their attention.
|
 Speed Speed
|
- The Pyro is only useful at close range, so he will try to get close to you by chasing you down. The Pyro moves at the standard speed, so you can retreat while attacking in order to avoid damage.
|
 Power Power
|
- Keeping your distance will negate much of the Pyro's strength. The Flare Gun is the Pyro's only long-range weapon, and it is slow to fire and can be hard to score hits with, especially in open areas. The only other ranged weapon the Pyro has is the standard Shotgun, which is only viable at short or moderate distances.
|
Weapon Specific
A list of useful tidbits about the Pyro's tools, and how to counter them.
Primary Weapons
Secondary Weapons
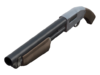
Shotgun
|
- Like the other standard Shotguns, this weapon is only truly effective at mid-range or closer due to bullet spread. Most classes have much more dangerous ranged weapons to use if the Pyro is forced to engage you from a distance.
|

Flare Gun
|
- This weapon is slow to fire and can be difficult to score a hit with. While it can set you on fire, the damage from the flare itself is low and it will take time for the Pyro to hit you again with it. Further, the flare is very easy to avoid in open areas.
- Most Pyros use this weapon as a long-range harassment weapon. It should be easy enough to find a body of water, a Dispenser, or a Medic without having to fight the Pyro up-close. If you do get lit on fire, keep your distance from the Pyro so they can't insta-kill you with the Axtinguisher.
|
Melee Weapons
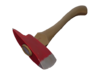
Fire Axe
|
- Most Pyros will use their Axtinguisher instead of the Fire Axe. If a Pyro is using this, he's either counting on a random Critical hit or he's out of Flamethrower ammunition. Use this to your advantage and press your attack.
|

Axtinguisher
|
- This is arguably the Pyro's most dangerous weapon as it usually only takes one hit to kill most classes. You won't usually see the Pyro use this weapon unless you're on fire and in close range of the Pyro because it deals very little damage to a non-burning target.
- Heavies and overhealed Soldiers usually take two (or sometimes three) hits before dying to this weapon. If you're being healed by a Medic, be sure to hit the Pyro with everything you have as that extra second or two can make the difference between life and death.
|
Homewrecker
|
- The Homewrecker does decreased damage to players making it less effective as a melee weapon.
- Watch your buildings or Sappers though, as if a Pyro with the Homewrecker gets close to them, he can easily destroy them due to the increased damage.
|
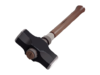
Powerjack
|
- Pyros tend to use this weapon in a similar manner as an Axtinguisher; they will light you on fire and attempt to finish you off with the Powerjack in order to gain back health. However, as there are no Critical hits for Pyros wielding the Powerjack, this tactic gives you extra time to deal more damage and hopefully finish off the Pyro before they can kill you. Keep in mind that this weapon does significantly more damage than most melee weapons.
|
Back Scratcher
|
- The Back Scratcher makes it harder for a Pyro/Medic combo to be effective because the Pyro will heal much slower. This makes it a lot easier to take out the Pyro first rather than trying to get around him to kill the Medic.
- Keep in mind, however, that it does more damage than normal melee weapons with the addition of Critical hits.
- If there are medkits around the area, take them as soon as you get damaged, as the the health of the Pyro is replenished more quickly when he takes a medkit with the Backscratcher equipped.
|
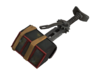
Class Set
The Gas Jockey's Gear
|
- The Pyro has 10% more bullet vulnerability while using this set. Use the Pistol or Shotgun to harass him at long range, and prevent him from getting into close quarters with his extra movement speed.
|
See also


