Difference between revisions of "Anti-Pyro strategy"
m |
m (replaced: Anti-Pyro Strategy → Anti-Pyro strategy (5)) |
||
| Line 8: | Line 8: | ||
{| class="wikitable grid" cellpadding="0" cellspacing="0" | {| class="wikitable grid" cellpadding="0" cellspacing="0" | ||
! class="header" colspan="1" width="200"| Attributes | ! class="header" colspan="1" width="200"| Attributes | ||
| − | ! class="header" colspan="1" width="800"| Anti-Pyro | + | ! class="header" colspan="1" width="800"| Anti-Pyro strategy |
|- | |- | ||
| class="small" align="center" valign="center" style="padding:0.5em" |[[Image:Pyro_badge_RED.png|40px]] [[Classes|Role]] | | class="small" align="center" valign="center" style="padding:0.5em" |[[Image:Pyro_badge_RED.png|40px]] [[Classes|Role]] | ||
| Line 42: | Line 42: | ||
{| class="wikitable grid" cellpadding="0" cellspacing="0" | {| class="wikitable grid" cellpadding="0" cellspacing="0" | ||
! class="header" colspan="1" width="200"| Weapon | ! class="header" colspan="1" width="200"| Weapon | ||
| − | ! class="header" colspan="1" width="800"| Anti-Pyro | + | ! class="header" colspan="1" width="800"| Anti-Pyro strategy |
|- | |- | ||
| class="small" align="center" valign="center" style="padding:0.5em" | {{Table icon|Flamethrower}} | | class="small" align="center" valign="center" style="padding:0.5em" | {{Table icon|Flamethrower}} | ||
| Line 66: | Line 66: | ||
{| class="wikitable grid" cellpadding="0" cellspacing="0" | {| class="wikitable grid" cellpadding="0" cellspacing="0" | ||
! class="header" colspan="1" width="200"| Weapon | ! class="header" colspan="1" width="200"| Weapon | ||
| − | ! class="header" colspan="1" width="800"| Anti-Pyro | + | ! class="header" colspan="1" width="800"| Anti-Pyro strategy |
|- | |- | ||
| class="small" align="center" valign="center" style="padding:0.5em" | {{Table icon|Shotgun}} | | class="small" align="center" valign="center" style="padding:0.5em" | {{Table icon|Shotgun}} | ||
| Line 90: | Line 90: | ||
{| class="wikitable grid" cellpadding="0" cellspacing="0" | {| class="wikitable grid" cellpadding="0" cellspacing="0" | ||
! class="header" colspan="1" width="200"| Weapon | ! class="header" colspan="1" width="200"| Weapon | ||
| − | ! class="header" colspan="1" width="800"| Anti-Pyro | + | ! class="header" colspan="1" width="800"| Anti-Pyro strategy |
|- | |- | ||
| class="small" align="center" valign="center" style="padding:0.5em" | {{Table icon|Fire Axe}} | | class="small" align="center" valign="center" style="padding:0.5em" | {{Table icon|Fire Axe}} | ||
| Line 132: | Line 132: | ||
{| class="wikitable grid" cellpadding="0" cellspacing="0" | {| class="wikitable grid" cellpadding="0" cellspacing="0" | ||
! class="header" colspan="1" width="200"| Set | ! class="header" colspan="1" width="200"| Set | ||
| − | ! class="header" colspan="1" width="800"| Anti-Pyro | + | ! class="header" colspan="1" width="800"| Anti-Pyro strategy |
|- | |- | ||
| class="small" align="center" valign="center" style="padding:0.5em" | [[File:Backpack Pyro Bundle.png|100px|The Gas Jockey's Gear Set]] | | class="small" align="center" valign="center" style="padding:0.5em" | [[File:Backpack Pyro Bundle.png|100px|The Gas Jockey's Gear Set]] | ||
Revision as of 18:58, 16 August 2011
| “ | Go to hell and tell the devil I'm comin' for him next!
Click to listen
— The Demoman
|
” |
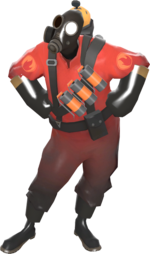
The Pyro is a class that is extremely dangerous at close range. Generally, the best way to engage a Pyro is from a distance because the Pyro lacks substantial ranged weaponry. The Pyro excels in close-quarters combat so try and fight him in the open, away from areas where he can trap you. Keep in mind that a Pyro can use his compression blast ability to deflect projectiles back at you.
Contents
General
| Attributes | Anti-Pyro strategy |
|---|---|
| |
| |
| |
|
Weapon Specific
A list of useful tidbits about the Pyro's tools, and how to counter them:
Primary Weapons
- Compression blast
- Pyros will often panic when confronted by a Soldier or Demoman and immediately use their compression blast to deflect projectiles. Fire your rockets or grenades immediately after the airblast to hit the Pyro and avoid being killed by your own weapon.
- You can often cause an enemy Pyro to waste ammunition by firing projectiles off to the side where they can not be reflected despite attempts to do so.
- Do not fire your explosives straight at the enemy Pyro. This makes it easier for him to both aim and reflect them. Aim near the Pyro and use splash damage instead.
- Each airblast takes 20 units of ammo out of 200 total (unless it's a Backburner, which uses 50 units of ammo). Try and make the Pyro waste ammo by firing projectiles into the ground just short of the Pyro before making your actual attack; this also has the benefit of not allowing the Pyro to hit you with your own projectile. The Pyro may already be low on ammo and will have to switch to a much weaker weapon.
- Avoid fighting or retreating near cliffs or dangerous objects such as the Sawblades in Sawmill when fighting a Pyro. A proficient Pyro will use the compression blast ability to kill you instantly via environmental damage.
| Weapon | Anti-Pyro strategy |
|---|---|
Flame Thrower |
|
Backburner |
|
Degreaser |
|
Secondary Weapons
| Weapon | Anti-Pyro strategy |
|---|---|
Shotgun |
|
Flare Gun |
|
Detonator |
|
Melee Weapons
| Weapon | Anti-Pyro strategy |
|---|---|
Fire Axe |
|
| |
| |
Powerjack |
|
Back Scratcher |
|
Sharpened Volcano Fragment |
|
Class Set
See also
|

