| Steel
|

|
| 資訊
|
| 開發者: |
未知
|
| 地圖資料
|
| 所處地區: |
工業區
|
| 環境設定: |
白天,晴朗
|
| 特定致死因素: |
深坑
|
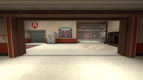
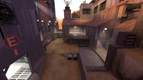
| 地圖相片
|
|
|
| 地圖的俯瞰圖
|
|
|
| 地圖郵票
|
|
| 贊助者排行榜
|
Steel(冽鋼要塞)是一張結構複雜的攻擊/防禦控制點模式地圖,有著獨特的遊戲進行方式。和其他 TF2 地圖不同,在這張地圖中,成功地佔領控制點會使地圖的結構與動線改變。因此,攻方進攻最終控制點的戰略路線會隨著佔領控制點的數量進展變得越來越多樣。又一與其它 TF2 線性控制點地圖(五點對稱地圖)的相異處是,攻方([[BLU/zh-hant|藍隊)能夠隨時攻佔最終控制點,無視其他週邊控制點的佔領進度。然而,若藍隊能夠佔領越多控制點,就能夠開啟越多能通往最終控制點(E 點)的路徑。藍隊是要剛開局就派出偵察兵和火箭兵正攻最終控制點呢?還是要先行佔領周邊控制點以開啟更多路徑?或是要佔領所有周邊控制點以封鎖守方的動線?諸如此類的多樣抉擇使這張地圖能讓玩家保有很長一段時間的新鮮感,並提供各式各樣的遊戲經驗。
Steel 是為 Valve 所選為榮譽官方地圖的高品質社群地圖之一。
The goal of Steel is for BLU to capture point E in order to win the round. Point E is always in play. BLU can capture it at any time. Capturing points A, B, C and D will make E easier to take!
Capturing A opens additional paths to B and E. Capturing B moves RED's spawnroom and also opens an additional route to C. Capturing C extends bridges to E. Capturing D blocks RED from easily reaching E, and extends guardrails on the bridges. Watch out for the pit!
Introduction video
Locations

Overview of the map. (Large file)
Spawn Areas
BLU's Staging Area: A train station at the very bottom of the map. The base has three exits, two to Command Point A (one low and one high), and one to Command Point B. From spawn orientation, Point A is to the right and point B is to the left.
RED's Initial Spawn: A small room with exits leading to A, B and E. From spawn orientation, A is to the left, B is to the right and E is forward.
RED's Second Spawn: After BLU captures point B, RED is forced to spawn between points C and D. From spawn orientation, C is to the left, D is to the right and E is forward. After BLU captures point D, the exit to E is closed off.
Control Points
Shipping Dock (Point A): Point A is a shipping dock located directly to the left of RED's initial spawn. BLU is required to climb up a short hill to get to the point at the top, while a couple of walls surrounding the point prevent RED from directly firing at the point. The higher exit from BLU's base leads to the top of a wall. Capturing point A immediately opens a door to the right of the point leading to B, as well as a slow-opening door directly on the point that leads to D and E. RED spawn's door to A becomes sealed.
Truck Yard (Point B): Point B is located to the right of RED's initial spawn and is partially protected by a small wall facing the RED spawn. There is only one path leading to B before A is captured, while capturing A opens up another. RED's entrance to point B leads into a small 2 story building with a window at the top that can shoot out onto the whole B area except for the closest half of point B. Blue's spawn exit has a passageway off the side which leads to a small overlook and a shack that Snipers may use in attacking B. To the left of point B and just off of the building in front of RED's spawn is a passageway that leads to point E and then a ledge in the C area. Capturing point B causes a door to slowly open to point C and also moves RED's spawn to the opposite side of point E.
Canyon (Point C): Point C is located on an elevated platform north of point B. The hill leading up from B spikes down into a canyon. Several large rocks provide cover from incoming fire on the B side. There are two sets of stairs to get onto C, one on the outside with no cover, and on to the right which is a small tunnel. RED has a choice of 2 doorways to defend from, one of which includes a small wall on the B side. Capturing C causes three bridges to extend to point E very slowly.
Storehouse (Point D): Point D is located directly next to RED's second spawn, on the opposite side of C. A narrow hallway with a small ledge connects C and D, but one must travel in front of RED's back spawn. RED can also see anyone moving through this hallway by way of a window above their exit to point E, but the window is closed off when the exit is. Capturing D raises guardrails on the bridges and also seals off RED spawn's closest exit to E.
Launch Pad (Point E): Point E is located in the center of the base, on a small platform above a deep pit. At first, only Scouts, Soldiers, and Demomen can effectively reach it, but once C is captured, bridges appear and allow all classes to get to the point. Point E is available from the start of the round, but capturing all the other points can make E easier to capture.
Strategy
Control Point Timing
| 控制點模式 A
|
×1
|
|
| ×2
|
|
| ×3
|
|
| ×4
|
|
| ×5
|
|
| 控制點模式 B
|
×1
|
|
| ×2
|
|
| ×3
|
|
| ×4
|
|
| ×5
|
|
| 控制點模式 C
|
×1
|
|
| ×2
|
|
| ×3
|
|
| ×4
|
|
| ×5
|
|
| 控制點模式 D
|
×1
|
|
| ×2
|
|
| ×3
|
|
| ×4
|
|
| ×5
|
|
| 控制點模式 E
|
×1
|
|
| ×2
|
|
| ×3
|
|
| ×4
|
|
| ×5
|
|
Update history
2008年8月19日更新 (A Heavy Update)
2010年12月21日更新
- Fixed Steel not loading properly, instead returning the user to the Main Menu.
2012年1月26日更新
- Localized the team goal strings
Bugs
- If a BLU Scout, Soldier, Pyro, Demoman, or Engineer uses their jump abilities to stand on top of BLU's door leading directly to B from spawn before setup ends, the door will appear to open, but will still block players and projectiles from passing it.
- In the first RED spawn, any class that is able to jump onto the suspended wooden beams above the area with the exits to point B and E can avoid being transferred to the other spawn after BLU captures B. Touching the ground again will immediately teleport them.