Difference between revisions of "Scream Fortress 2016/fi"
m (Updated displaytitle) |
BrazilianNut (talk | contribs) m |
||
| Line 11: | Line 11: | ||
== Lisäykset == | == Lisäykset == | ||
=== Kosmeettiset esineet === | === Kosmeettiset esineet === | ||
| − | {{main|Cosmetic items | + | {{main|Cosmetic items{{if lang}}|l1={{common string|Cosmetic items}}}} |
{| class="wikitable collapsible" cellpadding="3" style="text-align:center;" | {| class="wikitable collapsible" cellpadding="3" style="text-align:center;" | ||
| − | | width="60px" style="background: #6A5587;" rowspan="1" | {{icon class|Scout}}<br/>'''[[Scout | + | | width="60px" style="background: #6A5587;" rowspan="1" | {{icon class|Scout}}<br/>'''[[Scout{{if lang}}|<span style="color: #FFF;">{{class name|Scout}}</span>]]''' |
| − | | align="center" style="background: # | + | | align="center" style="background: #4B69FF;" | {{item icon|Wing Mann|75px}} |
| − | | style="background: #F1ECF7;"| ''' | + | | style="background: #F1ECF7;"| '''{{item link|Wing Mann}}''' |
|- | |- | ||
| − | | width="60px" style="background: #6A5587;" rowspan="3" | {{icon class|Pyro}}<br/>'''[[Pyro | + | | width="60px" style="background: #6A5587;" rowspan="3" | {{icon class|Pyro}}<br/>'''[[Pyro{{if lang}}|<span style="color: #FFF;">{{class name|Pyro}}</span>]]''' |
| − | | align="center" style="background: # | + | | align="center" style="background: #EB4B4B;" | {{item icon|Combustible Cutie|75px}} |
| − | | style="background: #F1ECF7;"| ''' | + | | style="background: #F1ECF7;"| '''{{item link|Combustible Cutie}}''' |
|- | |- | ||
| − | | align="center" style="background: # | + | | align="center" style="background: #4B69FF;" | {{item icon|Cranial Carcharodon|75px}} |
| − | | style="background: #F1ECF7;"| ''' | + | | style="background: #F1ECF7;"| '''{{item link|Cranial Carcharodon}}''' |
|- | |- | ||
| − | | align="center" style="background: # | + | | align="center" style="background: #FFD700;" | {{item icon|Hovering Hotshot|75px}} |
| − | | style="background: #F1ECF7;"| ''' | + | | style="background: #F1ECF7;"| '''{{item link|Hovering Hotshot}}''' |
|- | |- | ||
| − | | width="60px" style="background: #6A5587;" rowspan="2" | {{icon class|Demoman}}<br/>'''[[Demoman | + | | width="60px" style="background: #6A5587;" rowspan="2" | {{icon class|Demoman}}<br/>'''[[Demoman{{if lang}}|<span style="color: #FFF;">{{class name|Demoman}}</span>]]''' |
| − | | align="center" style="background: # | + | | align="center" style="background: #FFD700;" | {{item icon|Aerobatics Demonstrator|75px}} |
| − | | style="background: #F1ECF7;"| ''' | + | | style="background: #F1ECF7;"| '''{{item link|Aerobatics Demonstrator}}''' |
|- | |- | ||
| − | | align="center" style="background: # | + | | align="center" style="background: #8847FF;" | {{item icon|Spirit of the Bombing Past|75px}} |
| − | | style="background: #F1ECF7;"| ''' | + | | style="background: #F1ECF7;"| '''{{item link|Spirit of the Bombing Past}}''' |
|- | |- | ||
| − | | width="60px" style="background: #6A5587;" rowspan="3" | {{icon class|Heavy}}<br/>'''[[Heavy | + | | width="60px" style="background: #6A5587;" rowspan="3" | {{icon class|Heavy}}<br/>'''[[Heavy{{if lang}}|<span style="color: #FFF;">{{class name|Heavy}}</span>]]''' |
| − | | align="center" style="background: # | + | | align="center" style="background: #8847FF;" | {{item icon|Heavy Tourism|75px}} |
| − | | style="background: #F1ECF7;"| ''' | + | | style="background: #F1ECF7;"| '''{{item link|Heavy Tourism}}''' |
|- | |- | ||
| − | | align="center" style="background: # | + | | align="center" style="background: #4B69FF;" | {{item icon|Mad Mask|75px}} |
| − | | style="background: #F1ECF7;"| ''' | + | | style="background: #F1ECF7;"| '''{{item link|Mad Mask}}''' |
|- | |- | ||
| − | | align="center" style="background: # | + | | align="center" style="background: #D32CE6;" | {{item icon|Mo'Horn|75px}} |
| − | | style="background: #F1ECF7;"| ''' | + | | style="background: #F1ECF7;"| '''{{item link|Mo'Horn}}''' |
|- | |- | ||
| − | | width="60px" style="background: #6A5587;" rowspan="4" | {{icon class|Engineer}}<br/>'''[[Engineer | + | | width="60px" style="background: #6A5587;" rowspan="4" | {{icon class|Engineer}}<br/>'''[[Engineer{{if lang}}|<span style="color: #FFF;">{{class name|Engineer}}</span>]]''' |
| − | | align="center" style="background: # | + | | align="center" style="background: #8847FF;" | {{item icon|Corpus Christi Cranium|75px}} |
| − | | style="background: #F1ECF7;"| ''' | + | | style="background: #F1ECF7;"| '''{{item link|Corpus Christi Cranium}}''' |
|- | |- | ||
| − | | align="center" style="background: # | + | | align="center" style="background: #4B69FF;" | {{item icon|El Paso Poncho|75px}} |
| − | | style="background: #F1ECF7;"| ''' | + | | style="background: #F1ECF7;"| '''{{item link|El Paso Poncho}}''' |
|- | |- | ||
| − | | align="center" style="background: # | + | | align="center" style="background: #FFD700;" | {{item icon|Final Frontier Freighter|75px}} |
| − | | style="background: #F1ECF7;"| ''' | + | | style="background: #F1ECF7;"| '''{{item link|Final Frontier Freighter}}''' |
|- | |- | ||
| − | | align="center" style="background: # | + | | align="center" style="background: #4B69FF;" | {{item icon|Wide-Brimmed Bandito|75px}} |
| − | | style="background: #F1ECF7;"| ''' | + | | style="background: #F1ECF7;"| '''{{item link|Wide-Brimmed Bandito}}''' |
|- | |- | ||
| − | | width="60px" style="background: #6A5587;" rowspan="3" | {{icon class|Medic}}<br/>'''[[Medic | + | | width="60px" style="background: #6A5587;" rowspan="3" | {{icon class|Medic}}<br/>'''[[Medic{{if lang}}|<span style="color: #FFF;">{{class name|Medic}}</span>]]''' |
| − | | align="center" style="background: # | + | | align="center" style="background: #D32CE6;" | {{item icon|Burly Beast|75px}} |
| − | | style="background: #F1ECF7;"| ''' | + | | style="background: #F1ECF7;"| '''{{item link|Burly Beast}}''' |
|- | |- | ||
| − | | align="center" style="background: # | + | | align="center" style="background: #4B69FF;" | {{item icon|Colossal Cranium|75px}} |
| − | | style="background: #F1ECF7;"| ''' | + | | style="background: #F1ECF7;"| '''{{item link|Colossal Cranium}}''' |
|- | |- | ||
| − | | align="center" style="background: # | + | | align="center" style="background: #4B69FF;" | {{item icon|Surgeon's Sidearms|75px}} |
| − | | style="background: #F1ECF7;"| ''' | + | | style="background: #F1ECF7;"| '''{{item link|Surgeon's Sidearms}}''' |
|- | |- | ||
| − | | width="60px" style="background: #6A5587;" rowspan="2" | {{icon class|Spy}}<br/>'''[[Spy | + | | width="60px" style="background: #6A5587;" rowspan="2" | {{icon class|Spy}}<br/>'''[[Spy{{if lang}}|<span style="color: #FFF;">{{class name|Spy}}</span>]]''' |
| − | | align="center" style="background: # | + | | align="center" style="background: #8847FF;" | {{item icon|Big Topper|75px}} |
| − | | style="background: #F1ECF7;"| ''' | + | | style="background: #F1ECF7;"| '''{{item link|Big Topper}}''' |
|- | |- | ||
| − | | align="center" style="background: # | + | | align="center" style="background: #4B69FF;" | {{item icon|Showstopper|75px}} |
| − | | style="background: #F1ECF7;"| ''' | + | | style="background: #F1ECF7;"| '''{{item link|Showstopper}}''' |
|- | |- | ||
| − | | width="60px" style="background: #6A5587;" rowspan="1" | {{icon class|Scout}}<br/>'''[[Scout | + | | width="60px" style="background: #6A5587;" rowspan="1" | {{icon class|Scout}}<br/>'''[[Scout{{if lang}}|<span style="color: #FFF;">{{class name|Scout}}</span>]]'''<br>{{icon class|Soldier}}<br/>'''[[Soldier{{if lang}}|<span style="color: #FFF;">{{class name|Soldier}}</span>]]'''<br>{{icon class|Pyro}}<br/>'''[[Pyro{{if lang}}|<span style="color: #FFF;">{{class name|Pyro}}</span>]]'''<br>{{icon class|Heavy}}<br/>'''[[Heavy{{if lang}}|<span style="color: #FFF;">{{class name|Heavy}}</span>]]''' |
| − | | align="center" style="background: # | + | | align="center" style="background: #D32CE6;" | {{item icon|Pestering Jester|75px}} |
| − | | style="background: #F1ECF7;"| ''' | + | | style="background: #F1ECF7;"| '''{{item link|Pestering Jester}}''' |
|- | |- | ||
| − | | width="60px" style="background: #6A5587;" rowspan="5" | {{icon class|All Classes}}<br/>'''[[Classes | + | | width="60px" style="background: #6A5587;" rowspan="5" | {{icon class|All Classes}}<br/>'''[[Classes{{if lang}}|<span style="color: #FFF;">{{class name|All Classes}}</span>]]''' |
| − | | align="center" style="background: # | + | | align="center" style="background: #EB4B4B;" | {{item icon|Class Crown|75px}} |
| − | | style="background: #F1ECF7;"| ''' | + | | style="background: #F1ECF7;"| '''{{item link|Class Crown}}''' |
|- | |- | ||
| − | | align="center" style="background: # | + | | align="center" style="background: #8847FF;" | {{item icon|Lil' Bitey|75px}} |
| − | | style="background: #F1ECF7;"| ''' | + | | style="background: #F1ECF7;"| '''{{item link|Lil' Bitey}}''' |
|- | |- | ||
| − | | align="center" style="background: # | + | | align="center" style="background: #4B69FF;" | {{item icon|Nasty Norsemann|75px}} |
| − | | style="background: #F1ECF7;"| ''' | + | | style="background: #F1ECF7;"| '''{{item link|Nasty Norsemann}}''' |
|- | |- | ||
| − | | align="center" style="background: # | + | | align="center" style="background: #4B69FF;" | {{item icon|Spooktacles|75px}} |
| − | | style="background: #F1ECF7;"| ''' | + | | style="background: #F1ECF7;"| '''{{item link|Spooktacles}}''' |
| − | |||
| − | |||
| − | |||
|- | |- | ||
| + | | align="center" style="background: #8847FF;" | {{item icon|Toadstool Topper|75px}} | ||
| + | | style="background: #F1ECF7;"| '''{{item link|Toadstool Topper}}''' | ||
|} | |} | ||
| Line 99: | Line 98: | ||
{{main|Taunts/fi|l1=Pilkat}} | {{main|Taunts/fi|l1=Pilkat}} | ||
{| class="wikitable collapsible" cellpadding=2 style="text-align:center;" | {| class="wikitable collapsible" cellpadding=2 style="text-align:center;" | ||
| − | | style="background-color:#6A5587;" width:"90px;" rowspan="2"| {{icon class|All Classes}}<br/>'''[[Classes/fi|<span style="color: #FFF;">All Classes</span>]]''' | + | | style="background-color:#6A5587;" width:"90px;" rowspan="2"| {{icon class|All Classes}}<br/>'''[[Classes/fi|<span style="color: #FFF;">{{class name|All Classes}}</span>]]''' |
| align="center" style="background-color:#AD9DC3;" | {{Icon item|Second Rate Sorcery|75px}} | | align="center" style="background-color:#AD9DC3;" | {{Icon item|Second Rate Sorcery|75px}} | ||
| style="background-color:#F1ECF7;"| '''{{item link|Second Rate Sorcery}}''' | | style="background-color:#F1ECF7;"| '''{{item link|Second Rate Sorcery}}''' | ||
| Line 105: | Line 104: | ||
| align="center" style="background-color:#AD9DC3;" | {{Icon item|Victory Lap|75px}} | | align="center" style="background-color:#AD9DC3;" | {{Icon item|Victory Lap|75px}} | ||
| style="background-color:#F1ECF7;"| '''{{item link|Victory Lap}}''' | | style="background-color:#F1ECF7;"| '''{{item link|Victory Lap}}''' | ||
| − | |||
|} | |} | ||
| Line 119: | Line 117: | ||
| align="center" style="background: #AD9DC3;" | {{item icon|Unusualifier|75px}} | | align="center" style="background: #AD9DC3;" | {{item icon|Unusualifier|75px}} | ||
| style="background: #F1ECF7;"| '''[[Unusualifier/fi|Epätavallistaja]]''' | | style="background: #F1ECF7;"| '''[[Unusualifier/fi|Epätavallistaja]]''' | ||
| − | |||
|} | |} | ||
| Line 126: | Line 123: | ||
{|class="wikitable" cellpadding=2 style="text-align:center;" | {|class="wikitable" cellpadding=2 style="text-align:center;" | ||
|-style="height:20px;" | |-style="height:20px;" | ||
| − | !class="header" style="background-color:#6A5587;color:#FFFFFF;" |Name | + | !class="header" style="background-color:#6A5587;color:#FFFFFF;" |{{common string|Name}} |
| − | !class="header" style="background-color:#6A5587;color:#FFFFFF;" |Picture | + | !class="header" style="background-color:#6A5587;color:#FFFFFF;" |{{common string|Picture}} |
| − | !class="header" style="background-color:#6A5587;color:#FFFFFF;" |Game mode | + | !class="header" style="background-color:#6A5587;color:#FFFFFF;" |{{common string|Game mode}} |
| − | !class="header" style="background-color:#6A5587;color:#FFFFFF;" |File name | + | !class="header" style="background-color:#6A5587;color:#FFFFFF;" |{{common string|File name}} |
|- | |- | ||
|style="background-color:#AD9DC3;" |'''[[Brimstone (map)/fi|Brimstone]]''' | |style="background-color:#AD9DC3;" |'''[[Brimstone (map)/fi|Brimstone]]''' | ||
| − | |width="100px" style="background:#F1ECF7" |[[File:Pl_fifthcurve_event.png|160px|link=Brimstone (map)]] | + | |width="100px" style="background:#F1ECF7" |[[File:Pl_fifthcurve_event.png|160px|link=Brimstone (map)/fi]] |
| − | |align="center" style="background:#F1ECF7" | '''[[Payload/fi|Pommilasti]]'''<br>[[File:Hoodoo Bombcart.png|50px|link=Payload]] | + | |align="center" style="background:#F1ECF7" | '''[[Payload/fi|Pommilasti]]'''<br>[[File:Hoodoo Bombcart.png|50px|link=Payload/fi]] |
|width="60px" |{{code|pl_fifthcurve_event}} | |width="60px" |{{code|pl_fifthcurve_event}} | ||
|- | |- | ||
|style="background-color:#AD9DC3;" |'''[[Maple Ridge Event/fi|Maple Ridge Event]]''' | |style="background-color:#AD9DC3;" |'''[[Maple Ridge Event/fi|Maple Ridge Event]]''' | ||
| − | |width="100px" style="background:#F1ECF7" |[[File:Koth_maple_ridge_event.png|160px|link=Maple Ridge Event]] | + | |width="100px" style="background:#F1ECF7" |[[File:Koth_maple_ridge_event.png|160px|link=Maple Ridge Event/fi]] |
| − | |align="center" style="background:#F1ECF7" |'''[[King of the Hill/fi|Kukkulan kuningas]]'''<br>[[File:Controlpoint.png|50px|link=King of the Hill]] | + | |align="center" style="background:#F1ECF7" |'''[[King of the Hill/fi|Kukkulan kuningas]]'''<br>[[File:Controlpoint.png|50px|link=King of the Hill/fi]] |
|width="60px" |{{code|koth_maple_ridge_event}} | |width="60px" |{{code|koth_maple_ridge_event}} | ||
|- | |- | ||
|style="background-color:#AD9DC3;" |'''[[Pit of Death/fi|Pit of Death]]''' | |style="background-color:#AD9DC3;" |'''[[Pit of Death/fi|Pit of Death]]''' | ||
| − | |width="100px" style="background:#F1ECF7" |[[File:Pd_pit_of_death_event.png|160px|link=Pit of Death]] | + | |width="100px" style="background:#F1ECF7" |[[File:Pd_pit_of_death_event.png|160px|link=Pit of Death/fi]] |
| − | |align="center" style="background:#F1ECF7" |'''[[Player Destruction/fi|Pelaajan tuho]]'''<br>[[File:Hud_invasion_bottle.png|50px|link=Player Destruction]] | + | |align="center" style="background:#F1ECF7" |'''[[Player Destruction/fi|Pelaajan tuho]]'''<br>[[File:Hud_invasion_bottle.png|50px|link=Player Destruction/fi]] |
|width="60px" |{{code|pd_pit_of_death_event}} | |width="60px" |{{code|pd_pit_of_death_event}} | ||
|} | |} | ||
=== Erikoiset efektit === | === Erikoiset efektit === | ||
| − | {{main|Unusual effects/fi | + | {{main|Unusual effects/fi|l1=Erikoiset efektit}} |
<gallery perrow="4"> | <gallery perrow="4"> | ||
File:Unusual Neutron Star.png| Neutronitähti | File:Unusual Neutron Star.png| Neutronitähti | ||
Revision as of 05:13, 3 November 2019

Tämä artikkeli on päivityksessä julkaistua sisältöä varten. Nähdäksesi itse päivityksen, katso 21. lokakuuta 2016 -päivitys.
Scream Fortress 2016 oli merkittävä päivitys joka julkaistiin 21. elokuuta 2016. Päivitys lisäsi kaksi uutta pilkkaa, 3 uutta karttaa, 24 uutta kosmeettista esinettä, uuden työkalun nimeltään Epätavallistaja, kuten myös Merasmusmissioiden paluun viime vuoden tapahtumasta.
Sisällysluettelo
Aikajana
Tapahtuma ajoitettiin alunperin 21. lokakuuta 2016-9. marraskuuta 2016, mutta sitä pidennettiin niin että se loppui 16. marraskuuta 2016.
Lisäykset
Kosmeettiset esineet
Pääartikkeli: Kosmeettiset esineet
Pilkat
Pääartikkeli: Pilkat
Kaikki luokat |
Rihkamariitti | |
| Kunniakierros |
Työkalut
Pääartikkeli: Työkalut
| Hirvittävän hämiksen arkku | |
| Hirvittävän hämiksen arkun avain | |
| Epätavallistaja |
Kartat
Pääartikkeli: Luettelo kartoista
| Nimi | Kuva | Pelimoodi | Tiedostonimi |
|---|---|---|---|
| Brimstone | 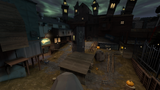
|
Pommilasti
|
pl_fifthcurve_event
|
| Maple Ridge Event | 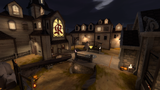
|
Kukkulan kuningas |
koth_maple_ridge_event
|
| Pit of Death | 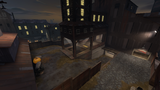
|
Pelaajan tuho
|
pd_pit_of_death_event
|
Erikoiset efektit
Pääartikkeli: Erikoiset efektit
Neutronitähti
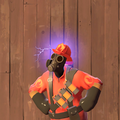
Teslakäämi

Unettoman tähtisade
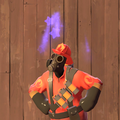
Unisen tähtisade

Helvetillinen kiirastuli
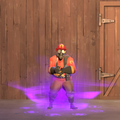
Aavemainen pyörre
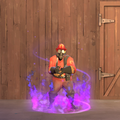
Pirulliset lieskat

Pirullinen savu


Galleria
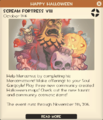
Pelinsisäinen ilmoitus tapahtuman alusta.
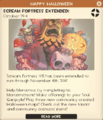
Pelinsisäinen ilmoitus tapahtuman pidennyksestä.
- User Twolfe Halloween2016.png
Ennen tapahtumaa julkaistu teaser-kuva.


| |||||
| ||||||||||||||||||||||||||||||||||||||||||||||||||||||||||||||||||||||||||||||||||||||||||||||||||