Difference between revisions of "Health"
GrampaSwood (talk | contribs) m (→Other health sources: Someone may have walked over a health and ammo pack separately and thought they were the same, I can't find any packs that do this) |
GrampaSwood (talk | contribs) |
||
| Line 137: | Line 137: | ||
* [[Pickups]] | * [[Pickups]] | ||
* [[Ammo]] | * [[Ammo]] | ||
| + | |||
{{Pickup Nav}} | {{Pickup Nav}} | ||
| + | {{Mechanics Nav}} | ||
Revision as of 15:11, 11 August 2024
| Health | ||
|---|---|---|
| ||
| Pickup Type: | Health | |
| “ | Thanks for the aid.
Click to listen
— The Soldier
|
” |
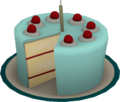
Health pickups are items that can be collected in the various maps during gameplay. They restore a set amount of the user's health when picked up and automatically regenerate after ten seconds. There are three different types of health pickups (small, medium, and large) that can be found, with each restoring a different amount of hitpoints depending on the size of the pickup and the class' max health. There are also Halloween variants of the health pickups, which can be seen below in the image gallery.
A player can be healed by several different methods, including healing by friendly Medics (and, as a disguised Spy, enemy Medics as well). Since these pickups are a vital item in combat, be sure to use them wisely; consider letting a teammate who has less health than you grab it, or especially a nearby Medic who may need it. When healed by any source outside of a Medic's healing, a small green-colored cross is emitted in the lower-left HUD along with the number of hitpoints restored.
Contents
Sources
Health kits
Most maps have health kits available in various locations around the map, excluding most Arena maps. All health kits have a 10 second respawn time, and play a distinct sound that only the player can hear when used.
- Small Health kit: Heals roughly a fifth (20.5%) of the user's health. It is also dropped by any player who is killed during Medieval Mode.
- Medium Health kit: Heals half (50%) of the user's health.
- Large Health kit: Heals all (100%) of the user's health.
Other health sources
| Level | Health per second | ||
|---|---|---|---|
|
10 health/second | ||
|
15 health/second | ||
|
20 health/second |
- Payloads: Payloads act as a Level 1 Dispenser, healing 10 health/second to team members and disguised enemy Spies standing close to the Payload.
- Resupply Lockers: 100% health
- Health On Kill and Health Regen upgrades in Mann vs Machine.
- Vampire, Regeneration and King powerups, Intelligence carrier health regeneration in Mannpower mode.
- Health regeneration from nearby friendly JACK carriers in PASS Time.
- Health regeneration from nearby Team Leaders in Player Destruction (same as Level 1 Dispenser).
- Upon entering and/or exiting various Underworlds during Halloween events.
- Shadow Leap, Blast Jump, Overheal, Stealth and Power Up Magic spells.
Weapons that provide health
| List of weapons that provide health | |||||
|---|---|---|---|---|---|
| Secondary |
| ||||
| Mad Milk | Mutated Milk | ||||
| |||||
| Pretty Boy's Pocket Pistol | |||||
| Melee |
| ||||
| Candy Cane | |||||
| Primary |
| ||||
| Black Box† | |||||
| Secondary |
| ||||
| Concheror | |||||
| Primary |
| ||||
| Compression blast | |||||
| Secondary |
| ||||
| Manmelter | |||||
| Melee |
| ||||
| Powerjack | |||||
| |||||
| Back Scratcher | |||||
| Melee |
| ||||
| Eyelander† | Horseless Headless Horsemann's Headtaker | ||||
| Nessie's Nine Iron | |||||
| Secondary |
| ||||
| Sandvich† | Robo-Sandvich | ||||
| |||||
| Dalokohs Bar | Fishcake | ||||
| |||||
| Buffalo Steak Sandvich | |||||
| |||||
| Second Banana | |||||
| Melee |
| ||||
| Warrior's Spirit | |||||
| Primary |
| ||||
| Blutsauger | |||||
| |||||
| Crusader's Crossbow† | |||||
| Secondary |
| ||||
| Medi Gun† | Vaccinator | ||||
| |||||
| Kritzkrieg† | |||||
| |||||
| Quick-Fix† | |||||
| Melee |
| ||||
| Amputator | |||||
| Secondary |
| ||||
| Cozy Camper | |||||
| Secondary |
| ||||
| Conniver's Kunai | |||||
| Melee |
| ||||
| Half-Zatoichi | |||||
| Note |
| ||||
Health kit comparison table
| Class | Small |
Medium |
Large |
|---|---|---|---|
| 26 | 63 | 125 | |
| With the Sandman equipped | 23 | 55 | 110 |
| 41 | 100 | 200 | |
| With the Battalion's Backup equipped | 45 | 110 | 220 |
| 36 | 88 | 175 | |
| With the Back Scratcher equipped | 54 | 131 | 263† |
| 36 | 88 | 175 | |
| With weapon slot boots equipped | 41 | 100 | 200 |
| With a head-taking melee weapon equipped with 0 heads | 31 | 75 | 150 |
| With a head-taking melee weapon equipped with 1 head | 34 | 83 | 165 |
| With a head-taking melee weapon equipped with 2 heads | 37 | 90 | 180 |
| With a head-taking melee weapon equipped with 3 heads | 40 | 98 | 195 |
| With a head-taking melee weapon with 4 or more heads | 43 | 105 | 210 |
| With weapon slot boots and a head-taking melee weapon equipped with 0 heads | 36 | 88 | 175 |
| With weapon slot boots and a head-taking melee weapon equipped with 1 head | 39 | 95 | 190 |
| With weapon slot boots and a head-taking melee weapon equipped with 2 heads | 42 | 103 | 205 |
| With weapon slot boots and a head-taking melee weapon equipped with 3 heads | 45 | 110 | 220 |
| With weapon slot boots and a head-taking melee weapon equipped with 4 or more heads | 48 | 118 | 235 |
| 62 | 150 | 300 | |
| Under the effects of the Dalokohs Bar or Fishcake | 72 | 175 | 350 |
| With the Fists of Steel equipped | 62 | 150 | 300 |
| With the Fists of Steel equipped and while under the effects of the Dalokohs Bar or Fishcake | 72 | 175 | 350 |
| 26 | 63 | 125 | |
| With the Gunslinger equipped | 31 | 75 | 150 |
| 31 | 75 | 150 | |
| With the Vita-Saw equipped | 29 | 70 | 140 |
| 26 | 63 | 125 | |
| 26 | 63 | 125 | |
| With the Big Earner equipped | 21 | 50 | 100 |
| With Conniver's Kunai equipped | 14 | 35 | 70 |
†Theoretical value. Heal received from pickups does not exceed the classes' maximum health.
Gallery
Pickups and dispensing units
Small Health Pickup (Halloween mode)
Medium Health Pickup (Medieval mode)
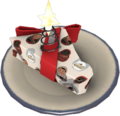
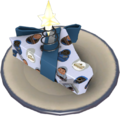
Small Health Pickup (Birthday mode, Pyroland)
Level 1 Dispenser
Medieval Mode Resupply Locker
RED Payload Cart
Weapons that provide health
Particle effects
Strategy
- Health pickups can instantly extinguish fire and stop bleeding.
- Use health pickups to their full potential. If an item heals you for 50%, consider waiting until your health drops below 50% before picking it up.
- Staying next to a Dispenser or cart in battle can give you a health advantage.
- Note that health pickups will not overheal.
- Consider for whom the health pack would be better. If you are at high health, and a teammate is at lower health, allow them to use the health pack.
- If the Medics are hurt, allow them to use the health pack so they can continue to work and heal you and your teammates.
- As a Heavy, if both you and the Medic are hurt, give them your lunchbox item with alt-fire so the Medic`s chances of surviving increase. Having the Medic survive is crucial because he can heal you and your entire team.
- As a Heavy, the Sandvich, the Dalokohs Bar and the Second Banana takes 4 seconds to consume. Eat them in cover or before engaging in fights to not get attacked when you are vulnerable. Facing your back to the wall is ideal to prevent backstabs.
- As a Heavy, the Sandvich, the Dalokohs Bar and the Second Banana take 30 seconds, 10 seconds, and 11 seconds to recharge respectively.
- As a Heavy, if your health is full while the Sandvich, the Dalokohs Bar or the Second Banana is recharging, any health pickup you collect will refill the lunchbox bar instantly.
- As a Spy, it is possible to use a health pickup while disguised regardless of whether you or your disguise is injured. Both health values will be increased by the health pack, doing nothing if both health values are full. This is useful for weakening enemy pushes.
Update history
- Overhealed players that are bleeding or on fire can now pick up health kits to remove these conditions.
- Fixed the Regen powerup preventing players from picking up health kits.
See also
|
| ||||||||||||||


