Oyun modları listesi
| Bu sayfa şu anda Türkçeye tercüme edilme aşamasında. Eğer Türkçe biliyorsanız, konuşma sayfasına yazın ya da daha önceden sayfaya katkıda bulunanlarla konuşun (sayfa geçmişinden isimlerini bularak). |
Bu sayfada Team Fortress 2 'deki oyun modları üzerine detaylı bilgi bulabilirsiniz. Başlangıçta, oyunda sadece 3 farklı mod vardı: Bayrak Kapmaca, Kontrol Noktaları, ve Bölgesel Kontrol. Daha sonra pek çok güncelleme ile altı farklı mod (Yük Vagonu, Arena, Tepenin Hakimi, Yük Vagonu Yarışı, Ortaçağ Modu, Özel Teslimat ve [[Robot Destruction/tr|Robot Destruction) daha eklenerek on bir resmî oyun modu ve iki tane alıştırma haritası elde edildi. Bu oyun modları, 50 resmi haritada farklı bir oynanış ve deneyim sunmaktadır.
Konu başlıkları
Arena
| “ | Size gönülden şunu diyebilirim ki: Arena Moduna bayılıyorum.
— Abraham Lincoln, İkinci Göreve Başlangıç Konuşması, 1865
|
” |
Arena haritaları, Team Fortress 2 'deki sınıf çeşitliliğini sağlamak adına oyuna eklenmiş haritalardır. Takımlar birbirleriyle savaşırken belirli bir amaca da odaklanmaktadırlar. Diğer oyun modları, kazanmak için daha genel ve spesifik olmayan bir strateji gerektirirken, Arena tek savaş içerisinde takımların uyguladığı özel taktiklere dayanmaktadır. Arena haritaları arena_ ön ekini taşımaktadır.
Arena, kısa süren küçük haritalar içermektedir. Raunt, takımlardan birinin tüm üyeleri öldürüldüğünde ya da belirli bir süre sonra aktif olan merkezi kontrol noktası ele geçirildiğinde sona ermektedir. Merkezi kontrol noktası, raunt içinde bir dakika geçtikten sonra aktif olmaktadır. Rauntlar, özellikle takımdaki sınıfların silah düzeni ve karşı takım üyelerinin tercih ettiği sınıflara karşı koyabilme yeteneğinize bağlı olarak oldukça hızlı ve mücadeleli geçmektedir. Arena modu, üçe üç şeklinde küçük takım maçlarına müsait olduğu gibi, on ikiye on ikilik büyük takım karşılaşmalarını da desteklemektedir. Arena, Ani Ölüm Modu şeklinde işlemektedir - yeniden doğma kapalı ve erzak dolapları yoktur. Haritalar, çatışmadan uzak ve ölüm riski içeren bölgelerde konuşlanmış, az sayıda sağlık kiti içermektedir. Bu da takımların Dispanser ve Mediclere olan ihtiyacını arttırmaktadır.
Kaybeden takım oyuncuları, takımlar arası oyuncu sayısının eşit olabilmesi ya da diğer izleyici oyunculara oynama şansı vermek adına oyundan sıra sıra, bir sonraki raunta kadar çıkarılmaktadır. Öte yandan kazanan takım oyuncuları, hiçbir şekilde oyundan çıkarılmak zorunda değildir.
İlk Kan desteği sadece Arena Moduna hastır ve raunt içinde ilk rakibini öldürene verilmektedir. Bu destek, oyuncuya beş saniyelik kritik vuruş yeteneği kazandırmaktadır. Ayrıca oyuncular, aslında ölmemiş olmasına rağmen Kusursuz Kopya kullanan bir Spy'ı öldürdüğünde de İlk Kan desteğini alabilmektedir.
Arena haritaları:
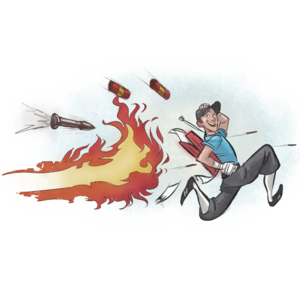
Capture The Flag
| “ | Wave goodbye to ya secret crap, dumbass!
Dinlemek için tıklayın
— The Scout
|
” |
Capture the Flag features both RED and BLU bases, each containing its own Intelligence briefcase (known as the flag). The goal for both teams is to capture the enemy's Intelligence until they have reached the game's capture limit (default limit is 3 captures) while preventing their enemy from achieving the same.
Both team's Intelligence are typically located deep within their territory, usually in a symmetrical location from each other, in an area known as the "Intelligence Room". To pick up the Intelligence the player must touch the enemy's briefcase. While holding the enemy's Intelligence, the player must bring it to the location of their Intelligence where they must enter their 'capture zone' (indicated by the yellow and black lines) in order to successfully capture it. After each successful capture, your team will be rewarded with ten seconds of crit boost.
If the Intelligence carrier is killed or the Intelligence is intentionally dropped,the Administrator informs the teams over the loudspeaker and the Briefcase will remain stationary for 60 seconds, with a timer shown above the Intelligence indicating how much time is left before it is returned to the Intelligence room. During that time the Intelligence can be picked up as normal. Each time the Intelligence is dropped, the timer is reset. The enemy cannot move or reset the Intelligence themselves. The intelligence cannot be carried by players with an invulnerability buff, i.e. ÜberCharged players and Scouts under the effects of Bonk! Atomic Punch, and Intelligence carriers cannot receive an invulnerability buff. Cloaked Spies cannot pick up Intelligence until their Cloak has been turned off. However, if a Spy does acquire the Intelligence then they will lose their disguise and no longer be able to change their disguise or Cloak.
If the Intelligence carrier dies in a normally inaccessible part of the map, i.e. falling into a pit, the Intelligence is immediately returned to its starting location in the Intelligence room. If no team completes the capture limit before time runs out, the match will enter Sudden Death mode.
Unlike variants of Capture the Flag in other games, you can make a capture without actually having your Intelligence at your base.
Capture the Flag maps:
Control Point
| “ | This point ain't gonna cap itself! Get over here!
Dinlemek için tıklayın
— The Engineer
|
” |
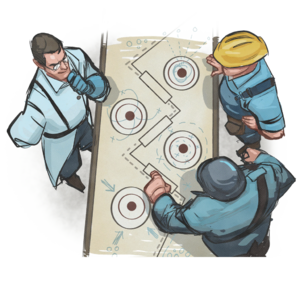
Control Point maps have two main types of game modes.
Control points are circular platforms with a team-colored light and hologram in the center (neutral points will have a white light and hologram). To capture a point owned by the enemy team, the player simply stands on the point until the capture meter fills with his or her team color. The more players on a point, the faster it will capture, though only to a limited extent. Scouts, as well as Soldiers/Demomen (if the Pain Train is equipped) count as 2 players when capturing control points. Capture progress will not be made when players of both teams are on the control point. If all the capturing players are killed or driven off before the capture is completed, the capture progress will not reset immediately, but instead will slowly fade away.
There are three states for a capture point:
There are three main types of Control Point maps – Standard Control Point, Attack/Defend, and Medieval Attack/Defend.
Standard Control Point
Standard Control Point, or Linear Control Point, maps play symmetrically. Both teams start with two controlled points, and a central point starts out neutral. The team that captures all control points wins. Traditional Control Point maps will go into Sudden Death (or Stalemate) if no team captures all the control points before times runs out. Control points closer to a team's spawn point are captured more quickly by the enemy team.
Standard Control Point maps:
Attack/Defend
| “ | Next time you'll bloody ask before you stand on my point.
Dinlemek için tıklayın
— The Demoman
|
” |
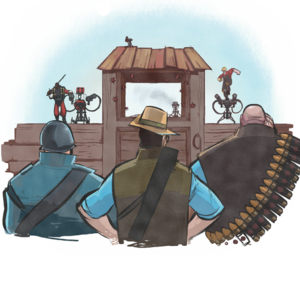
Attack/Defend maps play asymmetrically. RED begins with all the points in their control. BLU wins if it captures all of RED's points. Points may only be captured in a set order (though some maps, such as Gravel Pit and Steel, may make exceptions). RED wins if it prevents BLU from capturing all points before the timer expires. Points captured by BLU are typically locked and cannot be captured again by RED.
Attack/Defend maps can come in various styles. Some maps, such as Dustbowl and Egypt, require the BLU team to capture three stages of two control points each to win the game. If the attacking team fails to win any stage, teams will switch and the defenders will then take turn to be the attackers, beginning with stage 1. Other maps such as Gravel Pit and Junction allow the attacker to capture two points in any order (points A or B) before attacking the final point (point C). Steel is a unique Attack/Defend map in that capturing each minor capture point (points A,B,C and D) will allow better accessibility to the main point (point E), such as allowing more routes into point E or extending bridges to the point so that classes other than the Scouts, Soldiers, Demomen, Pyros with the Detonator or sentry jumping Engineers can capture it.
Attack/Defend maps:
- Dustbowl
- Egypt
- Gorge
- Gravel Pit
- Junction
- Steel
- Mountain Lab
- Mann Manor (Mountain Lab Event)
Medieval Attack/Defend
| “ | How did the manly men of Team Fortress 2 appear at a tenth century battlement? Simple. The Soldier angered a magician.
— Valve
|
” |
Medieval Attack/Defend is a part of Medieval Mode, added during the Australian Christmas update. It plays like regular Attack/Defend, but with one major twist: all guns are removed, and all weapons that are not defined as guns, known as "Olde" weapons, are all the player can use, including Mad Milk, but not Jarate. The only projectile weapons allowed are the Crusader's Crossbow and the Huntsman, with the exception of Melee Weapons that fling projectiles like the Sandman. Text chat is filtered (to Olde English) to resemble the language of the era (though with considerable inaccuracy) and the map is Medieval-themed.
Medieval Attack/Defend maps:
King of the Hill
| “ | Since their discovery in 1895, hills have fascinated kings.
— The Classless Update
|
” |
King of the Hill is similar to Arena. King of the Hill focuses on a single control point at the center of the map, which is neutral and locked at the beginning of the round. Teams must make their way to the control point and capture it when it becomes available. Once the point is captured by a team, their team clock will start a three minute countdown. If the enemy team manages to capture the point back, their clock will start counting down while the other team’s clock freezes at the time the point was recaptured. A team wins once they own the point and their three minutes is expired.
King of the Hill maps:
Payload
| “ | Onward, great bomb-cart!
Dinlemek için tıklayın
— The Heavy
|
” |
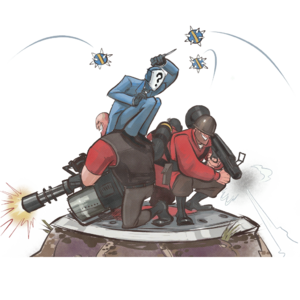
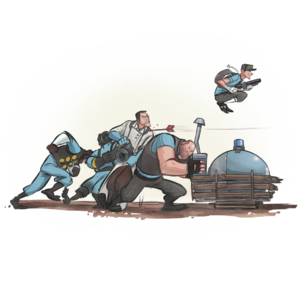
In Payload maps, BLU team must escort a cart full of explosives through a series of checkpoints and into RED's base within a certain amount of time. BLU team members move or 'push' the cart by standing next to it - the more people near the cart, the faster it moves. Any RED team member standing near the cart will stop it from venturing further. If no BLU player pushes the cart for 30 seconds, the cart will start moving backwards slowly until it reaches a checkpoint/BLU spawn, a uphill in the way (just in some maps) or a BLU player who stands next to it again. The cart functions as a level 1 Dispenser for BLU team (and disguised enemy Spies) to restore health and ammunition to those pushing it. Ammunition is not restored to players standing at the front of the cart.
Some maps have one-way routes from the BLU side, sometimes closed off until a specific point is taken.
Some maps, such as Gold Rush, Hoodoo, and Thunder Mountain, are split in three stages that the BLU team must advance through and win. Stages one and two have 2 checkpoints and stage three has 3 checkpoints (2 for Hoodoo), including the final point. Badwater Basin and Upward maps have a single round with 4 checkpoints, including the final point. Advancing the cart to the next checkpoint gives the BLU team extra time. Advancing it to the final point moves the map onto the next stage. When the cart reaches the final point on the final stage, the Payload explodes and destroys RED's base, indicating BLU's victory.
Payload maps:
Payload Race
| “ | Two teams. Two carts. Two tracks. Hilarity ensues.
— In-game Summary
|
” |
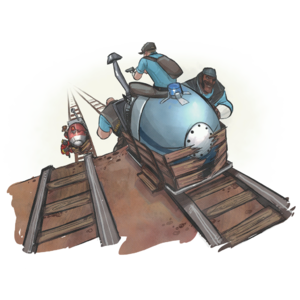
Unlike standard Payload maps, Payload Race maps feature both RED and BLU teams issued with a cart; in this way, teams are not defined to an attacking or defending role. To win, each team must simultaneously push their cart through enemy territory to reach the final point while preventing the enemy team from doing the same. As with Payload mode, team members push the cart by standing next to it, with more members increasing the speed of the cart and opposing team members halting it.
Unlike Payload mode, the cart will not move backwards after any duration of time and there is no time limit; the map will only end when one team successfully pushes their cart to the finish point. Each cart works as a Dispenser for their team (and disguised enemy Spies), restoring health and ammunition to those pushing the cart. Parts of the track may feature slopes, on which the cart will quickly roll back down to the bottom unless it is being constantly pushed.
Payload Race maps may or may not be split into multiple rounds.
Payload Race maps:
Territorial Control
| “ | We have you surrounded, at least from this side!
Dinlemek için tıklayın
— The Soldier
|
” |
In Territorial Control, the goal is to take over the entire map by capturing "territories". Each game is randomly selected from the six available layouts in a 'point against point' game where both teams must capture the opposite point while defending their own. After a team successfully captures the opposite point, the next round takes place in a different area of the map which is also randomly selected. After a team captures all four territories, that team must capture the enemy team's base. If the base point is captured (in Hydro, the Radar Dish for RED, the Power Plant for BLU), the attacking team wins the game. When the next round begins, territories are reset and a new random layout is selected. The Territorial Control game mode is not very popular amongst players. It lost its interest during the Free to Play update.
In any game in TC (except in RED/BLU base games), if a control point is not captured within the eight minute time clock, the game then will go into Sudden Death mode.
Territorial control maps:
Special Delivery
Special Delivery is a Game Mode that has been released as part of the Pyromania update. In this game mode, both teams must transport Australium to a rocket before their opponent team can. If a team picks up the Australium and does not succeed in transporting it , it will be sent back to the picking point.
Training Mode
| “ | I make it look easy.
Dinlemek için tıklayın
— The Sniper
|
” |
Training maps are intended to teach the basics of gameplay and advanced techniques. Training mode shipped with the Mac Update, which introduced two official training maps.
Training maps:
Brandon Reinhart indirectly announced on the Official TF2 Blog on July 28, 2010 that Corey Peters is currently working on another official training map,[1] though details are as of yet unknown for which class or what gameplay mechanics it is focusing on.
Other modes
Highlander
| “ | There can be only one!
Dinlemek için tıklayın
— The Demoman
|
” |
Highlander mode restricts the number of players of each team to 9 players and only allows one player per class on each team. It is applicable to any game mode and can be activated by entering mp_highlander 1 into the console.
The idea behind Highlander mode existed previous to its official inclusion in the game, and had been implemented in server mods. Highlander mode was officially added in the 3 Şubat 2010 Yaması.
The game mode's name is a reference to the Template:W film series, where the phrase "There can be only one" was often repeated; this references the limitation of one player per class.
Dueling Mini-Game
| “ | Let's settle this like gentlemen!
Dinlemek için tıklayın
— The Spy
|
” |
A mini-game released in the Mann-Conomy Update, the Dueling Mini-Game is an action item that can be purchased in the Mann Co. Store, recieved via trading, or found via drops. When loaded into the action slot, the item can be triggered to pit the user against one person on the opposing team, provided they accept the challenge. Until the end of the round, points are gained by killing, or assisting in killing. Kills of the two players dueling are tracked, and the player with the most points wins the "duel" when the round ends. If one of the players disconnects or leaves the match, a short duel ban will be issued to that player. The item itself has a maximum of 5 uses, and is usable on all official maps. After winning your first duel, a Bronze Dueling Badge will be granted which will level up to Silver, Gold, followed by Platinum as you gain more wins. For every 10 wins, a Dueling Minigame is granted.
Medieval Mode
| “ | So grab your swords, and keep your clothes on, because things are about to get clothing-non-optional Medieval on your fully clothed ass!
— Medieval Mode publicity blurb
|
” |
Medieval Mode was originally supposed to be released during the Polycount Update; however, it was held back a couple of months and released during the Australian Christmas update.
It changes gameplay by making it so only Olde weapons can be used and also causes dead players to drop small health kits instead of their weapon.
It also filters the chat's text into "Olde English".
Medieval maps:
Tournament Mode
| “ | Dominated, hippie! Get a job!
Dinlemek için tıklayın
— The Soldier
|
” |
Tournament Mode is used mostly on competitive servers. It allows for the creation of custom teams, and the ability to track the success of a particular team over multiple games. A user interface is present for naming teams, and once team members have been organized, teams must say they are ready to start the game. In tournament mode there is no limit to team player limits and no autobalancing.
Community mods
| “ | Never bring a bat to a battlefield, war is not a game.
Dinlemek için tıklayın
— The Soldier
|
” |
Community game mode mods are custom, unofficial game modes, produced by talented community members. They vary from remakes of Team Fortress Classic game modes to completely original modes, and may change anything about the way a class works from their core mechanics to the weapons they carry. Some modes even add new enemies for the RED and BLU teams to fight, or put the player in the shoes of someone or something they couldn't play in an official mode. Some game mode mods have been honorably mentioned by Valve on the TF2 Official Blog.
See also
References
| |||||||||||||||||


