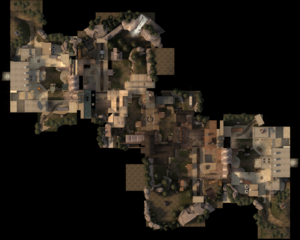
Snakewater
| Snakewater | |
|---|---|

| |
| Basic Information | |
| Developer(s): | Unknown |
| Map Info | |
| Environment: | Alpine |
| Setting: | Daylight, cloudy |
| Map Overview | |
| “ | What is Snakewater? Well, it's an action-packed control point map. It was created by community author Toivo Sawen. It's been battle-tested in competitive matches around the world. And it's now an official part of TF2. But one thing it is not is a city, because this is the Two Cities Update and we're announcing a second city tomorrow. So for the record, Snakewater is more of a mill town than a city. To summarize: Action-packed. Toivo Sawen. Official part. Not a city.
— Two Cities Update
|
” |
Snakewater is an unofficial, soon to be official, Standard Control Point map. It is set in the middle of a logging facility, and consists of a base for each team, an open second point for each team, and a center point.
The objective of Snakewater is to control all five capture points. Each team starts with their second and final control points locked, leaving only the middle point available.
Snakewater will become an official map in the Two Cities Update. It has been often used in 6's competitive play.
Locations
All place names are given from the perspective of defense as their primary name (in terms of left and right), except obviously for the middle control point.
Control Points 1/5
- Left: One of two main paths that the team can move through, the other being right. There is a raised plank allowing for cover from support classes as well as a fence located further up.
- Lower/Main: This area is lower down and has a large path to the point. This makes it difficult if there is players on the control point. There is a staircase that leads up to the right area for a quick getaway as well.
- Right: This is the other main path that the team can push from. There is a large rock and an elevated house, which is useful for the defending team to watch any area that the offending team may push from.
- Drop Down: This area is to the far left, and is a small, one man door on top of a long crate with stairs made of boxes. This area is mostly only useful for the defending team to move through, or for a Spy to come in.
- Lobby: This is the main area where the attacking team stands and it has access to all of the paths for attacking.
Control Points 2/4
Some people refer to this control point as "Yard" because of its open area.
- Ramp: One main area that allows access into the lobby, it's located in the middle area of the yard.
- Cliff/Drop Down: This area is covered behind a fence, as well as having access to the lobby. This area is called drop down because a player can go through the lobby and go through the pit at the top, getting easy access behind the opposing team.
- Control Point: The control point itself is located more to the left of the whole area. The cliff is located above it, so the team can drop down to defend it. A train cart is located to the right of the point. A fence and a house protect the team from direct fire, however they can both be jumped over.
- Main: This is the main area where most players will tend to move onto the point. It is located right in front of the team and acts as an opening area.
- House: This area is mostly used as a sniping area for attacking Snipers. It is located above the main area. Players can drop down from it, but it is generally more difficult to get back up.
Control Point 3
Because of the symmetrical style of Snakewater (and almost all 5 Point Control Point maps), each team share a similar landmark/location on their respective sides of the middle point. A popular method to counteract this is to add the prefix "our" or "their", e.g. "their Choke". Some players may also refer the middle point as "Mid".
- Control Point: The middle point is comprised of two sheds with outstretched planks, containing a log that connects the two. This log hangs directly over the middle point.
- Kitchen/Shed: These buildings are located to the left and right of the point. Inside both of the buildings are areas that lead to either team's respective right area.
- Choke: This is the area where the team can emerge from from. It is straight behind the little house vertical to the point.
- Right: The area that is directly to the right of the choke. Players can go through the sheds to get to this area for each respective team. Teams can push through right instead of through choke because of its advantages.
- Houses: These areas are located somewhat behind the planks on top of the shed and are often used to fire down on the control point and sheds. Within these buildings are two rooms; the lower room is "Saw Room" and the upper room is "Window Room".
| ||||||||||||||||||||||||||||||||||||||||||||||||


