Steel (competitive)
The community competitive scene changes frequently. Some or all info may be outdated.
| Steel (competitive) | |
|---|---|

| |
| Basic Information | |
| Developer(s): | Unknown |
| Map Info | |
| Environment: | Industrial |
| Setting: | Daylight, sunny |
| Hazards: | Pit, Rocket exhaust path |
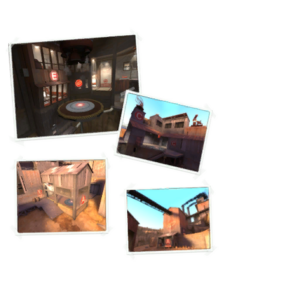
| Map Photos | |
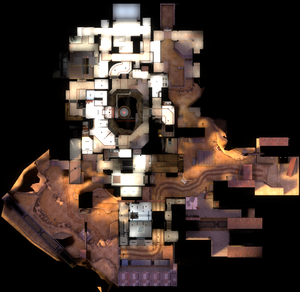
Steel is a control point map with points ranging from A-B-C-D-E, with A and B being the first points BLU can attack and E being the last control point. Steel is a community made map with a labyrinth like structure which many players find confusing. The map contains 5 control points, A and B must first be controlled to access other points, the final point E is a slow capturing point which becomes more accessible as more points are captured. This map is regularly played in Highlander competitive format and normally never played in other formats. If you are in or have a Highlander team it is worth researching this map as it can be very confusing. Steel is especially hard for Engineers due to tight corners, multiple flanks and a confusing map layout.
The objective of Steel is for the BLU team to attack all or some of the points before finally attacking point E, while the RED team must defend these points but most importantly point E. Capturing points (excluding E) grants additional paths to B and E (A), change of RED's spawnroom and an additional route to C (B), a slowly extending bridge to E (C), and both blocking a vital passageway to E for RED and raising guardrails on the bridges (D).
Contents
Locations
Point A
- The main entrance: The BLU team will have to come out of the point A door, the Sentry Gun is typically placed next to the point with the combo hanging around the point as well, attacking Engineers normally will be setting up a level 3 Sentry in their spawn. The attacking combo normally goes through the large doors whilst the Soldier and the Sniper try to get picks through the windows in the side.
- The window entrance: The picking classes such as Soldier and Sniper will normally use this entrance as it gives a height and distance advantage.
Point B
- The main entrance: There is only one entrance to point B, however there is a side route to a peaking spot that the attacking Sniper or Scout usually watch and call out activity. Point B is also a popular spot for defending Engineers to first set up, as it doesn't allow for Demomen to easily sticky spam, and there is no way to flank the Sentry Gun if point A is not captured.
Point C
- The main entrance: After capping point B the metal doors behind point B will open to point C, however this route is rarely taken as it is generally considered too obvious and doesn't provide many advantages; However the combo might try to enter through.
- The balcony: A common spot for Soldiers and peaking Snipers to get picks or spam rockets.
- The bridge flank: A very common spot for the combo to push as it allows heavies to easily get close to the enemy team and dish out damage.
Point D
- The main entrance: Point D is usually ignored by the defending team, as there aren't many good positions to hold. Engineers normally go straight to setting up at point E. Point D is very enclosed making it dangerous if Pyros or Heavies are nearby.
- The D-E connector: This is a good place for the defending team to hold as it allows them to defend E and D simultaneously.
- The small balcony: The balcony is normally accessible by the defending team, and is regularly used by flanking classes.
Point E
- The main entrance: When Point C is captured, Engineers normally go straight to point E to set up, the Combo normally holds in the D-E connector or the C-E connector, and the attacking team normally tries to attack and control these connectors. A very dangerous tactic attacking Engineers use is to deploy a level 3 Sentry Gun in the main entrance to Point E, and cover their team whilst they attack the point. If point E is captured, the game is won by the BLU team, even if not all points are captured. This makes it vital for the RED team to defend point E above all else.
- The C-E connector: A common place for the attacking team to set up, some times the Engineer will place a Dispenser there to support his team and maybe even a Sentry Gun to cover the flanks.
- The D-E connector: A common place for the defending team to hold, as it allows them to defend two points at once.
Tactics
Cp_Steel is a very unique map, research is required by both teams to succeed. Engineers are extremely important in this map due to their area denial capabilities, especially with many classes attempting flanks. Close range classes such as Heavy and Pyro excel in this map.
Defending
Defending in this map is extremely hard due to the vast amount of points and flanking routes available to the opposing team.
- Defending A
- Very rarely a team will focus to defend A completely, the defending team will usually focus all fire-power on point B as it has better defense positions and leads to Point C which is very important to hold .
- Point A favors the Enemy Sniper and Demoman as the long distance and the cliff between the point and the spawn allow the Demoman to deal heavy amounts of damage without being seen, whilst the Sniper can easily headshot exposed targets.
- The Demoman will usually hide stickies by either the window or the main entrance to point A to hopefully catch out the combo or the Sniper.
- Defending B
- Red should typically put in a substantial amount of effort to defend point B, as a lot of time can be taken away from the opposing team as they attempt to capture it. This spot favours the Engineer due to the open areas by the point.
- A Sentry Gun should be placed on the small ledge right at the back and your Scout should watch and pick Snipers trying to kill your team mates as the balcony at the front is easily accessible for the attacking Sniper.
- The area is very open and has very little flanks making it very hard for the enemy Scout to pick classes.
- Point B leads directly to Point C which is another point worth holding
- Defending C
- Your team should try their best to defend this point, however if point E is being attacked, defend point E. Losing point E will end the game, regardless of the status of the other points.
- A Sentry Gun is normally placed on the bridge which protects the flank and the area around point C.
- Holding point C makes your Pyro's life much easier. He can defend both the Sentry and the combo in one area.
- Defending D
- Point D should typically be ignored, if they have capped C most classes can already get onto Point E.
- Point D doesn't have many good Sentry Gun positions or holding positions and should really only be held by the combo.
- Defending E
- Point E is your highest priority, a Sentry should always guard the point from Scouts and jumping Soldiers/Demomen.
- Protect the entrance, especially if the enemy Engineer is deploying a level 3 Sentry as it can make point E impossible to hold.
- Always have a height advantage and never attempt to go onto point E unless in dire situations or the Pyro believes he can dispatch of the targets easily with an airblast.
Attacking
- Attacking A
- Most if not all of your team should attack point A, the defending team shouldn't put too much effort into defending point A as they would with point B and attacking Point A allows for some extra routes to point B and two other points.
- Your Scout can either support the attack on point A or either watch and call out on point B, calling out on Point B is advised as you can prepare your team on what top expect on their next attack.
- Attacking B
- This will be the second hardest point to capture in Steel as it allows for little flank options and a Sentry Gun is very hard to destroy without an effective Über push.
- Your Sniper, if well defended, should be able to acquire a lot of picks as the hold position is quite exposed.
- An Übered Demoman is advised for a push as it is very hard for the Demoman to destroy the Sentry without being exposed, the Sentry Gun should also be a high priority target due to it being in an effective position.
- Attacking C
- Use flanks to attack the team from behind, the control point has many flanks and they should be used to your advantage.
- If your Heavy can get close enough he can be a very effective at clearing out the point.
- The Sentry Gun on the Bridge can quite easily be flanked and destroyed by an aware Demoman.
- Attacking D
- The combo usually hangs around in the D-E connector, a Demoman can clear them out quite easily.
- Watch out for classes such as Spy and Scout who can easily flank through the balcony door can kill your Medic.
- Attacking E
- Remember, you don't have to capture every point to capture E, classes such as Scout, Soldier, Engineer and Demoman can normally jump to the other side, make sure your Medic buffs them as much as possible.
- Try to control the connectors as they can be very effective places to set up and hold.
- Your Engineer can place a level 3 Sentry on the entrance making an effective cover for your team trying to capture and prevents the enemy from jumping or contesting the point.
- Utilizing the Pyro's air blast ability can prove extremely dangerous due to the falling hazard, which can deny an Über push and kill instantly any class.
Rollout
The map is too confined to perform an effective rollout; the defending team is so close to the first two points that only a few jumps are needed.
Gallery
See Also
| |||||||||||||||||||||||||||||||


