Difference between revisions of "Summer Event 2013"
(added Quote and Image) |
(Pooosh beeg table) |
||
| Line 6: | Line 6: | ||
}} | }} | ||
| − | The '''Summer Event Update''' was the in-game release of several [[items]] that were selected by Valve for outstanding quality through the [[Steam Workshop]] and resubmitted using new item importing system, along with the fixing of several exploits and bugs present in existing [[maps]] and the tweak to several [[weapons]]. Released with the {{Patch name|7|10|2013}}, the update added a total of 64 new [[hats]] and [[miscellaneous items]] which were available via opening [[Summer Cooler|Crates]] with their special [[Key|Summer Cooler Keys]], and 2 new [maps]. | + | The '''Summer Event Update''' was the in-game release of several [[items]] that were selected by Valve for outstanding quality through the [[Steam Workshop]] and resubmitted using new item importing system, along with the fixing of several exploits and bugs present in existing [[maps]] and the tweak to several [[weapons]]. Released with the {{Patch name|7|10|2013}}, the update added a total of 64 new [[hats]] and [[miscellaneous items]] which were available via opening [[Summer 2013 Cooler|Crates]] with their special [[Key|Summer Cooler Keys]], and 2 new [maps]. |
| + | == Additions == | ||
| + | === Hats === | ||
| + | {| class="wikitable collapsible" cellpadding=2 style="text-align:center;" | ||
| + | | width="60px" style="background:#ffe567;" rowspan = 1| {{icon class|Scout}}<br/>'''[[Scout|<span style="color: black;">Scout</span>]]''' | ||
| + | | align="center" style="background: #fff2b3;" | {{item icon|Greased Lightning|75px}} | ||
| + | | '''{{Item link|Greased Lightning}}''' | ||
| + | |- | ||
| + | | width="60px" style="background:#ffe567;" rowspan = 5| {{icon class|Soldier}}<br/>'''[[Soldier|<span style="color: black;">Soldier</span>]]''' | ||
| + | | align="center" style="background: #fff2b3;" | {{item icon|Valley Forge|75px}} | ||
| + | | '''{{Item link|Valley Forge}}''' | ||
| + | |- | ||
| + | | align="center" style="background: #fff2b3;" | {{item icon|Caribbean Conqueror|75px}} | ||
| + | | '''{{Item link|Caribbean Conqueror}}''' | ||
| + | |- | ||
| + | | align="center" style="background: #fff2b3;" | {{item icon|Whirly Warrior|75px}} | ||
| + | | '''{{Item link|Whirly Warrior}}''' | ||
| + | |- | ||
| + | | align="center" style="background: #fff2b3;" | {{item icon|Federal Casemaker|75px}} | ||
| + | | '''{{Item link|Federal Casemaker}}''' | ||
| + | |- | ||
| + | | align="center" style="background: #fff2b3;" | {{item icon|Rebel Rouser|75px}} | ||
| + | | '''{{Item link|Rebel Rouser}}''' | ||
| + | |- | ||
| + | | width="60px" style="background:#ffe567;" rowspan = 3| {{icon class|Pyro}}<br/>'''[[Pyro|<span style="color: black;">Pyro</span>]]''' | ||
| + | | align="center" style="background: #fff2b3;" | {{item icon|Burning Bandana|75px}} | ||
| + | | '''{{Item link|Burning Bandana}}''' | ||
| + | |- | ||
| + | | align="center" style="background: #fff2b3;" | {{item icon|Hive Minder|75px}} | ||
| + | | '''{{Item link|Hive Minder}}''' | ||
| + | |- | ||
| + | | align="center" style="background: #fff2b3;" | {{item icon|Pampered Pyro|75px}} | ||
| + | | '''{{Item link|Pampered Pyro}}''' | ||
| + | |- | ||
| + | | width="60px" style="background:#ffe567;" rowspan = 4| {{icon class|Demoman}}<br/>'''[[Demoman|<span style="color: black;">Demoman</span>]]''' | ||
| + | | align="center" style="background: #fff2b3;" | {{item icon|Glasgow Great Helm|75px}} | ||
| + | | '''{{Item link|Glasgow Great Helm}}''' | ||
| + | |- | ||
| + | | align="center" style="background: #fff2b3;" | {{item icon|Black Watch|75px}} | ||
| + | | '''{{Item link|Black Watch}}''' | ||
| + | |- | ||
| + | | align="center" style="background: #fff2b3;" | {{item icon|Tartan Spartan|75px}} | ||
| + | | '''{{Item link|Tartan Spartan}}''' | ||
| + | |- | ||
| + | | align="center" style="background: #fff2b3;" | {{item icon|Stormin' Norman|75px}} | ||
| + | | '''{{Item link|Stormin' Norman}}''' | ||
| + | |- | ||
| + | | width="60px" style="background:#ffe567;" rowspan = 3| {{icon class|Heavy}}<br/>'''[[Heavy|<span style="color: black;">Heavy</span>]]''' | ||
| + | | align="center" style="background: #fff2b3;" | {{item icon|Tsarboosh|75px}} | ||
| + | | '''{{Item link|Tsarboosh}}''' | ||
| + | |- | ||
| + | | align="center" style="background: #fff2b3;" | {{item icon|Katyusha|75px}} | ||
| + | | '''{{Item link|Katyusha}}''' | ||
| + | |- | ||
| + | | align="center" style="background: #fff2b3;" | {{item icon|Bear Necessities|75px}} | ||
| + | | '''{{Item link|Bear Necessities}}''' | ||
| + | |- | ||
| + | | width="60px" style="background:#ffe567;" rowspan = 1| {{icon class|Engineer}}<br/>'''[[Engineer|<span style="color: black;">Engineer</span>]]''' | ||
| + | | align="center" style="background: #fff2b3;" | {{item icon|Pardner's Pompadour|75px}} | ||
| + | | '''{{Item link|Pardner's Pompadour}}''' | ||
| + | |- | ||
| + | | width="60px" style="background:#ffe567;" rowspan = 6| {{icon class|Medic}}<br/>'''[[Medic|<span style="color: black;">Medic</span>]]''' | ||
| + | | align="center" style="background: #fff2b3;" | {{item icon|Das Hazmattenhatten|75px}} | ||
| + | | '''{{Item link|Das Hazmattenhatten}}''' | ||
| + | |- | ||
| + | | align="center" style="background: #fff2b3;" | {{item icon|Das Ubersternmann|75px}} | ||
| + | | '''{{Item link|Das Ubersternmann}}''' | ||
| + | |- | ||
| + | | align="center" style="background: #fff2b3;" | {{item icon|Das Naggenvatcher|75px}} | ||
| + | | '''{{Item link|Das Naggenvatcher}}''' | ||
| + | |- | ||
| + | | align="center" style="background: #fff2b3;" | {{item icon|Das Maddendoktor|75px}} | ||
| + | | '''{{Item link|Das Maddendoktor}}''' | ||
| + | |- | ||
| + | | align="center" style="background: #fff2b3;" | {{item icon|Das Gutenkutteharen|75px}} | ||
| + | | '''{{Item link|Das Gutenkutteharen}}''' | ||
| + | |- | ||
| + | | align="center" style="background: #fff2b3;" | {{item icon|Baron von Havenaplane|75px}} | ||
| + | | '''{{Item link|Baron von Havenaplane}}''' | ||
| + | |- | ||
| + | | width="60px" style="background:#ffe567;" rowspan = 1| {{icon class|Sniper}}<br/>'''[[Sniper|<span style="color: black;">Sniper</span>]]''' | ||
| + | | align="center" style="background: #fff2b3;" | {{item icon|Wet Works|75px}} | ||
| + | | '''{{Item link|Wet Works}}''' | ||
| + | |- | ||
| + | | width="60px" style="background:#ffe567;" rowspan = 2| {{icon class|Spy}}<br/>'''[[Spy|<span style="color: black;">Spy</span>]]''' | ||
| + | | align="center" style="background: #fff2b3;" | {{item icon|Harmburg|75px}} | ||
| + | | '''{{Item link|Harmburg}}''' | ||
| + | |- | ||
| + | | align="center" style="background: #fff2b3;" | {{item icon|Belgian Detective|75px}} | ||
| + | | '''{{Item link|Belgian Detective}}''' | ||
| + | |- | ||
| + | | width="60px" style="background:#ffe567;" rowspan = 1| {{icon class|All Classes}}<br/>'''[[Classes|<span style="color: black;">All Classes</span>]]''' | ||
| + | | align="center" style="background: #fff2b3;" | {{item icon|Virtual Viewfinder|75px}} | ||
| + | | '''{{Item link|Virtual Viewfinder}}''' | ||
| + | |- | ||
| + | |} | ||
| + | |||
| + | === Miscellaneous Items === | ||
| + | {| class="wikitable collapsible" cellpadding=2 style="text-align:center;" | ||
| + | | width="60px" style="background:#ffe567;" rowspan = 5| {{icon class|Scout}}<br/>'''[[Scout|<span style="color: black;">Scout</span>]]''' | ||
| + | | align="center" style="background: #fff2b3;" | {{Icon item|Bigg Mann on Campus|75px}} | ||
| + | | '''{{Item link|Bigg Mann on Campus}}''' | ||
| + | |- | ||
| + | | align="center" style="background: #fff2b3;" | {{Icon item|Cool Cat Cardigan|75px}} | ||
| + | | '''{{Item link|Cool Cat Cardigan}}''' | ||
| + | |- | ||
| + | | align="center" style="background: #fff2b3;" | {{Icon item|Caffeine Cooler|75px}} | ||
| + | | '''{{Item link|Caffeine Cooler}}''' | ||
| + | |- | ||
| + | | align="center" style="background: #fff2b3;" | {{Icon item|Half-Pipe Hurdler|75px}} | ||
| + | | '''{{Item link|Half-Pipe Hurdler}}''' | ||
| + | |- | ||
| + | | align="center" style="background: #fff2b3;" | {{Icon item|Delinquent's Down Vest|75px}} | ||
| + | | '''{{Item link|Delinquent's Down Vest}}''' | ||
| + | |- | ||
| + | | width="60px" style="background:#ffe567;" rowspan = 7| {{icon class|Soldier}}<br/>'''[[Soldier|<span style="color: black;">Soldier</span>]]''' | ||
| + | | align="center" style="background: #fff2b3;" | {{Icon item|Compatriot|75px}} | ||
| + | | '''{{Item link|Compatriot}}''' | ||
| + | |- | ||
| + | | align="center" style="background: #fff2b3;" | {{Icon item|Colonial Clogs|75px}} | ||
| + | | '''{{Item link|Colonial Clogs}}''' | ||
| + | |- | ||
| + | | align="center" style="background: #fff2b3;" | {{Icon item|Shogun's Shoulder Guard|75px}} | ||
| + | | '''{{Item link|Shogun's Shoulder Guard}}''' | ||
| + | |- | ||
| + | | align="center" style="background: #fff2b3;" | {{Icon item|Hornblower|75px}} | ||
| + | | '''{{Item link|Hornblower}}''' | ||
| + | |- | ||
| + | | align="center" style="background: #fff2b3;" | {{Icon item|Lieutenant Bites|75px}} | ||
| + | | '''{{Item link|Lieutenant Bites}}''' | ||
| + | |- | ||
| + | | align="center" style="background: #fff2b3;" | {{Icon item|Brawling Buccaneer|75px}} | ||
| + | | '''{{Item link|Brawling Buccaneer}}''' | ||
| + | |- | ||
| + | | align="center" style="background: #fff2b3;" | {{Icon item|Founding Father|75px}} | ||
| + | | '''{{Item link|Founding Father}}''' | ||
| + | |- | ||
| + | | width="60px" style="background:#ffe567;" rowspan = 3| {{icon class|Pyro}}<br/>'''[[Pyro|<span style="color: black;">Pyro</span>]]''' | ||
| + | | align="center" style="background: #fff2b3;" | {{Icon item|El Muchacho|75px}} | ||
| + | | '''{{Item link|El Muchacho}}''' | ||
| + | |- | ||
| + | | align="center" style="background: #fff2b3;" | {{Icon item|Backpack Broiler|75px}} | ||
| + | | '''{{Item link|Backpack Broiler}}''' | ||
| + | |- | ||
| + | | align="center" style="background: #fff2b3;" | {{Icon item|Soot Suit|75px}} | ||
| + | | '''{{Item link|Soot Suit}}''' | ||
| + | |- | ||
| + | | width="60px" style="background:#ffe567;" rowspan = 3| {{icon class|Demoman}}<br/>'''[[Demoman|<span style="color: black;">Demoman</span>]]''' | ||
| + | | align="center" style="background: #fff2b3;" | {{Icon item|Gaelic Golf Bag|75px}} | ||
| + | | '''{{Item link|Gaelic Golf Bag}}''' | ||
| + | |- | ||
| + | | align="center" style="background: #fff2b3;" | {{Icon item|Whiskey Bib|75px}} | ||
| + | | '''{{Item link|Whiskey Bib}}''' | ||
| + | |- | ||
| + | | align="center" style="background: #fff2b3;" | {{Icon item|Gaelic Garb|75px}} | ||
| + | | '''{{Item link|Gaelic Garb}}''' | ||
| + | |- | ||
| + | | width="60px" style="background:#ffe567;" rowspan = 5| {{icon class|Heavy}}<br/>'''[[Heavy|<span style="color: black;">Heavy</span>]]''' | ||
| + | | align="center" style="background: #fff2b3;" | {{Icon item|Red Army Robin|75px}} | ||
| + | | '''{{Item link|Red Army Robin}}''' | ||
| + | |- | ||
| + | | align="center" style="background: #fff2b3;" | {{Icon item|Heavy-Weight Champ|75px}} | ||
| + | | '''{{Item link|Heavy-Weight Champ}}''' | ||
| + | |- | ||
| + | | align="center" style="background: #fff2b3;" | {{Icon item|Borscht Belt|75px}} | ||
| + | | '''{{Item link|Borscht Belt}}''' | ||
| + | |- | ||
| + | | align="center" style="background: #fff2b3;" | {{Icon item|Bolshevik Biker|75px}} | ||
| + | | '''{{Item link|Bolshevik Biker}}''' | ||
| + | |- | ||
| + | | align="center" style="background: #fff2b3;" | {{Icon item|Gabe Glasses|75px}} | ||
| + | | '''{{Item link|Gabe Glasses}}''' | ||
| + | |- | ||
| + | | width="60px" style="background:#ffe567;" rowspan = 3| {{icon class|Engineer}}<br/>'''[[Engineer|<span style="color: black;">Engineer</span>]]''' | ||
| + | | align="center" style="background: #fff2b3;" | {{Icon item|Trash Toter|75px}} | ||
| + | | '''{{Item link|Trash Toter}}''' | ||
| + | |- | ||
| + | | align="center" style="background: #fff2b3;" | {{Icon item|Dry Gulch Gulp|75px}} | ||
| + | | '''{{Item link|Dry Gulch Gulp}}''' | ||
| + | |- | ||
| + | | align="center" style="background: #fff2b3;" | {{Icon item|Flared Frontiersman|75px}} | ||
| + | | '''{{Item link|Flared Frontiersman}}''' | ||
| + | |- | ||
| + | | width="60px" style="background:#ffe567;" rowspan = 3| {{icon class|Medic}}<br/>'''[[Medic|<span style="color: black;">Medic</span>]]''' | ||
| + | | align="center" style="background: #fff2b3;" | {{Icon item|Das Feelinbeterbager|75px}} | ||
| + | | '''{{Item link|Das Feelinbeterbager}}''' | ||
| + | |- | ||
| + | | align="center" style="background: #fff2b3;" | {{Icon item|Das Metalmeatencasen|75px}} | ||
| + | | '''{{Item link|Das Metalmeatencasen}}''' | ||
| + | |- | ||
| + | | align="center" style="background: #fff2b3;" | {{Icon item|Das Fantzipantzen|75px}} | ||
| + | | '''{{Item link|Das Fantzipantzen}}''' | ||
| + | |- | ||
| + | | width="60px" style="background:#ffe567;" rowspan = 3| {{icon class|Sniper}}<br/>'''[[Sniper|<span style="color: black;">Sniper</span>]]''' | ||
| + | | align="center" style="background: #fff2b3;" | {{Icon item|Birdman of Australiacatraz|75px}} | ||
| + | | '''{{Item link|Birdman of Australiacatraz}}''' | ||
| + | |- | ||
| + | | align="center" style="background: #fff2b3;" | {{Icon item|Cobber Chameleon|75px}} | ||
| + | | '''{{Item link|Cobber Chameleon}}''' | ||
| + | |- | ||
| + | | align="center" style="background: #fff2b3;" | {{Icon item|Falconer|75px}} | ||
| + | | '''{{Item link|Falconer}}''' | ||
| + | |- | ||
| + | | width="60px" style="background:#ffe567;" rowspan = 3| {{icon class|Spy}}<br/>'''[[Spy|<span style="color: black;">Spy</span>]]''' | ||
| + | | align="center" style="background: #fff2b3;" | {{Icon item|Rogue's Brogues|75px}} | ||
| + | | '''{{Item link|Rogue's Brogues}}''' | ||
| + | |- | ||
| + | | align="center" style="background: #fff2b3;" | {{Icon item|Blood Banker|75px}} | ||
| + | | '''{{Item link|Blood Banker}}''' | ||
| + | |- | ||
| + | | align="center" style="background: #fff2b3;" | {{Icon item|After Dark|75px}} | ||
| + | | '''{{Item link|After Dark}}''' | ||
| + | |- | ||
| + | | width="60px" style="background:#ffe567;" rowspan = 2| {{icon class|All Classes}}<br/>'''[[Classes|<span style="color: black;">All Classes</span>]]''' | ||
| + | | align="center" style="background: #fff2b3;" | {{Icon item|Graybanns|75px}} | ||
| + | | '''{{Item link|Graybanns}}''' | ||
| + | |- | ||
| + | | align="center" style="background: #fff2b3;" | {{Icon item|Macho Mann|75px}} | ||
| + | | '''{{Item link|Macho Mann}}'''<sup>1</sup> | ||
| + | |- | ||
| + | | width="40px" style="background:#ffe567;" rowspan="1" | '''Notes''' | ||
| + | | colspan="14" | | ||
| + | {| width="100%" | ||
| + | | style="text-align: left; background:transparent;" | <sup>1</sup> {{lang | ||
| + | | en = Not Available for Pyro | ||
| + | }} | ||
| + | |} | ||
| + | |} | ||
| + | |||
| + | === Action Items === | ||
| + | {| class="wikitable collapsible" cellpadding=2 style="text-align:center;" | ||
| + | | align="center" style="background: #ffe567;" | {{Icon item|A Random Summer Cooler Key Gift|75px}} | ||
| + | | '''{{Item link|A Random Summer Cooler Key Gift}}''' | ||
| + | |- | ||
| + | | align="center" style="background: #ffe567;" | {{Icon item|Pile of Summer Cooler Key Gifts|75px}} | ||
| + | | '''{{Item link|Pile of Summer Cooler Key Gifts}}''' | ||
| + | |} | ||
| + | |||
| + | === Tool === | ||
| + | {| class="wikitable collapsible" cellpadding=2 style="text-align:center;" | ||
| + | | align="center" style="background: #ffe567;" | {{Icon item|Red Summer 2013 Cooler Key|75px}} | ||
| + | | '''{{Item link|Red Summer 2013 Cooler Key}}''' | ||
| + | |- | ||
| + | | align="center" style="background: #ffe567;" | {{Icon item|Orange Summer 2013 Cooler Key|75px}} | ||
| + | | '''{{Item link|Orange Summer 2013 Cooler Key}}''' | ||
| + | |- | ||
| + | | align="center" style="background: #ffe567;" | {{Icon item|Yellow Summer 2013 Cooler Key|75px}} | ||
| + | | '''{{Item link|Yellow Summer 2013 Cooler Key}}''' | ||
| + | |- | ||
| + | | align="center" style="background: #ffe567;" | {{Icon item|Green Summer 2013 Cooler Key|75px}} | ||
| + | | '''{{Item link|Green Summer 2013 Cooler Key}}''' | ||
| + | |- | ||
| + | | align="center" style="background: #ffe567;" | {{Icon item|Aqua Summer 2013 Cooler Key|75px}} | ||
| + | | '''{{Item link|Aqua Summer 2013 Cooler Key}}''' | ||
| + | |- | ||
| + | | align="center" style="background: #ffe567;" | {{Icon item|Blue Summer 2013 Cooler Key|75px}} | ||
| + | | '''{{Item link|Blue Summer 2013 Cooler Key}}''' | ||
| + | |- | ||
| + | | align="center" style="background: #ffe567;" | {{Icon item|Brown Summer 2013 Cooler Key|75px}} | ||
| + | | '''{{Item link|Brown Summer 2013 Cooler Key}}''' | ||
| + | |- | ||
| + | | align="center" style="background: #ffe567;" | {{Icon item|Black Summer 2013 Cooler Key|75px}} | ||
| + | | '''{{Item link|Black Summer 2013 Cooler Key}}''' | ||
| + | |- | ||
| + | |} | ||
== Pre-announcement references == | == Pre-announcement references == | ||
Revision as of 01:43, 12 July 2013
This article is for content released in the update. For the patch itself, see July 10, 2013 Patch.

| “ | Over the last week we've taken you through some of our thinking around maps, weapons and items. We thought you might find it interesting if we walked you through the process we use to ship an update to TF2.
There we go, update shipped.
— TF2 Official Website
|
” |
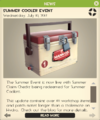
The Summer Event Update was the in-game release of several items that were selected by Valve for outstanding quality through the Steam Workshop and resubmitted using new item importing system, along with the fixing of several exploits and bugs present in existing maps and the tweak to several weapons. Released with the July 10, 2013 Patch, the update added a total of 64 new hats and miscellaneous items which were available via opening Crates with their special Summer Cooler Keys, and 2 new [maps].
Contents
Additions
Hats
Miscellaneous Items
Action Items
| A Random Summer Cooler Key Gift | |
| Pile of Summer Cooler Key Gifts |
Tool
| Red Summer 2013 Cooler Key | |
| Orange Summer 2013 Cooler Key | |
| Yellow Summer 2013 Cooler Key | |
| Green Summer 2013 Cooler Key | |
| Aqua Summer 2013 Cooler Key | |
| Blue Summer 2013 Cooler Key | |
| Brown Summer 2013 Cooler Key | |
| Black Summer 2013 Cooler Key |
Pre-announcement references
Posts in the Official Site started at July 5, 2013; with subsequent posts reporting data about the update every following day.
Update Gallery
In-game notification

External links
| ||||||||||||||||||||||||||||||||||||||||||||||||||||||||||||||||||||||||||||||||||||||||||||||||||