Difference between revisions of "Scream Fortress 2014/tr"
m |
(→Eklenenler) |
||
| Line 21: | Line 21: | ||
=== Kozmetik eşyalar === | === Kozmetik eşyalar === | ||
{| class="wikitable collapsible" cellpadding="3" style="text-align:center;" | {| class="wikitable collapsible" cellpadding="3" style="text-align:center;" | ||
| − | | width="60px" style="background: #6A5587;" rowspan="6" | {{icon class|Scout}}<br/>'''[[Scout|<span style="color: #FFF;">Scout</span>]]''' | + | | width="60px" style="background: #6A5587;" rowspan="6" | {{icon class|Scout}}<br/>'''[[Scout/tr|<span style="color: #FFF;">Scout</span>]]''' |
| align="center" style="background: #AD9DC3;" | {{item icon|Claws And Infect|75px}} | | align="center" style="background: #AD9DC3;" | {{item icon|Claws And Infect|75px}} | ||
| − | | style="background: #F1ECF7;"| ''' | + | | style="background: #F1ECF7;"| '''{{item link|Claws And Infect}}''' |
|- | |- | ||
| align="center" style="background: #AD9DC3;" | {{item icon|Crazy Legs|75px}} | | align="center" style="background: #AD9DC3;" | {{item icon|Crazy Legs|75px}} | ||
| − | | style="background: #F1ECF7;"| ''' | + | | style="background: #F1ECF7;"| '''{{item link|Crazy Legs}}''' |
|- | |- | ||
| align="center" style="background: #AD9DC3;" | {{item icon|Fowl Fists|75px}} | | align="center" style="background: #AD9DC3;" | {{item icon|Fowl Fists|75px}} | ||
| − | | style="background: #F1ECF7;"| ''' | + | | style="background: #F1ECF7;"| '''{{item link|Fowl Fists}}''' |
|- | |- | ||
| align="center" style="background: #AD9DC3;" | {{item icon|Head Hunter|75px}} | | align="center" style="background: #AD9DC3;" | {{item icon|Head Hunter|75px}} | ||
| − | | style="background: #F1ECF7;"| ''' | + | | style="background: #F1ECF7;"| '''{{item link|Head Hunter}}''' |
|- | |- | ||
| align="center" style="background: #AD9DC3;" | {{item icon|Nugget Noggin|75px}} | | align="center" style="background: #AD9DC3;" | {{item icon|Nugget Noggin|75px}} | ||
| − | | style="background: #F1ECF7;"| ''' | + | | style="background: #F1ECF7;"| '''{{item link|Nugget Noggin}}''' |
|- | |- | ||
| align="center" style="background: #AD9DC3;" | {{item icon|Talon Trotters|75px}} | | align="center" style="background: #AD9DC3;" | {{item icon|Talon Trotters|75px}} | ||
| − | | style="background: #F1ECF7;"| ''' | + | | style="background: #F1ECF7;"| '''{{item link|Talon Trotters}}''' |
|- | |- | ||
| − | | width="60px" style="background: #6A5587;" rowspan="4" | {{icon class|Soldier}}<br/>'''[[Soldier|<span style="color: #FFF;">Soldier</span>]]''' | + | | width="60px" style="background: #6A5587;" rowspan="4" | {{icon class|Soldier}}<br/>'''[[Soldier/tr|<span style="color: #FFF;">Soldier</span>]]''' |
| align="center" style="background: #AD9DC3;" | {{item icon|Battle Bird|75px}} | | align="center" style="background: #AD9DC3;" | {{item icon|Battle Bird|75px}} | ||
| − | | style="background: #F1ECF7;"| ''' | + | | style="background: #F1ECF7;"| '''{{item link|Battle Bird}}''' |
|- | |- | ||
| align="center" style="background: #AD9DC3;" | {{item icon|Ghoul Gibbin' Gear|75px}} | | align="center" style="background: #AD9DC3;" | {{item icon|Ghoul Gibbin' Gear|75px}} | ||
| − | | style="background: #F1ECF7;"| ''' | + | | style="background: #F1ECF7;"| '''{{item link|Ghoul Gibbin' Gear}}''' |
|- | |- | ||
| align="center" style="background: #AD9DC3;" | {{item icon|Hellhunter's Headpiece|75px}} | | align="center" style="background: #AD9DC3;" | {{item icon|Hellhunter's Headpiece|75px}} | ||
| − | | style="background: #F1ECF7;"| ''' | + | | style="background: #F1ECF7;"| '''{{item link|Hellhunter's Headpiece}}''' |
|- | |- | ||
| align="center" style="background: #AD9DC3;" | {{item icon|Supernatural Stalker|75px}} | | align="center" style="background: #AD9DC3;" | {{item icon|Supernatural Stalker|75px}} | ||
| − | | style="background: #F1ECF7;"| ''' | + | | style="background: #F1ECF7;"| '''{{item link|Supernatural Stalker}}''' |
|- | |- | ||
| − | | width="60px" style="background: #6A5587;" rowspan="6" | {{icon class|Pyro}}<br/>'''[[Pyro|<span style="color: #FFF;">Pyro</span>]]''' | + | | width="60px" style="background: #6A5587;" rowspan="6" | {{icon class|Pyro}}<br/>'''[[Pyro/tr|<span style="color: #FFF;">Pyro</span>]]''' |
| align="center" style="background: #AD9DC3;" | {{item icon|Arsonist Apparatus|75px}} | | align="center" style="background: #AD9DC3;" | {{item icon|Arsonist Apparatus|75px}} | ||
| − | | style="background: #F1ECF7;"| ''' | + | | style="background: #F1ECF7;"| '''{{item link|Arsonist Apparatus}}''' |
|- | |- | ||
| align="center" style="background: #AD9DC3;" | {{item icon|Creature's Grin|75px}} | | align="center" style="background: #AD9DC3;" | {{item icon|Creature's Grin|75px}} | ||
| − | | style="background: #F1ECF7;"| ''' | + | | style="background: #F1ECF7;"| '''{{item link|Creature's Grin}}''' |
|- | |- | ||
| align="center" style="background: #AD9DC3;" | {{item icon|Lollichop Licker|75px}} | | align="center" style="background: #AD9DC3;" | {{item icon|Lollichop Licker|75px}} | ||
| − | | style="background: #F1ECF7;"| ''' | + | | style="background: #F1ECF7;"| '''{{item link|Lollichop Licker}}''' |
|- | |- | ||
| align="center" style="background: #AD9DC3;" | {{item icon|Moccasin Machinery|75px}} | | align="center" style="background: #AD9DC3;" | {{item icon|Moccasin Machinery|75px}} | ||
| − | | style="background: #F1ECF7;"| ''' | + | | style="background: #F1ECF7;"| '''{{item link|Moccasin Machinery}}''' |
|- | |- | ||
| align="center" style="background: #AD9DC3;" | {{item icon|Mr. Juice|75px}} | | align="center" style="background: #AD9DC3;" | {{item icon|Mr. Juice|75px}} | ||
| − | | style="background: #F1ECF7;"| ''' | + | | style="background: #F1ECF7;"| '''{{item link|Mr. Juice}}''' |
|- | |- | ||
| align="center" style="background: #AD9DC3;" | {{item icon|Vampyro|75px}} | | align="center" style="background: #AD9DC3;" | {{item icon|Vampyro|75px}} | ||
| − | | style="background: #F1ECF7;"| ''' | + | | style="background: #F1ECF7;"| '''{{item link|Vampyro}}''' |
|- | |- | ||
| − | | width="60px" style="background: #6A5587;" rowspan="4" | {{icon class|Demoman}}<br/>'''[[Demoman|<span style="color: #FFF;">Demoman</span>]]''' | + | | width="60px" style="background: #6A5587;" rowspan="4" | {{icon class|Demoman}}<br/>'''[[Demoman/tr|<span style="color: #FFF;">Demoman</span>]]''' |
| align="center" style="background: #AD9DC3;" | {{item icon|Eyeborg|75px}} | | align="center" style="background: #AD9DC3;" | {{item icon|Eyeborg|75px}} | ||
| − | | style="background: #F1ECF7;"| ''' | + | | style="background: #F1ECF7;"| '''{{item link|Eyeborg}}''' |
|- | |- | ||
| align="center" style="background: #AD9DC3;" | {{item icon|Forgotten King's Pauldrons|75px}} | | align="center" style="background: #AD9DC3;" | {{item icon|Forgotten King's Pauldrons|75px}} | ||
| − | | style="background: #F1ECF7;"| ''' | + | | style="background: #F1ECF7;"| '''{{item link|Forgotten King's Pauldrons}}''' |
|- | |- | ||
| align="center" style="background: #AD9DC3;" | {{item icon|Forgotten King's Restless Head|75px}} | | align="center" style="background: #AD9DC3;" | {{item icon|Forgotten King's Restless Head|75px}} | ||
| − | | style="background: #F1ECF7;"| ''' | + | | style="background: #F1ECF7;"| '''{{item link|Forgotten King's Restless Head}}''' |
|- | |- | ||
| align="center" style="background: #AD9DC3;" | {{item icon|Mannhattan Project|75px}} | | align="center" style="background: #AD9DC3;" | {{item icon|Mannhattan Project|75px}} | ||
| − | | style="background: #F1ECF7;"| ''' | + | | style="background: #F1ECF7;"| '''{{item link|Mannhattan Project}}''' |
|- | |- | ||
| − | | width="60px" style="background: #6A5587;" rowspan="4" | {{icon class|Heavy}}<br/>'''[[Heavy|<span style="color: #FFF;">Heavy</span>]]''' | + | | width="60px" style="background: #6A5587;" rowspan="4" | {{icon class|Heavy}}<br/>'''[[Heavy/tr|<span style="color: #FFF;">Heavy</span>]]''' |
| align="center" style="background: #AD9DC3;" | {{item icon|Bone-Cut Belt|75px}} | | align="center" style="background: #AD9DC3;" | {{item icon|Bone-Cut Belt|75px}} | ||
| − | | style="background: #F1ECF7;"| ''' | + | | style="background: #F1ECF7;"| '''{{item link|Bone-Cut Belt}}''' |
|- | |- | ||
| align="center" style="background: #AD9DC3;" | {{item icon|Bull Locks|75px}} | | align="center" style="background: #AD9DC3;" | {{item icon|Bull Locks|75px}} | ||
| − | | style="background: #F1ECF7;"| ''' | + | | style="background: #F1ECF7;"| '''{{item link|Bull Locks}}''' |
|- | |- | ||
| align="center" style="background: #AD9DC3;" | {{item icon|Immobile Suit|75px}} | | align="center" style="background: #AD9DC3;" | {{item icon|Immobile Suit|75px}} | ||
| − | | style="background: #F1ECF7;"| ''' | + | | style="background: #F1ECF7;"| '''{{item link|Immobile Suit}}''' |
|- | |- | ||
| align="center" style="background: #AD9DC3;" | {{item icon|Minsk Beef|75px}} | | align="center" style="background: #AD9DC3;" | {{item icon|Minsk Beef|75px}} | ||
| style="background: #F1ECF7;"| '''{{item link|Minsk Beef}}''' | | style="background: #F1ECF7;"| '''{{item link|Minsk Beef}}''' | ||
|- | |- | ||
| − | | width="60px" style="background: #6A5587;" rowspan="5" | {{icon class|Engineer}}<br/>'''[[Engineer|<span style="color: #FFF;">Engineer</span>]]''' | + | | width="60px" style="background: #6A5587;" rowspan="5" | {{icon class|Engineer}}<br/>'''[[Engineer/tr|<span style="color: #FFF;">Engineer</span>]]''' |
| align="center" style="background: #AD9DC3;" | {{item icon|Beep Man|75px}} | | align="center" style="background: #AD9DC3;" | {{item icon|Beep Man|75px}} | ||
| − | | style="background: #F1ECF7;"| ''' | + | | style="background: #F1ECF7;"| '''{{item link|Beep Man}}''' |
|- | |- | ||
| align="center" style="background: #AD9DC3;" | {{item icon|Garden Bristles|75px}} | | align="center" style="background: #AD9DC3;" | {{item icon|Garden Bristles|75px}} | ||
| − | | style="background: #F1ECF7;"| ''' | + | | style="background: #F1ECF7;"| '''{{item link|Garden Bristles}}''' |
|- | |- | ||
| align="center" style="background: #AD9DC3;" | {{item icon|Iron Fist|75px}} | | align="center" style="background: #AD9DC3;" | {{item icon|Iron Fist|75px}} | ||
| − | | style="background: #F1ECF7;"| ''' | + | | style="background: #F1ECF7;"| '''{{item link|Iron Fist}}''' |
|- | |- | ||
| align="center" style="background: #AD9DC3;" | {{item icon|Soul of 'Spensers Past|75px}} | | align="center" style="background: #AD9DC3;" | {{item icon|Soul of 'Spensers Past|75px}} | ||
| − | | style="background: #F1ECF7;"| ''' | + | | style="background: #F1ECF7;"| '''{{item link|Soul of 'Spensers Past}}''' |
|- | |- | ||
| align="center" style="background: #AD9DC3;" | {{item icon|Tiny Texan|75px}} | | align="center" style="background: #AD9DC3;" | {{item icon|Tiny Texan|75px}} | ||
| − | | style="background: #F1ECF7;"| ''' | + | | style="background: #F1ECF7;"| '''{{item link|Tiny Texan}}''' |
|- | |- | ||
| − | | width="60px" style="background: #6A5587;" rowspan="7" | {{icon class|Medic}}<br/>'''[[Medic|<span style="color: #FFF;">Medic</span>]]''' | + | | width="60px" style="background: #6A5587;" rowspan="7" | {{icon class|Medic}}<br/>'''[[Medic/tr|<span style="color: #FFF;">Medic</span>]]''' |
| align="center" style="background: #AD9DC3;" | {{item icon|Herzensbrecher|75px}} | | align="center" style="background: #AD9DC3;" | {{item icon|Herzensbrecher|75px}} | ||
| − | | style="background: #F1ECF7;"| ''' | + | | style="background: #F1ECF7;"| '''{{item link|Herzensbrecher}}''' |
|- | |- | ||
| align="center" style="background: #AD9DC3;" | {{item icon|Hundkopf|75px}} | | align="center" style="background: #AD9DC3;" | {{item icon|Hundkopf|75px}} | ||
| − | | style="background: #F1ECF7;"| ''' | + | | style="background: #F1ECF7;"| '''{{item link|Hundkopf}}''' |
|- | |- | ||
| align="center" style="background: #AD9DC3;" | {{item icon|Kriegsmaschine-9000|75px}} | | align="center" style="background: #AD9DC3;" | {{item icon|Kriegsmaschine-9000|75px}} | ||
| − | | style="background: #F1ECF7;"| ''' | + | | style="background: #F1ECF7;"| '''{{item link|Kriegsmaschine-9000}}''' |
|- | |- | ||
| align="center" style="background: #AD9DC3;" | {{item icon|Templar's Spirit|75px}} | | align="center" style="background: #AD9DC3;" | {{item icon|Templar's Spirit|75px}} | ||
| − | | style="background: #F1ECF7;"| ''' | + | | style="background: #F1ECF7;"| '''{{item link|Templar's Spirit}}''' |
|- | |- | ||
| align="center" style="background: #AD9DC3;" | {{item icon|Vampire Makeover|75px}} | | align="center" style="background: #AD9DC3;" | {{item icon|Vampire Makeover|75px}} | ||
| − | | style="background: #F1ECF7;"| ''' | + | | style="background: #F1ECF7;"| '''{{item link|Vampire Makeover}}''' |
|- | |- | ||
| align="center" style="background: #AD9DC3;" | {{item icon|Vampiric Vesture|75px}} | | align="center" style="background: #AD9DC3;" | {{item icon|Vampiric Vesture|75px}} | ||
| − | | style="background: #F1ECF7;"| ''' | + | | style="background: #F1ECF7;"| '''{{item link|Vampiric Vesture}}''' |
|- | |- | ||
| align="center" style="background: #AD9DC3;" | {{item icon|Wings of Purity|75px}} | | align="center" style="background: #AD9DC3;" | {{item icon|Wings of Purity|75px}} | ||
| − | | style="background: #F1ECF7;"| ''' | + | | style="background: #F1ECF7;"| '''{{item link|Wings of Purity}}''' |
|- | |- | ||
| − | | width="60px" style="background: #6A5587;" rowspan="7" | {{icon class|Sniper}}<br/>'''[[Sniper|<span style="color: #FFF;">Sniper</span>]]''' | + | | width="60px" style="background: #6A5587;" rowspan="7" | {{icon class|Sniper}}<br/>'''[[Sniper/tr|<span style="color: #FFF;">Sniper</span>]]''' |
| align="center" style="background: #AD9DC3;" | {{item icon|Cranial Conspiracy|75px}} | | align="center" style="background: #AD9DC3;" | {{item icon|Cranial Conspiracy|75px}} | ||
| − | | style="background: #F1ECF7;"| ''' | + | | style="background: #F1ECF7;"| '''{{item link|Cranial Conspiracy}}''' |
|- | |- | ||
| align="center" style="background: #AD9DC3;" | {{item icon|Kanga Kickers|75px}} | | align="center" style="background: #AD9DC3;" | {{item icon|Kanga Kickers|75px}} | ||
| − | | style="background: #F1ECF7;"| ''' | + | | style="background: #F1ECF7;"| '''{{item link|Kanga Kickers}}''' |
|- | |- | ||
| align="center" style="background: #AD9DC3;" | {{item icon|Marsupial Man|75px}} | | align="center" style="background: #AD9DC3;" | {{item icon|Marsupial Man|75px}} | ||
| − | | style="background: #F1ECF7;"| ''' | + | | style="background: #F1ECF7;"| '''{{item link|Marsupial Man}}''' |
|- | |- | ||
| align="center" style="background: #AD9DC3;" | {{item icon|Marsupial Muzzle|75px}} | | align="center" style="background: #AD9DC3;" | {{item icon|Marsupial Muzzle|75px}} | ||
| − | | style="background: #F1ECF7;"| ''' | + | | style="background: #F1ECF7;"| '''{{item link|Marsupial Muzzle}}''' |
|- | |- | ||
| align="center" style="background: #AD9DC3;" | {{item icon|Mr. Mundee's Wild Ride|75px}} | | align="center" style="background: #AD9DC3;" | {{item icon|Mr. Mundee's Wild Ride|75px}} | ||
| − | | style="background: #F1ECF7;"| ''' | + | | style="background: #F1ECF7;"| '''{{item link|Mr. Mundee's Wild Ride}}''' |
|- | |- | ||
| align="center" style="background: #AD9DC3;" | {{item icon|Roo Rippers|75px}} | | align="center" style="background: #AD9DC3;" | {{item icon|Roo Rippers|75px}} | ||
| − | | style="background: #F1ECF7;"| ''' | + | | style="background: #F1ECF7;"| '''{{item link|Roo Rippers}}''' |
|- | |- | ||
| align="center" style="background: #AD9DC3;" | {{item icon|Scaly Scrapers|75px}} | | align="center" style="background: #AD9DC3;" | {{item icon|Scaly Scrapers|75px}} | ||
| − | | style="background: #F1ECF7;"| ''' | + | | style="background: #F1ECF7;"| '''{{item link|Scaly Scrapers}}''' |
|- | |- | ||
| − | | width="60px" style="background: #6A5587;" rowspan="4" | {{icon class|Spy}}<br/>'''[[Spy|<span style="color: #FFF;">Spy</span>]]''' | + | | width="60px" style="background: #6A5587;" rowspan="4" | {{icon class|Spy}}<br/>'''[[Spy/tr|<span style="color: #FFF;">Spy</span>]]''' |
| align="center" style="background: #AD9DC3;" | {{item icon|Facepeeler|75px}} | | align="center" style="background: #AD9DC3;" | {{item icon|Facepeeler|75px}} | ||
| − | | style="background: #F1ECF7;"| ''' | + | | style="background: #F1ECF7;"| '''{{item link|Facepeeler}}''' |
|- | |- | ||
| align="center" style="background: #AD9DC3;" | {{item icon|Nightmare Hunter|75px}} | | align="center" style="background: #AD9DC3;" | {{item icon|Nightmare Hunter|75px}} | ||
| − | | style="background: #F1ECF7;"| ''' | + | | style="background: #F1ECF7;"| '''{{item link|Nightmare Hunter}}''' |
|- | |- | ||
| align="center" style="background: #AD9DC3;" | {{item icon|Rogue's Rabbit|75px}} | | align="center" style="background: #AD9DC3;" | {{item icon|Rogue's Rabbit|75px}} | ||
| − | | style="background: #F1ECF7;"| ''' | + | | style="background: #F1ECF7;"| '''{{item link|Rogue's Rabbit}}''' |
|- | |- | ||
| align="center" style="background: #AD9DC3;" | {{item icon|Shadowman's Shade|75px}} | | align="center" style="background: #AD9DC3;" | {{item icon|Shadowman's Shade|75px}} | ||
| − | | style="background: #F1ECF7;"| ''' | + | | style="background: #F1ECF7;"| '''{{item link|Shadowman's Shade}}''' |
|- | |- | ||
| − | | width="60px" style="background: #6A5587;" rowspan="3" | {{icon class|All Classes}}<br/>'''[[Classes|<span style="color: #FFF;"> | + | | width="60px" style="background: #6A5587;" rowspan="3" | {{icon class|All Classes}}<br/>'''[[Classes/tr|<span style="color: #FFF;">Bütün Sınıflar</span>]]''' |
| align="center" style="background: #AD9DC3;" | {{item icon|Ghost of Spies Checked Past|75px}} | | align="center" style="background: #AD9DC3;" | {{item icon|Ghost of Spies Checked Past|75px}} | ||
| − | | style="background: #F1ECF7;"| ''' | + | | style="background: #F1ECF7;"| '''{{item link|Ghost of Spies Checked Past}}''' |
|- | |- | ||
| align="center" style="background: #AD9DC3;" | {{item icon|Hooded Haunter|75px}} | | align="center" style="background: #AD9DC3;" | {{item icon|Hooded Haunter|75px}} | ||
| − | | style="background: #F1ECF7;"| ''' | + | | style="background: #F1ECF7;"| '''{{item link|Hooded Haunter}}''' |
|- | |- | ||
| align="center" style="background: #AD9DC3;" | {{item icon|Li'l Dutchman|75px}} | | align="center" style="background: #AD9DC3;" | {{item icon|Li'l Dutchman|75px}} | ||
| − | | style="background: #F1ECF7;"| ''' | + | | style="background: #F1ECF7;"| '''{{item link|Li'l Dutchman}}''' |
|- | |- | ||
|} | |} | ||
| Line 186: | Line 186: | ||
{| class="wikitable collapsible" cellpadding="2" style="text-align:center;" | {| class="wikitable collapsible" cellpadding="2" style="text-align:center;" | ||
| width="70px" style="background:#6A5587;" rowspan="6" | {{icon class|Scout}}<br/>'''[[Scout{{if lang}}|<span style="color:#FFF;">{{class name|scout}}</span>]]''' | | width="70px" style="background:#6A5587;" rowspan="6" | {{icon class|Scout}}<br/>'''[[Scout{{if lang}}|<span style="color:#FFF;">{{class name|scout}}</span>]]''' | ||
| − | | style="background:#E8E2F0;" rowspan="3" |''' | + | | style="background:#E8E2F0;" rowspan="3" |'''{{item link|The Deep-Fried Dummy}}'''<br/> |
| align="center" style="background:#AD9DC3;" | {{icon item|Nugget Noggin|75px}} | | align="center" style="background:#AD9DC3;" | {{icon item|Nugget Noggin|75px}} | ||
| − | | style="background:#F1ECF7;" | ''' | + | | style="background:#F1ECF7;" | '''{{item link|Nugget Noggin}}''' |
|- | |- | ||
| align="center" style="background:#AD9DC3;" | {{icon item|Fowl Fists|75px}} | | align="center" style="background:#AD9DC3;" | {{icon item|Fowl Fists|75px}} | ||
| − | | style="background:#F1ECF7;" | ''' | + | | style="background:#F1ECF7;" | '''{{item link|Fowl Fists}}''' |
|- | |- | ||
| align="center" style="background:#AD9DC3;" | {{icon item|Talon Trotters|75px}} | | align="center" style="background:#AD9DC3;" | {{icon item|Talon Trotters|75px}} | ||
| − | | style="background:#F1ECF7;" | ''' | + | | style="background:#F1ECF7;" | '''{{item link|Talon Trotters}}''' |
|- | |- | ||
| − | | style="background:#E8E2F0;" rowspan="3" |''' | + | | style="background:#E8E2F0;" rowspan="3" |'''{{item link|The Rooftop Rebel}}'''<br/> |
| align="center" style="background:#AD9DC3;" | {{icon item|Head Hunter|75px}} | | align="center" style="background:#AD9DC3;" | {{icon item|Head Hunter|75px}} | ||
| − | | style="background:#F1ECF7;" | ''' | + | | style="background:#F1ECF7;" | '''{{item link|Head Hunter}}''' |
|- | |- | ||
| align="center" style="background:#AD9DC3;" | {{icon item|Claws And Infect|75px}} | | align="center" style="background:#AD9DC3;" | {{icon item|Claws And Infect|75px}} | ||
| − | | style="background:#F1ECF7;" | ''' | + | | style="background:#F1ECF7;" | '''{{item link|Claws And Infect}}''' |
|- | |- | ||
| align="center" style="background:#AD9DC3;" | {{icon item|Crazy Legs|75px}} | | align="center" style="background:#AD9DC3;" | {{icon item|Crazy Legs|75px}} | ||
| − | | style="background:#F1ECF7;" | ''' | + | | style="background:#F1ECF7;" | '''{{item link|Crazy Legs}}''' |
|- | |- | ||
| width="70px" style="background:#6A5587;" rowspan="3" | {{icon class|Soldier}}<br/>'''[[Soldier{{if lang}}|<span style="color:#FFF;">{{class name|soldier}}</span>]]''' | | width="70px" style="background:#6A5587;" rowspan="3" | {{icon class|Soldier}}<br/>'''[[Soldier{{if lang}}|<span style="color:#FFF;">{{class name|soldier}}</span>]]''' | ||
| − | | style="background:#E8E2F0;" rowspan="3" |''' | + | | style="background:#E8E2F0;" rowspan="3" |'''{{item link|The Sgt. Helsing}}'''<br/> |
| align="center" style="background:#AD9DC3;" | {{icon item|Hellhunter's Headpiece|75px}} | | align="center" style="background:#AD9DC3;" | {{icon item|Hellhunter's Headpiece|75px}} | ||
| − | | style="background:#F1ECF7;" | ''' | + | | style="background:#F1ECF7;" | '''{{item link|Hellhunter's Headpiece}}''' |
|- | |- | ||
| align="center" style="background:#AD9DC3;" | {{icon item|Supernatural Stalker|75px}} | | align="center" style="background:#AD9DC3;" | {{icon item|Supernatural Stalker|75px}} | ||
| − | | style="background:#F1ECF7;" | ''' | + | | style="background:#F1ECF7;" | '''{{item link|Supernatural Stalker}}''' |
|- | |- | ||
| align="center" style="background:#AD9DC3;" | {{icon item|Ghoul Gibbin' Gear|75px}} | | align="center" style="background:#AD9DC3;" | {{icon item|Ghoul Gibbin' Gear|75px}} | ||
| − | | style="background:#F1ECF7;" | ''' | + | | style="background:#F1ECF7;" | '''{{item link|Ghoul Gibbin' Gear}}''' |
|- | |- | ||
| width="70px" style="background:#6A5587;" rowspan="2" | {{icon class|Pyro}}<br/>'''[[Pyro{{if lang}}|<span style="color:#FFF;">Pyro</span>]]''' | | width="70px" style="background:#6A5587;" rowspan="2" | {{icon class|Pyro}}<br/>'''[[Pyro{{if lang}}|<span style="color:#FFF;">Pyro</span>]]''' | ||
| − | | style="background:#E8E2F0;" rowspan="2" | ''' | + | | style="background:#E8E2F0;" rowspan="2" | '''{{item link|Automated Abnormality}}'''<br/> |
| align="center" style="background:#AD9DC3;" | {{icon item|Moccasin Machinery|75px}} | | align="center" style="background:#AD9DC3;" | {{icon item|Moccasin Machinery|75px}} | ||
| − | | style="background:#F1ECF7;" | ''' | + | | style="background:#F1ECF7;" | '''{{item link|Moccasin Machinery}}''' |
|- | |- | ||
| align="center" style="background:#AD9DC3;" | {{icon item|Arsonist Apparatus|75px}} | | align="center" style="background:#AD9DC3;" | {{icon item|Arsonist Apparatus|75px}} | ||
| − | | style="background:#F1ECF7;" | ''' | + | | style="background:#F1ECF7;" | '''{{item link|Arsonist Apparatus}}''' |
|- | |- | ||
| width="70px" style="background:#6A5587;" rowspan="2" | {{icon class|Demoman}}<br/>'''[[Demoman{{if lang}}|<span style="color:#FFF;">{{class name|demoman}}</span>]]''' | | width="70px" style="background:#6A5587;" rowspan="2" | {{icon class|Demoman}}<br/>'''[[Demoman{{if lang}}|<span style="color:#FFF;">{{class name|demoman}}</span>]]''' | ||
| − | | style="background:#E8E2F0;" rowspan="2" | ''' | + | | style="background:#E8E2F0;" rowspan="2" | '''{{item link|The Forgotten King}}'''<br/> |
| align="center" style="background:#AD9DC3;" | {{icon item|Forgotten King's Restless Head|75px}} | | align="center" style="background:#AD9DC3;" | {{icon item|Forgotten King's Restless Head|75px}} | ||
| − | | style="background:#F1ECF7;" | ''' | + | | style="background:#F1ECF7;" | '''{{item link|Forgotten King's Restless Head}}''' |
|- | |- | ||
| align="center" style="background:#AD9DC3;" | {{icon item|Forgotten King's Pauldrons|75px}} | | align="center" style="background:#AD9DC3;" | {{icon item|Forgotten King's Pauldrons|75px}} | ||
| − | | style="background:#F1ECF7;" | ''' | + | | style="background:#F1ECF7;" | '''{{item link|Forgotten King's Pauldrons}}''' |
|- | |- | ||
| width="70px" style="background:#6A5587;" rowspan="3" | {{icon class|Heavy}}<br/>'''[[Heavy{{if lang}}|<span style="color:#FFF;">{{class name|heavy}}</span>]]''' | | width="70px" style="background:#6A5587;" rowspan="3" | {{icon class|Heavy}}<br/>'''[[Heavy{{if lang}}|<span style="color:#FFF;">{{class name|heavy}}</span>]]''' | ||
| − | | style="background:#E8E2F0;" rowspan="3" | ''' | + | | style="background:#E8E2F0;" rowspan="3" | '''{{item link|The Minsk Beast}}'''<br/> |
| align="center" style="background:#AD9DC3;" | {{icon item|Minsk Beef|75px}} | | align="center" style="background:#AD9DC3;" | {{icon item|Minsk Beef|75px}} | ||
| − | | style="background:#F1ECF7;" | ''' | + | | style="background:#F1ECF7;" | '''{{item link|Minsk Beef}}''' |
|- | |- | ||
| align="center" style="background:#AD9DC3;" | {{icon item|Bull Locks|75px}} | | align="center" style="background:#AD9DC3;" | {{icon item|Bull Locks|75px}} | ||
| − | | style="background:#F1ECF7;" | ''' | + | | style="background:#F1ECF7;" | '''{{item link|Bull Locks}}''' |
|- | |- | ||
| align="center" style="background:#AD9DC3;" | {{icon item|Bone-Cut Belt|75px}} | | align="center" style="background:#AD9DC3;" | {{icon item|Bone-Cut Belt|75px}} | ||
| − | | style="background:#F1ECF7;" | ''' | + | | style="background:#F1ECF7;" | '''{{item link|Bone-Cut Belt}}''' |
|- | |- | ||
| style="background:#6A5587;" rowspan="7" | {{icon class|Medic}}<br/>'''[[Medic{{if lang}}|<span style="color:#FFF;">{{class name|medic}}</span>]]''' | | style="background:#6A5587;" rowspan="7" | {{icon class|Medic}}<br/>'''[[Medic{{if lang}}|<span style="color:#FFF;">{{class name|medic}}</span>]]''' | ||
| − | | style="background:#E8E2F0;" rowspan="3" | ''' | + | | style="background:#E8E2F0;" rowspan="3" | '''{{item link|Canis Ex Machina}}'''<br/> |
| align="center" style="background:#AD9DC3;" | {{icon item|Hundkopf|75px}} | | align="center" style="background:#AD9DC3;" | {{icon item|Hundkopf|75px}} | ||
| − | | style="background:#F1ECF7;" | ''' | + | | style="background:#F1ECF7;" | '''{{item link|Hundkopf}}''' |
|- | |- | ||
| align="center" style="background:#AD9DC3;" | {{icon item|Herzensbrecher|75px}} | | align="center" style="background:#AD9DC3;" | {{icon item|Herzensbrecher|75px}} | ||
| − | | style="background:#F1ECF7;" | ''' | + | | style="background:#F1ECF7;" | '''{{item link|Herzensbrecher}}''' |
|- | |- | ||
| align="center" style="background:#AD9DC3;" | {{icon item|Kriegsmaschine-9000|75px}} | | align="center" style="background:#AD9DC3;" | {{icon item|Kriegsmaschine-9000|75px}} | ||
| − | | style="background:#F1ECF7;" | ''' | + | | style="background:#F1ECF7;" | '''{{item link|Kriegsmaschine-9000}}''' |
|- | |- | ||
| − | | style="background:#E8E2F0;" rowspan="2" | ''' | + | | style="background:#E8E2F0;" rowspan="2" | '''{{item link|Dr. Acula}}'''<br/> |
| align="center" style="background:#AD9DC3;" | {{icon item|Vampire Makeover|75px}} | | align="center" style="background:#AD9DC3;" | {{icon item|Vampire Makeover|75px}} | ||
| − | | style="background:#F1ECF7;" | ''' | + | | style="background:#F1ECF7;" | '''{{item link|Vampire Makeover}}''' |
|- | |- | ||
| align="center" style="background:#AD9DC3;" | {{icon item|Vampiric Vesture|75px}} | | align="center" style="background:#AD9DC3;" | {{icon item|Vampiric Vesture|75px}} | ||
| − | | style="background:#F1ECF7;" | ''' | + | | style="background:#F1ECF7;" | '''{{item link|Vampiric Vesture}}''' |
|- | |- | ||
| − | | style="background:#E8E2F0;" rowspan="2" | ''' | + | | style="background:#E8E2F0;" rowspan="2" | '''{{item link|The Templar}}'''<br/> |
| align="center" style="background:#AD9DC3;" | {{icon item|Templar's Spirit|75px}} | | align="center" style="background:#AD9DC3;" | {{icon item|Templar's Spirit|75px}} | ||
| − | | style="background:#F1ECF7;" | ''' | + | | style="background:#F1ECF7;" | '''{{item link|Templar's Spirit}}''' |
|- | |- | ||
| align="center" style="background:#AD9DC3;" | {{icon item|Wings of Purity|75px}} | | align="center" style="background:#AD9DC3;" | {{icon item|Wings of Purity|75px}} | ||
| − | | style="background:#F1ECF7;" | ''' | + | | style="background:#F1ECF7;" | '''{{item link|Wings of Purity}}''' |
|- | |- | ||
| style="background:#6A5587;" rowspan="5" | {{icon class|Sniper}}<br/>'''[[Sniper{{if lang}}|<span style="color:#FFF;">{{class name|sniper}}</span>]]''' | | style="background:#6A5587;" rowspan="5" | {{icon class|Sniper}}<br/>'''[[Sniper{{if lang}}|<span style="color:#FFF;">{{class name|sniper}}</span>]]''' | ||
| − | | style="background:#E8E2F0;" rowspan="3" | ''' | + | | style="background:#E8E2F0;" rowspan="3" | '''{{item link|The Manngaroo}}'''<br/> |
| align="center" style="background:#AD9DC3;" | {{icon item|Marsupial Muzzle|75px}} | | align="center" style="background:#AD9DC3;" | {{icon item|Marsupial Muzzle|75px}} | ||
| − | | style="background:#F1ECF7;" | ''' | + | | style="background:#F1ECF7;" | '''{{item link|Marsupial Muzzle}}''' |
|- | |- | ||
| align="center" style="background:#AD9DC3;" | {{icon item|Kanga Kickers|75px}} | | align="center" style="background:#AD9DC3;" | {{icon item|Kanga Kickers|75px}} | ||
| − | | style="background:#F1ECF7;" | ''' | + | | style="background:#F1ECF7;" | '''{{item link|Kanga Kickers}}''' |
|- | |- | ||
| align="center" style="background:#AD9DC3;" | {{icon item|Roo Rippers|75px}} | | align="center" style="background:#AD9DC3;" | {{icon item|Roo Rippers|75px}} | ||
| − | | style="background:#F1ECF7;" | ''' | + | | style="background:#F1ECF7;" | '''{{item link|Roo Rippers}}''' |
|- | |- | ||
| − | | style="background:#E8E2F0;" rowspan="2" | ''' | + | | style="background:#E8E2F0;" rowspan="2" | '''{{item link|The Reptiloid}}'''<br/> |
| align="center" style="background:#AD9DC3;" | {{icon item|Scaly Scrapers|75px}} | | align="center" style="background:#AD9DC3;" | {{icon item|Scaly Scrapers|75px}} | ||
| − | | style="background:#F1ECF7;" | ''' | + | | style="background:#F1ECF7;" | '''{{item link|Scaly Scrapers}}''' |
|- | |- | ||
| align="center" style="background:#AD9DC3;" | {{icon item|Cranial Conspiracy|75px}} | | align="center" style="background:#AD9DC3;" | {{icon item|Cranial Conspiracy|75px}} | ||
| − | | style="background:#F1ECF7;" | ''' | + | | style="background:#F1ECF7;" | '''{{item link|Cranial Conspiracy}}''' |
|- | |- | ||
|} | |} | ||
| Line 291: | Line 291: | ||
=== Eylem eşyaları === | === Eylem eşyaları === | ||
{| class="wikitable collapsible" cellpadding="3" style="text-align:center;" | {| class="wikitable collapsible" cellpadding="3" style="text-align:center;" | ||
| − | | width="60px" style="background: #6A5587;" | {{icon class|Scout}}<br/>'''[[Scout|<span style="color: #FFF;">Scout</span>]]''' | + | | width="60px" style="background: #6A5587;" | {{icon class|Scout}}<br/>'''[[Scout/tr|<span style="color: #FFF;">Scout</span>]]''' |
| align="center" style="background: #AD9DC3;" | {{item icon|Unlocked Creepy Scout Crate|75px}} | | align="center" style="background: #AD9DC3;" | {{item icon|Unlocked Creepy Scout Crate|75px}} | ||
| − | | style="background: #F1ECF7;"| ''' | + | | style="background: #F1ECF7;"| '''{{item link|Unlocked Creepy Scout Crate}}''' |
|- | |- | ||
| − | | width="60px" style="background: #6A5587;" | {{icon class|Soldier}}<br/>'''[[Soldier|<span style="color: #FFF;">Soldier</span>]]''' | + | | width="60px" style="background: #6A5587;" | {{icon class|Soldier}}<br/>'''[[Soldier/tr|<span style="color: #FFF;">Soldier</span>]]''' |
| align="center" style="background: #AD9DC3;" | {{item icon|Unlocked Creepy Soldier Crate|75px}} | | align="center" style="background: #AD9DC3;" | {{item icon|Unlocked Creepy Soldier Crate|75px}} | ||
| − | | style="background: #F1ECF7;"| ''' | + | | style="background: #F1ECF7;"| '''{{item link|Unlocked Creepy Soldier Crate}}''' |
|- | |- | ||
| − | | width="60px" style="background: #6A5587;" | {{icon class|Pyro}}<br/>'''[[Pyro|<span style="color: #FFF;">Pyro</span>]]''' | + | | width="60px" style="background: #6A5587;" | {{icon class|Pyro}}<br/>'''[[Pyro/tr|<span style="color: #FFF;">Pyro</span>]]''' |
| align="center" style="background: #AD9DC3;" | {{item icon|Unlocked Creepy Pyro Crate|75px}} | | align="center" style="background: #AD9DC3;" | {{item icon|Unlocked Creepy Pyro Crate|75px}} | ||
| − | | style="background: #F1ECF7;"| ''' | + | | style="background: #F1ECF7;"| '''{{item link|Unlocked Creepy Pyro Crate}}''' |
|- | |- | ||
| − | | width="60px" style="background: #6A5587;" | {{icon class|Demoman}}<br/>'''[[Demoman|<span style="color: #FFF;">Demoman</span>]]''' | + | | width="60px" style="background: #6A5587;" | {{icon class|Demoman}}<br/>'''[[Demoman/tr|<span style="color: #FFF;">Demoman</span>]]''' |
| align="center" style="background: #AD9DC3;" | {{item icon|Unlocked Creepy Demo Crate|75px}} | | align="center" style="background: #AD9DC3;" | {{item icon|Unlocked Creepy Demo Crate|75px}} | ||
| − | | style="background: #F1ECF7;"| ''' | + | | style="background: #F1ECF7;"| '''{{item link|Unlocked Creepy Demo Crate}}''' |
|- | |- | ||
| − | | width="60px" style="background: #6A5587;" | {{icon class|Heavy}}<br/>'''[[Heavy|<span style="color: #FFF;">Heavy</span>]]''' | + | | width="60px" style="background: #6A5587;" | {{icon class|Heavy}}<br/>'''[[Heavy/tr|<span style="color: #FFF;">Heavy</span>]]''' |
| align="center" style="background: #AD9DC3;" | {{item icon|Unlocked Creepy Heavy Crate|75px}} | | align="center" style="background: #AD9DC3;" | {{item icon|Unlocked Creepy Heavy Crate|75px}} | ||
| − | | style="background: #F1ECF7;"| ''' | + | | style="background: #F1ECF7;"| '''{{item link|Unlocked Creepy Heavy Crate}}''' |
|- | |- | ||
| − | | width="60px" style="background: #6A5587;" | {{icon class|Engineer}}<br/>'''[[Engineer|<span style="color: #FFF;">Engineer</span>]]''' | + | | width="60px" style="background: #6A5587;" | {{icon class|Engineer}}<br/>'''[[Engineer/tr|<span style="color: #FFF;">Engineer</span>]]''' |
| align="center" style="background: #AD9DC3;" | {{item icon|Unlocked Creepy Engineer Crate|75px}} | | align="center" style="background: #AD9DC3;" | {{item icon|Unlocked Creepy Engineer Crate|75px}} | ||
| − | | style="background: #F1ECF7;"| ''' | + | | style="background: #F1ECF7;"| '''{{item link|Unlocked Creepy Engineer Crate}}''' |
|- | |- | ||
| − | | width="60px" style="background: #6A5587;" | {{icon class|Medic}}<br/>'''[[Medic|<span style="color: #FFF;">Medic</span>]]''' | + | | width="60px" style="background: #6A5587;" | {{icon class|Medic}}<br/>'''[[Medic/tr|<span style="color: #FFF;">Medic</span>]]''' |
| align="center" style="background: #AD9DC3;" | {{item icon|Unlocked Creepy Medic Crate|75px}} | | align="center" style="background: #AD9DC3;" | {{item icon|Unlocked Creepy Medic Crate|75px}} | ||
| − | | style="background: #F1ECF7;"| ''' | + | | style="background: #F1ECF7;"| '''{{item link|Unlocked Creepy Medic Crate}}''' |
|- | |- | ||
| − | | width="60px" style="background: #6A5587;" | {{icon class|Sniper}}<br/>'''[[Sniper|<span style="color: #FFF;">Sniper</span>]]''' | + | | width="60px" style="background: #6A5587;" | {{icon class|Sniper}}<br/>'''[[Sniper/tr|<span style="color: #FFF;">Sniper</span>]]''' |
| align="center" style="background: #AD9DC3;" | {{item icon|Unlocked Creepy Sniper Crate|75px}} | | align="center" style="background: #AD9DC3;" | {{item icon|Unlocked Creepy Sniper Crate|75px}} | ||
| − | | style="background: #F1ECF7;"| ''' | + | | style="background: #F1ECF7;"| '''{{item link|Unlocked Creepy Sniper Crate}}''' |
|- | |- | ||
| − | | width="60px" style="background: #6A5587;" | {{icon class|Spy}}<br/>'''[[Spy|<span style="color: #FFF;">Spy</span>]]''' | + | | width="60px" style="background: #6A5587;" | {{icon class|Spy}}<br/>'''[[Spy/tr|<span style="color: #FFF;">Spy</span>]]''' |
| align="center" style="background: #AD9DC3;" | {{item icon|Unlocked Creepy Spy Crate|75px}} | | align="center" style="background: #AD9DC3;" | {{item icon|Unlocked Creepy Spy Crate|75px}} | ||
| − | | style="background: #F1ECF7;"| ''' | + | | style="background: #F1ECF7;"| '''{{item link|Unlocked Creepy Spy Crate}}''' |
|- | |- | ||
| − | | width="60px" style="background: #6A5587;" rowspan=2 | {{icon class|All Classes}}<br/>'''[[Classes|<span style="color: #FFF;"> | + | | width="60px" style="background: #6A5587;" rowspan=2 | {{icon class|All Classes}}<br/>'''[[Classes/tr|<span style="color: #FFF;">Bütün Sınıflar</span>]]''' |
| align="center" style="background: #AD9DC3;" | {{item icon|Halloween Gift Cauldron|75px}} | | align="center" style="background: #AD9DC3;" | {{item icon|Halloween Gift Cauldron|75px}} | ||
| − | | style="background: #F1ECF7;"| ''' | + | | style="background: #F1ECF7;"| '''{{item link|Halloween Gift Cauldron}}''' |
|- | |- | ||
| align="center" style="background: #AD9DC3;" | {{item icon|Kritz or Treat Canteen|75px}} | | align="center" style="background: #AD9DC3;" | {{item icon|Kritz or Treat Canteen|75px}} | ||
Revision as of 00:28, 1 November 2014
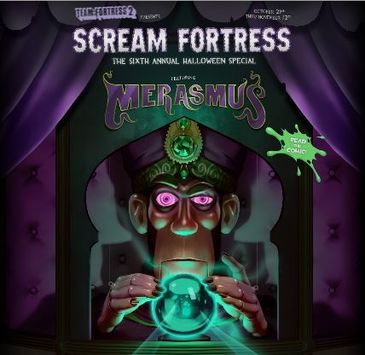
Scream Fortress 2014, temasının Merasmus tarafından yönetilen bir karnaval olduğu bir büyük güncellemedir. Üç farklı modu olan çarpışan arabalar bir post-round aktivite olarak tanıtılmıştır. Altıncı Scream Fortress güncellemesidir. Güncellemeyi yükledikten sonra Team Fortress 2'ye giren bütün oyuncular üç rastgele 2014 kostüm parçasından oluşan Halloween Goodie Cauldron 2014 ile ödüllendirilir.
Güncellemeyle 50 yeni kozmetik, 6 başarım, Cadılar Bayramı etkinliği haritası Carnival of Carnage, eşya olarak Krit mi Şaka mı Matarası ve Necro Parçalayıcı eklenmiştir.
Güncellemeyle ayrıca Garip Lanetli nitelikte kozmetikler tanıtılmıştır. Bütün Garip Lanetli nitelikte eşyalar 2 garip parça içerir: "Kazanılan Karnaval Oyunları" ve "Yeraltı Karnaval Öldürmeleri". Düzenli Öldürmeler sadece Carnival of Carnage'da sayılır. Bütün Halloween Goodie Cauldron 2014'ler 1 Garip Lanetli kostüm parçası içerir.
Konu başlıkları
Eklenenler
Silahlar
Bütün Sınıflar |
Necro Parçalayıcı |
- *Spy hariç bütün sınıflar
Kozmetik eşyalar
Setler
Eylem eşyaları
Haritalar
| İsim | Resim | Oyun modu | Dosya adı |
|---|---|---|---|
| Carnival of Carnage | 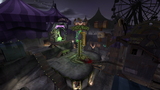
|
Özel Teslimat | sd_doomsday_event
|
2014 Cadılar Bayramı başarımları
|
|


Ek bilgiler
- Güncellemenin sayfasında büyülerin adını yazmak için Agathodaimon sembolleri kullanılmıştır. Bu semboller 2012 ve 2013'teki Cadılar Bayramlarında da kullanılmıştır.
Dış bağlantılar
| ||||||||||||||||||||||||||||||||||||||||||||||||||||||||||||||||||||||||||||||||||||||||||||||||||