Difference between revisions of "Community Bread Space strategy"
SychTheDry (talk | contribs) m (→While Attacking: changed an error) |
GrampaSwood (talk | contribs) m (Condensed everything into 3 small points (While removing generic tips such as "Watch out for Spies" and "Keep your buildings moving with the Payload cart"), removed images as they cluttered the page up, fixed most of the formatting. Feel free to reword.) |
||
| Line 39: | Line 39: | ||
=== {{class link|Engineer}}=== | === {{class link|Engineer}}=== | ||
| − | + | * While defending near the first BLU spawn, consider putting your sentry behind the yellow panels, this makes it harder for enemies to reach the Sentry and is an unexpected spot. This spot also works well if attacking. | |
| − | + | ** Another good place for a Sentry is on a bridge near the end of the map, as enemies will have to pass through this point and will have to focus your Sentry for a while, delaying their advance. | |
| − | + | ** At the complete end of the map at the giant Bread Monster is another good spot for your Sentry, place it in such a way that it can see most of the Payload cart track but doesn't stick out too much to make it harder to destroy. | |
| − | |||
| − | |||
| − | |||
| − | |||
| − | |||
| − | |||
| − | |||
| − | |||
| − | |||
| − | |||
| − | |||
| − | |||
| − | |||
| − | |||
| − | |||
| − | |||
| − | |||
| − | |||
| − | |||
| − | |||
| − | |||
| − | |||
| − | |||
| − | |||
| − | |||
| − | |||
| − | |||
| − | |||
| − | |||
| − | |||
| − | |||
| − | |||
| − | |||
| − | |||
| − | |||
| − | |||
| − | |||
| − | |||
| − | |||
| − | |||
| − | |||
| − | |||
| − | |||
| − | |||
| − | |||
| − | |||
| − | |||
| − | |||
| − | |||
| − | |||
| − | |||
| − | |||
| − | |||
| − | |||
| − | |||
| − | |||
| − | |||
=== {{class link|Medic}} === | === {{class link|Medic}} === | ||
Revision as of 13:53, 10 February 2022
| “Sun Tzu's got nothing on us!” This article is a Community strategy stub. As such, it is not complete. You can help the Team Fortress Wiki Community Strategy Project by expanding it. |
| Community Bread Space strategy | |
|---|---|

| |
| Basic Information | |
| Developer(s): | {{{map-developer}}} |
| Map Info | |
| Environment: | Space |
| Setting: | Night, moon |
| Hazards: | Bread Monster, Pitfalls, Green fissures |
| Map Photos | |
This article is about Community Bread Space strategy.
Note: It is recommended to read the main Bread Space article first to become familiar with the names of key map locations used in this article.
Contents
General Strategy
Bread Space, even though containing a lot of cover for you to hide behind, is still a very open map and you are in danger from most sides. The most important rule of this map is to scan your surroundings. A very useful note is that you can use the bread monsters forming in the radioactive puddles as a source of acceleration. By crouching near a bread monster and hitting it with your melee weapon, it explodes giving you a lot of knockback and some damage. It's a useful way of transportation similar to rocket/sticky jumping. But remember to use it wisely! it takes a bit of damage and takes some time to respawn, so don't waste it!
Class-specific strategy
 Scout
Scout
 Soldier
 Pyro
Pyro
 Demoman
 Heavy
Heavy
 Engineer
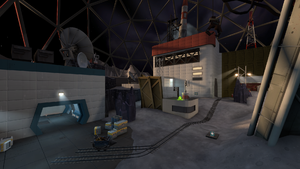
- While defending near the first BLU spawn, consider putting your sentry behind the yellow panels, this makes it harder for enemies to reach the Sentry and is an unexpected spot. This spot also works well if attacking.
- Another good place for a Sentry is on a bridge near the end of the map, as enemies will have to pass through this point and will have to focus your Sentry for a while, delaying their advance.
- At the complete end of the map at the giant Bread Monster is another good spot for your Sentry, place it in such a way that it can see most of the Payload cart track but doesn't stick out too much to make it harder to destroy.
