Difference between revisions of "User:GrampaSwood/Template:CasualList"
GrampaSwood (talk | contribs) (A/D done, except for Snowplow. Thinking of changing the format) |
GrampaSwood (talk | contribs) |
||
| (3 intermediate revisions by the same user not shown) | |||
| Line 1: | Line 1: | ||
| + | {{fmbox | ||
| + | | image = Warning red.png | ||
| + | | text = The row in the middle is temporary until I find a better solution for having a gap inbetween it | ||
| + | | class = enerror | ||
| + | }} | ||
| + | |||
{{hatnote|{{lang | {{hatnote|{{lang | ||
| en = '''Note:''' Community maps are identified in italics. | | en = '''Note:''' Community maps are identified in italics. | ||
| Line 19: | Line 25: | ||
}}}} | }}}} | ||
{| class="wikitable sortable grid" | {| class="wikitable sortable grid" | ||
| − | ! | + | ! colspan="11" class="unsortable header" | {{lang |
| − | + | | en = List of Casual Mode maps | |
| − | | en = | ||
| − | |||
| − | |||
| − | |||
| − | |||
| − | |||
| − | |||
| − | |||
| − | |||
| − | |||
| − | |||
| − | |||
| − | |||
| − | |||
| − | |||
| − | |||
| − | |||
| − | |||
| − | |||
| − | |||
| − | |||
| − | |||
| − | |||
| − | |||
| − | |||
| − | |||
| − | |||
| − | |||
| − | |||
| − | |||
| − | |||
| − | |||
| − | |||
| − | |||
| − | |||
| − | |||
| − | |||
| − | |||
| − | |||
| − | |||
| − | |||
| − | |||
| − | |||
| − | |||
| − | |||
| − | |||
| − | |||
| − | |||
| − | |||
| − | |||
| − | |||
| − | |||
| − | |||
| − | |||
| − | |||
| − | |||
| − | |||
| − | |||
| − | |||
| − | |||
| − | |||
| − | |||
| − | |||
| − | |||
| − | |||
| − | |||
| − | |||
| − | |||
| − | |||
| − | |||
| − | |||
| − | |||
| − | |||
| − | |||
| − | |||
| − | |||
| − | |||
| − | |||
| − | |||
| − | |||
| − | |||
| − | |||
| − | |||
| − | |||
| − | |||
| − | |||
| − | |||
| − | |||
| − | |||
| − | |||
| − | |||
| − | |||
| − | |||
| − | |||
| − | |||
| − | |||
| − | |||
| − | |||
| − | |||
| − | |||
| − | |||
| − | |||
| − | |||
| − | |||
| − | |||
| − | |||
| − | |||
}} | }} | ||
| − | + | |- | |
| − | | | + | ! colspan="11" class="unsortable header" | {{lang |
| − | + | | en = Core game modes | |
| − | |||
| − | | | ||
| − | | | ||
}} | }} | ||
| + | |- | ||
| + | ! colspan="5" class="unsortable header" | {{gamemode link|Attack/Defend}} | ||
| + | ! class="unsortable header" style="width:1%;" | | ||
| + | ! colspan="5" class="unsortable header" | {{gamemode link|Capture the Flag}} | ||
| + | |- <!-- row 1 Attack/Defend images --> | ||
| + | | [[File:Cp altitude.png|150px|link=Altitude{{if lang}}]] | ||
| + | | [[File:TF2 Dustbowl Map.jpg|150px|link=Dustbowl{{if lang}}]] | ||
| + | | [[File:Cp gorge.jpg|150px|link=Gorge{{if lang}}]] | ||
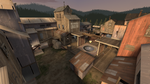
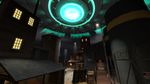
| + | | [[File:Ctf haarp.png|150px|link=Haarp{{if lang}}]] | ||
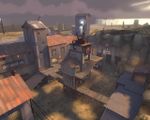
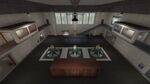
| + | | [[File:Junct 01.png|150px|link=Junction{{if lang}}]] | ||
| + | | <!-- row 1 Capture the Flag images --> | ||
| + | | [[File:Ctf 2fort bridge ss.png|150px|link=2Fort{{if lang}}]] | ||
| + | | [[File:CTF DoubleCross RedBase.png|150px|link=Double Cross{{if lang}}]] | ||
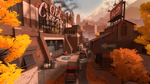
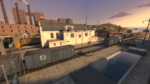
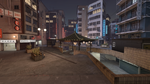
| + | | [[File:Ctf landfall red base.png|150px|link=Landfall{{if lang}}]] | ||
| + | | [[File:CTF Sawmill Center.png|150px|link=Sawmill (Capture the Flag){{if lang}}]] | ||
| + | | [[File:Ctfwell04.png|150px|link=Well (Capture the Flag){{if lang}}]] | ||
| + | |- <!-- row 1 Attack/Defend map names --> | ||
| + | | class="nameplate" | {{italics|{{map link|Altitude}}}} | ||
| + | | class="nameplate" | {{map link|Dustbowl}} | ||
| + | | class="nameplate" | {{map link|Gorge}} | ||
| + | | class="nameplate" | {{italics|{{map link|Haarp}}}} | ||
| + | | class="nameplate" | {{italics|{{map link|Junction}}}} | ||
| + | | <!-- row 1 Capture the Flag map names --> | ||
| + | | class="nameplate" | {{map link|2Fort}} | ||
| + | | class="nameplate" | {{map link|Double Cross}} | ||
| + | | class="nameplate" | {{italics|{{map link|Landfall}}}} | ||
| + | | class="nameplate" | {{map link|Sawmill|Sawmill (Capture the Flag)}} | ||
| + | | class="nameplate" | {{map link|Well|Well (Capture the Flag)}} | ||
| + | |- <!-- row 2 Attack/Defend maps --> | ||
| + | | [[File:Mossrock main.png|150px|link=Mossrock{{if lang}}]] | ||
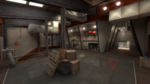
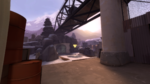
| + | | [[File:Steel Main.png|150px|link=Steel{{if lang}}]] | ||
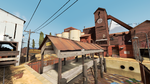
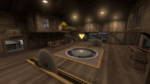
| + | | [[File:Cp brew.png|150px|link=Brew{{if lang}}]] | ||
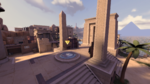
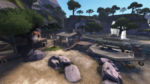
| + | | [[File:Egypt 01.png|150px|link=Egypt{{if lang}}]] | ||
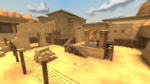
| + | | [[File:Tf2 gravelpit.jpg|150px|link=Gravel Pit{{if lang}}]] | ||
| + | | <!-- row 2 Capture the Flag maps --> | ||
| + | | [[File:Ctf 2fort invasion.png|150px|link=2Fort Invasion{{if lang}}]] | ||
| + | | [[File:Ctf frosty.png|150px|link=Frosty{{if lang}}]] | ||
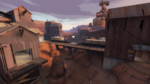
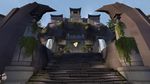
| + | | [[File:Ctf pelican peak.png|150px|link=Pelican Peak{{if lang}}]] | ||
| + | | [[File:CTF Turbine Center.png|150px|link=Turbine{{if lang}}]] | ||
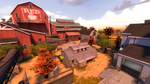
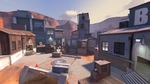
| + | | [[File:Ctf applejack.png|150px|link=Applejack{{if lang}}]] | ||
| + | |- <!-- row 2 Attack/Defend map names --> | ||
| + | | class="nameplate" | {{italics|{{map link|Mossrock}}}} | ||
| + | | class="nameplate" | {{italics|{{map link|Steel}}}} | ||
| + | | class="nameplate" | {{italics|{{map link|Brew}}}} | ||
| + | | class="nameplate" | {{italics|{{map link|Egypt}}}} | ||
| + | | class="nameplate" | {{map link|Gravel Pit}} | ||
| + | | <!-- row 2 Capture the Flag map names --> | ||
| + | | class="nameplate" | {{italics|{{map link|2Fort Invasion}}}} | ||
| + | | class="nameplate" | {{italics|{{map link|Frosty}}}} | ||
| + | | class="nameplate" | {{italics|{{map link|Pelican Peak}}}} | ||
| + | | class="nameplate" | {{italics|{{map link|Turbine}}}} | ||
| + | | class="nameplate" | {{italics|{{map link|Applejack}}}} | ||
| + | |- <!-- row 3 Attack/Defend maps --> | ||
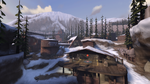
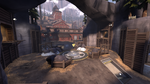
| + | | [[File:Cp hardwood.png|150px|link=Hardwood{{if lang}}]] | ||
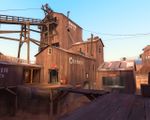
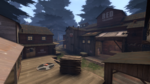
| + | | [[File:Yetipark 5.png|150px|link=Mercenary Park{{if lang}}]] | ||
| + | | [[File:Art Pass Winner 3DNJ.jpg|150px|link=Mountain Lab{{if lang}}]] | ||
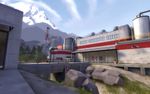
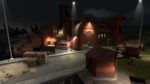
| + | | [[File:Cp sulfur.png|150px|link=Sulfur{{if lang}}]] | ||
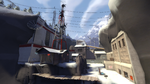
| + | | [[File:Cp hadal.png|150px|link=Hadal{{if lang}}]] | ||
| + | |- <!-- row 3 Attack/Defend map names --> | ||
| + | | class="nameplate" | {{italics|{{map link|Hardwood}}}} | ||
| + | | class="nameplate" | {{map link|Mercenary Park}} | ||
| + | | class="nameplate" | {{italics|{{map link|Mountain Lab}}}} | ||
| + | | class="nameplate" | {{italics|{{map link|Sulfur}}}} | ||
| + | | class="nameplate" | {{map link|Hadal}} | ||
| + | |- <!-- row 4 Attack/Defend maps --> | ||
| + | | [[File:Cp overgrown.png|150px|link=Overgrown{{if lang}}]] | ||
| + | |- <!-- row 4 Attack/Defend map names --> | ||
| + | | class="nameplate" | {{italics|{{map link|Overgrown}}}} | ||
| + | |- | ||
| + | ! colspan="5" class="unsortable header" | {{gamemode link|Control Point}} | ||
| + | ! class="unsortable header" style="width:1%;" | | ||
| + | ! colspan="5" class="unsortable header" | {{gamemode link|King of the Hill}} | ||
| + | |- <!-- row 1 Control Point maps --> | ||
| + | | [[File:5gorge1.png|150px|link=5Gorge{{if lang}}]] | ||
| + | | [[File:Coldfront5.png|150px|link=Coldfront{{if lang}}]] | ||
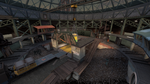
| + | | [[File:Cp foundry mid.png|150px|link=Foundry{{if lang}}]] | ||
| + | | [[File:TF2 Granary Map.png|150px|link=Granary (Control Point){{if lang}}]] | ||
| + | | [[File:Cp metalworks.png|150px|link=Metalworks{{if lang}}]] | ||
| + | | <!-- row 1 King of the Hill maps --> | ||
| + | | [[File:Koth badlands.png|150px|link=Badlands (Control Point){{if lang}}]] | ||
| + | | [[File:Koth cascade.png|150px|link=Cascade{{if lang}}]] | ||
| + | | [[File:KOTH Highpass.png|150px|link=Highpass{{if lang}}]] | ||
| + | | [[File:Koth lakeside final.png|150px|link=Lakeside{{if lang}}]] | ||
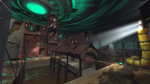
| + | | [[File:Nucleus.PNG|150px|link=Nucleus (King of the Hill){{if lang}}]] | ||
| + | |- <!-- row 1 Control Point map names --> | ||
| + | | class="nameplate" | {{map link|5Gorge}} | ||
| + | | class="nameplate" | {{italics|{{map link|Coldfront}}}} | ||
| + | | class="nameplate" | {{map link|Foundry}} | ||
| + | | class="nameplate" | {{map link|Granary|Granary (Control Point)}} | ||
| + | | class="nameplate" | {{italics|{{map link|Metalworks}}}} | ||
| + | | <!-- row 1 King of the Hill map names --> | ||
| + | | class="nameplate" | {{map link|Badlands|Badlands (King of the Hill)}} | ||
| + | | class="nameplate" | {{italics|{{map link|Cascade}}}} | ||
| + | | class="nameplate" | {{italics|{{map link|Highpass}}}} | ||
| + | | class="nameplate" | {{italics|{{map link|Lakeside}}}} | ||
| + | | class="nameplate" | {{map link|Nucleus|Nucleus (King of the Hill)}} | ||
| + | |- <!-- row 2 Control Point maps --> | ||
| + | | [[File:Cp process middle point.png|150px|link=Process{{if lang}}]] | ||
| + | | [[File:Snakewater mid.png|150px|link=Snakewater{{if lang}}]] | ||
| + | | [[File:Sunshine main.png|150px|link=Sunshine{{if lang}}]] | ||
| + | | [[File:TF2 Well Map.png|150px|link=Well (Control Point){{if lang}}]] | ||
| + | | [[File:Badlands2.png|150px|link=Badlands (Control Point){{if lang}}]] | ||
| + | | <!-- row 2 King of the Hill maps --> | ||
| + | | [[File:Koth rotunda.png|150px|link=Rotunda{{if lang}}]] | ||
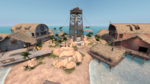
| + | | [[File:Koth sharkbay.png|150px|link=Sharkbay{{if lang}}]] | ||
| + | | [[File:Suijin main.jpg|150px|link=Suijin{{if lang}}]] | ||
| + | | [[File:Brazil main.jpg|150px|link=Brazil{{if lang}}]] | ||
| + | | [[File:KOTH Harvest Farmhouse.png|150px|link=Harvest{{if lang}}]] | ||
| + | |- <!-- row 2 Control Point map names --> | ||
| + | | class="nameplate" | {{italics|{{map link|Process}}}} | ||
| + | | class="nameplate" | {{italics|{{map link|Snakewater}}}} | ||
| + | | class="nameplate" | {{italics|{{map link|Sunshine}}}} | ||
| + | | class="nameplate" | {{map link|Well|Well (Control Point)}} | ||
| + | | class="nameplate" | {{map link|Badlands|Badlands (Control Point)}} | ||
| + | | <!-- row 2 King of the Hill map names --> | ||
| + | | class="nameplate" | {{italics|{{map link|Rotunda}}}} | ||
| + | | class="nameplate" | {{italics|{{map link|Sharkbay}}}} | ||
| + | | class="nameplate" | {{italics|{{map link|Suijin}}}} | ||
| + | | class="nameplate" | {{italics|{{map link|Brazil}}}} | ||
| + | | class="nameplate" | {{italics|{{map link|Harvest}}}} | ||
| + | |- <!-- row 3 Control Point maps --> | ||
| + | | [[File:Fastlane1.png|150px|link=Fastlane{{if lang}}]] | ||
| + | | [[File:Freight1.png|150px|link=Freight{{if lang}}]] | ||
| + | | [[File:CP Gullywash 3.png|150px|link=Gullywash{{if lang}}]] | ||
| + | | [[File:Cp powerhouse.png|150px|link=Powerhouse{{if lang}}]] | ||
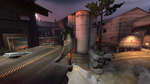
| + | | [[File:Cp reckoner.png|150px|link=Reckoner{{if lang}}]] | ||
| + | | <!-- row 3 King of the Hill maps --> | ||
| + | | [[File:Kong King.png|150px|link=Kong King{{if lang}}]] | ||
| + | | [[File:Lazarus main.jpg|150px|link=Lazarus{{if lang}}]] | ||
| + | | [[File:Koth probed.jpg|150px|link=Probed{{if lang}}]] | ||
| + | | [[File:Koth sawmill.png|150px|link=Sawmill (King of the Hill){{if lang}}]] | ||
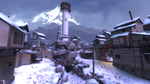
| + | | [[File:Koth snowtower.png|150px|link=Snowtower{{if lang}}]] | ||
| + | |- <!-- row 3 Control Point map names --> | ||
| + | | class="nameplate" | {{italics|{{map link|Fastlane}}}} | ||
| + | | class="nameplate" | {{italics|{{map link|Freight}}}} | ||
| + | | class="nameplate" | {{italics|{{map link|Gullywash}}}} | ||
| + | | class="nameplate" | {{map link|Powerhouse}} | ||
| + | | class="nameplate" | {{italics|{{map link|Reckoner}}}} | ||
| + | | <!-- row 3 King of the Hill map names --> | ||
| + | | class="nameplate" | {{italics|{{map link|Kong King}}}} | ||
| + | | class="nameplate" | {{italics|{{map link|Lazarus}}}} | ||
| + | | class="nameplate" | {{italics|{{map link|Probed}}}} | ||
| + | | class="nameplate" | {{map link|Sawmill|Sawmill (King of the Hill)}} | ||
| + | | class="nameplate" | {{italics|{{map link|Snowtower}}}} | ||
| + | |- <!-- row 4 Control Point maps --> | ||
| + | | [[File:Cp standin B.png|150px|link=Standin{{if lang}}]] | ||
| + | | [[File:Cp vanguard.png|150px|link=Vanguard{{if lang}}]] | ||
| + | | [[File:CP Yukon overview.png|150px|link=Yukon{{if lang}}]] | ||
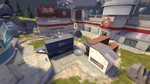
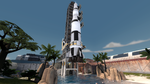
| + | | [[File:Cp canaveral 5cp.png|150px|link=Canaveral{{if lang}}]] | ||
| + | | <!-- row 4 King of the Hill maps --> | ||
| + | | | ||
| + | | [[File:Koth viaduct.png|150px|link=Viaduct{{if lang}}]] | ||
| + | | [[File:Cachoeira.png|150px|link=Cachoeira{{if lang}}]] | ||
| + | | [[File:Megaton.png|150px|link=Megaton{{if lang}}]] | ||
| + | |- <!-- row 4 Control Point map names --> | ||
| + | | class="nameplate" | {{italics|{{map link|Standin}}}} | ||
| + | | class="nameplate" | {{italics|{{map link|Vanguard}}}} | ||
| + | | class="nameplate" | {{italics|{{map link|Yukon}}}} | ||
| + | | class="nameplate" | {{italics|{{map link|Canaveral}}}} | ||
| + | | <!-- row 4 King of the Hill map names --> | ||
| + | | | ||
| + | | class="nameplate" | {{map link|Viaduct}} | ||
| + | | class="nameplate" | {{italics|{{map link|Cachoeira}}}} | ||
| + | | class="nameplate" | {{italics|{{map link|Megaton}}}} | ||
|} | |} | ||
Latest revision as of 23:39, 16 August 2024
 | The row in the middle is temporary until I find a better solution for having a gap inbetween it |
Note: Community maps are identified in italics.