Difference between revisions of "Scream Fortress 2013/pt-br"
BrazilianNut (talk | contribs) m (Added {{Scream Fortress Events Nav}}.) |
GrampaSwood (talk | contribs) |
||
| (5 intermediate revisions by 2 users not shown) | |||
| Line 14: | Line 14: | ||
== Adições == | == Adições == | ||
| − | === | + | === NPCs === |
| − | {| class="wikitable collapsible" cellpadding=" | + | * [[Skeletons/pt-br|Esqueletos]] |
| − | | width=" | + | * [[Monoculus/pt-br|Monoculus]] |
| − | | | + | |
| − | | style="background: #F1ECF7;"| '''{{item link| | + | === Conjuntos de fantasias === |
| + | {{main|Halloween Costumes/pt-br|l1=Fantasias de Dia das Bruxas}} | ||
| + | {| class="wikitable collapsible" cellpadding="2" style="text-align:center;" | ||
| + | | width="90px" style="background:#6A5587;" rowspan="2" | '''{{class link|Scout|br=yes|color=white}}''' | ||
| + | | style="background:#E8E2F0;" rowspan="2" | '''{{item link|Boston Bulldog}}'''<br/> | ||
| + | | style="background:#AD9DC3;" | {{icon item|Hound's Hood|75px}} | ||
| + | | style="background:#F1ECF7;" | '''{{item link|Hound's Hood}}''' | ||
|- | |- | ||
| − | | | + | | style="background:#AD9DC3;" | {{icon item|Terrier Trousers|75px}} |
| − | | style="background: #F1ECF7;"| '''{{item link| | + | | style="background:#F1ECF7;" | '''{{item link|Terrier Trousers}}''' |
|- | |- | ||
| − | | | + | | style="background:#6A5587;" rowspan="6" | '''{{class link|Soldier|br=yes|color=white}}''' |
| − | | style="background: #F1ECF7;"| '''{{item link| | + | | style="background:#E8E2F0;" rowspan="3" | '''{{item link|Rocket Ranger}}'''<br/> |
| + | | style="background:#AD9DC3;" | {{icon item|Hardium Helm|75px}} | ||
| + | | style="background:#F1ECF7;" | '''{{item link|Hardium Helm}}''' | ||
|- | |- | ||
| − | | | + | | style="background:#AD9DC3;" | {{icon item|Space Bracers|75px}} |
| − | | style="background: #F1ECF7;"| '''{{item link| | + | | style="background:#F1ECF7;" | '''{{item link|Space Bracers}}''' |
|- | |- | ||
| − | | | + | | style="background:#AD9DC3;" | {{icon item|Jupiter Jumpers|75px}} |
| − | | style="background: #F1ECF7;"| '''{{item link| | + | | style="background:#F1ECF7;" | '''{{item link|Jupiter Jumpers}}''' |
|- | |- | ||
| − | | | + | | style="background:#E8E2F0;" rowspan="3" | '''{{item link|The Terracotta Trooper}}'''<br/> |
| − | | | + | | style="background:#AD9DC3;" | {{icon item|Hidden Dragon|75px}} |
| − | | style="background: #F1ECF7;"| '''{{item link| | + | | style="background:#F1ECF7;" | '''{{item link|Hidden Dragon}}''' |
|- | |- | ||
| − | | | + | | style="background:#AD9DC3;" | {{icon item|Faux Manchu|75px}} |
| − | | style="background: #F1ECF7;"| '''{{item link| | + | | style="background:#F1ECF7;" | '''{{item link|Faux Manchu}}''' |
|- | |- | ||
| − | | | + | | style="background:#AD9DC3;" | {{icon item|Shaolin Sash|75px}} |
| − | | style="background: #F1ECF7;"| '''{{item link| | + | | style="background:#F1ECF7;" | '''{{item link|Shaolin Sash}}''' |
|- | |- | ||
| − | | | + | | style="background:#6A5587;" rowspan="7" | '''{{class link|Pyro|br=yes|color=white}}''' |
| − | | style="background: #F1ECF7;"| '''{{item link| | + | | style="background:#E8E2F0;" rowspan="3" | '''{{item link|Burny the Pyrosaur}}'''<br/> |
| + | | style="background:#AD9DC3;" | {{icon item|Burny's Boney Bonnet|75px}} | ||
| + | | style="background:#F1ECF7;" | '''{{item link|Burny's Boney Bonnet}}''' | ||
|- | |- | ||
| − | | | + | | style="background:#AD9DC3;" | {{icon item|Cauterizer's Caudal Appendage|75px}} |
| − | | style="background: #F1ECF7;"| '''{{item link| | + | | style="background:#F1ECF7;" | '''{{item link|Cauterizer's Caudal Appendage}}''' |
|- | |- | ||
| − | | | + | | style="background:#AD9DC3;" | {{icon item|Monster's Stompers|75px}} |
| − | | style="background: #F1ECF7;"| '''{{item link| | + | | style="background:#F1ECF7;" | '''{{item link|Monster's Stompers}}''' |
|- | |- | ||
| − | | | + | | style="background:#E8E2F0;" rowspan="2" | '''{{item link|Malice in Pyroland}}'''<br/> |
| − | | | + | | style="background:#AD9DC3;" | {{icon item|Crispy Golden Locks|75px}} |
| − | | style="background: #F1ECF7;"| '''{{item link| | + | | style="background:#F1ECF7;" | '''{{item link|Crispy Golden Locks}}''' |
|- | |- | ||
| − | | | + | | style="background:#AD9DC3;" | {{icon item|Scorched Skirt|75px}} |
| − | | style="background: #F1ECF7;"| '''{{item link| | + | | style="background:#F1ECF7;" | '''{{item link|Scorched Skirt}}''' |
|- | |- | ||
| − | | | + | | style="background:#E8E2F0;" rowspan="2" | '''{{item link|Murky Lurker}}'''<br/> |
| − | | style="background: #F1ECF7;"| '''{{item link| | + | | style="background:#AD9DC3;" | {{icon item|Vicious Visage|75px}} |
| + | | style="background:#F1ECF7;" | '''{{item link|Vicious Visage}}''' | ||
|- | |- | ||
| − | | | + | | style="background:#AD9DC3;" | {{icon item|Abhorrent Appendages|75px}} |
| − | | style="background: #F1ECF7;"| '''{{item link| | + | | style="background:#F1ECF7;" | '''{{item link|Abhorrent Appendages}}''' |
|- | |- | ||
| − | | | + | | style="background:#6A5587;" rowspan="4" | '''{{class link|Demoman|br=yes|color=white}}''' |
| − | | style="background: #F1ECF7;"| '''{{item link| | + | | style="background:#E8E2F0;" rowspan="2" | '''{{item link|Count Tavish}}'''<br/> |
| + | | style="background:#AD9DC3;" | {{icon item|Transylvania Top|75px}} | ||
| + | | style="background:#F1ECF7;" | '''{{item link|Transylvania Top}}''' | ||
|- | |- | ||
| − | | | + | | style="background:#AD9DC3;" | {{icon item|Lordly Lapels|75px}} |
| − | | style="background: #F1ECF7;"| '''{{item link| | + | | style="background:#F1ECF7;" | '''{{item link|Lordly Lapels}}''' |
|- | |- | ||
| − | | | + | | style="background:#E8E2F0;" rowspan="2" | '''{{item link|Cursed Captain}}'''<br/> |
| − | | style="background: #F1ECF7;"| '''{{item link| | + | | style="background:#AD9DC3;" | {{icon item|Squid's Lid|75px}} |
| + | | style="background:#F1ECF7;" | '''{{item link|Squid's Lid}}''' | ||
|- | |- | ||
| − | | | + | | style="background:#AD9DC3;" | {{icon item|Cap'n Calamari|75px}} |
| − | | style="background: #F1ECF7;"| '''{{item link| | + | | style="background:#F1ECF7;" | '''{{item link|Cap'n Calamari}}''' |
|- | |- | ||
| − | | | + | | style="background:#6A5587;" rowspan="4" | '''{{class link|Medic|br=yes|color=white}}''' |
| − | | style="background: #F1ECF7;"| '''{{item link| | + | | style="background:#E8E2F0;" rowspan="2" | '''{{item link|Doctor Galactic}}'''<br/> |
| + | | style="background:#AD9DC3;" | {{icon item|Surgeon's Space Suit|75px}} | ||
| + | | style="background:#F1ECF7;" | '''{{item link|Surgeon's Space Suit}}''' | ||
|- | |- | ||
| − | | | + | | style="background:#AD9DC3;" | {{icon item|Lo-Grav Loafers|75px}} |
| − | | style="background: #F1ECF7;"| '''{{item link| | + | | style="background:#F1ECF7;" | '''{{item link|Lo-Grav Loafers}}''' |
|- | |- | ||
| − | | | + | | style="background:#E8E2F0;" rowspan="2" | '''{{item link|Sun King}}'''<br/> |
| − | | style="background: #F1ECF7;"| '''{{item link| | + | | style="background:#AD9DC3;" | {{icon item|Teutonkahmun|75px}} |
| + | | style="background:#F1ECF7;" | '''{{item link|Teutonkahmun}}''' | ||
|- | |- | ||
| − | | | + | | style="background:#AD9DC3;" | {{icon item|Ramses' Regalia|75px}} |
| − | | style="background: #F1ECF7;"| '''{{item link| | + | | style="background:#F1ECF7;" | '''{{item link|Ramses' Regalia}}''' |
|- | |- | ||
| − | | | + | | style="background:#6A5587;" rowspan="3" | '''{{class link|Spy|br=yes|color=white}}''' |
| − | | style="background: #F1ECF7;"| '''{{item link| | + | | style="background:#E8E2F0;" rowspan="3" | '''{{item link|Gravelpit Emperor}}'''<br/> |
| + | | style="background:#AD9DC3;" | {{icon item|Candyman's Cap|75px}} | ||
| + | | style="background:#F1ECF7;" | '''{{item link|Candyman's Cap}}''' | ||
|- | |- | ||
| − | | | + | | style="background:#AD9DC3;" | {{icon item|Bountiful Bow|75px}} |
| − | | style="background: #F1ECF7;"| '''{{item link| | + | | style="background:#F1ECF7;" | '''{{item link|Bountiful Bow}}''' |
|- | |- | ||
| − | | align=" | + | | style="background:#AD9DC3;" | {{icon item|Bozo's Brogues|75px}} |
| − | | style="background: #F1ECF7;"| '''{{item link| | + | | style="background:#F1ECF7;" | '''{{item link|Bozo's Brogues}}''' |
| + | |} | ||
| + | |||
| + | === Itens cosméticos === | ||
| + | {{main|Cosmetic items/pt-br|l1=Itens cosméticos}} | ||
| + | {| class="wikitable collapsible" cellpadding="3" style="text-align:center;" | ||
| + | | width="90px" style="background:#6A5587;" rowspan="5" | '''{{class link|Scout|br=yes|color=white}}''' | ||
| + | | width="75px" style="background:#AD9DC3;" | {{item icon|Face Plante|75px}} | ||
| + | | width="230px" style="background:#F1ECF7;" | '''{{item link|Face Plante}}''' | ||
|- | |- | ||
| − | | | + | | style="background:#AD9DC3;" | {{item icon|Faun Feet|75px}} |
| − | | style="background: #F1ECF7;"| '''{{item link| | + | | style="background:#F1ECF7;" | '''{{item link|Faun Feet}}''' |
|- | |- | ||
| − | | | + | | style="background:#AD9DC3;" | {{item icon|Halloweiner|75px}} |
| − | | style="background: #F1ECF7;"| '''{{item link| | + | | style="background:#F1ECF7;" | '''{{item link|Halloweiner}}''' |
|- | |- | ||
| − | | | + | | style="background:#AD9DC3;" | {{item icon|Horrific Head of Hare|75px}} |
| − | | style="background: #F1ECF7;"| '''{{item link| | + | | style="background:#F1ECF7;" | '''{{item link|Horrific Head of Hare}}''' |
|- | |- | ||
| − | | | + | | style="background:#AD9DC3;" | {{item icon|Sprinting Cephalopod|75px}} |
| − | | style="background: #F1ECF7;"| '''{{item link| | + | | style="background:#F1ECF7;" | '''{{item link|Sprinting Cephalopod}}''' |
|- | |- | ||
| − | | | + | | style="background:#6A5587;" rowspan="6" | '''{{class link|Soldier|br=yes|color=white}}''' |
| − | | style="background: #F1ECF7;"| '''{{item link| | + | | style="background:#AD9DC3;" | {{item icon|Cadaver's Capper|75px}} |
| + | | style="background:#F1ECF7;" | '''{{item link|Cadaver's Capper}}''' | ||
|- | |- | ||
| − | | | + | | style="background:#AD9DC3;" | {{item icon|Freedom Feathers|75px}} |
| − | | style="background: #F1ECF7;"| '''{{item link| | + | | style="background:#F1ECF7;" | '''{{item link|Freedom Feathers}}''' |
|- | |- | ||
| − | | | + | | style="background:#AD9DC3;" | {{item icon|Grub Grenades|75px}} |
| − | + | | style="background:#F1ECF7;" | '''{{item link|Grub Grenades}}''' | |
| − | | style="background: #F1ECF7;"| '''{{item link| | ||
|- | |- | ||
| − | | | + | | style="background:#AD9DC3;" | {{item icon|Larval Lid|75px}} |
| − | | style="background: #F1ECF7;"| '''{{item link| | + | | style="background:#F1ECF7;" | '''{{item link|Larval Lid}}''' |
|- | |- | ||
| − | | | + | | style="background:#AD9DC3;" | {{item icon|Lieutenant Bites the Dust|75px}} |
| − | | style="background: #F1ECF7;"| '''{{item link| | + | | style="background:#F1ECF7;" | '''{{item link|Lieutenant Bites the Dust}}''' |
|- | |- | ||
| − | | | + | | style="background:#AD9DC3;" | {{item icon|Spellbinder's Bonnet|75px}} |
| − | | style="background: #F1ECF7;"| '''{{item link| | + | | style="background:#F1ECF7;" | '''{{item link|Spellbinder's Bonnet}}''' |
|- | |- | ||
| − | | | + | | style="background:#6A5587;" rowspan="21" | '''{{class link|Pyro|br=yes|color=white}}''' |
| − | | style="background: #F1ECF7;"| '''{{item link| | + | | style="background:#AD9DC3;" | {{item icon|Beast from Below|75px}} |
| + | | style="background:#F1ECF7;" | '''{{item link|Beast from Below}}''' | ||
|- | |- | ||
| − | | | + | | style="background:#AD9DC3;" | {{item icon|Bozo's Bouffant|75px}} |
| − | + | | style="background:#F1ECF7;" | '''{{item link|Bozo's Bouffant}}''' | |
| − | | style="background: #F1ECF7;"| '''{{item link| | ||
|- | |- | ||
| − | | | + | | style="background:#AD9DC3;" | {{item icon|Carrion Companion|75px}} |
| − | | style="background: #F1ECF7;"| '''{{item link| | + | | style="background:#F1ECF7;" | '''{{item link|Carrion Companion}}''' |
|- | |- | ||
| − | | | + | | style="background:#AD9DC3;" | {{item icon|Corpsemopolitan|75px}} |
| − | | style="background: #F1ECF7;"| '''{{item link| | + | | style="background:#F1ECF7;" | '''{{item link|Corpsemopolitan}}''' |
|- | |- | ||
| − | | | + | | style="background:#AD9DC3;" | {{item icon|Creature from the Heap|75px}} |
| − | | style="background: #F1ECF7;"| '''{{item link| | + | | style="background:#F1ECF7;" | '''{{item link|Creature from the Heap}}''' |
|- | |- | ||
| − | | | + | | style="background:#AD9DC3;" | {{item icon|Death Support Pack|75px}} |
| − | | style="background: #F1ECF7;"| '''{{item link| | + | | style="background:#F1ECF7;" | '''{{item link|Death Support Pack}}''' |
|- | |- | ||
| − | | | + | | style="background:#AD9DC3;" | {{item icon|External Organ|75px}} |
| − | + | | style="background:#F1ECF7;" | '''{{item link|External Organ}}''' | |
| − | | style="background: #F1ECF7;"| '''{{item link| | ||
|- | |- | ||
| − | | | + | | style="background:#AD9DC3;" | {{item icon|Glob|75px}} |
| − | + | | style="background:#F1ECF7;" | '''{{item link|Glob}}''' | |
| − | | style="background: #F1ECF7;"| '''{{item link| | ||
|- | |- | ||
| − | | | + | | style="background:#AD9DC3;" | {{item icon|Gothic Guise|75px}} |
| − | | style="background: #F1ECF7;"| '''{{item link| | + | | style="background:#F1ECF7;" | '''{{item link|Gothic Guise}}''' |
|- | |- | ||
| − | | | + | | style="background:#AD9DC3;" | {{item icon|Grisly Gumbo|75px}} |
| − | | style="background: #F1ECF7;"| '''{{item link| | + | | style="background:#F1ECF7;" | '''{{item link|Grisly Gumbo}}''' |
|- | |- | ||
| − | | | + | | style="background:#AD9DC3;" | {{item icon|Handhunter|75px}} |
| − | | style="background: #F1ECF7;"| '''{{item link| | + | | style="background:#F1ECF7;" | '''{{item link|Handhunter}}''' |
|- | |- | ||
| − | | | + | | style="background:#AD9DC3;" | {{item icon|Hard-Headed Hardware|75px}} |
| − | | style="background: #F1ECF7;"| '''{{item link| | + | | style="background:#F1ECF7;" | '''{{item link|Hard-Headed Hardware}}''' |
|- | |- | ||
| − | | | + | | style="background:#AD9DC3;" | {{item icon|Hollowhead|75px}} |
| − | | style="background: #F1ECF7;"| '''{{item link| | + | | style="background:#F1ECF7;" | '''{{item link|Hollowhead}}''' |
|- | |- | ||
| − | | | + | | style="background:#AD9DC3;" | {{item icon|Macabre Mask|75px}} |
| − | | style="background: #F1ECF7;"| '''{{item link| | + | | style="background:#F1ECF7;" | '''{{item link|Macabre Mask}}''' |
|- | |- | ||
| − | | | + | | style="background:#AD9DC3;" | {{item icon|Maniac's Manacles|75px}} |
| − | | style="background: #F1ECF7;"| '''{{item link| | + | | style="background:#F1ECF7;" | '''{{item link|Maniac's Manacles}}''' |
|- | |- | ||
| − | | | + | | style="background:#AD9DC3;" | {{item icon|Mucous Membrain|75px}} |
| − | + | | style="background:#F1ECF7;" | '''{{item link|Mucous Membrain}}''' | |
| − | | style="background: #F1ECF7;"| '''{{item link| | ||
|- | |- | ||
| − | | | + | | style="background:#AD9DC3;" | {{item icon|PY-40 Incinibot|75px}} |
| − | | style="background: #F1ECF7;"| '''{{item link| | + | | style="background:#F1ECF7;" | '''{{item link|PY-40 Incinibot}}''' |
|- | |- | ||
| − | | | + | | style="background:#AD9DC3;" | {{item icon|Raven's Visage|75px}} |
| − | | style="background: #F1ECF7;"| '''{{item link| | + | | style="background:#F1ECF7;" | '''{{item link|Raven's Visage}}''' |
|- | |- | ||
| − | | | + | | style="background:#AD9DC3;" | {{item icon|Rugged Respirator|75px}} |
| − | + | | style="background:#F1ECF7;" | '''{{item link|Rugged Respirator}}''' | |
| − | | style="background: #F1ECF7;"| '''{{item link| | ||
|- | |- | ||
| − | | | + | | style="background:#AD9DC3;" | {{item icon|Spectralnaut|75px}} |
| − | | style="background: #F1ECF7;"| '''{{item link| | + | | style="background:#F1ECF7;" | '''{{item link|Spectralnaut}}''' |
|- | |- | ||
| − | | | + | | style="background:#AD9DC3;" | {{item icon|Up Pyroscopes|75px}} |
| − | + | | style="background:#F1ECF7;" | '''{{item link|Up Pyroscopes}}''' | |
| − | | style="background: #F1ECF7;"| '''{{item link| | ||
|- | |- | ||
| − | | | + | | style="background:#6A5587;" rowspan="5" | '''{{class link|Demoman|br=yes|color=white}}''' |
| − | | | + | | style="background:#AD9DC3;" | {{item icon|Headtaker's Hood|75px}} |
| − | | style="background: #F1ECF7;"| '''{{item link| | + | | style="background:#F1ECF7;" | '''{{item link|Headtaker's Hood}}''' |
|- | |- | ||
| − | | | + | | style="background:#AD9DC3;" | {{item icon|Horsemann's Hand-Me-Down|75px}} |
| − | + | | style="background:#F1ECF7;" | '''{{item link|Horsemann's Hand-Me-Down}}''' | |
| − | | style="background: #F1ECF7;"| '''{{item link| | ||
|- | |- | ||
| − | | | + | | style="background:#AD9DC3;" | {{item icon|Mann-Bird of Aberdeen|75px}} |
| − | + | | style="background:#F1ECF7;" | '''{{item link|Mann-Bird of Aberdeen}}''' | |
| − | | style="background: #F1ECF7;"| '''{{item link| | ||
|- | |- | ||
| − | | | + | | style="background:#AD9DC3;" | {{item icon|Parasight|75px}} |
| − | + | | style="background:#F1ECF7;"| '''{{item link|Parasight}}''' | |
| − | | style="background: #F1ECF7;"| '''{{item link| | ||
|- | |- | ||
| − | | | + | | style="background:#AD9DC3;" | {{item icon|Polly Putrid|75px}} |
| − | + | | style="background:#F1ECF7;" | '''{{item link|Polly Putrid}}''' | |
| − | | style="background: #F1ECF7;"| '''{{item link| | ||
|- | |- | ||
| − | | | + | | style="background:#6A5587;" rowspan="5" | '''{{class link|Heavy|br=yes|color=white}}''' |
| − | | style="background: #F1ECF7;"| '''{{item link| | + | | style="background:#AD9DC3;" | {{item icon|Chicken Kiev|75px}} |
| + | | style="background:#F1ECF7;" | '''{{item link|Chicken Kiev}}''' | ||
|- | |- | ||
| − | | | + | | style="background:#AD9DC3;" | {{item icon|Horned Honcho|75px}} |
| − | | style="background: #F1ECF7;"| '''{{item link| | + | | style="background:#F1ECF7;" | '''{{item link|Horned Honcho}}''' |
|- | |- | ||
| − | | | + | | style="background:#AD9DC3;" | {{item icon|Ivan The Inedible|75px}} |
| − | | style="background: #F1ECF7;"| '''{{item link| | + | | style="background:#F1ECF7;" | '''{{item link|Ivan The Inedible}}''' |
|- | |- | ||
| − | | | + | | style="background:#AD9DC3;" | {{item icon|Last Bite|75px}} |
| − | | style="background: #F1ECF7;"| '''{{item link| | + | | style="background:#F1ECF7;" | '''{{item link|Last Bite}}''' |
|- | |- | ||
| − | | | + | | style="background:#AD9DC3;" | {{item icon|Monstrous Mandible|75px}} |
| − | | style="background: #F1ECF7;"| '''{{item link| | + | | style="background:#F1ECF7;" | '''{{item link|Monstrous Mandible}}''' |
|- | |- | ||
| − | | | + | | style="background:#6A5587;" rowspan="1" | '''{{class link|Engineer|br=yes|color=white}}''' |
| − | | style="background: #F1ECF7;"| '''{{item link| | + | | style="background:#AD9DC3;" | {{item icon|Grease Monkey|75px}} |
| + | | style="background:#F1ECF7;" | '''{{item link|Grease Monkey}}''' | ||
|- | |- | ||
| − | | | + | | style="background:#6A5587;" rowspan="8" | '''{{class link|Medic|br=yes|color=white}}''' |
| − | | style="background: #F1ECF7;"| '''{{item link| | + | | style="background:#AD9DC3;" | {{item icon|Alternative Medicine Mann|75px}} |
| + | | style="background:#F1ECF7;" | '''{{item link|Alternative Medicine Mann}}''' | ||
|- | |- | ||
| − | | | + | | style="background:#AD9DC3;" | {{item icon|Archimedes the Undying|75px}} |
| − | | style="background: #F1ECF7;"| '''{{item link| | + | | style="background:#F1ECF7;" | '''{{item link|Archimedes the Undying}}''' |
|- | |- | ||
| − | | | + | | style="background:#AD9DC3;" | {{item icon|Das Blutliebhaber|75px}} |
| − | | style="background: #F1ECF7;"| '''{{item link| | + | | style="background:#F1ECF7;" | '''{{item link|Das Blutliebhaber}}''' |
|- | |- | ||
| − | | | + | | style="background:#AD9DC3;" | {{item icon|Medimedes|75px}} |
| − | | style="background: #F1ECF7;"| '''{{item link| | + | | style="background:#F1ECF7;" | '''{{item link|Medimedes}}''' |
|- | |- | ||
| − | | | + | | style="background:#AD9DC3;" | {{item icon|Second Opinion|75px}} |
| − | | style="background: #F1ECF7;"| '''{{item link| | + | | style="background:#F1ECF7;" | '''{{item link|Second Opinion}}''' |
|- | |- | ||
| − | | | + | | style="background:#AD9DC3;" | {{item icon|Shaman's Skull|75px}} |
| − | | style="background: #F1ECF7;"| '''{{item link| | + | | style="background:#F1ECF7;" | '''{{item link|Shaman's Skull}}''' |
|- | |- | ||
| − | | | + | | style="background:#AD9DC3;" | {{item icon|Trepanabotomizer|75px}} |
| − | | style="background: #F1ECF7;"| '''{{item link| | + | | style="background:#F1ECF7;" | '''{{item link|Trepanabotomizer}}''' |
|- | |- | ||
| − | | | + | | style="background:#AD9DC3;" | {{item icon|Vicar's Vestments|75px}} |
| − | | style="background: #F1ECF7;"| '''{{item link| | + | | style="background:#F1ECF7;" | '''{{item link|Vicar's Vestments}}''' |
|- | |- | ||
| − | | | + | | style="background:#6A5587;" rowspan="3" | '''{{class link|Sniper|br=yes|color=white}}''' |
| − | + | | style="background:#AD9DC3;" | {{item icon|Carious Chameleon|75px}} | |
| − | + | | style="background:#F1ECF7;" | '''{{item link|Carious Chameleon}}''' | |
| − | |||
| − | |||
| − | |||
| − | | | ||
| − | | style="background:#F1ECF7;" | '''{{item link| | ||
|- | |- | ||
| − | | | + | | style="background:#AD9DC3;" | {{item icon|Hallowed Headcase|75px}} |
| − | | style="background:#F1ECF7;" | '''{{item link| | + | | style="background:#F1ECF7;" | '''{{item link|Hallowed Headcase}}''' |
|- | |- | ||
| − | | | + | | style="background:#AD9DC3;" | {{item icon|Sir Shootsalot|75px}} |
| − | + | | style="background:#F1ECF7;" | '''{{item link|Sir Shootsalot}}''' | |
| − | |||
| − | | style="background:#F1ECF7;" | '''{{item link| | ||
|- | |- | ||
| − | | | + | | style="background:#6A5587;" rowspan="2" | '''{{class link|Spy|br=yes|color=white}}''' |
| − | | style="background:#F1ECF7;" | '''{{item link| | + | | style="background:#AD9DC3;" | {{item icon|Foul Cowl|75px}} |
| + | | style="background:#F1ECF7;" | '''{{item link|Foul Cowl}}''' | ||
|- | |- | ||
| − | | | + | | style="background:#AD9DC3;" | {{item icon|Hyperbaric Bowler|75px}} |
| − | | style="background:#F1ECF7;" | '''{{item link| | + | | style="background:#F1ECF7;" | '''{{item link|Hyperbaric Bowler}}''' |
|- | |- | ||
| − | | style="background:# | + | | align="left" style="background:#6A5587;" rowspan="1" | '''{{class link|Scout|color=white}}<br>{{class link|Demoman|color=white}}''' |
| − | | | + | | style="background:#AD9DC3;" | {{item icon|Baphomet Trotters|75px}} |
| − | | style="background:#F1ECF7;" | '''{{item link| | + | | style="background:#F1ECF7;" | '''{{item link|Baphomet Trotters}}''' |
|- | |- | ||
| − | | align=" | + | | align="left" style="background:#6A5587;" rowspan="1" | '''{{class link|Soldier|color=white}}<br>{{class link|Pyro|color=white}}''' |
| − | | style="background:#F1ECF7;" | '''{{item link| | + | | style="background:#AD9DC3;" | {{item icon|Pin Pals|75px}} |
| + | | style="background:#F1ECF7;" | '''{{item link|Pin Pals}}''' | ||
|- | |- | ||
| − | | align=" | + | | align="left" style="background:#6A5587;" rowspan="1" | <!-- |
| − | | style="background:#F1ECF7;" | '''{{item link| | + | -->'''{{class link|Soldier|color=white}}'''<br/><!-- |
| + | -->'''{{class link|Pyro|color=white}}'''<br/><!-- | ||
| + | -->'''{{class link|Demoman|color=white}}''' | ||
| + | | style="background:#AD9DC3;" | {{item icon|Candleer|75px}} | ||
| + | | style="background:#F1ECF7;" | '''{{item link|Candleer}}''' | ||
|- | |- | ||
| − | | | + | | align="left" style="background:#6A5587;" rowspan="1" | <!-- |
| − | | | + | -->'''{{class link|Pyro|color=white}}'''<br/><!-- |
| − | | | + | -->'''{{class link|Engineer|color=white}}'''<br/><!-- |
| − | | style="background:#F1ECF7;" | '''{{item link| | + | -->'''{{class link|Sniper|color=white}}''' |
| + | | style="background:#AD9DC3;" | {{item icon|Snaggletoothed Stetson|75px}} | ||
| + | | style="background:#F1ECF7;" | '''{{item link|Snaggletoothed Stetson}}''' | ||
|- | |- | ||
| − | | align=" | + | | align="left" style="background:#6A5587;" rowspan="1" | '''{{class link|Demoman|color=white}}<br>{{class link|Spy|color=white}}''' |
| − | | style="background:#F1ECF7;" | '''{{item link| | + | | style="background:#AD9DC3;" | {{item icon|Ethereal Hood|75px}} |
| + | | style="background:#F1ECF7;" | '''{{item link|Ethereal Hood}}''' | ||
|- | |- | ||
| − | | | + | | style="background:#6A5587;" rowspan="15" | '''{{class link|All Classes|br=yes|color=white}}''' |
| − | | style="background:#F1ECF7;" | '''{{item link| | + | | style="background:#AD9DC3;" | {{item icon|Accursed Apparition|75px}} |
| + | | style="background:#F1ECF7;" | '''{{item link|Accursed Apparition}}''' | ||
|- | |- | ||
| − | | | + | | style="background:#AD9DC3;" | {{item icon|Beacon from Beyond|75px}} |
| − | + | | style="background:#F1ECF7;" | '''{{item link|Beacon from Beyond}}''' | |
| − | | style="background:#F1ECF7;" | '''{{item link| | ||
|- | |- | ||
| − | | | + | | style="background:#AD9DC3;" | {{item icon|Birdie Bonnet|75px}} |
| − | | style="background:#F1ECF7;" | '''{{item link| | + | | style="background:#F1ECF7;" | '''{{item link|Birdie Bonnet}}''' |
|- | |- | ||
| − | | | + | | style="background:#AD9DC3;" | {{item icon|Cryptic Keepsake|75px}} |
| − | + | | style="background:#F1ECF7;" | '''{{item link|Cryptic Keepsake}}''' | |
| − | | style="background:#F1ECF7;" | '''{{item link| | ||
|- | |- | ||
| − | | | + | | style="background:#AD9DC3;" | {{item icon|Dark Helm|75px}} |
| − | | style="background:#F1ECF7;" | '''{{item link| | + | | style="background:#F1ECF7;" | '''{{item link|Dark Helm}}''' |
|- | |- | ||
| − | | | + | | style="background:#AD9DC3;" | {{item icon|Guano|75px}} |
| − | + | | style="background:#F1ECF7;" | '''{{item link|Guano}}''' | |
| − | |||
| − | | style="background:#F1ECF7;" | '''{{item link| | ||
|- | |- | ||
| − | | | + | | style="background:#AD9DC3;" | {{item icon|Haunted Hat|75px}} |
| − | | style="background:#F1ECF7;" | '''{{item link| | + | | style="background:#F1ECF7;" | '''{{item link|Haunted Hat}}''' |
|- | |- | ||
| − | | | + | | style="background:#AD9DC3;" | {{item icon|Magical Mercenary|75px}} |
| − | + | | style="background:#F1ECF7;" | '''{{item link|Magical Mercenary}}''' | |
| − | | style="background:#F1ECF7;" | '''{{item link| | ||
|- | |- | ||
| − | | | + | | style="background:#AD9DC3;" | {{item icon|Manneater|75px}} |
| − | | style="background:#F1ECF7;" | '''{{item link| | + | | style="background:#F1ECF7;" | '''{{item link|Manneater}}''' |
|- | |- | ||
| − | | | + | | style="background:#AD9DC3;" | {{item icon|One-Way Ticket|75px}} |
| − | + | | style="background:#F1ECF7;" | '''{{item link|One-Way Ticket}}''' | |
| − | |||
| − | | style="background:#F1ECF7;" | '''{{item link| | ||
|- | |- | ||
| − | | | + | | style="background:#AD9DC3;" | {{item icon|Pocket Horsemann|75px}} |
| − | + | | style="background:#F1ECF7;" | '''{{item link|Pocket Horsemann}}''' | |
| − | |||
| − | |||
| − | |||
| − | |||
| − | |||
| − | |||
| − | | style="background:#F1ECF7;" | '''{{item link| | ||
|- | |- | ||
| − | | | + | | style="background:#AD9DC3;" | {{item icon|Quoth|75px}} |
| − | + | | style="background:#F1ECF7;" | '''{{item link|Quoth}}''' | |
| − | |||
| − | | style="background:#F1ECF7;" | '''{{item link| | ||
|- | |- | ||
| − | | | + | | style="background:#AD9DC3;" | {{item icon|Sackcloth Spook|75px}} |
| − | | style="background:#F1ECF7;" | '''{{item link| | + | | style="background:#F1ECF7;" | '''{{item link|Sackcloth Spook}}''' |
|- | |- | ||
| − | | | + | | style="background:#AD9DC3;" | {{item icon|Tuque or Treat|75px}} |
| − | | style="background:#F1ECF7;" | '''{{item link| | + | | style="background:#F1ECF7;" | '''{{item link|Tuque or Treat}}''' |
|- | |- | ||
| + | | style="background:#AD9DC3;" | {{item icon|Unidentified Following Object|75px}} | ||
| + | | style="background:#F1ECF7;" | '''{{item link|Unidentified Following Object}}''' | ||
|} | |} | ||
=== Itens de ação === | === Itens de ação === | ||
| + | {{main|Action items/pt-br|l1=Itens de Ação}} | ||
{| class="wikitable collapsible" cellpadding=2 style="text-align:center;" | {| class="wikitable collapsible" cellpadding=2 style="text-align:center;" | ||
| − | | | + | | width="90px" style="background: #AD9DC3;" | {{Icon item|Fancy Spellbook|75px}} |
| − | | | + | | '''{{item link|Fancy Spellbook}}''' |
|- | |- | ||
| − | | | + | | style="background: #AD9DC3;" | {{Icon item|Spellbook Magazine|75px}} |
| − | | | + | | '''{{item link|Spellbook Magazine}}''' |
|} | |} | ||
=== Ferramentas=== | === Ferramentas=== | ||
| + | {{main|Tools/pt-br|l1=Ferramentas}} | ||
{| class="wikitable collapsible" cellpadding=2 style="text-align:center;" | {| class="wikitable collapsible" cellpadding=2 style="text-align:center;" | ||
| − | | | + | | width="90px" style="background:#AD9DC3;" | {{Icon item|Costume Transmogrifier|75px}} |
| − | | | + | | '''{{item link|Costume Transmogrifier}}''' |
|- | |- | ||
| − | | | + | | style="background:#AD9DC3;" | {{Icon item|Enchantment Eternaween|75px}} |
| − | | | + | | '''{{item link|Enchantment Eternaween|Enchantment: Eternaween}}''' |
|- | |- | ||
| − | | | + | | style="background:#AD9DC3;" | {{Icon item|Spellbook Page|75px}} |
| − | | | + | | '''{{item link|Spellbook Page}}''' |
|- | |- | ||
| − | | | + | | style="background:#AD9DC3;" | {{Icon item|Spooky Crate|75px}} |
| − | | | + | | '''{{item link|Spooky Crate}}''' |
|- | |- | ||
| − | | | + | | style="background:#AD9DC3;" | {{Icon item|Spooky Key|75px}} |
| − | | | + | | '''{{item link|Spooky Key}}''' |
| + | |- | ||
| + | | style="background: #AD9DC3;" | {{Icon item|Unfilled Fancy Spellbook|75px}} | ||
| + | | '''{{item link|Unfilled Fancy Spellbook}}''' | ||
|} | |} | ||
| − | |||
| − | |||
| − | |||
| − | |||
| − | |||
| − | |||
| − | |||
=== Mapas === | === Mapas === | ||
{{main|List of maps/pt-br|l1=Lista de mapas}} | {{main|List of maps/pt-br|l1=Lista de mapas}} | ||
{| class="wikitable" cellpadding="2" style="text-align:center;" | {| class="wikitable" cellpadding="2" style="text-align:center;" | ||
| − | + | ! style="background:#6A5587;" class="header" | <font color="white"> Nome | |
| − | ! style="background: #6A5587;" class="header" | | + | ! style="background:#6A5587;" class="header" | <font color="white"> Imagem |
| − | ! style="background: #6A5587;" class="header" | | + | ! style="background:#6A5587;" class="header" | <font color="white"> Modo de jogo |
| − | + | ! style="background:#6A5587;" class="header" | <font color="white"> Nome do arquivo | |
| − | ! style="background: #6A5587;" class="header" | | ||
| − | |||
| − | |||
| − | |||
| − | |||
| − | |||
|- | |- | ||
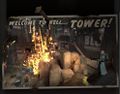
| + | | width="90px" style="background:#AD9DC3;" | '''[[Helltower/pt-br|<font color="white">Helltower</font>]]''' | ||
| + | | style="background:#F1ECF7;" | [[File:Plr hightower event3.png|200px|link=Helltower/pt-br]] | ||
| + | | style="background:#F1ECF7;" | '''[[Payload Race/pt-br|Corrida de Cargas]]'''<br>[[File:RED Bombcart.png|30px|link=Payload Race/pt-br]][[File:BLU Bombcart.png|30px|link=Payload Race/pt-br]] | ||
| + | | {{code|plr_hightower_event}} | ||
|} | |} | ||
| + | |||
| + | === Efeitos Incomuns === | ||
| + | {{main|Unusual effects/pt-br|l1=Efeitos Incomuns}} | ||
| + | <gallery perrow="4"> | ||
| + | File:Unusual_Arcana.png| {{item name|Arcana}} | ||
| + | File:Unusual_Chiroptera_Venenata.png| {{item name|Chiroptera Venenata}} | ||
| + | File:Unusual_Darkblaze.png| {{item name|Darkblaze}} | ||
| + | File:Unusual_Demonflame.png| {{item name|Demonflame}} | ||
| + | File:Unusual_Hellfire.png| {{item name|Hellfire}} | ||
| + | File:Unusual_Poisoned_Shadows.png| {{item name|Poisoned Shadows}} | ||
| + | File:Unusual_Something_Burning_This_Way_Comes.png| {{item name|Something Burning This Way Comes}} | ||
| + | File:Unusual_Spellbound.png| {{item name|Spellbound}} | ||
| + | </gallery> | ||
| + | |||
| + | == Conquistas == | ||
| + | === {{Achiev type link|bereavements}} === | ||
| + | {{Halloween 2013 achievement list}} | ||
== Curiosidades == | == Curiosidades == | ||
| − | * Várias mensagens codificadas aparecem na página da atualização, e elas usam | + | * Várias mensagens codificadas aparecem na página da atualização, e elas usam símbolos "Agathodaimon". |
** Duas são encontradas em fitas que se estendem ao longo da página. A primeira diz "Bazbo Bibbons", e a segunda "Abo alabazbus" | ** Duas são encontradas em fitas que se estendem ao longo da página. A primeira diz "Bazbo Bibbons", e a segunda "Abo alabazbus" | ||
** Várias linhas podem ser lidas dentro de uma ilustração do livro de feitiços | ** Várias linhas podem ser lidas dentro de uma ilustração do livro de feitiços | ||
Latest revision as of 18:08, 21 August 2024
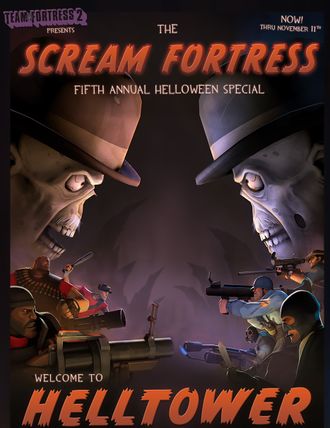
| “ | Trilhe seu caminho através de pilhas de livros mofados e esqueletos enquanto dois velhos gritam coisas sem sentido um com o outro enquanto estão sendo levados para o Inferno! É isso mesmo, fans do Team Feartress- nós combinamos o terror de Dia das Bruxas com o terror suave e deprimente de um lar de idosos, e acidentalmente inventamos um novo tipo de horror! Então percebemos que ouvir dois velhos brigarem do além (do túmulo) não é tão horrível, por isso, os jogamos um monte feitiços malucos que você pode lançar um para o outro!
— Página da atualização
|
” |
O Quinto Especial Anual de Dia das Bruxas Scream Fortress (Scream Fortress Fifth Annual Helloween Special) foi uma atualização principal lançada na Atualização de 29 de outubro de 2013. A quinta da série de atualizações Scream Fortress, ela adicionou um mapa de Dia das Bruxas Helltower, junto a 102 itens cosméticos temáticos.
Índice
Linha do tempo
Envios de itens à oficina para o evento foram abertas em 18 de setembro de 2013 pelo Blog Oficial do Team Fortress 2 (em inglês).
O evento foi previsto em 28 de outubro de 2013 através da hq Grave Matters.
O evento durou de 29 outubro de 2013 a 11 de novembro de 2013.
Adições
NPCs
Conjuntos de fantasias
Itens cosméticos
Itens de ação
| Livro de Feitiços | |
| Revista de Feitiços |
Ferramentas
| Transmogrifador de Fantasia | |
| Encantamento: Dia das Bruxas Instantâneo | |
| Página do Livro de Feitiços | |
| Caixa Apavorante | |
| Chave Apavorante | |
| Livro de Feitiços Incompleto |
Mapas
| Nome | Imagem | Modo de jogo | Nome do arquivo |
|---|---|---|---|
| Helltower | 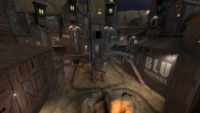
|
Corrida de Cargas |
plr_hightower_event
|
Efeitos Incomuns

Arcano

Chiroptera venenata

Labareda sombria

Chama demoníaca
Fogo infernal
Veneno sombrio
Arder ou não arder

Feitiço de artifício


Conquistas
 Bereavements
|
|
Curiosidades
- Várias mensagens codificadas aparecem na página da atualização, e elas usam símbolos "Agathodaimon".
- Duas são encontradas em fitas que se estendem ao longo da página. A primeira diz "Bazbo Bibbons", e a segunda "Abo alabazbus"
- Várias linhas podem ser lidas dentro de uma ilustração do livro de feitiços
- FEAR NOT THOSE WHO SEEK TO DESTROY YOU. FOR WITH THIS BOOK YOU ARE GRANTED THE STRENGTH OF A GIANT.
- OR PERHAPS WHAT YOU SEEK IS A RAIN OF BURNING COMETS TO SMITE YOUR FOE.
- A RAIN OF COMMETS(sic) ISN'T GOOD ENOUGH FOR YOU
- FINE. YOU SHALL BE GIVEN THE SPEED OF CHEETAH.
- AND STILL NOT GOOD ENOUGH FOR YOU
- FINE. WELL LEAVE THIS TO CHANCE. TRY NOT TO BURN YOUR OWN FACE OFF.
Galeria
Cartão de Helltower.

Links externos
- Scream Fortress 2013 (em inglês)
| |||||
| ||||||||||||||||||||||||||||||||||||||||||||||||||||||||||||||||||||||||||||||||||||||||||||||||||