Difference between revisions of "Tank Robot"
m (→Bugs) |
Missing boi (talk | contribs) (→Gallery) |
||
| (105 intermediate revisions by 54 users not shown) | |||
| Line 1: | Line 1: | ||
| − | {{ | + | {{Infobox class |
| − | | image = Mvm boss tank.png | + | | image = Mvm boss tank.png |
| − | | health = ''Varies''<br> | + | | health = ''Varies''<br> |
Lowest: '''10000''' <small><br>[[Mannhunt (mission)|Mannhunt]]: Wave 6D, 6E, and 6F </small><br> | Lowest: '''10000''' <small><br>[[Mannhunt (mission)|Mannhunt]]: Wave 6D, 6E, and 6F </small><br> | ||
Highest: '''60000''' <small><br>[[Caliginous Caper (mission)|Caliginous Caper]]: Sub-wave 8G/[[Broken Parts (mission)|Broken Parts]]: Wave 6D</small> | Highest: '''60000''' <small><br>[[Caliginous Caper (mission)|Caliginous Caper]]: Sub-wave 8G/[[Broken Parts (mission)|Broken Parts]]: Wave 6D</small> | ||
| − | | speed = '''25%''' | + | | speed = '''25%''' |
}} | }} | ||
{{Quotation|Day 1 of the '''[[Mann vs. Machine update]]'''|We don't know what this thing is, but it's big as hell, looks unstoppable, and it probably runs on human blood. We're just guessing that last part, because it's usually covered in it.}} | {{Quotation|Day 1 of the '''[[Mann vs. Machine update]]'''|We don't know what this thing is, but it's big as hell, looks unstoppable, and it probably runs on human blood. We're just guessing that last part, because it's usually covered in it.}} | ||
| − | '''Tank Robots''' (referred just as '''Tank''') are large bomb-carrying [[Robots|machines]] that arrive with the robots in [[Mann vs. Machine | + | '''Tank Robots''' (referred just as '''Tank''') are large and extremely durable bomb-carrying [[Robots|machines]] that arrive with the robots in [[Mann vs. Machine|Mann vs. Machine mode]]. While they possess no offensive abilities and thus have no direct way of harming the player other than possibly crushing players against objects, they can withstand extreme amounts of damage before they are destroyed, far more so than any robot, with the exception of some boss robots. The [[Administrator]] announces the entrance, progress, and destruction of each Tank. |
| − | After entering the map, | + | After entering the map, Tanks slowly travel along a set path to the bomb hatch before deploying their bomb and ending the round. This path is unique to each map and may differ from the path of other robots in the wave if any. They have their own bomb, independent of the one carried by the other robots, and in waves with Tank(s) and bomb-carrying robots, both the Tank(s) and the robots must be destroyed to complete the wave. |
| − | Tanks | + | Tanks are immune to all effects outside of damage and [[critical hits]]; they can only be stopped via destruction. They cannot have their movement interrupted or [[Slowdown|slowed]]; standing in front of one simply pushes the player away with no damage, while players that cannot be pushed away due to walls or props are crushed to death, and [[buildings]] in the way are destroyed. They cannot be burned by [[fire]] or soaked by [[Jarate]] or [[Mad Milk]], they cannot be [[Sapper|sapped]] or [[marked for death]], they do not give health to players buffed by the [[Concheror]], and they have no [[Headshot|heads to shoot]] or [[Backstab|backs to stab]]. Finally, they resist 75% of [[Minigun]] damage, severely reducing a Heavy's damage output against it. |
| − | Tanks have a health meter below the "robots remaining" display on the [[HUD]], and as they are | + | Tanks have a health meter below the "robots remaining" display on the [[Heads-up display|HUD]], and as they are damaged, they acquire bullet holes, cracks, and lose parts, like the covering on their treads. The final Tank of a mission has distinctive white stripes; this does not correlate to any of its properties. |
== Health == | == Health == | ||
| − | {| | + | {{Hatnote|Each Tank in a wave has a given amount of health based on its intended difficulty and the length of the path it must travel.}} |
| − | + | {{TankHealth}} | |
| − | |||
| − | |||
| − | |||
| − | |||
| − | |||
| − | |||
| − | |||
| − | |||
| − | |||
| − | |||
| − | |||
| − | |||
| − | |||
| − | |||
| − | |||
| − | |||
| − | |||
| − | |||
| − | |||
| − | |||
| − | |||
| − | |||
| − | |||
| − | |||
| − | |||
| − | |||
| − | |||
| − | |||
| − | |||
| − | |||
| − | |||
| − | |||
| − | |||
| − | |||
| − | |||
| − | |||
| − | |||
| − | |||
| − | |||
| − | |||
| − | |||
| − | |||
| − | |||
| − | |||
| − | |||
| − | |||
| − | |||
| − | |||
| − | |||
| − | |||
| − | |||
| − | |||
| − | |||
| − | |||
| − | |||
| − | |||
| − | |||
| − | |||
| − | |||
| − | |||
| − | |||
| − | |||
| − | |||
| − | |||
| − | |||
| − | |||
| − | |||
| − | |||
| − | |||
| − | |||
| − | |||
| − | |||
| − | |||
| − | |||
| − | |||
| − | |||
== Elimination == | == Elimination == | ||
| − | When a | + | When a Tank is the only robot in the wave (excluding support-class robots like Snipers), it should be focused on by all players until it is destroyed. [[Kritzkrieg]] Medics and [[Canteen]]s are extremely effective when paired with sustained high-damage classes like Pyros and Soldiers, or when used with Demomen using Grenade Launchers and Stickybomb Launchers. [[Wrangler|Wrangled]] Sentry Guns also deal massive damage to Tanks, but may have to be relocated once the Tank passes out of their range or if they are in the Tank's path. Pair the [[Widowmaker]] with your Sentry Gun for extra damage and no reloading. Also, the [[Mechanics#Hit detection|hitbox]] of the Tank is very large, making weapons with "bullet spread", such as the [[Frontier Justice]], effective even at medium-long range. Considering using the [[Buff Banner]] to boost everyone's damage output to the tank. |
| − | If a | + | If a Tank arrives with other robots, especially Giant robots, consider killing the robots first, as Tanks do not deal damage and can usually be dealt with after the regular robots if they have not traveled more than halfway. On many missions, it is very beneficial to designate one or two players as "Tank-killers," usually Soldier, Pyros, Demomen to follow the Tank while the rest of the team contains the bomb. The Tank's resistance to Minigun damage encourages team balance by severely punishing teams that rely on an excessive number of Heavies. Sniper is excellent at quickly dealing with tanks, when equipped with the [[Cleaner's Carbine]], and the [[Bushwacka]]. This allows the Sniper to quickly charge up 'CRIKEY', and then attack with the Bushwacka for guaranteed crits. The [[Righteous Bison]]'s penetration also affects the tank. |
| + | |||
| + | Scouts can deal large amounts of damage with their primary weapons, such as the [[Soda Popper]] or the [[Shortstop]]. Pair this with crit canteens for a lot of damage. As Pyro, look up at the tank to do maximum damage. Consider using the [[Detonator]] to jump up to the tank while using the [[Phlogistinator]]. Taunting at the back of the tank drops you on the ground and cancels the taunt, giving you extra Mmmph and even the ÜberCharge remaining from the taunt. | ||
| + | |||
| + | After arriving at the bomb hatch, the Tank takes a while to deploy its bomb, so the team still has time to destroy it. | ||
| + | |||
| + | == Operation in other game modes == | ||
| + | If a server has {{code|sv_cheats}} enabled, a tank can be spawned by typing "{{code|ent_create tank_boss}}" into the console. | ||
| + | |||
| + | The tank behaves oddly when spawned in on non-MVM maps. On [[Payload]] and Payload Race maps the tank first tries to go directly to the starting point of the cart, although it is unable to go through any walls in the way. Once it reaches the starting point, it follows the route the cart takes. The tank destroys itself if it hits the cart. If the tank somehow reaches the last point without touching the cart, it also explodes, but the game acts as if the [[BLU]] team has pushed the cart to the end and the BLU team wins. | ||
| + | |||
| + | On all other modes the tank goes towards non-spawn room doors and attempts to go through them, where they then deploy their bomb (even though the administrator plays one of her voice lines the round is not won by either side). | ||
| + | |||
| + | On non-Payload/Payload Race maps without any non-spawn room doors, the tank simply stays in the same place. | ||
| + | |||
| + | On maps with the [[vdc:Path_track|{{code|path_track}}]] entity, the tank goes to the start of the track and goes to the end of the track following all of the {{code|path_track}} entitys connected to it. Once it reaches the end of the track, it deploys its bomb and then idles at the end. | ||
| + | |||
| + | On all maps the tank spawns with a lower amount of health than in any mission in MVM; and, as it is considered part of the BLU team, only members of the [[RED]] team can damage it. | ||
== Related achievements == | == Related achievements == | ||
| − | === | + | === {{Achiev type link|mvm}} === |
{{Achievement table | {{Achievement table | ||
| 1 = {{Show achievement|mann vs. machievements|Balls-E}} | | 1 = {{Show achievement|mann vs. machievements|Balls-E}} | ||
{{Show achievement|mann vs. machievements|Clockwork Carnage}} | {{Show achievement|mann vs. machievements|Clockwork Carnage}} | ||
| 2 = {{Show achievement|mann vs. machievements|Clockwork Conqueror}} | | 2 = {{Show achievement|mann vs. machievements|Clockwork Conqueror}} | ||
| + | {{Show achievement|Mann vs. Machievements|Palace-Aid}} | ||
}} | }} | ||
== Update history == | == Update history == | ||
| − | '''{{Patch name|8|15|2012}}''' ( | + | {{Update history| |
| + | '''{{Patch name|8|15|2012}}''' ({{update link|Mann vs. Machine (update)}}) | ||
* The Tank was added to the game. | * The Tank was added to the game. | ||
| Line 117: | Line 60: | ||
'''{{Patch name|9|4|2012}}''' | '''{{Patch name|9|4|2012}}''' | ||
| − | * Fixed the looping | + | * Fixed the looping Tank sound not playing if it was spawned far from the player. |
| − | * Fixed | + | * Fixed Tank destruction effects playing at the map origin. |
'''{{Patch name|12|20|2012}}''' ([[Mecha Update]]) | '''{{Patch name|12|20|2012}}''' ([[Mecha Update]]) | ||
| − | * {{undocumented}} Rage from [[Buff Banner]], [[Concheror]], [[Upgrade Station|upgraded]] [[Weapons#heavyprimary|Minigun]], and Mmmph from | + | * {{undocumented}} Rage from [[Buff Banner]], [[Concheror]], [[Upgrade Station|upgraded]] [[Weapons#heavyprimary|Minigun]], and Mmmph from Phlogistinator can now be generated from Tanks. |
| + | |||
| + | '''{{Patch name|11|21|2013}}''' ([[Two Cities Update]]) | ||
| + | * Fixed the [[Romevision]] Tank not animating. | ||
| + | |||
| + | '''{{Patch name|11|22|2013}}''' | ||
| + | * Fixed a server crash related to damaging the Tank with the Medic shield. | ||
| + | }} | ||
| − | + | == Unused content == | |
| − | * | + | * In the game files, there is an unused file called [[:Media:mvm_tank_ping.wav|mvm_tank_ping]] that would play a loud ear-piercing beep. This sound was replaced by the tank horn sound. |
| + | * The Tank has unique destruction animations for the maps [[Coaltown]], [[Decoy]] and [[Mannworks]]. However, the unique destruction animations for Coaltown and Decoy are not used. The reasons for this is that the tank destruction animations are looked up based on map name, and that the tank destruction animations for these maps still use the map's pre-release names. | ||
| − | ==Bugs== | + | == Bugs == |
| − | * If the | + | * If several Tanks are involved in the wave, the Administrator announces that the Tank is already halfway through, although it just appeared. |
| − | ==Gallery== | + | == Notes == |
| − | <gallery | + | * The Tank has its own animation of destruction, but it is not visible because of the smoke. |
| − | + | ||
| − | + | == Gallery == | |
| − | + | <gallery> | |
| − | + | File:MvM Tank Damage 1.png|Lightly damaged Tank. | |
| + | File:MvM Tank Damage 2.png|Moderately damaged Tank. | ||
| + | File:MvM Tank Damage 3.png|Heavily damaged Tank. | ||
| + | File:MvM Tank Final.png|The Final Wave version of the Tank. | ||
| + | File:MvM Tank Final Damage 1.png|Lightly damaged Final Wave Tank. | ||
| + | File:MvM Tank Final Damage 2.png|Moderately damaged Final Wave Tank. | ||
| + | File:MvM Tank Final Damage 3.png|Heavily damaged Final Wave Tank. | ||
| + | File:Romevision Tank.png|The [[Romevision]] version of the Tank. | ||
| + | File:Romevision Tank Damage 1.png|Lightly damaged Romevision Tank. | ||
| + | File:Romevision Tank Damage 2.png|Moderately damaged Romevision Tank. | ||
| + | File:Romevision Tank Damage 3.png|Heavily damaged Romevision Tank. | ||
| + | File:Romevision Tank Final.png|The Romevision Final Wave version of the Tank. | ||
| + | File:Romevision Tank Final Damage 1.png|Lightly damaged Romevision Final Wave Tank. | ||
| + | File:Romevision Tank Final Damage 2.png|Moderately damaged Romevision Final Wave Tank. | ||
| + | File:Romevision Tank Final Damage 3.png|Heavily damaged Romevision Final Wave Tank. | ||
| + | File:Mvm_tank.png|Unused image of the Tank for the [[main menu]]. | ||
</gallery> | </gallery> | ||
== External links == | == External links == | ||
| − | * [ | + | * [https://www.teamfortress.com/mvm/machines/ "Machines" official announcement], with the hint of the Tank Robot. |
| − | |||
{{Robot Nav}} | {{Robot Nav}} | ||
| + | {{Mann Vs Machine Nav}} | ||
| + | |||
[[Category:Mann vs. Machine]] | [[Category:Mann vs. Machine]] | ||
Latest revision as of 16:14, 13 October 2023
| Tank Robot | |
|---|---|

| |
| Basic Information | |
| Health: | Varies Lowest: 10000 |
| Speed: | 25% |
| “ | We don't know what this thing is, but it's big as hell, looks unstoppable, and it probably runs on human blood. We're just guessing that last part, because it's usually covered in it.
— Day 1 of the Mann vs. Machine update
|
” |
Tank Robots (referred just as Tank) are large and extremely durable bomb-carrying machines that arrive with the robots in Mann vs. Machine mode. While they possess no offensive abilities and thus have no direct way of harming the player other than possibly crushing players against objects, they can withstand extreme amounts of damage before they are destroyed, far more so than any robot, with the exception of some boss robots. The Administrator announces the entrance, progress, and destruction of each Tank.
After entering the map, Tanks slowly travel along a set path to the bomb hatch before deploying their bomb and ending the round. This path is unique to each map and may differ from the path of other robots in the wave if any. They have their own bomb, independent of the one carried by the other robots, and in waves with Tank(s) and bomb-carrying robots, both the Tank(s) and the robots must be destroyed to complete the wave.
Tanks are immune to all effects outside of damage and critical hits; they can only be stopped via destruction. They cannot have their movement interrupted or slowed; standing in front of one simply pushes the player away with no damage, while players that cannot be pushed away due to walls or props are crushed to death, and buildings in the way are destroyed. They cannot be burned by fire or soaked by Jarate or Mad Milk, they cannot be sapped or marked for death, they do not give health to players buffed by the Concheror, and they have no heads to shoot or backs to stab. Finally, they resist 75% of Minigun damage, severely reducing a Heavy's damage output against it.
Tanks have a health meter below the "robots remaining" display on the HUD, and as they are damaged, they acquire bullet holes, cracks, and lose parts, like the covering on their treads. The final Tank of a mission has distinctive white stripes; this does not correlate to any of its properties.
Contents
Health
| Health | Mission | Wave |
|---|---|---|
| Mannhunt | 6C (x5) | |
| Mannslaughter | 3B | |
| Cave-in | 4 (x3) | |
| Mean Machines | 5A-1 (x2) | |
| Disintegration | 5 | |
| Quarry | 6 | |
| Cave-in | 2B | |
| Disintegration | 2D | |
| Machine Massacre | 4, 7A | |
| Mech Mutilation | 1C | |
| Doe's Drill | 3, 8B | |
| Mann-euvers | 2 | |
| Benign Infiltration | 4 (x2) | |
| Doe's Doom | 7 (x2) | |
| Mannhunt | 3 | |
| Village Vanguard | 4 (x2), 7 (x4) | |
| Disintegration | 4A, 5B | |
| Ctrl+Alt+Destruction | 7B | |
| CPU Slaughter | 6C, 6E | |
| Machine Massacre | 7D | |
| Mech Mutilation | 3D | |
| Cataclysm | 4A, 7A | |
| Mannslaughter | 5C, 5E | |
| Quarry | 1 | |
| Desperation | 4 | |
| Mann-euvers | 7 (x2) | |
| Doe's Doom | 2A-1 | |
| Day of Wreckening | 2, 6B | |
| Cave-in | 6B-1, 6B-2 | |
| Mannhunt | 5B | |
| Village Vanguard | 2B | |
| Disk Deletion | 6, 8A-1, 8A-2 | |
| Data Demolition | 3D, 4A | |
| Ctrl+Alt+Destruction | 5 | |
| Hamlet Hostility | 7A (x2) | |
| Mean Machines | 3A-1 | |
| Crash Course | 3 | |
| Crash Course | 5 | |
| Benign Infiltration | 6B | |
| Data Demolition | 6B, 6D | |
| Ctrl+Alt+Destruction | 2A | |
| CPU Slaughter | 6A | |
| Broken Parts | 3D | |
| Hamlet Hostility | 7A | |
| Bavarian Botbash | 6C, 7A | |
| Data Demolition | 6A | |
| Crash Course | 6B | |
| Quarry | 5 | |
| Caliginous Caper | 4 | |
| Ctrl+Alt+Destruction | 7D | |
| CPU Slaughter | 4 | |
| Broken Parts | 6B | |
| Bone Shaker | 2 | |
| Hamlet Hostility | 3D, 5A | |
| Bavarian Botbash | 2B, 4C | |
| Desperation | 7A | |
| Cataclysm | 3A | |
| Caliginous Caper | 5 | |
| Broken Parts | 2A | |
| Bone Shaker | 4A, 7 | |
| Caliginous Caper | 7 | |
| Broken Parts | 2A | |
| Desperation | 7C-2 | |
| Cataclysm | 7F | |
| Bone Shaker | 7F | |
| Caliginous Caper | 8G | |
| Broken Parts | 6D |
Elimination
When a Tank is the only robot in the wave (excluding support-class robots like Snipers), it should be focused on by all players until it is destroyed. Kritzkrieg Medics and Canteens are extremely effective when paired with sustained high-damage classes like Pyros and Soldiers, or when used with Demomen using Grenade Launchers and Stickybomb Launchers. Wrangled Sentry Guns also deal massive damage to Tanks, but may have to be relocated once the Tank passes out of their range or if they are in the Tank's path. Pair the Widowmaker with your Sentry Gun for extra damage and no reloading. Also, the hitbox of the Tank is very large, making weapons with "bullet spread", such as the Frontier Justice, effective even at medium-long range. Considering using the Buff Banner to boost everyone's damage output to the tank.
If a Tank arrives with other robots, especially Giant robots, consider killing the robots first, as Tanks do not deal damage and can usually be dealt with after the regular robots if they have not traveled more than halfway. On many missions, it is very beneficial to designate one or two players as "Tank-killers," usually Soldier, Pyros, Demomen to follow the Tank while the rest of the team contains the bomb. The Tank's resistance to Minigun damage encourages team balance by severely punishing teams that rely on an excessive number of Heavies. Sniper is excellent at quickly dealing with tanks, when equipped with the Cleaner's Carbine, and the Bushwacka. This allows the Sniper to quickly charge up 'CRIKEY', and then attack with the Bushwacka for guaranteed crits. The Righteous Bison's penetration also affects the tank.
Scouts can deal large amounts of damage with their primary weapons, such as the Soda Popper or the Shortstop. Pair this with crit canteens for a lot of damage. As Pyro, look up at the tank to do maximum damage. Consider using the Detonator to jump up to the tank while using the Phlogistinator. Taunting at the back of the tank drops you on the ground and cancels the taunt, giving you extra Mmmph and even the ÜberCharge remaining from the taunt.
After arriving at the bomb hatch, the Tank takes a while to deploy its bomb, so the team still has time to destroy it.
Operation in other game modes
If a server has sv_cheats enabled, a tank can be spawned by typing "ent_create tank_boss" into the console.
The tank behaves oddly when spawned in on non-MVM maps. On Payload and Payload Race maps the tank first tries to go directly to the starting point of the cart, although it is unable to go through any walls in the way. Once it reaches the starting point, it follows the route the cart takes. The tank destroys itself if it hits the cart. If the tank somehow reaches the last point without touching the cart, it also explodes, but the game acts as if the BLU team has pushed the cart to the end and the BLU team wins.
On all other modes the tank goes towards non-spawn room doors and attempts to go through them, where they then deploy their bomb (even though the administrator plays one of her voice lines the round is not won by either side).
On non-Payload/Payload Race maps without any non-spawn room doors, the tank simply stays in the same place.
On maps with the path_track entity, the tank goes to the start of the track and goes to the end of the track following all of the path_track entitys connected to it. Once it reaches the end of the track, it deploys its bomb and then idles at the end.
On all maps the tank spawns with a lower amount of health than in any mission in MVM; and, as it is considered part of the BLU team, only members of the RED team can damage it.
Related achievements
 Mann vs. Machievements
|
|

Update history
- The Tank was added to the game.
- Fixed a crash related to server plug-ins spawning a Tank before the game is ready.
- Fixed the looping Tank sound not playing if it was spawned far from the player.
- Fixed Tank destruction effects playing at the map origin.
December 20, 2012 Patch (Mecha Update)
- [Undocumented] Rage from Buff Banner, Concheror, upgraded Minigun, and Mmmph from Phlogistinator can now be generated from Tanks.
November 21, 2013 Patch (Two Cities Update)
- Fixed the Romevision Tank not animating.
- Fixed a server crash related to damaging the Tank with the Medic shield.
Unused content
- In the game files, there is an unused file called mvm_tank_ping that would play a loud ear-piercing beep. This sound was replaced by the tank horn sound.
- The Tank has unique destruction animations for the maps Coaltown, Decoy and Mannworks. However, the unique destruction animations for Coaltown and Decoy are not used. The reasons for this is that the tank destruction animations are looked up based on map name, and that the tank destruction animations for these maps still use the map's pre-release names.
Bugs
- If several Tanks are involved in the wave, the Administrator announces that the Tank is already halfway through, although it just appeared.
Notes
- The Tank has its own animation of destruction, but it is not visible because of the smoke.
Gallery

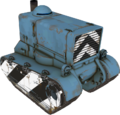
Lightly damaged Tank.

Moderately damaged Tank.

Heavily damaged Tank.
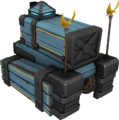
The Final Wave version of the Tank.

Lightly damaged Final Wave Tank.

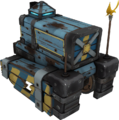
Moderately damaged Final Wave Tank.

Heavily damaged Final Wave Tank.
The Romevision version of the Tank.

Lightly damaged Romevision Tank.

Moderately damaged Romevision Tank.

Heavily damaged Romevision Tank.

The Romevision Final Wave version of the Tank.
Lightly damaged Romevision Final Wave Tank.

Moderately damaged Romevision Final Wave Tank.

Heavily damaged Romevision Final Wave Tank.
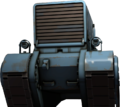
Unused image of the Tank for the main menu.


External links
- "Machines" official announcement, with the hint of the Tank Robot.
| |||||
| ||||||||||||||||||||||||||||||||||||||