Difference between revisions of "Community Hellfire strategy"
(Created page with "{{hatnote|This article discusses community strategy for Hellfire.}} {{Map infobox | game-type = Capture the Flag | file-name = ctf_hel...") |
m (Auto: Sync Map infobox) |
||
| (15 intermediate revisions by 8 users not shown) | |||
| Line 1: | Line 1: | ||
| − | {{ | + | {{Community strategy stub|Class specifics and general strategy}} |
{{Map infobox | {{Map infobox | ||
| − | | game-type | + | | map-strategy = yes |
| − | | file-name | + | | map-status = official |
| + | | map-name = Hellfire | ||
| + | | map-game-type = Capture the Flag | ||
| + | | map-file-name = ctf_hellfire | ||
| map-image = Ctf_hellfire.jpg | | map-image = Ctf_hellfire.jpg | ||
| − | | | + | | map-released = {{Patch name|10|28|2015}} |
| + | | map-released-major = Scream Fortress 2015 | ||
| map-environment = Desert | | map-environment = Desert | ||
| map-setting = Daytime | | map-setting = Daytime | ||
| − | | map-hazards = [[ | + | | map-hazards = [[Environmental hazards#Lava fire|Lava fire]], Fireballs |
| − | | map-health | + | | map-pickups-health-small = 10 |
| − | | map-health | + | | map-pickups-health-medium = 6 |
| − | | map-health | + | | map-pickups-health-large = 3 |
| − | | map-ammo | + | | map-pickups-ammo-medium = 10 |
| − | | map-ammo | + | | map-pickups-ammo-large = 7 |
}} | }} | ||
| + | |||
| + | This article is about '''Community Hellfire strategy'''. | ||
| + | |||
| + | '''Note''': It is recommended to read the main [[Hellfire]] article first to become familiar with the names of key map locations used in this article. | ||
| + | |||
| + | {{TOC limit|3}} | ||
== General strategy == | == General strategy == | ||
| Line 30: | Line 40: | ||
=== {{class link|Engineer}} === | === {{class link|Engineer}} === | ||
| + | * When playing Engineer on this map, it is always wise to set up a Sentry as soon as you can. Try to place it on the catwalk by the intelligence or on a cliff overlooking it. To make sure [[Sniper]]s can't get a good shot at it, walk around your Sentry from different positions to see if it still needs to be placed differently. | ||
| + | |||
| + | * A good area to try to place a Teleporter is in the middle area, perhaps near the lava pit at mid. This method is suggested as not that many players check around that area. Another good location would be the enemy team's vent room, specifically in the vents if possible. The vents are one-way, so most players wouldn't bother to enter the room in the first place. | ||
=== {{class link|Medic}} === | === {{class link|Medic}} === | ||
=== {{class link|Sniper}} === | === {{class link|Sniper}} === | ||
| + | * Due to the map being very wide open, playing as a Sniper gives you a great advantage on this map. | ||
| + | |||
| + | * The player can stand on top of the support beams by the mid area, as well as the one that supports the intelligence platform, which gives you a great line of sight across large areas of the map. | ||
=== {{class link|Spy}} === | === {{class link|Spy}} === | ||
{{Map strategy}} | {{Map strategy}} | ||
Latest revision as of 19:48, 20 January 2024
| “Sun Tzu's got nothing on us!” This article is a Community strategy stub. As such, it is not complete. You can help the Team Fortress Wiki Community Strategy Project by expanding it. Notes: Class specifics and general strategy |
| Hellfire | |
|---|---|

| |
| Basic Information | |
| Map type: | Capture the Flag |
| File name: | ctf_hellfire
|
| Released: | October 28, 2015 Patch (Scream Fortress VII) |
| Developer(s): | Valve |
| Map Info | |
| Environment: | Desert |
| Setting: | Daytime |
| Hazards: | Lava fire, Fireballs |
| Map Items | |
| Map Overview | |
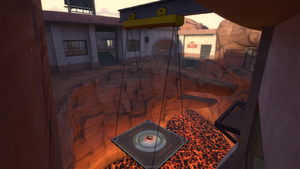
This article is about Community Hellfire strategy.
Note: It is recommended to read the main Hellfire article first to become familiar with the names of key map locations used in this article.
General strategy
Class-specific strategy
 Scout
Scout
 Soldier
 Pyro
Pyro
 Demoman
 Heavy
Heavy
 Engineer
- When playing Engineer on this map, it is always wise to set up a Sentry as soon as you can. Try to place it on the catwalk by the intelligence or on a cliff overlooking it. To make sure Snipers can't get a good shot at it, walk around your Sentry from different positions to see if it still needs to be placed differently.
- A good area to try to place a Teleporter is in the middle area, perhaps near the lava pit at mid. This method is suggested as not that many players check around that area. Another good location would be the enemy team's vent room, specifically in the vents if possible. The vents are one-way, so most players wouldn't bother to enter the room in the first place.
 Medic
Medic
 Sniper
- Due to the map being very wide open, playing as a Sniper gives you a great advantage on this map.
- The player can stand on top of the support beams by the mid area, as well as the one that supports the intelligence platform, which gives you a great line of sight across large areas of the map.
