Difference between revisions of "Community Metalworks strategy"
m (Auto: Sync Map infobox) |
|||
| (5 intermediate revisions by 4 users not shown) | |||
| Line 1: | Line 1: | ||
| − | {{ | + | {{community strategy stub|Expand the "General Strategy" section to cover map locations in more detail. Potentially look at the class-specific strategies as well.}} |
{{Map infobox | {{Map infobox | ||
| − | | game-type | + | | map-strategy = yes |
| − | | file-name | + | | map-status = community |
| − | | map-image = | + | | map-name = Metalworks |
| − | | | + | | map-game-type = Control Point |
| − | | map-environment = Industrial | + | | map-file-name = cp_metalworks |
| − | | map-setting = Night, cloudy | + | | map-image = Cp metalworks b22 5.jpg |
| − | | map- | + | | map-released = {{Patch name|7|7|2016}} |
| − | | map-health | + | | map-released-major = Meet Your Match Update |
| − | | map-ammo | + | | map-environment = Industrial |
| − | | map-ammo | + | | map-setting = Night, cloudy |
| − | | map- | + | | map-stamp-link = https://steamcommunity.com/stats/TF2/leaderboards/1363090 |
| + | | map-pickups-health-small = 4 | ||
| + | | map-pickups-health-medium = 8 | ||
| + | | map-pickups-ammo-small = 4 | ||
| + | | map-pickups-ammo-medium = 12 | ||
| + | | map-has-bots = yes | ||
}} | }} | ||
| + | |||
| + | This article is about '''Community Metalworks strategy'''. | ||
| + | |||
| + | '''Note''': It is recommended to read the main [[Metalworks]] article first to become familiar with the names of key map locations used in this article. | ||
| + | |||
| + | {{TOC limit|3}} | ||
== General strategy == | == General strategy == | ||
| − | * Stay in a group. Your team will fall very quickly if you try to act | + | * Stay in a group. Your team will fall very quickly if you try to act alone. |
* There are multiple different entrances. If one route is too well defended, take another. | * There are multiple different entrances. If one route is too well defended, take another. | ||
| Line 23: | Line 34: | ||
=== {{class link|Scout}} === | === {{class link|Scout}} === | ||
* Scouts have lots of room to maneuver in the control point areas. Try not to get caught in an ambush in the crossover areas. | * Scouts have lots of room to maneuver in the control point areas. Try not to get caught in an ambush in the crossover areas. | ||
| − | * | + | * Scouts should stay behind to capture points while the rest of the team pushes forward. |
=== {{class link|Soldier}} === | === {{class link|Soldier}} === | ||
| − | * There | + | * There are plenty of upper walkpaths around the map, so feel free to rocket jump onto them for faster travel. |
=== {{class link|Pyro}} === | === {{class link|Pyro}} === | ||
* While not as useful on this map, the Pyro's airblast can be very useful in pushing enemies off the middle control point. | * While not as useful on this map, the Pyro's airblast can be very useful in pushing enemies off the middle control point. | ||
=== {{class link|Demoman}} === | === {{class link|Demoman}} === | ||
* Set stickytraps on the bridges. They can help disorganize large groups. | * Set stickytraps on the bridges. They can help disorganize large groups. | ||
| − | * The | + | * The Grenade Launcher will be extremely useful in the small corridors. Use it whenever possible. |
=== {{class link|Heavy}} === | === {{class link|Heavy}} === | ||
* The limiting catwalks make for great opportunities to lock down a control point. Provide suppressive fire while other teammates capture. | * The limiting catwalks make for great opportunities to lock down a control point. Provide suppressive fire while other teammates capture. | ||
| Line 36: | Line 47: | ||
* The final point will be a tough holdout without a sentry in place. Set your sentry to guard both the doors. | * The final point will be a tough holdout without a sentry in place. Set your sentry to guard both the doors. | ||
=== {{class link|Medic}} === | === {{class link|Medic}} === | ||
| − | * Save your | + | * Save your ÜberCharge when near a control point. It can help turn the battle into your team's favor. |
| + | * Be aware of enemy Soldiers and Demomen who may try to [[Jumping#Basic_rocket_jump|rocket jump]] or [[Jumping#Basic_sticky_jump|sticky jump]], respectively, towards you. | ||
=== {{class link|Sniper}} === | === {{class link|Sniper}} === | ||
| − | * Provide | + | * Provide Sniper cover on the last point. You'll have full sight on all entryways. |
* There are vantage points near the middle control point that can help you harass enemies trying to capture. | * There are vantage points near the middle control point that can help you harass enemies trying to capture. | ||
=== {{class link|Spy}} === | === {{class link|Spy}} === | ||
| − | * You can use the bottom floors in each area to slip past groups of enemies | + | * You can use the bottom floors in each area to slip past groups of enemies. |
| − | * Engineer nests can be tricky near the last | + | * Engineer nests can be tricky near the last couple points. You can assist your team by sabotaging the nests. |
{{Map strategy}} | {{Map strategy}} | ||
Latest revision as of 20:00, 20 January 2024
| “Sun Tzu's got nothing on us!” This article is a Community strategy stub. As such, it is not complete. You can help the Team Fortress Wiki Community Strategy Project by expanding it. Notes: Expand the "General Strategy" section to cover map locations in more detail. Potentially look at the class-specific strategies as well. |
| Metalworks | |
|---|---|

| |
| Basic Information | |
| Map type: | Control Point |
| File name: | cp_metalworks
|
| Released: | July 7, 2016 Patch (Meet Your Match Update) |
| Developer(s): | Ian "Scorpio Uprising" Cuslidge |
| Map Info | |
| Environment: | Industrial |
| Setting: | Night, cloudy |
| Bot support: | Yes |
| Map Items | |
| Map Overview | |
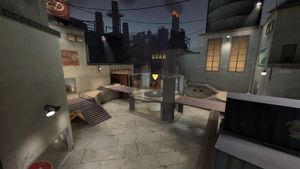
This article is about Community Metalworks strategy.
Note: It is recommended to read the main Metalworks article first to become familiar with the names of key map locations used in this article.
General strategy
- Stay in a group. Your team will fall very quickly if you try to act alone.
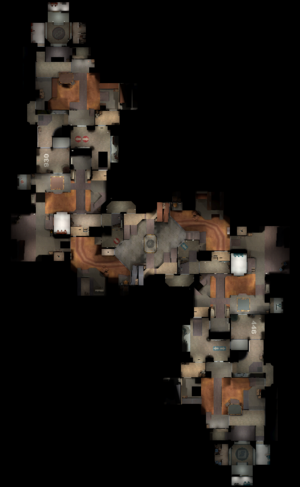
- There are multiple different entrances. If one route is too well defended, take another.
Class-specific strategy
 Scout
Scout
- Scouts have lots of room to maneuver in the control point areas. Try not to get caught in an ambush in the crossover areas.
- Scouts should stay behind to capture points while the rest of the team pushes forward.
 Soldier
- There are plenty of upper walkpaths around the map, so feel free to rocket jump onto them for faster travel.
 Pyro
Pyro
- While not as useful on this map, the Pyro's airblast can be very useful in pushing enemies off the middle control point.
 Demoman
- Set stickytraps on the bridges. They can help disorganize large groups.
- The Grenade Launcher will be extremely useful in the small corridors. Use it whenever possible.
 Heavy
Heavy
- The limiting catwalks make for great opportunities to lock down a control point. Provide suppressive fire while other teammates capture.
 Engineer
- The final point will be a tough holdout without a sentry in place. Set your sentry to guard both the doors.
 Medic
Medic
- Save your ÜberCharge when near a control point. It can help turn the battle into your team's favor.
- Be aware of enemy Soldiers and Demomen who may try to rocket jump or sticky jump, respectively, towards you.
 Sniper
- Provide Sniper cover on the last point. You'll have full sight on all entryways.
- There are vantage points near the middle control point that can help you harass enemies trying to capture.
 Spy
Spy
- You can use the bottom floors in each area to slip past groups of enemies.
- Engineer nests can be tricky near the last couple points. You can assist your team by sabotaging the nests.
