Difference between revisions of "Community Odyssey strategy"
m |
GrampaSwood (talk | contribs) |
||
| (18 intermediate revisions by 4 users not shown) | |||
| Line 1: | Line 1: | ||
{{Community strategy stub}} | {{Community strategy stub}} | ||
{{Map infobox | {{Map infobox | ||
| − | + | | map-strategy = yes | |
| − | + | | map-status = community | |
| − | + | | map-name = Odyssey | |
| − | + | | map-stamp-link = https://steamcommunity.com/stats/TF2/leaderboards/14154525 | |
| − | + | | map-workshopid = 3236834988 | |
| − | + | | map-image = Odyssey.png | |
| − | + | | map-game-type = Payload | |
| − | + | | map-file-name = pl_odyssey | |
| − | + | | map-released = {{Patch name|7|18|2024}} | |
| − | + | | map-released-major = Summer 2024 Update | |
| − | + | | map-environment = Ancient Greece, Mining | |
| − | + | | map-setting = Daylight, Sunny | |
| − | + | | map-has-bots = yes | |
| − | + | | map-has-vscript = yes | |
| − | + | | map-hazards = [[Pitfall]]s,<br/>[[Environmental death#Saw blades|Excavator blade]] (edge only) | |
| − | + | | map-pickups-health-small = 15 | |
| − | + | | map-pickups-health-medium = 15 | |
| + | | map-pickups-health-large = 2 | ||
| + | | map-pickups-ammo-small = 11 | ||
| + | | map-pickups-ammo-medium = 14 | ||
| + | | map-pickups-ammo-large = 7 | ||
}} | }} | ||
| − | This article is about '''Community [[ | + | This article is about '''Community Odyssey strategy'''. |
| + | |||
| + | '''Note''': It is recommended to read the main [[Odyssey]] article first to become familiar with the names of key map locations used in this article. | ||
== General Strategy (All Classes) == | == General Strategy (All Classes) == | ||
| − | {{See also| | + | {{See also|Community Payload strategy}} |
| − | *The map | + | * The map is very open, allowing for much vertical mobility, such as the [[Thermal Thruster]] or [[Jumping|explosive jumping]]. |
| + | |||
== Class-specific strategy == | == Class-specific strategy == | ||
=== {{class link|Scout}} === | === {{class link|Scout}} === | ||
| − | * | + | * At the end of the map, the attacking team has to capture a control point. This makes the Scout's double capture rate especially effective. Use a flank route or unexpected angle to start capture progress and force the enemy team to respond to it, while your own team moves in. |
| + | |||
=== {{class link|Soldier}} === | === {{class link|Soldier}} === | ||
| + | * The open sky of the map and majority outdoor areas give plenty of opportunities to rocket jump for flanks or simply jumping behind the enemy. Checkpoint C and D are a bit more enclosed than the rest of the map, so this strategy may not be as viable there. | ||
=== {{class link|Pyro}} === | === {{class link|Pyro}} === | ||
| + | * The many flank routes make the [[Backburner]] a good choice. High up ledges above the Payload cart are ideal spots to jump down to Crit players pushing the cart. The Thermal Thruster can aid in this with its vertical movement. | ||
=== {{class link|Demoman}} === | === {{class link|Demoman}} === | ||
| + | * The map has an abundance of slopes and angled props to [[Jumping#Rampsliding|trimp]] off of, one useful example is the large hill by BLU team's first spawn. A defending Demoman can use the [[Tide Turner]] to trimp behind the enemies pushing the cart. | ||
=== {{class link|Heavy}} === | === {{class link|Heavy}} === | ||
| + | * Because of the Heavy's slow movement speed, walking though the map is quite risky. You should try to take flank routes to minimise danger and suprise the enemy team. | ||
=== {{class link|Engineer}} === | === {{class link|Engineer}} === | ||
| − | * | + | * The bricks by the side exit of BLU's first spawn are an ideal place for a [[Sentry Gun]], placing one on top allows for it to shoot the RED team and give an opening to push the cart. |
| − | *The | + | * The many ledges allow for creative Sentry Gun positions, but keep in mind that anything too out in the open can be shot down by a Soldier or a [[Sniper]] out of its range. |
| − | * The map ending | + | * The map's ending control point makes it easy for you to build a Sentry Gun on the cliff above the point to stop pushes. The [[Wrangler]] allows for manual aiming of targets that might hide behind the cart, as well as significantly reducing damage from incoming fire. |
| + | |||
=== {{class link|Medic}} === | === {{class link|Medic}} === | ||
| + | * The capture at the end of the map can be made easier with the [[Amputator]]'s area of effect healing, allowing you to heal your entire team from a safe spot. | ||
| + | * The viability of explosive jumping makes the [[Quick-Fix]] a good choice due to its ability to mimic the explosive jumps and shield charges of the patient. | ||
| + | ** If you have an [[ÜberCharge]] ready and coordinate with your patient you can have them explosive jump you behind the enemy lines and pop your ÜberCharge. Causing chaos behind the enemy's lines like this provides an opportunity for the rest of your team to start pushing in. | ||
=== {{class link|Sniper}} === | === {{class link|Sniper}} === | ||
| + | * The many ledges are great spots for a Sniper to stand from, the high ground giving the advantage of being able to look over a lot of the cover. For example, the high up platform outside of BLU's spawn can be used to spawncamp the enemy team before they can reach the cart. | ||
=== {{class link|Spy}} === | === {{class link|Spy}} === | ||
| − | + | * The many hidden or out-of-sight areas on this map makes decloaking in a safe spot far easier to do. For example, the small network of tunnels around the first capture point, accessible by the side building overlooking checkpoint A, is a great spot for decloaking. | |
| + | * You can use the abundance of [[Ammo#Ammo boxes|ammo packs]] around the map to plan a route and stay cloaked as you go behind the enemy. | ||
{{Map Strategy Nav}} | {{Map Strategy Nav}} | ||
| − | |||
Latest revision as of 19:02, 21 November 2024
| “Sun Tzu's got nothing on us!” This article is a Community strategy stub. As such, it is not complete. You can help the Team Fortress Wiki Community Strategy Project by expanding it. |
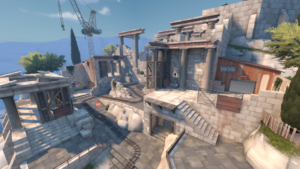
| Odyssey | |
|---|---|

| |
| Basic Information | |
| Map type: | Payload |
| File name: | pl_odyssey
|
| Released: | July 18, 2024 Patch (Summer 2024 Update) |
| Developer(s): | Evan "Defcon" LeBlanc Nickolas "KrazyZark" Fenech Freyja Sarexicus |
| Map Info | |
| Environment: | Ancient Greece, Mining |
| Setting: | Daylight, Sunny |
| Hazards: | Pitfalls, Excavator blade (edge only) |
| Bot support: | Yes |
| Map Items | |
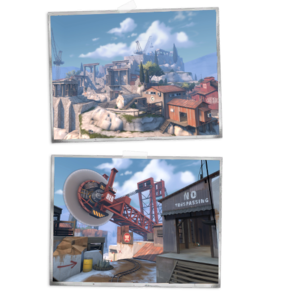
| Map Photos | |
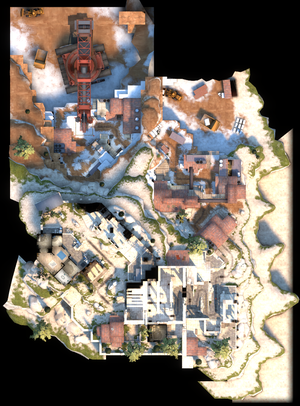
| Map Overview | |
This article is about Community Odyssey strategy.
Note: It is recommended to read the main Odyssey article first to become familiar with the names of key map locations used in this article.
Contents
General Strategy (All Classes)
See also: Community Payload strategy
- The map is very open, allowing for much vertical mobility, such as the Thermal Thruster or explosive jumping.
Class-specific strategy
 Scout
Scout
- At the end of the map, the attacking team has to capture a control point. This makes the Scout's double capture rate especially effective. Use a flank route or unexpected angle to start capture progress and force the enemy team to respond to it, while your own team moves in.
 Soldier
- The open sky of the map and majority outdoor areas give plenty of opportunities to rocket jump for flanks or simply jumping behind the enemy. Checkpoint C and D are a bit more enclosed than the rest of the map, so this strategy may not be as viable there.
 Pyro
Pyro
- The many flank routes make the Backburner a good choice. High up ledges above the Payload cart are ideal spots to jump down to Crit players pushing the cart. The Thermal Thruster can aid in this with its vertical movement.
 Demoman
- The map has an abundance of slopes and angled props to trimp off of, one useful example is the large hill by BLU team's first spawn. A defending Demoman can use the Tide Turner to trimp behind the enemies pushing the cart.
 Heavy
Heavy
- Because of the Heavy's slow movement speed, walking though the map is quite risky. You should try to take flank routes to minimise danger and suprise the enemy team.
 Engineer
- The bricks by the side exit of BLU's first spawn are an ideal place for a Sentry Gun, placing one on top allows for it to shoot the RED team and give an opening to push the cart.
- The many ledges allow for creative Sentry Gun positions, but keep in mind that anything too out in the open can be shot down by a Soldier or a Sniper out of its range.
- The map's ending control point makes it easy for you to build a Sentry Gun on the cliff above the point to stop pushes. The Wrangler allows for manual aiming of targets that might hide behind the cart, as well as significantly reducing damage from incoming fire.
 Medic
Medic
- The capture at the end of the map can be made easier with the Amputator's area of effect healing, allowing you to heal your entire team from a safe spot.
- The viability of explosive jumping makes the Quick-Fix a good choice due to its ability to mimic the explosive jumps and shield charges of the patient.
- If you have an ÜberCharge ready and coordinate with your patient you can have them explosive jump you behind the enemy lines and pop your ÜberCharge. Causing chaos behind the enemy's lines like this provides an opportunity for the rest of your team to start pushing in.
 Sniper
- The many ledges are great spots for a Sniper to stand from, the high ground giving the advantage of being able to look over a lot of the cover. For example, the high up platform outside of BLU's spawn can be used to spawncamp the enemy team before they can reach the cart.
 Spy
Spy
- The many hidden or out-of-sight areas on this map makes decloaking in a safe spot far easier to do. For example, the small network of tunnels around the first capture point, accessible by the side building overlooking checkpoint A, is a great spot for decloaking.
- You can use the abundance of ammo packs around the map to plan a route and stay cloaked as you go behind the enemy.

