Difference between revisions of "Payload/ko"
(Badwater Basin이 좀 그랬는데. Badwater Basin은 CA에 진짜로 있는 지역이더군요. http://en.wikipedia.org/wiki/Badwater_Basin 그래서, 배드워터 분지라고 했습니다. 졸려서 의역을 좀 넣었습니다. ...그리고 사) |
BrazilianNut (talk | contribs) m |
||
| (37 intermediate revisions by 13 users not shown) | |||
| Line 1: | Line 1: | ||
| + | {{update trans}} | ||
{{trans}} | {{trans}} | ||
| − | |||
| − | [[ | + | {{DISPLAYTITLE:수레 밀기}} |
| + | [[File:Goldrush.jpg|thumb|right|300px|게임 내에 처음으로 출시된 수레 밀기 맵인 {{map link|Gold Rush}}의 3라운드.]] | ||
| + | [[File:Badwater Basin RED Base.jpg|thumb|right|300px|{{map link|Badwater Basin}}의 마지막 목표 지점인 레드 본진.]] | ||
| − | {{Quotation|''' | + | {{Quotation|'''헤비'''|전진하라, 위대한 폭탄 수레여!|sound=Heavy cartmovingforwardoffense17.wav|en-sound=yes}} |
| − | + | '''수레 밀기'''는 [[BLU/ko|블루]] 팀이 폭발물들로 가득 찬 [[#수레|수레]]를 이어지는 여러 점령 지점들을 지나, 정해진 시간 내에 [[RED/ko|레드]] 팀 기지까지 호위해야 하는 게임 모드입니다. | |
| − | |||
| − | |||
| − | + | [[File:Pipeline.jpg|thumb|right|300px|The third stage of [[Pipeline]], a [[#Payload Race|Payload Race]] map.]] | |
| − | + | '''수레 밀기 경주'''는 '''수레 밀기'''에서 따온 게임 모드로, [[RED/ko|레드]] 팀과 [[BLU/ko|블루]] 팀이 각자의 수레를 상대 팀의 진영까지 먼저 미는 모드입니다. | |
| − | == | + | == 수레의 원리 == |
| − | [[ | + | === 기본 === |
| + | {{anchor|Cart Speed|Cart speed|Cart Speeds|Cart speeds|Speeds}} | ||
| + | 수레의 주변에 플레이어가 있으면 수레가 밀리며, 사람이 많을 수록 더 빠르게 밀 수 있습니다. 3명 이상이 수레 주변에 있을 때 미는 속도가 최대이며, 3명보다 많은 수의 플레이어가 있어도 속도가 더 증가하지 않습니다. | ||
| + | * {{cl|Scout}}과 {{item link|Pain Train}}을 착용한 플레이어는 2명으로 취급됩니다. | ||
| + | * 적이 수레 주변에 있으면 수레를 [[defense/ko|밀 수 없]]으며, 적이 수레 주변에서 벗어나거나 죽었을 때 수레를 밀 수 있습니다. | ||
| + | * 적으로 [[Disguise/ko|변장]]한 스파이는 적의 수레를 막거나 아군의 수레를 밀 수 없지만, 아군으로 변장한 스파이는 적의 수레를 막거나 아군의 수레를 밀 수 있습니다. | ||
| + | ** 스카웃으로 변장하거나, {{item name|Pain Train}}을 착용한 플레이어로 변장하여도 2명으로 취급되지 않습니다.<sup>확인 필요</sup> | ||
| + | * [[überCharge/ko|우버차지]] 상태의 플레이어는 메딕의 보조 무기에 따라 수레를 밀거나 막을 수 있을 수도, 없을 수도 있습니다. | ||
| + | {{UberCharge Cart}} | ||
| − | + | {{Anchor|inclined slope|Rollback}} | |
| + | 만약 아무도 수레 주변에 없다면 수레는 멈추게 되며, 30초 간 아무도 수레 주변에 가지 않으면 수레는 이전 점령 지점까지 천천히 되돌아갑니다. 수레를 미는 팀이 수레 주변에 가면 수레를 다시 밀 수 있습니다. | ||
| − | + | 몇몇 맵에는 수레 주변에 아무도 없으면 수레가 바로 되돌아가게 되는 '''오르막길''' 구간이 있습니다. 이 구간에서는, 수레를 미는 팀이 이 구간을 지날 때까지 수레 주변에 계속 있어야 합니다. 이 구간은 [[Heads-up display/ko|HUD]]에 화살표 무늬로 나타나 수레를 어디까지 밀어야 이 구간을 지나게 되는 지 알 수 있습니다. 이 구간을 지나면, 수레는 이후 되돌아가더라도 이 구간의 끝에서 멈추게 됩니다. | |
| − | |||
| − | |||
| − | {{ | + | 현재, 모든 기본 수레 밀기 맵의 수레를 미는 속도는 동일하며, 속도는 초당 [[Hammer unit/ko|해머 유닛]]으로 계산합니다. |
| + | {{Cart speeds}} | ||
| − | + | 만약 선로 위에 [[Buildings/ko|구조물]]이 있다면, 수레가 지나가며 구조물을 파괴시킵니다. 수레는 수레를 미는 팀에게 레벨 1 [[Dispenser/ko|디스펜서]]의 효과를 주어 체력과 탄약을 회복시킵니다. 하지만, 디스펜서와 달리 엔지니어에게 금속을 무제한으로 줄 수 있습니다. 이 효과는 변장한 적 스파이에게도 적용됩니다. | |
| − | |||
| − | |||
| − | + | [[July 8, 2010 Patch/ko|{{update name|Engineer Update}}]] 이후, 수레는 팀 색상의 빛나는 윤곽 효과가 있어 먼 곳에서도 벽을 넘어 위치를 확인할 수 있습니다. | |
| − | {{ | ||
| − | === | + | === 수레 밀기 === |
| − | ''' | + | '''수레 밀기'''에서, 블루 팀은 주어진 시간 내에 점령 지점들을 지나 레드 팀의 기지까지 수레를 밀어야 합니다. 점령 지점을 지나면 타이머에 시간이 늘어납니다. |
| − | + | 블루 팀이 30초 간 수레를 밀지 않으면, 수레는 점령 지점이나 블루 팀 기지까지 천천히 되돌아가며, 주변에 블루 팀 플레이어가 있으면 다시 앞으로 가게 됩니다. 타이머가 다 되었을 때 수레 주변에 블루 팀 플레이어가 없으면, [[Overtime/ko|추가시간]]이 나타나며, 블루 팀은 5초 내에 수레를 밀어 점령 지점 또는 마지막 지점까지 밀어야 합니다. 블루 팀이 수레를 밀 때마다 타이머가 초기화됩니다. | |
| − | |||
| − | |||
| − | |||
| − | |||
| − | |||
| − | |||
| − | |||
| − | |||
| − | |||
| − | |||
| − | |||
| − | |||
| − | |||
| − | |||
| − | |||
| − | |||
| − | |||
| − | |||
| − | |||
| − | |||
| − | |||
| − | |||
| − | |||
| − | |||
| − | |||
| − | |||
| − | |||
| − | |||
| − | |||
| − | |||
| − | |||
| − | |||
| − | |||
| − | {{anchor|PLR | + | === 수레 밀기 경주 === |
| + | {{anchor|PLR|plr|Plr|Race|race|Payload race|Payload Race}} | ||
| + | '''수레 밀기 경주'''에서는, 양 팀 모두 수레가 있어, 자신의 팀의 수레를 미는 동시에 적의 수레를 막아야 합니다. 수레 밀기 맵과는 달리, 오르막길 구간을 제외한 구간에서는 아무리 오랜 시간이 지나도 수레가 되돌아가지 않으며, 한 팀이 수레를 마지막 지점까지 밀어야만 맵이 끝나게 됩니다. | ||
| − | + | 수레 밀기 경주 맵은 일반적으로 수레 밀기 맵보다 오르막길 구간이 많습니다. [[Overtime/ko|추가시간]] 동안, 양 팀의 수레는 자동으로 천천히 앞으로 움직여 [[Match outcomes/ko#무승부|무승부]]가 나타나지 않습니다. 만약 수레의 선로가 겹치는 곳에서 양 팀의 수레가 만난다면, 한 쪽의 수레가 지나갈 때까지 양 팀의 수레는 움직이지 않습니다. | |
| − | |||
| − | + | === 쩝쩝폭폭 꼬마기차 === | |
| − | + | {{main|Frontier}} | |
| − | |||
| − | |||
| − | |||
| − | |||
| − | |||
| − | |||
| − | |||
| − | |||
| − | |||
| − | |||
| − | |||
| − | |||
| − | |||
| − | |||
| − | |||
| − | |||
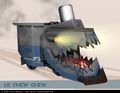
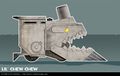
| − | + | 수레 밀기 맵인 {{map link|Frontier}}에서는, '''쩝쩝폭폭 꼬마기차'''라고 알려진 거대한 기차 엔진이 기본 수레 대신 사용됩니다. 쩝쩝폭폭 꼬마기차는 움직이는 턱, 날카로운 이빨과 두 개의 전조등이 있으며, 뒤에 올라탈 수 있는 플랫폼이 있습니다. | |
| − | ''' | ||
| − | + | 쩝쩝폭폭 꼬마기차를 이용해 정면에서 오는 공격을 막을 수 있으며, 앞으로 움직이는 동안 입 주변에 오는 양 팀의 플레이어에게 굉장한 피해를 입힙니다. 플랫폼에 올라탄 플레이어가 많을수록 피해량이 증가하며, 3명 이상의 플레이어가 플랫폼에 있으면 입 주변에 오는 모든 플레이어를 한 번에 죽입니다. 플랫폼에는 내장된 블루 팀 [[Dispenser/ko|디스펜서]]가 있으며, 플랫폼에 올라타면 기차에 가려 정면을 보기 힘듭니다. 쩝쩝폭폭 꼬마기차는 기본 수레보다 수레를 미는 범위가 크며, 적이 기차의 앞에 있어도 기차를 막을 수 없습니다. {{map link|Wutville}}에서는, 쩝쩝폭폭 꼬마기차의 변형된 버전인 Rüdy가 있습니다. | |
| − | + | == 전략 == | |
| + | {{main|Community Payload strategy/ko|l1=커뮤니티 수레 밀기 전략}} | ||
| + | {{main|Community Payload Race strategy/ko|l1=커뮤니티 수레 밀기 경주 전략}} | ||
| − | + | {{anchor|Payload maps|Payload Maps|maps}} | |
| − | + | == 맵 == | |
| − | + | {{main|List of maps/ko|l1=맵 목록}} | |
| − | |||
| − | |||
| − | |||
| − | |||
| − | |||
| − | |||
| − | {{anchor| | ||
| − | |||
| − | |||
| − | |||
| − | |||
| − | |||
| − | |||
| − | |||
| − | |||
| − | |||
| − | |||
| − | |||
| − | |||
| − | |||
| − | |||
| − | |||
| − | |||
| − | |||
| − | |||
| − | |||
| − | |||
| − | |||
| − | |||
| − | |||
| − | |||
| − | |||
| − | {{ | + | === 수레 밀기=== |
| + | '''수레 밀기''' 맵은 '''pl_''' 접두사가 붙으며, 커뮤니티 제작 맵은 이탤릭체가 적용되었습니다. | ||
| + | {{Maps table|Payload}} | ||
| − | + | === {{anchor|PLR maps|plr maps|Race maps|Payload Race maps}} 수레 밀기 경주 === | |
| − | === 수레 === | + | '''수레 밀기 경주''' 맵은 '''plr_''' 붙으며, 커뮤니티 제작 맵은 이탤릭체가 적용되었습니다. |
| − | + | {{Maps table|Payload Race}} | |
| − | |||
| − | |||
| − | |||
| − | |||
| − | |||
| − | + | == 관련 도전 과제 == | |
| − | + | === {{Class link|Scout}} === | |
| − | |||
| − | |||
| − | |||
| − | |||
| − | |||
| − | |||
| − | |||
| − | |||
| − | |||
| − | |||
| − | |||
| − | |||
| − | |||
| − | |||
| − | |||
| − | |||
| − | == 관련 | ||
| − | ==={{Class link|Scout}}=== | ||
{{Achievement table | {{Achievement table | ||
| {{Show achievement|Scout|Brushback}} | | {{Show achievement|Scout|Brushback}} | ||
}} | }} | ||
| − | ==={{Class link|Soldier}}=== | + | === {{Class link|Soldier}} === |
{{Achievement table | {{Achievement table | ||
| {{Show achievement|Soldier|Hamburger Hill}} | | {{Show achievement|Soldier|Hamburger Hill}} | ||
| Line 178: | Line 83: | ||
}} | }} | ||
| − | ==={{Class link|Demoman}}=== | + | === {{Class link|Demoman}} === |
{{Achievement table | {{Achievement table | ||
| {{Show achievement|Demoman|Bravehurt}} | | {{Show achievement|Demoman|Bravehurt}} | ||
| Line 184: | Line 89: | ||
}} | }} | ||
| − | ==={{Class link|Heavy}}=== | + | === {{Class link|Heavy}} === |
{{Achievement table | {{Achievement table | ||
| {{Show achievement|Heavy|Pushkin the Kart}} | | {{Show achievement|Heavy|Pushkin the Kart}} | ||
| Line 190: | Line 95: | ||
}} | }} | ||
| − | ==={{Class link|Engineer}}=== | + | === {{Class link|Engineer}} === |
{{Achievement table | {{Achievement table | ||
| {{Show achievement|Engineer|No Man's Land}} | | {{Show achievement|Engineer|No Man's Land}} | ||
}} | }} | ||
| − | ==={{Class link|Spy}}=== | + | === {{Class link|Spy}} === |
{{Achievement table | {{Achievement table | ||
| {{Show achievement|Spy|Is It Safe?}} | | {{Show achievement|Spy|Is It Safe?}} | ||
| Line 201: | Line 106: | ||
== 업데이트 기록 == | == 업데이트 기록 == | ||
| − | ''' | + | {{Update history| |
| − | * 수레 밀기 | + | '''{{Patch name|4|29|2008}}''' ({{update link|Gold Rush Update}}) |
| − | * | + | * 수레 밀기 게임 모드를 추가했습니다. |
| + | * Gold Rush 맵을 추가했습니다. | ||
| + | |||
| + | '''{{Patch name|8|19|2008}}''' ({{update link|Heavy Update}}) | ||
| + | * [[Badwater Basin/ko|Badwater Basin]]맵이 추가되었습니다. | ||
| + | * 수레 밀기 맵에 수레 이동 차단 인식에 대한 처리를 추가했습니다. | ||
| + | |||
| + | '''{{Patch name|5|21|2009}}''' ({{update link|Sniper vs. Spy Update}}) | ||
| + | * 수레 밀기 경주 모드를 추가했습니다. | ||
| + | * Hoodoo와 Pipeline 맵을 추가했습니다. | ||
| + | |||
| + | '''{{Patch name|7|8|2010}}''' ({{update link|Engineer Update}}) | ||
| + | * Hightower, Thunder Mountain 및 Upward 맵이 추가되었습니다. | ||
| − | ''' | + | '''{{Patch name|2|24|2011}}''' ({{update link|Community Map Pack Update}}) |
| − | * | + | * Frontier와 Nightfall 맵을 추가했습니다. |
| − | |||
| − | '''[[ | + | '''{{Patch name|6|23|2011}}''' ({{update link|Über Update}}) |
| − | * | + | * Barnblitz 맵을 추가했습니다. |
| + | |||
| + | '''{{Patch name|4|17|2012}}''' | ||
| + | * {{Undocumented}} 수레 밀기의 수레들은 더 이상 플레이어의 과치료를 유지시켜주지 않습니다. | ||
| + | |||
| + | '''{{Patch name|5|10|2012}}''' | ||
| + | * {{code|mapobj_cart_dispenser}} 엔티티에 활성화/비활성화 옵션을 추가하였습니다 | ||
| + | |||
| + | '''{{Patch name|6|27|2012}}''' | ||
| + | * 수레 밀기 [[Heads-up display/ko|HUD]]에서 수레가 언덕에 있지 않아도 언덕에 있는 것처럼 보이는 오류를 수정했습니다. | ||
| + | |||
| + | '''{{Patch name|2|1|2013}}''' | ||
| + | * 플레이어가 수레를 이용해 적의 기지에 들어갈 수 있는 오류를 수정했습니다. | ||
| + | |||
| + | '''{{Patch name|6|18|2014}}''' ({{update link|Love & War Update}}) | ||
| + | * 파편이 [[Upward/ko|{{code|pl_upward}}]]의 마지막 지점 폭발을 일으키는 오류를 수정했습니다. | ||
| + | * {{Undocumented}} 수레 밀기 경주에서 사용되는 관리자의 대사를 추가했습니다. | ||
| + | |||
| + | '''{{Patch name|12|8|2014}}''' ({{update link|End of the Line Update}}) | ||
| + | * {{Undocumented}} [[End of the Line (video)/ko|선로의 끝 영상]]에 나오는 폭탄과 수레를 추가했습니다. | ||
| + | |||
| + | '''{{Patch name|7|2|2015}} #1''' ({{update link|Gun Mettle Update}}) | ||
| + | * Borneo 맵을 추가했습니다. | ||
| + | |||
| + | '''{{Patch name|7|4|2015}} #1''' | ||
| + | * 수레 밀기 맵의 마지막 지점에서 도발하고 죽는 것과 관련된 오류를 수정했습니다. | ||
| + | |||
| + | '''{{Patch name|7|15|2015}} #1''' | ||
| + | * Badwater Basin, Barnblitz, Borneo 및 Gold Rush의 마지막 지점과 떨어트린 무기와 관련된 오류를 수정했습니다. | ||
| + | |||
| + | '''{{Patch name|10|28|2015}} #1''' ({{update link|Scream Fortress 2015}}) | ||
| + | * Hellstone 맵을 추가했습니다. | ||
| + | |||
| + | '''{{Patch name|12|17|2015}} #1''' ({{update link|Tough Break Update}}) | ||
| + | * Snowycoast 맵을 추가했습니다. | ||
| + | |||
| + | '''{{Patch name|7|7|2016}}''' ({{update link|Meet Your Match Update}}) | ||
| + | * Swiftwater 맵을 추가했습니다. | ||
| + | |||
| + | '''{{Patch name|10|21|2016}}''' ({{update link|Scream Fortress 2016}}) | ||
| + | * Brimstone 맵을 추가했습니다. | ||
| + | |||
| + | '''{{Patch name|10|20|2017}}''' ({{update link|Jungle Inferno Update}}) | ||
| + | * Banana Bay 및 Enclosure 맵을 추가했습니다. | ||
| + | |||
| + | '''{{Patch name|10|19|2018}}''' ({{update link|Scream Fortress 2018}}) | ||
| + | * Gravestone 맵을 추가했습니다. | ||
| + | |||
| + | '''{{Patch name|10|10|2019}}''' ({{update link|Scream Fortress 2019}}) | ||
| + | * Precipice 맵을 추가했습니다. | ||
| + | |||
| + | '''{{Patch name|10|1|2020}}''' ({{update link|Scream Fortress 2020}}) | ||
| + | * Bloodwater 및 Hassle Castle 맵을 추가했습니다. | ||
| + | |||
| + | '''{{Patch name|12|3|2020}}''' ({{update link|Smissmas 2020}}) | ||
| + | * Pier 및 Wutville 맵을 추가했습니다. | ||
| + | |||
| + | '''{{Patch name|10|5|2021}}''' ({{update link|Scream Fortress 2021}}) | ||
| + | * Terror 맵을 추가했습니다. | ||
| + | |||
| + | '''{{Patch name|12|2|2021}}''' ({{update link|Smissmas 2021}}) | ||
| + | * Bread Space, Chilly, 및 Polar 맵을 추가했습니다. | ||
| + | |||
| + | '''{{Patch name|7|8|2022}}''' | ||
| + | * 수레가 되돌아가지 않는 오류를 수정했습니다. | ||
| + | |||
| + | '''{{Patch name|10|5|2022}}''' ({{update link|Scream Fortress 2022}}) | ||
| + | * Bonesaw 및 Ghoulpit 맵을 추가했습니다. | ||
| + | |||
| + | '''{{Patch name|12|5|2022}}''' ({{update link|Smissmas 2022}}) | ||
| + | * Frostcliff 및 Rumford 맵을 추가했습니다. | ||
| + | |||
| + | '''{{Patch name|7|12|2023}}''' ({{update link|Summer 2023}}) | ||
| + | * Cashworks, Phoenix, 및 Venice 맵을 추가했습니다. | ||
| + | |||
| + | '''{{Patch name|10|9|2023}} #1''' ({{update link|Scream Fortress 2023}}) | ||
| + | * Corruption 및 Spineyard 맵을 추가했습니다. | ||
| + | |||
| + | '''{{Patch name|12|7|2023}}''' ({{update link|Smissmas 2023}}) | ||
| + | * Camber, Emerge, 및 Hacksaw 맵을 추가했습니다. | ||
| + | }} | ||
== 버그 == | == 버그 == | ||
| − | [[ | + | [[File:Payload glitch.jpeg|thumb|수레가 돌아가는 버그.]] |
| + | [[File:Derail.jpg|thumb|탈선한 수레.]] | ||
| + | [[File:Cart Headstart.jpg|thumb|수레가 앞에서 시작하는 버그.]] | ||
| + | * 수레는 가끔 수직으로 회전합니다. | ||
| + | * 수레 밀기 HUD는 가끔 얼마나 많은 플레이어가 수레를 미는 지 나타내지 않습니다. 또한 수레 주변에 적이 없어도 적에 의해 막혔다고 나오기도 합니다. | ||
| + | * 수레 폭발에 의해 죽어서 나오는 [[Deathcam/ko|데스캠]]은 맵의 특정 부분을 비추며 플레이어의 죽음에 적이 관여되지 않아도 적의 이름이 나타납니다. | ||
| + | * 떨어지는 수레는 가끔 폭발에 의해 탈선할 수 있습니다. 이는 마지막 지점을 점령하면 physics 프롭이 되기 때문입니다. | ||
| + | * 블루 팀의 문이 열리지 않고, 맵이 준비 시간에 멈추는 오류가 발생하기도 합니다. 수레는 혼자서 천천히 앞으로 움직이며, 적 팀은 수레를 막을 수 없습니다. | ||
| + | * 가끔, 수레가 라운드가 시작될 때 아무도 수레를 밀지 않고 [[Setup/ko|준비 시간]]임에도 기존 시작 위치와 다른 곳에 있을 수 있습니다. | ||
| + | * 플레이어가 특정 맵들의 마지막 지점에서 계속해서 무기를 주우면, 땅을 통과해 마지막 지점을 터트릴 수 있습니다. | ||
| + | * Upward의 두 번째 점령 지점 근처 터널의 출구와 같은 특정 장소에서 플레이어는 맵에 낄 수 있습니다. | ||
| + | ** 이를 이용해 구조물의 안에 낄 수도 있습니다. | ||
| + | ** 이를 이용해 적 플레이어의 모델 안에 낄 수도 있습니다. | ||
| + | |||
| + | == 상식 == | ||
| + | [[File:GoldrushCart.jpg|thumb|다른 모습의 수레의 구상도.]] | ||
| − | * | + | * 기본 수레는 인플로전 방식의 플루토늄 원자 폭탄인 "[[w:ko:팻 맨|팻 맨]]"의 모습과 닮았습니다. 이 폭탄은 제2차 세계 대전 중 나가사키에 투하되었습니다. |
| − | * | + | * Hoodoo 맵은 다른 수레 모델을 사용합니다. 맵의 설명에는 수레가 TNT와 같은 폭탄이 붙은 원자력 폭탄인 "더러운 폭탄" 임을 알게 해줍니다. |
| − | * | + | * 몇몇 폭탄에는 [[Heavy/ko|헤비]]의 [[Heavy responses/ko|대사]]가 적혀있습니다. |
| − | * | + | ** 기본 수레에는 "Cry some more" 이라고 쓰여있습니다. |
| − | * | + | ** Hoodoo 맵의 수레에는 "So much blood!"가 맨 앞에, "Bonk"가 끈 아래 쓰여있습니다. |
| + | ** 쩝쩝폭폭 꼬마기차에는 "All of you are dead!"이 굴뚝의 앞에 쓰여 있습니다. | ||
| + | * 수레에 있는 전구는 [[Combat Mini-Sentry Gun/ko|소형 센트리 건]]에 있는 전구와 같은 전구입니다. | ||
| − | == | + | == 갤러리 == |
| − | [[ | + | === Carts === |
| + | <gallery perrow="4"> | ||
| + | File:BLU Bombcart.png|[[BLU/ko|블루]] 팀 수레. | ||
| + | File:RED Bombcart.png|[[RED/ko|레드]] 팀 수레. 수레 밀기 경주 맵에서만 볼 수 있습니다. | ||
| + | File:Hoodoo Bombcart.png|{{map link|Hoodoo}}의 수레. | ||
| + | File:Lil-chewchew.png|{{map link|Frontier}}의 [[#쩝쩝폭폭 꼬마기차|쩝쩝폭폭 꼬마기차]] | ||
| + | File:RED Helltower Bombcart.png|{{map link|Helltower}}와 {{map link|Hassle Castle}}의 레드 팀 묘지 수레. | ||
| + | File:BLU Helltower Bombcart.png|Helltower와 {{map link|Brimstone}}의 블루 팀 묘지 수레. | ||
| + | File:RED EOTL Bombcart.png|레드 팀의 [[End of the Line Update/ko|선로의 끝]] 수레. | ||
| + | File:BLU EOTL Bombcart.png|블루 팀의 선로의 끝 수레. | ||
| + | File:BLU Snowycoast Bombcart.png|{{map link|Snowycoast}}의 블루 팀 수레. | ||
| + | File:Hellstone cart.png|{{map link|Hellstone}}의 수레. | ||
| + | File:Gravestone Bottle Cart.png|{{map link|Gravestone}}의 블루 팀 스크럼피 수레. | ||
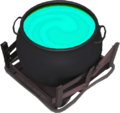
| + | File:Precipice Cauldron Cart.png|{{map link|Precipice}}의 블루 팀 마녀의 가마솥 수레. | ||
| + | File:Bloodwater cart.png|{{map link|Bloodwater}}의 수레. | ||
| + | File:Rudy.png|{{map link|Wutville}}의 수레인 Rüdy. | ||
| + | File:Breadspace cart.png|{{map link|Bread Space}}의 수레. | ||
| + | File:Chilly Cart.png|{{map link|Chilly}}의 수레. | ||
| + | File:RED Bonesaw Bombcart.png|{{map link|Hacksaw}} 및 [[Bonesaw (map)/ko|Bonesaw]]의 레드 팀 톱날 수레. | ||
| + | File:BLU Bonesaw Bombcart.png|Hacksaw 및 Bonesaw의 블루 팀 톱날 수레. | ||
| + | File:GhoulpitPayloadCart.png|{{map link|Ghoulpit}}의 수레. | ||
| + | File:Frostcliff cart.png|{{map link|Frostcliff}}의 수레. | ||
| + | File:Rumford cart.png|{{map link|Rumford}}의 수레. | ||
| + | </gallery> | ||
| + | |||
| + | === 구상도 === | ||
| + | <gallery> | ||
| + | File:Lilchewchew concept01.jpeg|쩝쩝폭폭 꼬마기차 모습. | ||
| + | File:Lilchewchew concept02.jpeg|쩝쩝폭폭 꼬마기차 최종 스케치. | ||
| + | File:Lilchewchew concept03.png|쩝쩝폭폭 꼬마기차 디자인 스케치. | ||
| + | File:Lilchewchew concept04.jpeg|기본 수레와 쩝쩝폭폭 꼬마기차의 크기 비교. | ||
| + | </gallery> | ||
| + | |||
| + | == 사용되지 않은 콘텐츠 == | ||
| + | 다음의 모델들은 게임 파일 내에 존재합니다. | ||
| + | <gallery perrow=5> | ||
| + | file:Prototrain1.png|탈 수 있는 수레의 프로토타입. | ||
| + | file:Prototrain1under.png|아래에서 본 탈 수 있는 수레의 프로토타입. | ||
| + | file:Prototrain2.png|탈 수 있는 수레의 프로토타입의 플랫폼. | ||
| + | file:Prototrain2under.png|아래에서 본 탈 수 있는 수레의 프로토타입의 플랫폼 | ||
| + | file:Spytechcartbomb.png|게임 파일 내의 구상도와 비슷한 모습의 수레 모델. | ||
| + | </gallery> | ||
| − | + | {{Goldrush Update Nav}} | |
| − | + | {{Maps Nav}} | |
| − | |||
| − | |||
| − | |||
| − | |||
| − | |||
| − | |||
| − | |||
| − | {{ | ||
| − | {{Maps | ||
| − | [[Category:Game modes]] | + | [[Category:Game modes/ko]] |
Latest revision as of 23:17, 20 July 2024
| 이 번역은 업데이트가 필요합니다. 당신은 Payload (원본 보기) 페이지에 담긴 내용을 참고해서 개선시킬 수 있습니다. Help:Language translation도 참조하세요. |
 | 이 페이지는 한국어로 번역 중입니다. 한국어를 능숙하게 하신다면 토론 페이지에 글을 남기거나 문서 역사를 참고하여 문서 번역에 참여한 번역가들과 이를 상의하시기 바랍니다. |


| “ | 전진하라, 위대한 폭탄 수레여!
클릭하시면 들을 수 있습니다 (영어로)
— 헤비
|
” |
수레 밀기는 블루 팀이 폭발물들로 가득 찬 수레를 이어지는 여러 점령 지점들을 지나, 정해진 시간 내에 레드 팀 기지까지 호위해야 하는 게임 모드입니다.

수레 밀기 경주는 수레 밀기에서 따온 게임 모드로, 레드 팀과 블루 팀이 각자의 수레를 상대 팀의 진영까지 먼저 미는 모드입니다.
목차
수레의 원리
기본
수레의 주변에 플레이어가 있으면 수레가 밀리며, 사람이 많을 수록 더 빠르게 밀 수 있습니다. 3명 이상이 수레 주변에 있을 때 미는 속도가 최대이며, 3명보다 많은 수의 플레이어가 있어도 속도가 더 증가하지 않습니다.
- 스카웃과 고통행 열차을 착용한 플레이어는 2명으로 취급됩니다.
- 적이 수레 주변에 있으면 수레를 밀 수 없으며, 적이 수레 주변에서 벗어나거나 죽었을 때 수레를 밀 수 있습니다.
- 적으로 변장한 스파이는 적의 수레를 막거나 아군의 수레를 밀 수 없지만, 아군으로 변장한 스파이는 적의 수레를 막거나 아군의 수레를 밀 수 있습니다.
- 스카웃으로 변장하거나, 고통행 열차을 착용한 플레이어로 변장하여도 2명으로 취급되지 않습니다.확인 필요
- 우버차지 상태의 플레이어는 메딕의 보조 무기에 따라 수레를 밀거나 막을 수 있을 수도, 없을 수도 있습니다.
| 메디 건 | 밀기 | 막기 |
|---|---|---|
메디 건 |
불가 | 가능 |
크리츠크리크 |
가능 | 가능 |
응급조치 |
불가 | 불가 |
예방접종기 |
가능 | 가능 |
만약 아무도 수레 주변에 없다면 수레는 멈추게 되며, 30초 간 아무도 수레 주변에 가지 않으면 수레는 이전 점령 지점까지 천천히 되돌아갑니다. 수레를 미는 팀이 수레 주변에 가면 수레를 다시 밀 수 있습니다.
몇몇 맵에는 수레 주변에 아무도 없으면 수레가 바로 되돌아가게 되는 오르막길 구간이 있습니다. 이 구간에서는, 수레를 미는 팀이 이 구간을 지날 때까지 수레 주변에 계속 있어야 합니다. 이 구간은 HUD에 화살표 무늬로 나타나 수레를 어디까지 밀어야 이 구간을 지나게 되는 지 알 수 있습니다. 이 구간을 지나면, 수레는 이후 되돌아가더라도 이 구간의 끝에서 멈추게 됩니다.
현재, 모든 기본 수레 밀기 맵의 수레를 미는 속도는 동일하며, 속도는 초당 해머 유닛으로 계산합니다.
| 인원수 | 속력 | 배율 |
|---|---|---|
| Backwards | -9 | -10% |
| x1 | 50 | 55% |
| x2 | 70 | 77% |
| x3 | 90 | 100% |
만약 선로 위에 구조물이 있다면, 수레가 지나가며 구조물을 파괴시킵니다. 수레는 수레를 미는 팀에게 레벨 1 디스펜서의 효과를 주어 체력과 탄약을 회복시킵니다. 하지만, 디스펜서와 달리 엔지니어에게 금속을 무제한으로 줄 수 있습니다. 이 효과는 변장한 적 스파이에게도 적용됩니다.
엔지니어 업데이트 이후, 수레는 팀 색상의 빛나는 윤곽 효과가 있어 먼 곳에서도 벽을 넘어 위치를 확인할 수 있습니다.
수레 밀기
수레 밀기에서, 블루 팀은 주어진 시간 내에 점령 지점들을 지나 레드 팀의 기지까지 수레를 밀어야 합니다. 점령 지점을 지나면 타이머에 시간이 늘어납니다.
블루 팀이 30초 간 수레를 밀지 않으면, 수레는 점령 지점이나 블루 팀 기지까지 천천히 되돌아가며, 주변에 블루 팀 플레이어가 있으면 다시 앞으로 가게 됩니다. 타이머가 다 되었을 때 수레 주변에 블루 팀 플레이어가 없으면, 추가시간이 나타나며, 블루 팀은 5초 내에 수레를 밀어 점령 지점 또는 마지막 지점까지 밀어야 합니다. 블루 팀이 수레를 밀 때마다 타이머가 초기화됩니다.
수레 밀기 경주
수레 밀기 경주에서는, 양 팀 모두 수레가 있어, 자신의 팀의 수레를 미는 동시에 적의 수레를 막아야 합니다. 수레 밀기 맵과는 달리, 오르막길 구간을 제외한 구간에서는 아무리 오랜 시간이 지나도 수레가 되돌아가지 않으며, 한 팀이 수레를 마지막 지점까지 밀어야만 맵이 끝나게 됩니다.
수레 밀기 경주 맵은 일반적으로 수레 밀기 맵보다 오르막길 구간이 많습니다. 추가시간 동안, 양 팀의 수레는 자동으로 천천히 앞으로 움직여 무승부가 나타나지 않습니다. 만약 수레의 선로가 겹치는 곳에서 양 팀의 수레가 만난다면, 한 쪽의 수레가 지나갈 때까지 양 팀의 수레는 움직이지 않습니다.
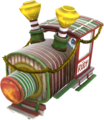
쩝쩝폭폭 꼬마기차
수레 밀기 맵인 Frontier에서는, 쩝쩝폭폭 꼬마기차라고 알려진 거대한 기차 엔진이 기본 수레 대신 사용됩니다. 쩝쩝폭폭 꼬마기차는 움직이는 턱, 날카로운 이빨과 두 개의 전조등이 있으며, 뒤에 올라탈 수 있는 플랫폼이 있습니다.
쩝쩝폭폭 꼬마기차를 이용해 정면에서 오는 공격을 막을 수 있으며, 앞으로 움직이는 동안 입 주변에 오는 양 팀의 플레이어에게 굉장한 피해를 입힙니다. 플랫폼에 올라탄 플레이어가 많을수록 피해량이 증가하며, 3명 이상의 플레이어가 플랫폼에 있으면 입 주변에 오는 모든 플레이어를 한 번에 죽입니다. 플랫폼에는 내장된 블루 팀 디스펜서가 있으며, 플랫폼에 올라타면 기차에 가려 정면을 보기 힘듭니다. 쩝쩝폭폭 꼬마기차는 기본 수레보다 수레를 미는 범위가 크며, 적이 기차의 앞에 있어도 기차를 막을 수 없습니다. Wutville에서는, 쩝쩝폭폭 꼬마기차의 변형된 버전인 Rüdy가 있습니다.
전략
맵
수레 밀기
수레 밀기 맵은 pl_ 접두사가 붙으며, 커뮤니티 제작 맵은 이탤릭체가 적용되었습니다.
| 이름 | 사진 | 파일명 |
|---|---|---|
| Badwater Basin | 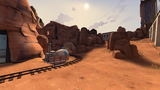
|
pl_badwater
|
| Barnblitz | 
|
pl_barnblitz
|
| Bloodwater | 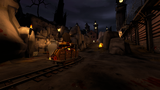
|
pl_bloodwater
|
| Borneo | 
|
pl_borneo
|
| Bread Space | 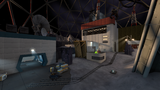
|
pl_breadspace
|
| Brimstone | 
|
pl_fifthcurve_event
|
| Cactus Canyon | 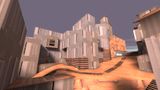
|
pl_cactuscanyon
|
| Camber | 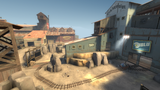
|
pl_camber
|
| Cashworks | 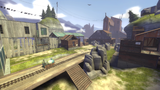
|
pl_cashworks
|
| Chilly | 
|
pl_chilly
|
| Corruption | 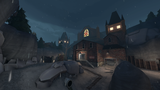
|
pl_corruption
|
| Embargo | 
|
pl_embargo
|
| Emerge | 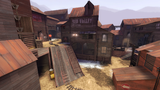
|
pl_emerge
|
| Enclosure | 
|
pl_enclosure_final
|
| Frontier | 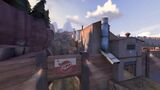
|
pl_frontier_final
|
| Frostcliff | 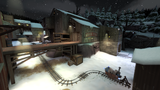
|
pl_frostcliff
|
| Ghoulpit | 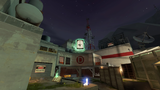
|
pl_sludgepit_event
|
| Goldrush | 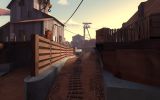
|
pl_goldrush
|
| Gravestone | 
|
pl_rumble_event
|
| Hassle Castle | 
|
pl_hasslecastle
|
| Hellstone | 
|
pl_millstone_event
|
| Hoodoo | 
|
pl_hoodoo_final
|
| Odyssey | 
|
pl_odyssey
|
| Pheonix | 
|
pl_phoenix
|
| Pier | 
|
pl_pier
|
| Polar | 
|
pl_coal_event
|
| Precipice | 
|
pl_precipice_event_final
|
| Rumford | 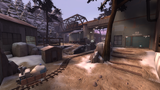
|
pl_rumford_event
|
| Snowycoast | 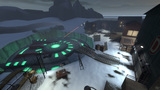
|
pl_snowycoast
|
| Spineyard | 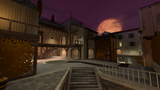
|
pl_spineyard
|
| Swiftwater | 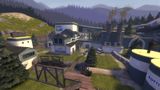
|
pl_swiftwater
|
| Terror | 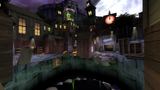
|
pl_terror_event
|
| Thundermountain | 
|
pl_thundermountain
|
| Upward | 
|
pl_upward
|
| Venice | 
|
pl_venice
|
| Wutville | 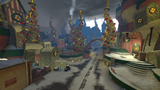
|
pl_wutville_event
|
수레 밀기 경주
수레 밀기 경주 맵은 plr_ 붙으며, 커뮤니티 제작 맵은 이탤릭체가 적용되었습니다.
| 이름 | 사진 | 파일명 |
|---|---|---|
| Banana Bay | 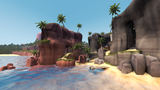
|
plr_bananabay
|
| Bonesaw | 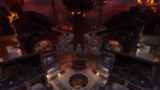
|
plr_hacksaw_event
|
| Hacksaw | 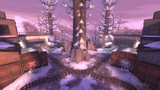
|
plr_hacksaw
|
| Helltower | 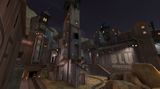
|
plr_hightower_event
|
| Hightower | 
|
plr_hightower
|
| Nightfall | 
|
plr_nightfall_final
|
| Pipeline | 
|
plr_pipeline
|
관련 도전 과제
 스카웃
스카웃
|

 솔저
솔저
|
|


 데모맨
데모맨
|
|


 헤비
헤비
|
|


 엔지니어
엔지니어
|

 스파이
스파이
|

업데이트 기록
- 수레 밀기 게임 모드를 추가했습니다.
- Gold Rush 맵을 추가했습니다.
- Badwater Basin맵이 추가되었습니다.
- 수레 밀기 맵에 수레 이동 차단 인식에 대한 처리를 추가했습니다.
2009년 5월 21일 패치 (스나이퍼 대 스파이 업데이트)
- 수레 밀기 경주 모드를 추가했습니다.
- Hoodoo와 Pipeline 맵을 추가했습니다.
- Hightower, Thunder Mountain 및 Upward 맵이 추가되었습니다.
2011년 2월 24일 패치 (커뮤니티 맵 묶음 업데이트)
- Frontier와 Nightfall 맵을 추가했습니다.
- Barnblitz 맵을 추가했습니다.
- [언급되지 않음] 수레 밀기의 수레들은 더 이상 플레이어의 과치료를 유지시켜주지 않습니다.
mapobj_cart_dispenser엔티티에 활성화/비활성화 옵션을 추가하였습니다
- 수레 밀기 HUD에서 수레가 언덕에 있지 않아도 언덕에 있는 것처럼 보이는 오류를 수정했습니다.
- 플레이어가 수레를 이용해 적의 기지에 들어갈 수 있는 오류를 수정했습니다.
- 파편이
pl_upward의 마지막 지점 폭발을 일으키는 오류를 수정했습니다. - [언급되지 않음] 수레 밀기 경주에서 사용되는 관리자의 대사를 추가했습니다.
- [언급되지 않음] 선로의 끝 영상에 나오는 폭탄과 수레를 추가했습니다.
2015년 7월 2일 패치 #1 (총기 패기 업데이트)
- Borneo 맵을 추가했습니다.
- 수레 밀기 맵의 마지막 지점에서 도발하고 죽는 것과 관련된 오류를 수정했습니다.
- Badwater Basin, Barnblitz, Borneo 및 Gold Rush의 마지막 지점과 떨어트린 무기와 관련된 오류를 수정했습니다.
2015년 10월 28일 패치 #1 (2015년 스크림 포트리스)
- Hellstone 맵을 추가했습니다.
2015년 12월 17일 패치 #1 (불행한 휴가 업데이트)
- Snowycoast 맵을 추가했습니다.
- Swiftwater 맵을 추가했습니다.
2016년 10월 21일 패치 (2016년 스크림 포트리스)
- Brimstone 맵을 추가했습니다.
2017년 10월 20일 패치 (정글 인페르노 업데이트)
- Banana Bay 및 Enclosure 맵을 추가했습니다.
2018년 10월 19일 패치 (2018 스크림 포트리스)
- Gravestone 맵을 추가했습니다.
2019년 10월 10일 패치 (2019 스크림 포트리스)
- Precipice 맵을 추가했습니다.
2020년 10월 1일 패치 (2020 스크림 포트리스)
- Bloodwater 및 Hassle Castle 맵을 추가했습니다.
- Pier 및 Wutville 맵을 추가했습니다.
2021년 10월 5일 패치 (2021 스크림 포트리스)
- Terror 맵을 추가했습니다.
- Bread Space, Chilly, 및 Polar 맵을 추가했습니다.
- 수레가 되돌아가지 않는 오류를 수정했습니다.
2022년 10월 5일 패치 (2022 스크림 포트리스)
- Bonesaw 및 Ghoulpit 맵을 추가했습니다.
- Frostcliff 및 Rumford 맵을 추가했습니다.
2023년 7월 12일 패치 (Summer 2023 Update)
- Cashworks, Phoenix, 및 Venice 맵을 추가했습니다.
2023년 10월 9일 패치 #1 (Scream Fortress XV)
- Corruption 및 Spineyard 맵을 추가했습니다.
- Camber, Emerge, 및 Hacksaw 맵을 추가했습니다.
버그


- 수레는 가끔 수직으로 회전합니다.
- 수레 밀기 HUD는 가끔 얼마나 많은 플레이어가 수레를 미는 지 나타내지 않습니다. 또한 수레 주변에 적이 없어도 적에 의해 막혔다고 나오기도 합니다.
- 수레 폭발에 의해 죽어서 나오는 데스캠은 맵의 특정 부분을 비추며 플레이어의 죽음에 적이 관여되지 않아도 적의 이름이 나타납니다.
- 떨어지는 수레는 가끔 폭발에 의해 탈선할 수 있습니다. 이는 마지막 지점을 점령하면 physics 프롭이 되기 때문입니다.
- 블루 팀의 문이 열리지 않고, 맵이 준비 시간에 멈추는 오류가 발생하기도 합니다. 수레는 혼자서 천천히 앞으로 움직이며, 적 팀은 수레를 막을 수 없습니다.
- 가끔, 수레가 라운드가 시작될 때 아무도 수레를 밀지 않고 준비 시간임에도 기존 시작 위치와 다른 곳에 있을 수 있습니다.
- 플레이어가 특정 맵들의 마지막 지점에서 계속해서 무기를 주우면, 땅을 통과해 마지막 지점을 터트릴 수 있습니다.
- Upward의 두 번째 점령 지점 근처 터널의 출구와 같은 특정 장소에서 플레이어는 맵에 낄 수 있습니다.
- 이를 이용해 구조물의 안에 낄 수도 있습니다.
- 이를 이용해 적 플레이어의 모델 안에 낄 수도 있습니다.
상식

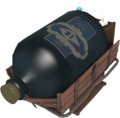
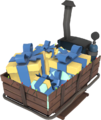
- 기본 수레는 인플로전 방식의 플루토늄 원자 폭탄인 "팻 맨"의 모습과 닮았습니다. 이 폭탄은 제2차 세계 대전 중 나가사키에 투하되었습니다.
- Hoodoo 맵은 다른 수레 모델을 사용합니다. 맵의 설명에는 수레가 TNT와 같은 폭탄이 붙은 원자력 폭탄인 "더러운 폭탄" 임을 알게 해줍니다.
- 몇몇 폭탄에는 헤비의 대사가 적혀있습니다.
- 기본 수레에는 "Cry some more" 이라고 쓰여있습니다.
- Hoodoo 맵의 수레에는 "So much blood!"가 맨 앞에, "Bonk"가 끈 아래 쓰여있습니다.
- 쩝쩝폭폭 꼬마기차에는 "All of you are dead!"이 굴뚝의 앞에 쓰여 있습니다.
- 수레에 있는 전구는 소형 센트리 건에 있는 전구와 같은 전구입니다.
갤러리
Carts
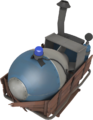
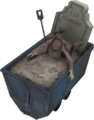
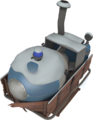
블루 팀 수레.
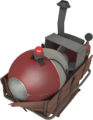
레드 팀 수레. 수레 밀기 경주 맵에서만 볼 수 있습니다.
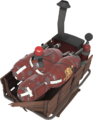
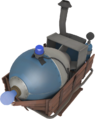
Hoodoo의 수레.
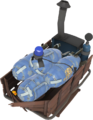
Helltower와 Hassle Castle의 레드 팀 묘지 수레.
Helltower와 Brimstone의 블루 팀 묘지 수레.
레드 팀의 선로의 끝 수레.
블루 팀의 선로의 끝 수레.

Snowycoast의 블루 팀 수레.
Hellstone의 수레.
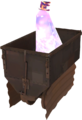
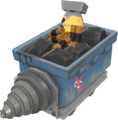
Gravestone의 블루 팀 스크럼피 수레.
Precipice의 블루 팀 마녀의 가마솥 수레.

Bloodwater의 수레.
Wutville의 수레인 Rüdy.
Bread Space의 수레.
Chilly의 수레.
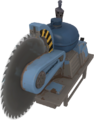
Hacksaw 및 Bonesaw의 블루 팀 톱날 수레.
Ghoulpit의 수레.
Frostcliff의 수레.
Rumford의 수레.


구상도
쩝쩝폭폭 꼬마기차 모습.
쩝쩝폭폭 꼬마기차 최종 스케치.
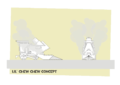
쩝쩝폭폭 꼬마기차 디자인 스케치.
기본 수레와 쩝쩝폭폭 꼬마기차의 크기 비교.


사용되지 않은 콘텐츠
다음의 모델들은 게임 파일 내에 존재합니다.
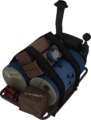
탈 수 있는 수레의 프로토타입.
아래에서 본 탈 수 있는 수레의 프로토타입.
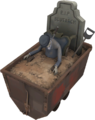
탈 수 있는 수레의 프로토타입의 플랫폼.
아래에서 본 탈 수 있는 수레의 프로토타입의 플랫폼
게임 파일 내의 구상도와 비슷한 모습의 수레 모델.


| ||||||||||||||||||||