Difference between revisions of "Community Mountain Lab strategy"
m (Auto: EnforceCapitalization(Sentry Gun) (Review RC#1084772)) |
LifeOnMars73 (talk | contribs) (→{{class link|soldier}}) |
||
| Line 31: | Line 31: | ||
*Try and avoid the open areas, as it gives the enemy a large window for avoiding your rockets. | *Try and avoid the open areas, as it gives the enemy a large window for avoiding your rockets. | ||
*Use your Rocket Launcher's blast radius to take advantage of the closed in control points, as it is a great way for clearing enemies off. | *Use your Rocket Launcher's blast radius to take advantage of the closed in control points, as it is a great way for clearing enemies off. | ||
| + | *Avoid enemy Pyros in small areas if you cannot escape, use you're shotgun so that the Pyro cannot reflect your rockets. | ||
==={{class link|pyro}}=== | ==={{class link|pyro}}=== | ||
Revision as of 05:49, 9 July 2012
| “You are so small! Is funny to me!” This article is a stub. As such, it is not complete. You can help Team Fortress Wiki by expanding it. |
| Community Mountain Lab strategy | |
|---|---|

| |
| Basic Information | |
| Developer(s): | Unknown |
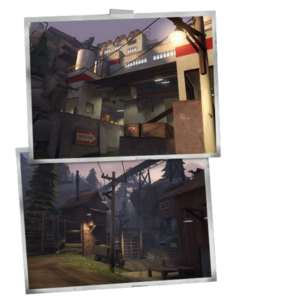
| Map Photos | |
This article is about Mountain Lab strategy.
Contents
General (All Classes)
- The final point is very open and as such is susceptible to combined-fire maneuvers.
- Be wary of players who may try to knock you into the pit with a compression blast or knockback.
Class-specific strategy
 Scout
Scout
- A good idea when going for the final control point is to wait in a corner or secluded out of sight area near the control point for all the enemies to pass, then start capturing. You may be able to draw the enemies back, allowing your team to advance.
- Be sure to take the secluded routes, to maximize surprise. This way you can have the enemies' health low before they even realize they're being attacked.
- The Sandman or Wrap Assassin may be a good choice for this map, due to the long straightaways.
 Soldier
- Try and avoid the open areas, as it gives the enemy a large window for avoiding your rockets.
- Use your Rocket Launcher's blast radius to take advantage of the closed in control points, as it is a great way for clearing enemies off.
- Avoid enemy Pyros in small areas if you cannot escape, use you're shotgun so that the Pyro cannot reflect your rockets.
 Pyro
Pyro
- While the first two control points can be tough for a Pyro as the space around is very open, once you have pushed (or been pushed) to the third point, the narrow hallways are perfect for ambushing enemies.
- The control points themselves, however, are pretty tight, which is great for the Flamethrower.
- Remember, airblasting enemies off the point, especially the final point, is always an option.
 Demoman
- Much like the Soldier, take advantage of the closed in spaces around the control points to deny capping.
- Use the corners of the hallways in the lab to ambush unsuspecting enemies.
 Heavy
Heavy
- As the areas to the first two points are pretty open, stick with a Medic and stay out of sight as to not get sniped.
- Equipping the Fists of Steel to run through the open is also a good idea.
 Engineer
- Put your Sentry Gun in the hallways of the lab to enforce area denial.
- It takes time for enemies to reach the walkway and rooms above the first control point, so set up a Sentry to defend the point.
- The trudge from spawn to the last point is fairly lengthy, so set up some Teleporters to cut the travel for your team.
- If you have the Pomson 6000 equipped, it isn't a bad idea to spam shots in the hallways or the long open areas.
- It is crucial that you avoid putting your Sentry Gun to far away from control points', otherwise you're Sentry Gun will not be able to reach the enemies attacking the point.
 Medic
Medic
- Since the control points are closed in, keep multiple teammates healed and try not to stick to one of them unless escorting a Heavy across an open area.
 Sniper
- The path from BLU spawn to the point A is excellent for sniping incoming enemies.
- The roof of Point B is great for defending and attacking Snipers, as you can aim towards people coming from RED spawn or aim towards people coming from Point A.
- The long corridor in the entrance to the lab is great for picking off approaching enemies.
- The area above the RED spawn gives you a good, long look to the room across.
 Spy
Spy
- One of the safest ways to get through the middle is to Cloak and to go across the top, where there is usually little to no traffic.
- Remember to sap teleporters, as it is a long walk to the control point.
- On offense, a good place to hide out at the first control point is inside the building behind it, disguised as a Sniper. Then, when you see an opening in the enemies, perhaps an exposed back, jump through the window and attack. After, Cloak and go back to the window, or escape.
 Go through this area while Cloaked to minimize chances of being discovered.

