Difference between revisions of "Arena/ko"
(→업데이트 목록) |
|||
| Line 1: | Line 1: | ||
{{DISPLAYTITLE:아레나}} | {{DISPLAYTITLE:아레나}} | ||
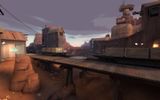
| − | + | [[File:Arenalumberyard.jpg|thumb|right|300px|게임에 처음으로 추가된 아레나 맵 중 하나인 [[Lumberyard/ko|Lumberyard]]의 레드 팀 대기실.]] | |
| − | [[File:Arenalumberyard.jpg|thumb|right|300px| | + | |
| − | {{Quotation|''' | + | {{Quotation|'''에이브러햄 링컨''', ''1865년 두 번째 취임 연설에서''|솔직하게 말하겠습니다: 전 아레나 모드가 ''좋습니다.''}} |
| − | '''아레나''' 는 [[ | + | |
| + | '''아레나'''는 {{update link|Heavy Update}} 때 추가된 [[레드]] 팀과 [[블루]] 팀이 서로 싸워서 사살하는 [[List of game modes/ko|게임 모드]]입니다. 양쪽 팀의 목표는 부활하지 않는 라운드에서 적 팀 플레이어를 전부 사살하는 것입니다. 만약 양쪽 팀이 싸우면서 1분 동안 살아남았다면, 점령한 팀이 승리하는 [[control point (objective)/ko|점령 지점]]이 잠금해제됩니다. | ||
| + | |||
| + | == 게임 플레이 == | ||
| + | {{See also|Tips/ko#아레나|l1=아레나 조언}} | ||
| + | |||
| + | 아레나 맵은 두 팀이 싸워 가면서 ''팀 포트리스 2''의 여러 병과들의 다양성을 살리는 맵입니다. 다른 게임 모드에서는 칠판에 적힌 글을 보고 전략을 알아내는 것과는 달리, 아레나 모드에서는 특별한 전략들을 직접 싸워 가면서 알아가야 합니다. | ||
| − | + | 아레나 모드는 플레이 시간이 빠른 작은 맵에서 플레이합니다. 한 팀의 플레이어가 전부 사망하거나, 점령 지점이 잠금해제되고 점령당하면 종료됩니다. 라운드는 팀을 구성하는 병과와 적 팀이 선택한 병과 간의 공격 작전에 따라 대부분 매우 빠르고 경쟁적으로 흘러가는 경향이 있습니다. | |
| − | |||
| − | |||
| − | + | 아레나 모드는 3대3 같이 소규모로 이루어지기도 하지만 12대12 같이 대규모로 이루어지기도 합니다. 일반적으로 [[Health/ko|치료제]]는 얼마 없고 주요 활동 지점에서 멀리 떨어져 있거나 위험한 장소 근처에 있거나 또는 두 경우 전부 포함한 위치에 있기 때문에 [[디스펜서]]와 메딕에게 의존해야 합니다. | |
| − | + | 패배한 팀에 속한 플레이어는 인원수 조정 때문에 게임에서 퇴장당할 수도 있지만 승리한 팀에 속한 플레이어는 다음 라운드로 넘어갈 때도 퇴장당하지 않습니다. | |
| − | + | [[First Blood/ko|최초의 희생자]] 치명타 증진은 아레나 게임 모드에서만 발동하고, 적 팀에게 대항하는 데 도움이 됩니다. | |
== 전략 == | == 전략 == | ||
| − | {{main| | + | {{main|커뮤니티 아레나 전략}} |
| + | |||
| + | == 맵 == | ||
| + | {{main|맵 목록}} | ||
| + | |||
| + | 아레나 맵은 앞에 '''arena_''' 접두사가 붙습니다. 커뮤니티 맵은 이탤릭체로 구분할 수 있습니다. | ||
| − | |||
| − | |||
| − | |||
{| class="wikitable" cellpadding=2 style="text-align:center;" | {| class="wikitable" cellpadding=2 style="text-align:center;" | ||
|- style="height: 20px;" | |- style="height: 20px;" | ||
! class="header" |이름 | ! class="header" |이름 | ||
| − | ! class="header" | | + | ! class="header" |사진 |
| − | ! class="header" | | + | ! class="header" |파일 이름 |
|- | |- | ||
| − | |style="background-color:#F9D483;" |'''[[Badlands (Arena)/ko|Badlands<br />( | + | |style="background-color:#F9D483;" |'''[[Badlands (Arena)/ko|Badlands<br />(아레나)]]''' |
| − | | width="100px" |[[File:Arenabadlands.jpg|160px|link=Badlands (Arena) | + | | width="100px" |[[File:Arenabadlands.jpg|160px|link=Badlands (Arena)]] |
| width="60px" |{{code|arena_badlands}} | | width="60px" |{{code|arena_badlands}} | ||
|- | |- | ||
| − | |style="background-color:#F9D483;" |'''[[Granary (Arena)/ko|Granary<br />( | + | |style="background-color:#F9D483;" |'''''[[Byre/ko|Byre]]''''' |
| − | | width="100px" |[[File:Arenagranary.jpg|160px|link=Granary (Arena) | + | | width="100px" |[[File:Arena byre b40007.jpg|160px|link=Byre]] |
| + | | width="60px" |{{code|arena_byre}} | ||
| + | |- | ||
| + | |style="background-color:#F9D483;" |'''[[Granary (Arena)/ko|Granary<br />(아레나)]]''' | ||
| + | | width="100px" |[[File:Arenagranary.jpg|160px|link=Granary (Arena)]] | ||
| width="60px" |{{code|arena_granary}} | | width="60px" |{{code|arena_granary}} | ||
|- | |- | ||
| − | |style="background-color:#F9D483;" |'''[[Lumberyard/ko| | + | |style="background-color:#F9D483;" |'''[[Lumberyard/ko|Lumberyard]]''' |
| − | | width="100px" |[[File:Arenalumberyard.jpg|160px|link=Lumberyard | + | | width="100px" |[[File:Arenalumberyard.jpg|160px|link=Lumberyard]] |
| width="60px" |{{code|arena_lumberyard}} | | width="60px" |{{code|arena_lumberyard}} | ||
|- | |- | ||
| − | |style="background-color:#F9D483;" |'''[[Nucleus (Arena)/ko]]''' | + | |style="background-color:#F9D483;" |'''[[Nucleus (Arena)/ko|Nucleus (아레나)]]''' |
| width="100px" |[[File:Arenanucleus.jpg|160px|link=Nucleus]] | | width="100px" |[[File:Arenanucleus.jpg|160px|link=Nucleus]] | ||
| width="60px" |{{code|arena_nucleus}} | | width="60px" |{{code|arena_nucleus}} | ||
|- | |- | ||
| − | |style="background-color:#F9D483;" |'''''[[Offblast/ko| | + | |style="background-color:#F9D483;" |'''''[[Offblast/ko|Offblast]]''''' |
| width="100px" |[[File:Offblast 01.jpg|160px|link=Offblast]] | | width="100px" |[[File:Offblast 01.jpg|160px|link=Offblast]] | ||
| width="60px" |{{code|arena_offblast_final}} | | width="60px" |{{code|arena_offblast_final}} | ||
|- | |- | ||
| − | |style="background-color:#F9D483;" |'''[[Ravine/ko]]''' | + | |style="background-color:#F9D483;" |'''[[Ravine/ko|Ravine]]''' |
| width="100px" |[[File:Arenaravine.jpg|160px|link=Ravine]] | | width="100px" |[[File:Arenaravine.jpg|160px|link=Ravine]] | ||
| width="60px" |{{code|arena_ravine}} | | width="60px" |{{code|arena_ravine}} | ||
|- | |- | ||
| − | |style="background-color:#F9D483;" |'''[[Sawmill (Arena)/ko|Sawmill<br />( | + | |style="background-color:#F9D483;" |'''[[Sawmill (Arena)/ko|Sawmill<br />(아레나)]]''' |
| width="100px" |[[File:Sawmill.PNG|160px|link=Sawmill]] | | width="100px" |[[File:Sawmill.PNG|160px|link=Sawmill]] | ||
| width="60px" |{{code|arena_sawmill}} | | width="60px" |{{code|arena_sawmill}} | ||
|- | |- | ||
| − | |style="background-color:#F9D483;" |'''''[[Watchtower/ko| | + | |style="background-color:#F9D483;" |'''''[[Watchtower/ko|Watchtower]]''''' |
| width="100px" |[[File:Watch 01.jpg|160px|link=Watchtower]] | | width="100px" |[[File:Watch 01.jpg|160px|link=Watchtower]] | ||
| width="60px" |{{code|arena_watchtower}} | | width="60px" |{{code|arena_watchtower}} | ||
|- | |- | ||
| − | |style="background-color:#F9D483;" |'''[[Well (Arena)/ko| | + | |style="background-color:#F9D483;" |'''[[Well (Arena)/ko|Well<br />(아레나)]]''' |
| width="100px" |[[File:Tg arenawell.jpg|160px|link=Well (Arena)]] | | width="100px" |[[File:Tg arenawell.jpg|160px|link=Well (Arena)]] | ||
| width="60px" |{{code|arena_well}} | | width="60px" |{{code|arena_well}} | ||
|} | |} | ||
| − | == 관련 | + | == 관련 도전 과제 == |
=== {{Class link|Scout}} === | === {{Class link|Scout}} === | ||
{{Achievement table | {{Achievement table | ||
| Line 71: | Line 81: | ||
}} | }} | ||
| − | == 업데이트 | + | == 업데이트 내역 == |
| + | {{Update history| | ||
| + | '''{{Patch name|8|19|2008}}''' ({{update link|Heavy Update}}) | ||
| + | * Added Arena mode. | ||
| + | * Added maps: Badlands (Arena), Granary (Arena), Well (Arena), Lumberyard, and Ravine. | ||
| − | '''{{Patch name| | + | '''{{Patch name|2|24|2009}}''' ({{update link|Scout Update}}) |
| − | * | + | * Added map: Watchtower. |
| − | |||
| − | '''{{Patch name| | + | '''{{Patch name|5|21|2009}}''' ({{update link|Sniper vs. Spy Update}}) |
| − | * | + | * Added maps: Sawmill (Arena) and Nucleus (Arena). |
| + | |||
| + | '''{{Patch name|8|13|2009}}''' ({{update link|Classless Update}}) | ||
| + | *Added map: Offblast. | ||
'''{{Patch name|6|28|2011}}''' | '''{{Patch name|6|28|2011}}''' | ||
| − | * | + | * Fixed a problem with Arena mode first blood [[Critical Hit#Crit-boost|Crit-Boost]] not removing itself at the correct time. |
| + | }} | ||
| + | |||
| + | == 더 보기 == | ||
| + | * [[Capping (competitive)/ko|점령 (경쟁)]] | ||
{{HeavyUpdateNav}} | {{HeavyUpdateNav}} | ||
{{maps}} | {{maps}} | ||
| − | |||
[[Category:Game modes/ko]] | [[Category:Game modes/ko]] | ||
Revision as of 08:07, 9 November 2015

| “ | 솔직하게 말하겠습니다: 전 아레나 모드가 좋습니다.
— 에이브러햄 링컨, 1865년 두 번째 취임 연설에서
|
” |
아레나는 헤비 업데이트 때 추가된 레드 팀과 블루 팀이 서로 싸워서 사살하는 게임 모드입니다. 양쪽 팀의 목표는 부활하지 않는 라운드에서 적 팀 플레이어를 전부 사살하는 것입니다. 만약 양쪽 팀이 싸우면서 1분 동안 살아남았다면, 점령한 팀이 승리하는 점령 지점이 잠금해제됩니다.
게임 플레이
아레나 맵은 두 팀이 싸워 가면서 팀 포트리스 2의 여러 병과들의 다양성을 살리는 맵입니다. 다른 게임 모드에서는 칠판에 적힌 글을 보고 전략을 알아내는 것과는 달리, 아레나 모드에서는 특별한 전략들을 직접 싸워 가면서 알아가야 합니다.
아레나 모드는 플레이 시간이 빠른 작은 맵에서 플레이합니다. 한 팀의 플레이어가 전부 사망하거나, 점령 지점이 잠금해제되고 점령당하면 종료됩니다. 라운드는 팀을 구성하는 병과와 적 팀이 선택한 병과 간의 공격 작전에 따라 대부분 매우 빠르고 경쟁적으로 흘러가는 경향이 있습니다.
아레나 모드는 3대3 같이 소규모로 이루어지기도 하지만 12대12 같이 대규모로 이루어지기도 합니다. 일반적으로 치료제는 얼마 없고 주요 활동 지점에서 멀리 떨어져 있거나 위험한 장소 근처에 있거나 또는 두 경우 전부 포함한 위치에 있기 때문에 디스펜서와 메딕에게 의존해야 합니다.
패배한 팀에 속한 플레이어는 인원수 조정 때문에 게임에서 퇴장당할 수도 있지만 승리한 팀에 속한 플레이어는 다음 라운드로 넘어갈 때도 퇴장당하지 않습니다.
최초의 희생자 치명타 증진은 아레나 게임 모드에서만 발동하고, 적 팀에게 대항하는 데 도움이 됩니다.
전략
맵
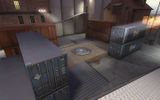
아레나 맵은 앞에 arena_ 접두사가 붙습니다. 커뮤니티 맵은 이탤릭체로 구분할 수 있습니다.
| 이름 | 사진 | 파일 이름 |
|---|---|---|
| Badlands (아레나) |
|
arena_badlands
|
| Byre | 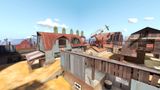
|
arena_byre
|
| Granary (아레나) |
|
arena_granary
|
| Lumberyard | 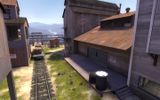
|
arena_lumberyard
|
| Nucleus (아레나) | 160px | arena_nucleus
|
| Offblast | 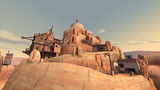
|
arena_offblast_final
|
| Ravine | 
|
arena_ravine
|
| Sawmill (아레나) |

|
arena_sawmill
|
| Watchtower | 
|
arena_watchtower
|
| Well (아레나) |
|
arena_well
|
관련 도전 과제
 스카웃
스카웃
|
|


업데이트 내역
- Added Arena mode.
- Added maps: Badlands (Arena), Granary (Arena), Well (Arena), Lumberyard, and Ravine.
- Added map: Watchtower.
2009년 5월 21일 패치 (스나이퍼 대 스파이 업데이트)
- Added maps: Sawmill (Arena) and Nucleus (Arena).
- Added map: Offblast.
- Fixed a problem with Arena mode first blood Crit-Boost not removing itself at the correct time.
더 보기
| |||||||||||||||||||||||