Difference between revisions of "Community Cursed Cove strategy"
HitlineMiamo (talk | contribs) (intro) |
m |
||
| Line 3: | Line 3: | ||
{{Map infobox | {{Map infobox | ||
| + | | map-strategy = yes | ||
| game-type = Player Destruction | | game-type = Player Destruction | ||
| file-name = pd_cursed_cove_event | | file-name = pd_cursed_cove_event | ||
Revision as of 18:08, 16 April 2021
| “What are you lookin' at?!” This page or section would benefit from the addition of one or more images. Please add a suitable image, then remove this notice. The specific instructions are: "stamp" |
| “Sun Tzu's got nothing on us!” This article is a Community strategy stub. As such, it is not complete. You can help the Team Fortress Wiki Community Strategy Project by expanding it. Notes: Complete Locations first. |
| Community Cursed Cove strategy | |
|---|---|

| |
| Basic Information | |
| Developer(s): | Unknown |
| Map Info | |
| Environment: | Ghost town |
| Setting: | Night |
| Hazards: | Shrinking Water, Explosive Barrels, Drowning |
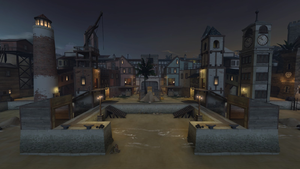
| Map Photos | |
This article is about Community Cursed Cove strategy.
Note: It is recommended to read the main Cursed Cove article first to become familiar with the names of key map locations used in this article.
General strategy
See also: Community Player Destruction strategy
- Davy Jones' Locker
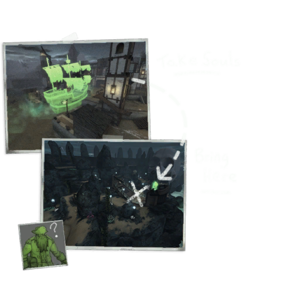
- Davy Jones' Locker is very easy to access: The Flying Dutchman provides a huge portal surface to enter as well as a large visual cover if you approach from the ground.
- A strong team that arrives at the Sunken Ship en masse can hold the Delivery Zone from straggles.
- Sorties may be needed to prevent the enemy from setting up a push.
- Ideally, kill the enemy while they are on the Sunken Ship with you; you can pick up and deliver their soul(s) immediately.
- Don't let the Team Leader attempt the delivery alone.
Class-specific strategy
 Scout
Scout
 Soldier
- Remember that you can shoot though the Flying Dutchman, even if you can not see the enemy running in on the other side.
 Pyro
Pyro
- Enemies that run too close to the Abyss can be easily pushed off with an airblast.
- A close-in flame fight with lighter classes in the Delivery Zone can pick you up more souls as you are delivering the ones you carried in.
- Hide on your side of the Bow or the Stern for a bit and watch for approaching numbers.
 Demoman
- Be the first in and set up Sticky traps in the enemy's Grotto.
 Heavy
Heavy
 Engineer
- The canopies on the Port and the corridor over the Gate serve as good Sentry spots.
- The rooftops of the Courtyard offer a good overview of the area, good for placing Sentry Guns, and provides plenty of cover for Dispensers and Teleporters.
- You may not build in the Locker.
- On the off chance that you have no souls to deliver (maybe even if you have just one or two), your time may be better spent building up your positions, maybe moving them, or setting up Sentry Gun traps.
 Medic
Medic
- The gates near the Docks, the palm tree, rock and crates in the Port, and the bell tower provide good cover for you to stand behind while healing your teammates.
- Davy Jones' Locker offers many covers as well, like the rocks on both the Sunken Ship's port and starboard and the Quarterdeck.
 Sniper
- Headshotting an enemy as they get on to the Sunken Ship prevents them from delivering all of the souls they are carrying, in the hope that one of you teammates will pick them up and deliver them immediately.
 Spy
Spy
- Most players go directly to the Sunken Ship when they enter the Locker; use the Bow and Stern Flanks to your advantage.
- Cloak and Dagger:
- Hide out near the Flying Dutchman's spawn to get a head start on the Locker.
- Use a Thermal Vent to jump up on the Bow unseen, hiding until the chance to strike presents itself.
