Difference between revisions of "Community Sharkbay strategy"
m |
GrampaSwood (talk | contribs) (Reword on some, re-added spaces between the headers (do not remove these)) |
||
| Line 28: | Line 28: | ||
=== {{class link|Demoman}} === | === {{class link|Demoman}} === | ||
| − | * You can try [[Jumping| | + | * You can try [[Jumping#Rampsliding|trimping]] up the slope that leads to the control point to either flank further into the enemy base or take advantage of your enemy being caught off guard and try to cap the point. |
| + | |||
=== {{class link|Heavy}} === | === {{class link|Heavy}} === | ||
=== {{class link|Engineer}} === | === {{class link|Engineer}} === | ||
| − | * There is a flank route on both sides of the map that exits out directly to the control point, if you put a [[Teleporter]] in the opposite flank route, you can create ambushes to attack the enemy team from | + | * There is a flank route on both sides of the map that exits out directly to the control point, if you put a [[Teleporters|Teleporter]] in the opposite flank route, you can create ambushes to attack the enemy team from behind. This pairs well with the [[Eureka Effect]]'s ability to teleport to your Teleporter Exit at will. |
| + | |||
=== {{class link|Medic}} === | === {{class link|Medic}} === | ||
=== {{class link|Sniper}} === | === {{class link|Sniper}} === | ||
| − | * | + | * When sniping from the plank at the top of the Transfer building, you are very vulnerable to [[Spy|Spies]]. Consider equipping the [[Razorback]] if they become a nuisance. |
| + | |||
=== {{class link|Spy}} === | === {{class link|Spy}} === | ||
{{Map Strategy Nav}} | {{Map Strategy Nav}} | ||
Latest revision as of 18:57, 25 November 2024
| “Sun Tzu's got nothing on us!” This article is a Community strategy stub. As such, it is not complete. You can help the Team Fortress Wiki Community Strategy Project by expanding it. |
| Sharkbay | |
|---|---|

| |
| Basic Information | |
| Map type: | King of the Hill |
| File name: | koth_sharkbay
|
| Released: | July 12, 2023 Patch (Summer 2023 Update) |
| Developer(s): | Vasilis "Billo" Chatzikostas Patrick "Zeus" Hennessy Seb "Tianes" Necula Benjamin "blaholtzen" Blåholtz Nickolas "KrazyZark" Fenech |
| Map Info | |
| Environment: | Port |
| Setting: | Daylight |
| Hazards: | Sharks |
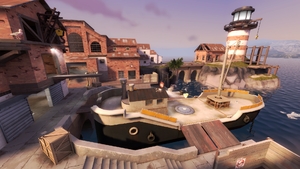
| Map Photos | |
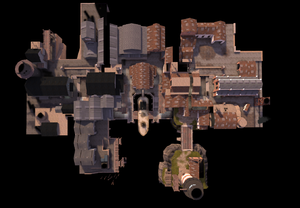
| Map Overview | |
Contents
General strategy
- The Transfer building has a small plank on the very top, which can be used to gain a high ground advantage over enemies capturing the point.
Class-specific strategy
 Scout
Scout
 Soldier
 Pyro
Pyro
- Because of the sharks around the control point you can use your airblast to clear off the entire point and feed the enemy team to the sharks. This pairs very well with the Thermal Thruster's additional mobility and knockback after landing, combined with an airblast to knock everyone away.
 Demoman
- You can try trimping up the slope that leads to the control point to either flank further into the enemy base or take advantage of your enemy being caught off guard and try to cap the point.
 Heavy
Heavy
 Engineer
- There is a flank route on both sides of the map that exits out directly to the control point, if you put a Teleporter in the opposite flank route, you can create ambushes to attack the enemy team from behind. This pairs well with the Eureka Effect's ability to teleport to your Teleporter Exit at will.
 Medic
Medic
 Sniper
- When sniping from the plank at the top of the Transfer building, you are very vulnerable to Spies. Consider equipping the Razorback if they become a nuisance.

