Difference between revisions of "Community Offblast strategy"
m |
(→General (All Classes)) |
||
| Line 20: | Line 20: | ||
==General (All Classes)== | ==General (All Classes)== | ||
| − | * | + | * Classes with high [[knock back]] potential will benefit most from the long drop that accompanies being pushed off the ledges on the sides of the map. |
* The pipes which sit against the wall above the lower entrances to the main room are solid and can be stood on. This is an excellent perch position for a Scout to have the element of surprise on incoming enemies. | * The pipes which sit against the wall above the lower entrances to the main room are solid and can be stood on. This is an excellent perch position for a Scout to have the element of surprise on incoming enemies. | ||
| − | * The various light posts on the outer pathways outside the spawn rooms can be stood on and used by | + | * The various light posts on the outer pathways outside the spawn rooms can be stood on and used by Soldiers, Demomen and Scouts as high positions to both observe the battlefield and have an out-of-sight drop on isolated enemies. Be advised, this position is highly susceptible to classes that have a knock back ability, and should only be used in specific circumstances. |
* The trucks in both teams' spawn rooms can be jumped inside, and provide excellent cover under darkness for any class attempting to hide or heal. These are ideal spots for a Sniper to hide and await an oncoming rush, or to pick off unsuspecting stragglers. | * The trucks in both teams' spawn rooms can be jumped inside, and provide excellent cover under darkness for any class attempting to hide or heal. These are ideal spots for a Sniper to hide and await an oncoming rush, or to pick off unsuspecting stragglers. | ||
Revision as of 11:35, 8 October 2011
| “You are so small! Is funny to me!” This article is a stub. As such, it is not complete. You can help Team Fortress Wiki by expanding it. |
| Community Offblast strategy | |
|---|---|

| |
| Basic Information | |
| Developer(s): | Unknown |
| Map Info | |
| Environment: | Desert |
| Setting: | Daylight, sunny |
| Hazards: | Pit |
| Map Photos | |
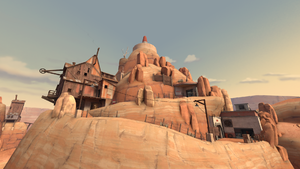
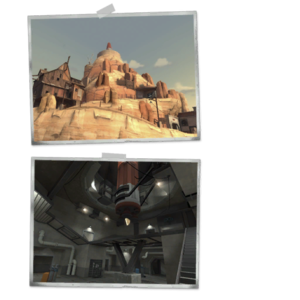
This article is about Community Offblast strategy.
Contents
General (All Classes)
- Classes with high knock back potential will benefit most from the long drop that accompanies being pushed off the ledges on the sides of the map.
- The pipes which sit against the wall above the lower entrances to the main room are solid and can be stood on. This is an excellent perch position for a Scout to have the element of surprise on incoming enemies.
- The various light posts on the outer pathways outside the spawn rooms can be stood on and used by Soldiers, Demomen and Scouts as high positions to both observe the battlefield and have an out-of-sight drop on isolated enemies. Be advised, this position is highly susceptible to classes that have a knock back ability, and should only be used in specific circumstances.
- The trucks in both teams' spawn rooms can be jumped inside, and provide excellent cover under darkness for any class attempting to hide or heal. These are ideal spots for a Sniper to hide and await an oncoming rush, or to pick off unsuspecting stragglers.
Class-specific strategy
 Scout
Scout
- Scouts work very well with this map, as their double jump ability allows them to jump off the cliff, then back on to avoid damage. However, this is a very risky move, as they can be knocked off the cliff while trying to dodge fire, or can simply mistime their jump.
- Using the Force-A-Nature can be a double-edged sword on this map, as the knock-back can effectively push enemies off of the cliff. But if miscalculated, the knock-back can send you down as well.
 Soldier
- Soldiers can easily defend the middle capture point due to the high level of elevation which provides easy shots of rockets down to the lower elevations.
 Pyro
Pyro
- The compression blast is your friend on this map. Use it to push enemies off the edges of the map to their death.
- This should be used by camping by that pathway just under the house, and then blast enemies off the side.
 Demoman
- A Demoman may be useful inside the House as you can place Stickies by the stairs as a trap.
- Try to use the knock back from Stickybombs to knock people off the cliff.
 Heavy
Heavy
- WARNING: Many people rage against Heavies in arena as they feel that it is imbalanced with his high health and high damage.
- By jumping off some of the higher level areas with your Minigun revved, you can ambush enemies below.
 Engineer
- Engineers are difficult to use with the default Wrench on Offblast, as there are many good perches where a Demoman or Soldier can sit and take out a Sentry Gun or Dispenser from outside its range.
- Using a Mini-Sentry an Engineer could push forward and place the Mini-Sentry in a favorable position covering the health-pack.
 Medic
Medic
- Since there are no health packs in Arena mode, Medics are highly valued, but since a Medic's Syringe Gun is difficult to effectively use and a Medic can't attack while using their Medi Gun, they are a prime target for enemies.
 Sniper
- Snipers are difficult to use on Offblast due to the close range confines of the map. Despite this, players have been known to dominate the map by taking out people from around corners using the Huntsman, Jarate, and the Bushwacka to eliminate those unprepared for the assault.
- At the centre house Alley, a single Huntsman headshot could take out an enemy and get First Blood.
- Use the First Blood crits with your SMG dealing significant damage and letting your team pick off the opposing team.
- At the centre house Alley, a single Huntsman headshot could take out an enemy and get First Blood.
 Spy
Spy
- Spies are difficult to effectively use, as this map usually sports an abundance of Pyro players, attempting to use their Compression blast on enemies that are unlucky enough to wander too close to the edge. However, if used effectively, a Spy can be a devastating opponent, as there are many small (not to mention dark and secluded) corners on this map.
- Staying near to the medkit could let the Spy pick off already weak opponents heading for a heal.
