Difference between revisions of "Community Hellstone strategy"
(→General MONOCULUS Strategy: * Watch for MONOCULUS stuns as opportunities to safely run past.) |
(Engineer strategy) |
||
| Line 23: | Line 23: | ||
* General [[Community Payload strategy]] applies, but with the added complication of scheduled monster spawns. | * General [[Community Payload strategy]] applies, but with the added complication of scheduled monster spawns. | ||
* As disruptive as they are, the monster spawns are generally a balancing factor, slowing a rapid BLU advance and weakening a strong RED defense. | * As disruptive as they are, the monster spawns are generally a balancing factor, slowing a rapid BLU advance and weakening a strong RED defense. | ||
| + | * Attack only those Skeletons chasing your team; waste no fire on any other monster. | ||
| + | * There are only 4 rare Magic Spells available each round on the main level; know where they are and when they unlock. | ||
| + | * When the enemy's Sentry Guns are shooting at Skeletons, the Horsemann, or MONOCULUS, they are not shooting at you; use these momentary distractions to more safely target Engineer nests. | ||
* Be wary of straying too near to Pumpkin bombs, as enemies may use them to injure you. Similarly, shoot Pumpkin bombs yourself to harm enemies or monsters near them. | * Be wary of straying too near to Pumpkin bombs, as enemies may use them to injure you. Similarly, shoot Pumpkin bombs yourself to harm enemies or monsters near them. | ||
| − | |||
| − | |||
== Class-specific strategy == | == Class-specific strategy == | ||
| Line 43: | Line 44: | ||
=== {{class link|Engineer}} === | === {{class link|Engineer}} === | ||
| + | * '''Bone breaker:''' Sentry Guns have a particular advantages against Skeletons and the Horsemann. Sentry Guns are safe from Skeletons and the Horsemann will usually take at most one swing at one. When these monsters are the closest target, Sentry Gun aim is perfect and the fire is rapid. | ||
| + | ** When skeletons spawn, drop a Sentry Gun where it can shoot into your team's area, yet be covered from the other teams direct attack. | ||
| + | ** Be aware of the Skeleton locations — don't stand between them and your own Sentry Gun! | ||
=== {{class link|Medic}} === | === {{class link|Medic}} === | ||
Revision as of 19:53, 6 August 2017
This article discusses community strategy for Hellstone.
| Community Hellstone strategy | |
|---|---|

| |
| Basic Information | |
| Developer(s): | Unknown |
| Map Info | |
| Environment: | Halloween |
| Setting: | Nighttime, overcast |
| Hazards: | Pitfall, Pumpkin bombs, Skeletons, Horseless Headless Horseman, Monoculus, Ghost |
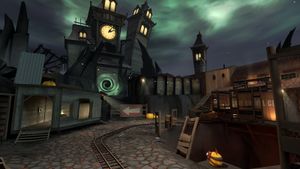
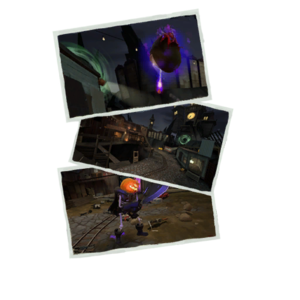
| Map Photos | |
Contents
General strategy
- General Community Payload strategy applies, but with the added complication of scheduled monster spawns.
- As disruptive as they are, the monster spawns are generally a balancing factor, slowing a rapid BLU advance and weakening a strong RED defense.
- Attack only those Skeletons chasing your team; waste no fire on any other monster.
- There are only 4 rare Magic Spells available each round on the main level; know where they are and when they unlock.
- When the enemy's Sentry Guns are shooting at Skeletons, the Horsemann, or MONOCULUS, they are not shooting at you; use these momentary distractions to more safely target Engineer nests.
- Be wary of straying too near to Pumpkin bombs, as enemies may use them to injure you. Similarly, shoot Pumpkin bombs yourself to harm enemies or monsters near them.
Class-specific strategy
 Scout
Scout
- When monsters are active, the BLU Scout has a job of monitoring the cart timer and tapping it as needed to keep it from moving backwards.
- Bonk! Atomic Punch allows a Scout who is IT to lead the Horsemann deeper into the enemy.
 Soldier
 Pyro
Pyro
 Demoman
- Since the Skeleton and the Horsemann spawn locations and timing are known, any available Demoman can set up carpet traps for them and then pipe spam the spawn at the right moment.
- Charging helps a Demoman who is IT to lead the Horsemann deeper into the enemy.
 Heavy
Heavy
 Engineer
- Bone breaker: Sentry Guns have a particular advantages against Skeletons and the Horsemann. Sentry Guns are safe from Skeletons and the Horsemann will usually take at most one swing at one. When these monsters are the closest target, Sentry Gun aim is perfect and the fire is rapid.
- When skeletons spawn, drop a Sentry Gun where it can shoot into your team's area, yet be covered from the other teams direct attack.
- Be aware of the Skeleton locations — don't stand between them and your own Sentry Gun!
 Medic
Medic
 Sniper
 Spy
Spy
- A Cloak and Dagger BLU Spy lurking about the cart after the third capture should also monitor the cart timer, uncloaking to tap it as needed.
General Horseless Headless Horsemann Strategy
See also: Community Mann Manor strategy
- The strategies for accommodating the Horseless Headless Horsemann in your Hellstone battle plans are contrary to most of the strategies for defeating the Horsemann on Mann Manor.
- There is generally no advantage in the Payload game mode to expending fire power on Horsemann.
- Most tactics and match-ups for fighting the Horsemann apply in Hellstone only when the team has agreed to fight the Horsemann instead of the enemy.
- Instead of fighting the Horsemann, assign the IT player to leading the Horsemann as far into the enemy as possible.
- It is better to attempt the Sleepy Holl0WND achievement in Mann Manor.
- The Horsemann will not chase players much farther than the second and forth capture points. With no immediate target within that range, the Horsemann will run towards the third capture point.
- If BLU is driven off of the cart shortly after capturing the second point, the Horsemann's attention will be focused exclusively on RED.
- The IT player can lose the Horsemann by running into second BLU spawn or around the Mine Shack (but not into the Mine Shack).
- Have the IT player lead the Horsemann as far into the enemy area as possible; dying to enemy fire deep in the enemy is as an effective way of tagging them as any melee hit.
- Fire on any enemy IT player attempting to lead the Horsemann to your team.
- Wearing a Saxton Hale Mask or Horseless Headless Horsemann's Head will prevent you from getting stunned by the Horsemann's taunt, allowing you to gain ground on him as you lead him into the enemy.
- The Horsemann cannot jump up, so jumping up to a ledge will force the Horsemann to chase you the long way around, ideally through the enemy.
General MONOCULUS Strategy
See also: Community Eyeaduct strategy
- The strategies for accommodating MONOCULUS in your Hellstone battle plans are contrary to most of the strategies for defeating MONOCULUS on Eyeaduct.
- There is generally no advantage in the Payload game mode to expending firepower on MONOCULUS.
- Most tactics and match-ups for fighting MONOCULUS apply in Hellstone only when the team has agreed to fight MONOCULUS instead of the enemy.
- Laying heavy fire on MONOCULUS draws its attention to your team and makes your team vulnerable the enemy.
- Truce is not called on Hellstone; the cart may be pushed and points may be captured while MONOCULUS is active.
- It is better to attempt the Optical Defusion achievement in Eyeaduct.
- Dodge MONOCULUS: build defenses behind its covering fire and launch pushes into enemy groups it disrupts.
- Critical hits anger MONOCULUS, causing it to rapid fire three projectiles with perfect lead.
- Attempting to anger MONOCULUS while it is in the middle of several of the enemy is an exception to the rule of not firing on MONOCULUS.
- Attempt this only when you know your weapon has a Crit Boost and you do not have another priority target.
- Avoid angering MONOCULUS when it is in your team's area.
- Stay away from MONOCULUS when it begins to rapid fire its projectiles. Use cover from buildings if you are close to it when it gets angry.
- Watch for MONOCULUS stuns as opportunities to safely run past.
- Do not stun MONOCULUS when it is in the middle of your enemy, use the underworld boost instead to injure the enemy.
