Difference between revisions of "Community Enclosure strategy"
| Line 27: | Line 27: | ||
==Class-specific strategy== | ==Class-specific strategy== | ||
=== {{class link|Scout}} === | === {{class link|Scout}} === | ||
| + | *Use your high speed to take alternate routes and catch enemies off guard. | ||
=== {{class link|Soldier}} === | === {{class link|Soldier}} === | ||
| − | + | *There are many tight spaces in Enclosure. Try to ambush enemies in these areas to prevent them from dodging your splash damage. | |
=== {{class link|Pyro}} === | === {{class link|Pyro}} === | ||
| − | * If your team controls it, the Service Hall can get you several [[ | + | * If your team controls it, the Service Hall can get you several [[Backburner|Backburner kills]], especially for a RED Pyro before BLU gets into the Observation Room. |
* Both sides of the Wood Structure (the end nearest the Boathouse) have a Medium Health Kit, close to each other and in sheltered positions for waiting out a Pickup respawn. | * Both sides of the Wood Structure (the end nearest the Boathouse) have a Medium Health Kit, close to each other and in sheltered positions for waiting out a Pickup respawn. | ||
** When the Cart is on the Wood Structure, this situation sets up a close quarters, continuous motion, defensive patrol for a Pyro. The Health pickup in the shed next to the Triceratops Enclosure can add a secondary route to your patrol. | ** When the Cart is on the Wood Structure, this situation sets up a close quarters, continuous motion, defensive patrol for a Pyro. The Health pickup in the shed next to the Triceratops Enclosure can add a secondary route to your patrol. | ||
** Pop around corners and up and down levels for single ambushes, then hit one of Health Kits (once a heavier class notices you, you should run off and heal) -- the Pickup under the ramp is particularly good for waiting for the respawn. | ** Pop around corners and up and down levels for single ambushes, then hit one of Health Kits (once a heavier class notices you, you should run off and heal) -- the Pickup under the ramp is particularly good for waiting for the respawn. | ||
| − | ** The [[Back Scratcher]] is useful here | + | ** The [[Back Scratcher]] is useful here due to the numerous health packs. |
=== {{class link|Demoman}} === | === {{class link|Demoman}} === | ||
Revision as of 18:32, 31 January 2019
| “Sun Tzu's got nothing on us!” This article is a Community strategy stub. As such, it is not complete. You can help the Team Fortress Wiki Community Strategy Project by expanding it. |
| Community Enclosure strategy | |
|---|---|

| |
| Basic Information | |
| Developer(s): | {{{map-developer}}} |
| Map Info | |
| Environment: | Jungle, industrial |
| Setting: | Daylight, sunny |
| Hazards: | White water, Raptors, Tyrannosaurus Rex, Pitfalls, Crushing |
| Map Photos | |
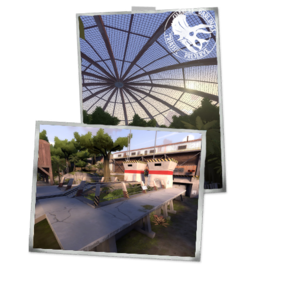
This article is about Community Enclosure strategy.
General Strategy (All Classes)
See also: Community Payload strategy
Class-specific strategy
 Scout
Scout
- Use your high speed to take alternate routes and catch enemies off guard.
 Soldier
- There are many tight spaces in Enclosure. Try to ambush enemies in these areas to prevent them from dodging your splash damage.
 Pyro
Pyro
- If your team controls it, the Service Hall can get you several Backburner kills, especially for a RED Pyro before BLU gets into the Observation Room.
- Both sides of the Wood Structure (the end nearest the Boathouse) have a Medium Health Kit, close to each other and in sheltered positions for waiting out a Pickup respawn.
- When the Cart is on the Wood Structure, this situation sets up a close quarters, continuous motion, defensive patrol for a Pyro. The Health pickup in the shed next to the Triceratops Enclosure can add a secondary route to your patrol.
- Pop around corners and up and down levels for single ambushes, then hit one of Health Kits (once a heavier class notices you, you should run off and heal) -- the Pickup under the ramp is particularly good for waiting for the respawn.
- The Back Scratcher is useful here due to the numerous health packs.
