Difference between revisions of "Mann-Conomy Update"
ThatHatGuy (talk | contribs) m (→Left 4 Dead 2 promotional items) |
BrazilianNut (talk | contribs) m |
||
| Line 10: | Line 10: | ||
== Additions == | == Additions == | ||
=== Class Sets === | === Class Sets === | ||
| + | {{main|Item sets}} | ||
{| class="wikitable collapsible" cellpadding=2 style="text-align:center;" | {| class="wikitable collapsible" cellpadding=2 style="text-align:center;" | ||
| − | | width="70px" style="background:#5B8300;" rowspan="4" | {{ | + | | width="70px" style="background:#5B8300;" rowspan="4" | '''{{Class link|Scout|br=yes|color=white}}''' |
| − | | style="background:#C6DDA3;" rowspan="4" |[[File:Backpack Scout Bundle.png|80px|link=Item sets#Scout]] <br/> '''[[Item sets#Scout| | + | | style="background:#C6DDA3;" rowspan="4" |[[File:Backpack Scout Bundle.png|80px|link=Item sets{{if lang}}#{{class name|Scout}}]] <br/> '''[[Item sets{{if lang}}#{{class name|Scout}}|{{item name|Special Delivery}}]]'''<br />{{pro}}Leaves a calling card on your victims |
| align="center" style="background:#5C9000;" | {{Icon item|Shortstop|75px}} | | align="center" style="background:#5C9000;" | {{Icon item|Shortstop|75px}} | ||
| − | | style="background:#C6DDA3;" | ''' | + | | style="background:#C6DDA3;" | '''{{item link|Shortstop}}''' |
|- | |- | ||
| align="center" style="background:#5B8300;" | {{Icon item|Mad Milk|75px}} | | align="center" style="background:#5B8300;" | {{Icon item|Mad Milk|75px}} | ||
| − | | style="background:#C6DDA3;" | ''' | + | | style="background:#C6DDA3;" | '''{{item link|Mad Milk}}''' |
|- | |- | ||
| align="center" style="background:#5B8300;" | {{Icon item|Holy Mackerel|75px}} | | align="center" style="background:#5B8300;" | {{Icon item|Holy Mackerel|75px}} | ||
| − | | style="background:#C6DDA3;" | ''' | + | | style="background:#C6DDA3;" | '''{{item link|Holy Mackerel}}''' |
|- | |- | ||
| align="center" style="background:#5B8300;" | {{Icon item|Milkman|75px}} | | align="center" style="background:#5B8300;" | {{Icon item|Milkman|75px}} | ||
| − | | style="background:#C6DDA3;" | ''' | + | | style="background:#C6DDA3;" | '''{{item link|Milkman}}''' |
|- | |- | ||
| − | | style="background:#5B8300;" rowspan="3" | {{ | + | | width="70px" style="background:#5B8300;" rowspan="3" | '''{{Class link|Soldier|br=yes|color=white}}''' |
| − | | rowspan="3" |[[File:Backpack Soldier Bundle.png|80px|link=Item sets#Soldier]] <br/> '''[[Item sets#Soldier| | + | | rowspan="3" |[[File:Backpack Soldier Bundle.png|80px|link=Item sets{{if lang}}#{{class name|Soldier}}]] <br/> '''[[Item sets{{if lang}}#{{class name|Soldier}}|{{item name|Tank Buster}}]]'''<br />{{pro}}Leaves a calling card on your victims |
| align="center" style="background:#5B8300;" | {{Icon item|Black Box|75px}} | | align="center" style="background:#5B8300;" | {{Icon item|Black Box|75px}} | ||
| − | | ''' | + | | '''{{item link|Black Box}}''' |
|- | |- | ||
| align="center" style="background:#5B8300;" | {{Icon item|Battalion's Backup|75px}} | | align="center" style="background:#5B8300;" | {{Icon item|Battalion's Backup|75px}} | ||
| − | | ''' | + | | '''{{item link|Battalion's Backup}}''' |
|- | |- | ||
| align="center" style="background:#5B8300;" | {{Icon item|Grenadier's Softcap|75px}} | | align="center" style="background:#5B8300;" | {{Icon item|Grenadier's Softcap|75px}} | ||
| − | | ''' | + | | '''{{item link|Grenadier's Softcap}}''' |
|- | |- | ||
| − | | style="background:#5B8300;" rowspan="3" | {{ | + | | width="70px" style="background:#5B8300;" rowspan="3" | '''{{Class link|Pyro|br=yes|color=white}}''' |
| − | | style="background:#C6DDA3;" rowspan="3" | [[File:Backpack Pyro Bundle.png|80px|link=Item sets#Pyro]] <br/> '''[[Item sets#Pyro| | + | | style="background:#C6DDA3;" rowspan="3" | [[File:Backpack Pyro Bundle.png|80px|link=Item sets{{if lang}}#{{class name|Pyro}}]] <br/> '''[[Item sets{{if lang}}#{{class name|Pyro}}|{{item name|Gas Jockey's Gear}}]]'''<br />{{pro}}Leaves a calling card on your victims |
| align="center" style="background:#5B8300;" | {{Icon item|Degreaser|75px}} | | align="center" style="background:#5B8300;" | {{Icon item|Degreaser|75px}} | ||
| − | | style="background:#C6DDA3;" | ''' | + | | style="background:#C6DDA3;" | '''{{item link|Degreaser}}''' |
|- | |- | ||
| align="center" style="background:#5B8300;" | {{Icon item|Powerjack|75px}} | | align="center" style="background:#5B8300;" | {{Icon item|Powerjack|75px}} | ||
| − | | style="background:#C6DDA3;" | ''' | + | | style="background:#C6DDA3;" | '''{{item link|Powerjack}}''' |
|- | |- | ||
| align="center" style="background:#5B8300;" | {{Icon item|Attendant|75px}} | | align="center" style="background:#5B8300;" | {{Icon item|Attendant|75px}} | ||
| − | | style="background:#C6DDA3;" | ''' | + | | style="background:#C6DDA3;" | '''{{item link|Attendant}}''' |
|- | |- | ||
| − | | style="background:#5B8300;" rowspan="4" | {{ | + | | width="70px" style="background:#5B8300;" rowspan="4" | '''{{Class link|Sniper|br=yes|color=white}}''' |
| − | | rowspan="4" | [[File:Backpack Sniper Bundle.png|80px|link=Item sets#Sniper]] <br/> '''[[Item sets#Sniper| | + | | rowspan="4" | [[File:Backpack Sniper Bundle.png|80px|link=Item sets{{if lang}}#{{class name|Sniper}}]] <br/> '''[[Item sets{{if lang}}#{{class name|Sniper}}|{{item name|Croc-o-Style Kit}}]]'''<br />{{pro}}Leaves a calling card on your victims |
| align="center" style="background:#5B8300;" | {{Icon item|Sydney Sleeper|75px}} | | align="center" style="background:#5B8300;" | {{Icon item|Sydney Sleeper|75px}} | ||
| − | | ''' | + | | '''{{item link|Sydney Sleeper}}''' |
|- | |- | ||
| align="center" style="background:#5B8300;" | {{Icon item|Darwin's Danger Shield|75px}} | | align="center" style="background:#5B8300;" | {{Icon item|Darwin's Danger Shield|75px}} | ||
| − | | ''' | + | | '''{{item link|Darwin's Danger Shield}}''' |
|- | |- | ||
| align="center" style="background:#5B8300;" | {{Icon item|Bushwacka|75px}} | | align="center" style="background:#5B8300;" | {{Icon item|Bushwacka|75px}} | ||
| − | | ''' | + | | ''' {{item link|Bushwacka}}''' |
|- | |- | ||
| align="center" style="background:#5B8300;" | {{Icon item|Ol' Snaggletooth|75px}} | | align="center" style="background:#5B8300;" | {{Icon item|Ol' Snaggletooth|75px}} | ||
| − | | ''' | + | | '''{{item link|Ol' Snaggletooth}}''' |
|- | |- | ||
| − | | style="background:#5B8300;" rowspan="3" | {{ | + | | width="70px" style="background:#5B8300;" rowspan="3" | '''{{Class link|Spy|br=yes|color=white}}''' |
| − | | style="background:#C6DDA3;" rowspan="3" | [[File:Backpack Spy Bundle.png|80px|link=Item sets#Spy]] <br/> '''[[Item sets#Spy| | + | | style="background:#C6DDA3;" rowspan="3" | [[File:Backpack Spy Bundle.png|80px|link=Item sets{{if lang}}#{{class name|Spy}}]] <br/> '''[[Item sets{{if lang}}#{{class name|Spy}}|{{item name|Saharan Spy}}]]'''<br />{{pro}}Additional particle effect when taunting |
| align="center" style="background:#5B8300;" | {{Icon item|L'Etranger|75px}} | | align="center" style="background:#5B8300;" | {{Icon item|L'Etranger|75px}} | ||
| − | | style="background:#C6DDA3;" | ''' | + | | style="background:#C6DDA3;" | '''{{item link|L'Etranger}}''' |
|- | |- | ||
| align="center" style="background:#5B8300;" | {{Icon item|Your Eternal Reward|75px}} | | align="center" style="background:#5B8300;" | {{Icon item|Your Eternal Reward|75px}} | ||
| − | | style="background:#C6DDA3;" | ''' | + | | style="background:#C6DDA3;" | '''{{item link|Your Eternal Reward}}''' |
|- | |- | ||
| align="center" style="background:#5B8300;" | {{Icon item|Familiar Fez|75px}} | | align="center" style="background:#5B8300;" | {{Icon item|Familiar Fez|75px}} | ||
| − | | style="background:#C6DDA3;" | ''' | + | | style="background:#C6DDA3;" | '''{{item link|Familiar Fez}}''' |
| − | |||
|} | |} | ||
=== Weapons === | === Weapons === | ||
| + | {{main|Weapons}} | ||
{| class="wikitable collapsible" cellpadding=2 style="text-align:center;" | {| class="wikitable collapsible" cellpadding=2 style="text-align:center;" | ||
| − | | width="60px" style="background:#5B8300;" | {{ | + | | width="60px" style="background:#5B8300;" | '''{{class link|Soldier|br=yes|color=white}}''' |
| align="center" style="background:#C6DDA3;" | {{Icon item|Rocket Jumper|75px}} | | align="center" style="background:#C6DDA3;" | {{Icon item|Rocket Jumper|75px}} | ||
| − | | width="125px" | ''' | + | | width="125px" | '''{{item link|Rocket Jumper}}''' |
|- | |- | ||
| − | | width="60px" style="background:#5B8300;" | {{ | + | | width="60px" style="background:#5B8300;" | '''{{class link|Heavy|br=yes|color=white}}''' |
| align="center" style="background:#C6DDA3;" | {{Icon item|Gloves of Running Urgently|75px}} | | align="center" style="background:#C6DDA3;" | {{Icon item|Gloves of Running Urgently|75px}} | ||
| − | | ''' | + | | '''{{item link|Gloves of Running Urgently}}''' |
|- | |- | ||
| − | | width="60px" style="background:#5B8300;" | {{ | + | | width="60px" style="background:#5B8300;" | '''{{class link|Medic|br=yes|color=white}}''' |
| align="center" style="background:#C6DDA3;" | {{Icon item|Vita-Saw|75px}} | | align="center" style="background:#C6DDA3;" | {{Icon item|Vita-Saw|75px}} | ||
| − | | ''' | + | | '''{{item link|Vita-Saw}}''' |
| − | |||
|} | |} | ||
=== Cosmetic items === | === Cosmetic items === | ||
| + | {{main|Cosmetic items}} | ||
{| class="wikitable collapsible" cellpadding=2 style="text-align:center;" | {| class="wikitable collapsible" cellpadding=2 style="text-align:center;" | ||
| − | | width="60px" style="background:#5B8300;" | {{ | + | | width="60px" style="background:#5B8300;" | '''{{class link|Scout|br=yes|color=white}}''' |
| align="center" style="background:#C6DDA3;" | {{Icon item|Bombing Run|75px}} | | align="center" style="background:#C6DDA3;" | {{Icon item|Bombing Run|75px}} | ||
| − | | width="150px" | ''' | + | | width="150px" | '''{{item link|Bombing Run}}''' |
|- | |- | ||
| − | | width="60px" style="background:#5B8300;" rowspan="2" | {{ | + | | width="60px" style="background:#5B8300;" rowspan="2" | '''{{class link|Soldier|br=yes|color=white}}''' |
| align="center" style="background:#C6DDA3;" | {{Icon item|Chieftain's Challenge|75px}} | | align="center" style="background:#C6DDA3;" | {{Icon item|Chieftain's Challenge|75px}} | ||
| − | | ''' | + | | '''{{item link|Chieftain's Challenge}}''' |
|- | |- | ||
| align="center" style="background:#C6DDA3;" | {{Icon item|Stout Shako|75px}} | | align="center" style="background:#C6DDA3;" | {{Icon item|Stout Shako|75px}} | ||
| − | | ''' | + | | '''{{item link|Stout Shako}}''' |
|- | |- | ||
| − | | width="60px" style="background:#5B8300;" rowspan="3" | {{ | + | | width="60px" style="background:#5B8300;" rowspan="3" | '''{{class link|Pyro|br=yes|color=white}}''' |
| align="center" style="background:#C6DDA3;" | {{Icon item|Handyman's Handle|75px}} | | align="center" style="background:#C6DDA3;" | {{Icon item|Handyman's Handle|75px}} | ||
| − | | ''' | + | | '''{{item link|Handyman's Handle}}''' |
|- | |- | ||
| align="center" style="background:#C6DDA3;" | {{Icon item|Napper's Respite|75px}} | | align="center" style="background:#C6DDA3;" | {{Icon item|Napper's Respite|75px}} | ||
| − | | ''' | + | | '''{{item link|Napper's Respite}}''' |
|- | |- | ||
| align="center" style="background:#C6DDA3;" | {{Icon item|Old Guadalajara|75px}} | | align="center" style="background:#C6DDA3;" | {{Icon item|Old Guadalajara|75px}} | ||
| − | | ''' | + | | '''{{item link|Old Guadalajara}}''' |
|- | |- | ||
| − | | width="60px" style="background:#5B8300;" rowspan="3" | {{ | + | | width="60px" style="background:#5B8300;" rowspan="3" | '''{{class link|Demoman|br=yes|color=white}}''' |
| align="center" style="background:#C6DDA3;" | {{Icon item|Carouser's Capotain|75px}} | | align="center" style="background:#C6DDA3;" | {{Icon item|Carouser's Capotain|75px}} | ||
| − | | ''' | + | | '''{{item link|Carouser's Capotain}}''' |
|- | |- | ||
| align="center" style="background:#C6DDA3;" | {{Icon item|Sober Stuntman|75px}} | | align="center" style="background:#C6DDA3;" | {{Icon item|Sober Stuntman|75px}} | ||
| − | | ''' | + | | '''{{item link|Sober Stuntman}}''' |
|- | |- | ||
| align="center" style="background:#C6DDA3;" | {{Icon item|Rimmed Raincatcher|75px}} | | align="center" style="background:#C6DDA3;" | {{Icon item|Rimmed Raincatcher|75px}} | ||
| − | | ''' | + | | '''{{item link|Rimmed Raincatcher}}''' |
|- | |- | ||
| − | | width="60px" style="background:#5B8300;" rowspan="2" | {{ | + | | width="60px" style="background:#5B8300;" rowspan="2" | '''{{class link|Heavy|br=yes|color=white}}''' |
| align="center" style="background:#C6DDA3;" | {{Icon item|Pugilist's Protector|75px}} | | align="center" style="background:#C6DDA3;" | {{Icon item|Pugilist's Protector|75px}} | ||
| − | | ''' | + | | '''{{item link|Pugilist's Protector}}''' |
|- | |- | ||
| align="center" style="background:#C6DDA3;" | {{Icon item|Hard Counter|75px}} | | align="center" style="background:#C6DDA3;" | {{Icon item|Hard Counter|75px}} | ||
| − | | ''' | + | | '''{{item link|Hard Counter}}''' |
|- | |- | ||
| − | | width="60px" style="background:#5B8300;" rowspan="3" | {{ | + | | width="60px" style="background:#5B8300;" rowspan="3" | '''{{class link|All Classes|br=yes|color=white}}''' |
| align="center" style="background:#C6DDA3;" | {{Icon item|Mann Co. Cap|75px}} | | align="center" style="background:#C6DDA3;" | {{Icon item|Mann Co. Cap|75px}} | ||
| − | | ''' | + | | '''{{item link|Mann Co. Cap}}''' |
|- | |- | ||
| align="center" style="background:#C6DDA3;" | {{Icon item|Wiki Cap|75px}} | | align="center" style="background:#C6DDA3;" | {{Icon item|Wiki Cap|75px}} | ||
| − | | ''' | + | | '''{{item link|Wiki Cap}}''' |
|- | |- | ||
| align="center" style="background:#C6DDA3;" | {{Icon item|Dr's Dapper Topper|75px}} | | align="center" style="background:#C6DDA3;" | {{Icon item|Dr's Dapper Topper|75px}} | ||
| − | | ''' | + | | '''{{item link|Dr's Dapper Topper}}''' |
| − | |||
|} | |} | ||
=== Left 4 Dead 2 promotional items === | === Left 4 Dead 2 promotional items === | ||
| − | |||
{| class="wikitable collapsible" cellpadding="2" style="text-align:center;" | {| class="wikitable collapsible" cellpadding="2" style="text-align:center;" | ||
| − | | rowspan="2" width="80px" style="background:#5B8300;" | {{ | + | | rowspan="2" width="80px" style="background:#5B8300;" | '''{{class link|All Classes|br=yes|color=white}}''' |
| align="center" style="background:#C6DDA3;" | {{Icon item|Ellis' Cap|75px}} | | align="center" style="background:#C6DDA3;" | {{Icon item|Ellis' Cap|75px}} | ||
| − | | width="125px" | ''' | + | | width="125px" | '''{{item link|Ellis' Cap}}''' |
|- | |- | ||
| align="center" style="background:#C6DDA3;" | {{Icon item|Frying Pan|75px}} | | align="center" style="background:#C6DDA3;" | {{Icon item|Frying Pan|75px}} | ||
| − | | ''' | + | | '''{{item link|Frying Pan}}'''<sup>†</sup> |
|- | |- | ||
| height="30px" style="background:#5B8300;" | <font color="white">'''Notes'''</font> | | height="30px" style="background:#5B8300;" | <font color="white">'''Notes'''</font> | ||
Revision as of 15:00, 20 November 2019

| “ | Then it hit us: it'd make everybody happy if we really DID let players buy items directly. Players'd be happy because we actually listened to them for once, and the bean counters would be happy because in-game stores are the future of everything, including making some f$*&ing money already.
— TF2 Official Blog
|
” |
The Mann-Conomy Update was a major content patch for Team Fortress 2, and was released on September 30, 2010 Patch. In total, the update added 65 new items including community-contributed content from the Polycount Pack contest, new Cosmetics, weapons, mini-games, tools, crates, and packs of cosmetics and weapons. The update also introduced the Mann Co. Store, Steam Wallet, and microtransaction system as well as item trading.
Contents
Additions
Class Sets
 The Special Delivery |
Shortstop | ||
| Mad Milk | |||
| Holy Mackerel | |||
| Milkman | |||
 The Tank Buster |
Black Box | ||
| Battalion's Backup | |||
| Grenadier's Softcap | |||
 The Gas Jockey's Gear |
Degreaser | ||
| Powerjack | |||
| Attendant | |||
 The Croc-o-Style Kit |
Sydney Sleeper | ||
| Darwin's Danger Shield | |||
| Bushwacka | |||
| Ol' Snaggletooth | |||
 The Saharan Spy |
L'Etranger | ||
| Your Eternal Reward | |||
| Familiar Fez |
Weapons
| Rocket Jumper | ||
| Gloves of Running Urgently | ||
| Vita-Saw |
Cosmetic items
Left 4 Dead 2 promotional items
| Ellis' Cap | ||
| Frying Pan† | ||
| Notes | †Not available for the Engineer and the Spy. | |
These items are given to those who purchase Left 4 Dead 2.
Qualities
Vintage quality
As the update was introduced, all of the items which were previously obtained became "Vintage Items". Their name is now rendered blue, and the "Vintage" prefix was added to their name. According to Valve, "some items that used to be rare will become more common when they are available for purchase. (...) This way, those older rare items remain rare (in fact, they're even rarer, because they're limited editions now). "
Some exceptions were promotional items, including but not limited to the Cheater's Lament, Alien Swarm Parasite, Lumbricus Lid, Mildly Disturbing Halloween Mask, Bill's Hat, Ghastly Gibus, Earbuds and Big Kill, as well as all the medals and craft materials.
Unusual cosmetics
Unusual cosmetics are cosmetics that have special particle effects about them. The only way to obtain an Unusual cosmetic is by unlocking a Mann Co. Supply Crate with a Mann Co. Supply Crate Key, or by trading for one. The different particle effects are viewable here.
New methods to obtain items
Trading
Trading is an in-game system allowing players to swap weapons, and cosmetic items allowing players to obtain items that they desire. Some items, such as the Golden Wrench, are untradable, meaning that they must remain on the original account that obtained them.
As of now, it is possible to trade with players on a player's friends list, with other players in their current server, and through either player's Steam Community ID.
Store
The Mann Co. Store is an in-game micro-transaction service. The store allows players to purchase in-game items such as Cosmetic items, weapons, and action items using money stored in their Steam Wallet. Creators of community-contributed items receive a percentage of sales for anything they've created.
All cosmetics or weapons bought through the store could not be crafted or traded, though they were giftable. Tools and action items bought through the store could be traded (after 2 days) and gifted. As of the Manniversary Update, all items bought from the store can be traded after a waiting period of 2-3 days, but still cannot used in crafting.
Update gallery
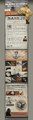
The Hub of the Mann-Conomy Update.

Full summary of the new Item Sets.
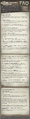
Mann-Conomy FAQ page.
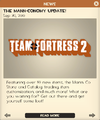
In-game announcement of the update.

Hidden pages
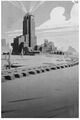
Mann Co. compound hidden image.
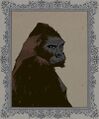
Ape portrait hidden image.


See also
External links
| ||||||||||||||||||||||||||||||||||||||||||||||||||||||||||||||||||||||||||||||||||||||||||||||||||