|
|
| Line 105: |
Line 105: |
| | <!-- End classes --> | | <!-- End classes --> |
| | | | |
| − | {{trans}}
| + | {{Quotation|'''De Heavy''' |Laat ons vechten: Man tegen kleine baby man.|sound=Heavy meleedare13.wav|en-sound=yes}} |
| − | {{Quotation|'''The Heavy''' |Laat ons vechten: Man tegen kleine baby man.|sound=Heavy meleedare13.wav|en-sound=yes}} | |
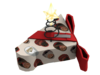
| | [[File:Heavytaunt1.PNG|320px|right]] | | [[File:Heavytaunt1.PNG|320px|right]] |
| | De [[Heavy/nl|Heavy]] is de sterkste, maar langzaamste klasse in het spel. Zijn grote vuurkracht en hoge gezondheid zullen bijna altijd verzekeren dat hij aan het front gevonden zal worden als aanvaller, waar zijn {{item link|Minigun}} overheerst op korte afstand. De Heavy is net een muur waar zijn teamgenoten zich achter kunnen verbergen en wordt vaak als een [[Medic buddy/nl|Medic buddy]] aangewezen. Maar zijn grootte en langzame snelheid maken hem een makkelijk doelwit, vooral voor vijandelijke [[Sniper/nl|Snipers]] en [[Spy/nl|Spy's]]. Zijn luidheid maakt hem niet al te best voor hinderlagen. Een goede Heavy zal samen met zijn team werken om doelen te behalen. | | De [[Heavy/nl|Heavy]] is de sterkste, maar langzaamste klasse in het spel. Zijn grote vuurkracht en hoge gezondheid zullen bijna altijd verzekeren dat hij aan het front gevonden zal worden als aanvaller, waar zijn {{item link|Minigun}} overheerst op korte afstand. De Heavy is net een muur waar zijn teamgenoten zich achter kunnen verbergen en wordt vaak als een [[Medic buddy/nl|Medic buddy]] aangewezen. Maar zijn grootte en langzame snelheid maken hem een makkelijk doelwit, vooral voor vijandelijke [[Sniper/nl|Snipers]] en [[Spy/nl|Spy's]]. Zijn luidheid maakt hem niet al te best voor hinderlagen. Een goede Heavy zal samen met zijn team werken om doelen te behalen. |
| | | | |
| | == Primaire wapens== | | == Primaire wapens== |
| − |
| |
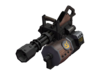
| | ==={{item link|Minigun}} + [[reskins/nl|alternatieve varianten]]=== | | ==={{item link|Minigun}} + [[reskins/nl|alternatieve varianten]]=== |
| | {{icon item|Minigun|100px}} {{icon item|Iron Curtain|100px}} {{icon item|Festive Minigun|100px|link=Festive weapons/nl}} {{icon item|Silver Botkiller Minigun|100px|link=Botkiller weapons/nl}} {{icon item|Australium Minigun|100px|link=Australium weapons/nl}} | | {{icon item|Minigun|100px}} {{icon item|Iron Curtain|100px}} {{icon item|Festive Minigun|100px|link=Festive weapons/nl}} {{icon item|Silver Botkiller Minigun|100px|link=Botkiller weapons/nl}} {{icon item|Australium Minigun|100px|link=Australium weapons/nl}} |
| Line 130: |
Line 128: |
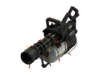
| | {{icon item|Tomislav|100px}} {{icon item|Australium Tomislav|100px|link=Australium weapons}} | | {{icon item|Tomislav|100px}} {{icon item|Australium Tomislav|100px|link=Australium weapons}} |
| | | | |
| − | The Tomislav has a faster spin-up time and revs up silently. The sound of your Minigun is a signal for the enemy to stay clear. However, the Tomislav's silent spin-up and superior accuracy makes it an excellent choice for ambushing enemies offensively or concealing your presence when guarding a location. However, the Tomislav fires 20% slower, causing it to deal far less damage in long battles despite the faster spin-up. Use the element of surprise to deal enough damage to your target before the Tomislav's firepower disadvantage becomes significant.
| + | De {{item name|Tomislav}} heeft een snellere opwarmtijd en is helemaal stil tijdens het opwarmen. Het geluid van je Minigun is een teken voor een vijand om weg te blijven, de {{item name|Tomislav}}'s stille opwarming en nauwkeurigere kogels maken het een goede keuze om vijanden te verrassen of jezelf te verbergen wanneer je een gebied beschermt. De {{item name|Tomislav}} schiet wel 20% langzamer, waardoor het minder schade doet in lange gevechten, zelfs met de kortere opwarmtijd. Verras je vijanden om ervoor te zorgen dat de lagere vuursnelheid niet uitmaakt. |
| | | | |
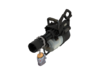
| − | ===[[Huo-Long Heater]]=== | + | ==={{item link|Huo-Long Heater}}=== |
| | {{icon item|Huo-Long Heater|100px}} | | {{icon item|Huo-Long Heater|100px}} |
| | | | |
| − | When revved up, the Huo-Long Heater continuously consumes ammunition to emit rings of fire around you. It is initially weaker than the default [[Minigun]], but deals significantly increased damage against ignited enemies. The flame rings deter any opponent who wants to get inside your personal bubble, so it's a strong choice when enemies must approach you, such as when defending a Control Point. If enemies choose to run away instead, ammunition can become a problem; consider staying closer to ammo pickups than usual. Don't entirely rely on the flame ring to reveal surprise attacks; there is enough time for enemies to approach you between each flame ring.
| + | Wanneer de {{item name|Huo-Long Heater}} is opgewarmt gebruikt het 4 munitie per seconden om een vuurring om je heen te maken. In het begin is de {{item name|Huo-Long Heater}} zwakker dan de standaard {{item name|Minigun}}, maar doet meer schade tegen vijanden die in de brand staan. De vuurring schrikt vijanden af zodat ze niet te dicht bij komen, hierdoor is het een goede keuze als je ergens staat waar vijanden ook moeten staan zoals een controlepost. Als een vijanden liever wegrennen, dan is munitie een probleem. Probeer bij munitiedozen te spelen om dit probleem tegen te gaan. Vertrouw niet te veel op je vuurring, want vijanden hebben genoeg tijd om er overheen te springen of dichtbij te komen tussen twee ringen door. |
| | | | |
| | == Secondary weapons == | | == Secondary weapons == |
| − |
| |
| | ===[[Shotgun]] + [[reskins]]=== | | ===[[Shotgun]] + [[reskins]]=== |
| | {{icon item|Shotgun|100px}} {{icon item|Festive Shotgun|100px|link=Festive weapons}} | | {{icon item|Shotgun|100px}} {{icon item|Festive Shotgun|100px|link=Festive weapons}} |
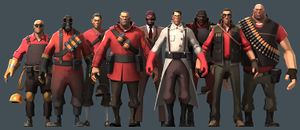
Er zijn negen officiële klassen die kunnen worden gespeeld in Team Fortress 2:
Officiële klassen
Klasserollen
Alle negen klassen worden gegroepeerd in drie specifieke vechttypen: aanvallend, verdedigend en ondersteunend, maar ze kunnen allemaal worden gespeeld buiten hun toegewezen rol gebasseerd op de speler's strategiekeuze.
Aanvallend 


Aanvallende klassen (Scout, Soldier en Pyro) zijn de aanvallende kracht van een team. Of het nou een controlepost aanvallen is of de intelligentie pakken, deze klassen hebben de focus op mobiliteit. Scouts hebben de mogelijkheid om controleposten twee keer zo snel te veroveren als andere klassen en kunnen er sneller naar toe komen met zijn snelheid en dubbele sprongen. Soldiers kunnen veel schade doen met hun Raketwerpers en kunnen uit alle kanten komen door te raketspringen. Pyros kunnen chaos veroorzaken met zijn vuur in vijandelijk gebied met een goed getimede hinderlaag. De Pyro kan ook teamgenoten blussen en heeft de hoogste snelheid/gezondheid ratio van alle klassen (exclusief buffs en voorwerpen).
Verdedigend 


Verdedigende klassen (Demoman, Heavy en Engineer) zijn er om vijandelijke toegang tot de belangrijkste delen van een map tegen te houden. De verdedigende klassen hebben de meeste vuurkracht. Demommannen kunnen gebieden beschermen met hun kleefbommen die ze kunnen ontsteken wanneer vijanden dichtbij komen. Heavy's zijn goed om veel vijanden neer te maaien en terug te forceren. Heavy's kunnen ook vijanden in het gebied houden terwijl ze vertraagt worden. Engineers kunnen Sentry's bouwen voor een effectieve verdediging over een heel gebied, maar ook Teleporters en Dispensers voor ondersteuning voor het hele team.
Ondersteuning


Support classes (Medic, Sniper, and Spy) cannot hold the fight on their own, but their specialized abilities can tip the balance in their team's favor. They offer the offensive and defensive classes an extra edge in battle and can help turn the tide of the game. Whether crippling the enemy advance from behind or keeping teammates healed, the support classes are always handy to have around. Medics offer a mobile means of healing for teammates, capable of overhealing them to 150% of their maximum health, and can provide a range of buffs such as invincibility, 100% critical hit rate, 300% healing rate as well as immunity to movement impairing effects, or 75% resistance to bullets, explosions, or fire. Snipers can eliminate key targets from a distance and use Jarate to extinguish teammates on fire and increase the damage dealt to the enemy. Spies can infiltrate enemy lines undetected, disable and deconstruct buildings, and assassinate critical menaces.
Health points
Class health points comparison
The "All class" portrait, featuring one of each class type.
| Scout
|
125
|
185
|
158
|
| Met de Klaas Vaak uitgerust
|
110
|
165
|
139
|
| Soldier
|
200
|
300
|
251
|
| Met de Back-up van het Bataljon uitgerust
|
220
|
330
|
276
|
| Pyro
|
175
|
260
|
220
|
| Demoman
|
175
|
260
|
220
|
| Uitgerust met Ali Baba's Kleine Schoentjes of de Smokkelaar
|
200
|
300
|
251
|
| Uitgerust met een Ooglander, Paardloze Hoofdloze Paardmanns Hoofdnemer of een Nessies Negen IJzer met 0 hoofden
|
150
|
225
|
189
|
| Uitgerust met een Ooglander, Paardloze Hoofdloze Paardmanns Hoofdnemer of een Nessies Negen IJzer met 1 hoofd
|
165
|
245
|
208
|
| Uitgerust met een Ooglander, Paardloze Hoofdloze Paardmanns Hoofdnemer of een Nessies Negen IJzer met 2 hoofden
|
180
|
270
|
226
|
| Uitgerust met een Ooglander, Paardloze Hoofdloze Paardmanns Hoofdnemer of een Nessies Negen IJzer met 3 hoofden
|
195
|
290
|
245
|
| Uitgerust met een Ooglander, Paardloze Hoofdloze Paardmanns Hoofdnemer of een Nessies Negen IJzer met 2 hoofden
|
210
|
315
|
264
|
| Uitgerust met Ali Baba's Kleine Schoentjes of de Smokkelaar en een Ooglander, Paardloze Hoofdloze Paardmanns Hoofdnemer of een Nessies Negen IJzer met 0 hoofden
|
175
|
260
|
220
|
| Uitgerust met Ali Baba's Kleine Schoentjes of de Smokkelaar en een Ooglander, Paardloze Hoofdloze Paardmanns Hoofdnemer of een Nessies Negen IJzer met 1 hoofd
|
190
|
285
|
239
|
| Uitgerust met Ali Baba's Kleine Schoentjes of de Smokkelaar en een Ooglander, Paardloze Hoofdloze Paardmanns Hoofdnemer of een Nessies Negen IJzer met 2 hoofden
|
205
|
305
|
258
|
| Uitgerust met Ali Baba's Kleine Schoentjes of de Smokkelaar en een Ooglander, Paardloze Hoofdloze Paardmanns Hoofdnemer of een Nessies Negen IJzer met 3 hoofden
|
220
|
330
|
276
|
| Uitgerust met Ali Baba's Kleine Schoentjes of de Smokkelaar en een Ooglander, Paardloze Hoofdloze Paardmanns Hoofdnemer of een Nessies Negen IJzer met 4 hoofden
|
235
|
350
|
295
|
| Heavy
|
300
|
450
|
376
|
| Onder het effect van de Dalokohsreep of Viskoek
|
350
|
500†
|
426
|
| With the Stalen Vuisten equipped
|
300
|
390
|
346
|
| With the Stalen Vuisten equipped and while under the effects of the Dalokohsreep or Viskoek
|
350
|
440
|
396
|
| Engineer
|
125
|
185
|
158
|
| Met de Geweerslinger uitgerust
|
150
|
225
|
189
|
| Medic
|
150
|
225
|
189
|
| Met de Vita-Zaag uitgerust
|
140
|
210
|
176
|
| Sniper
|
125
|
185
|
158
|
| Spy
|
125
|
185
|
158
|
| Met de Grote Verdiener uitgerust
|
100
|
150
|
126
|
| Met de Complotteerders Kunai uitgerust
|
70
|
105
|
89
|
| Maximale overgenezing van een ruggesteek met de Complotteerders Kunai
|
n.v.t.
|
210
|
n.v.t.
|
†Theoretical value. Overheal does not exceed 150% of the classes' maximum health.
A Medic with the Medi Gun, Kritzkrieg, or Vaccinator may overheal a teammate to 150% of their normal health maximum. The Quick-Fix can overheal up to only 125% of a teammate's health, but can still maintain fully overhealed health created by the Medi Gun, Vaccinator, or Kritzkrieg. If hurt, a player can refill their health through a number of ways.
Speed
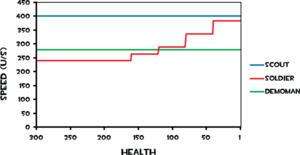
Escape Plan speed values vs. health
Speed is measured in-game using the command cl_showpos 1, measuring in velocity units (v.) The standard movement speed is 100% (that of the Engineer, Pyro, and Sniper). Note that forward speed is obtained by pressing the forward, left, or right keys, the backward speed is obtained by pressing the backward key, while crouching speed is found by pressing the crouch button. Backward speed is generally calculated by 90% of the class's forward speed, while crouching is at 33%. Forward and backward speeds are the same when crouching or charging/zooming as a Sniper. During humiliation, all classes on the winning team will move 10% faster and all on the losing team will move 10% slower.
All normal forward speeds are capped at 520v or 173%; backwards-capped at 468v or 156%; crouched at 173.33v, or 58%; swimming at 416v, or 139%.
For Spies, disguising as a slower class (Soldier, Pyro, Engineer, Sniper, Demoman, or Heavy) will accurately reduce the Spy's speed to the appropriate speed of the class he is disguised as, e.g. the Spy disguised as the Heavy will move to the speed of Heavy, and remain at that speed unless he breaks disguise or cloaks. Disguising as a faster class (Scout), however, will not make the Spy move faster and he will continue to move at 107% speed (Spy`s default speed). Disguising as a player wielding a weapon that increases move speed (eg Powerjack or Overdose) will show the disguised Spy as carrying the weapon, but will not actually increase speed.
A Demoman wielding the Eyelander, Horseless Headless Horsemann's Headtaker, or Nessie's Nine Iron will gain approximately 7% of his base speed with every kill or "head" taken with it. While charging with the Chargin' Targe or Splendid Screen equipped, he moves at 250% of the standard movement speed. The Soldier's speed while wielding the Escape Plan increases by 10% with every loss of 40 health below 200.
A Soldier who has activated the effects of the Concheror nearby their teammate, or has hit a teammate within the last 4 seconds with the Disciplinary Action, will allow the teammate and the Soldier himself to move up to 140% of the speed they normally would.
A Medic who has any secondary weapon equipped will be able to match the speed of any faster-moving teammate while they are connected by the healing beam.
Class speed comparison
| Scout
|
|
|
|
|
| Baby Face's Blaster at 0% boost
|
|
|
|
|
| Baby Face's Blaster at 50% boost
|
|
|
|
|
| Baby Face's Blaster at 100% boost
|
|
|
|
|
| Soldier
|
|
|
|
|
| Charging the Cow Mangler 5000
|
|
|
|
|
| Wielding the Escape Plan over 160 Health
|
|
|
|
|
| Wielding the Escape Plan between 160 and 121 Health
|
|
|
|
|
| Wielding the Escape Plan between 120 and 81 Health
|
|
|
|
|
| Wielding the Escape Plan between 80 and 41 Health
|
|
|
|
|
| Wielding the Escape Plan below 41 Health
|
|
|
|
|
| Pyro
|
|
|
|
|
| Wielding the Powerjack
|
|
|
|
|
| Demoman
|
|
|
|
|
| Uitgerust met Ali Baba's Kleine Schoentjes of de Smokkelaar
|
|
|
|
|
| Uitgerust met de Ooglander, Paardloze Hoofdloze Paardmanns Hoofdnemer of een Nessie's Negen IJzer met 0 koppen
|
|
|
|
|
| Uitgerust met een Ooglander, Paardloze Hoofdloze Paardmanns Hoofdnemer of een Nessie's Negen IJzer met 1 kop
|
|
|
|
|
| Uitgerust met een Ooglander, Paardloze Hoofdloze Paardmanns Hoofdnemer of een Nessie's Negen IJzer met 2 koppen
|
|
|
|
|
| Uitgerust met een Ooglander, Paardloze Hoofdloze Paardmanns Hoofdnemer of een Nessie's Negen IJzer met 3 koppen
|
|
|
|
|
| Uitgerust met een Ooglander, Paardloze Hoofdloze Paardmanns Hoofdnemer of een Nessie's Negen IJzer met 4 koppen
|
|
|
|
|
| Uitgerust met Ali Baba's Kleine Schoentjes of de Smokkelaar en een Ooglander, Paardloze Hoofdloze Paardmanns Hoofdnemer of een Nessie's Negen IJzer met 0 koppen
|
|
|
|
|
| Uitgerust met Ali Baba's Kleine Schoentjes of de Smokkelaar en een Ooglander, Paardloze Hoofdloze Paardmanns Hoofdnemer of een Nessie's Negen IJzer met 1 kop
|
|
|
|
|
| Uitgerust met Ali Baba's Kleine Schoentjes of de Smokkelaar en een Ooglander, Paardloze Hoofdloze Paardmanns Hoofdnemer of een Nessie's Negen IJzer met 2 koppen
|
|
|
|
|
| Uitgerust met Ali Baba's Kleine Schoentjes of de Smokkelaar en een Ooglander, Paardloze Hoofdloze Paardmanns Hoofdnemer of een Nessie's Negen IJzer met 3 koppen
|
|
|
|
|
| Uitgerust met Ali Baba's Kleine Schoentjes of de Smokkelaar en een Ooglander, Paardloze Hoofdloze Paardmanns Hoofdnemer of een Nessie's Negen IJzer met 4 koppen
|
|
|
|
|
| Uitgerust met de Schotse Schedelhouwer
|
|
|
|
|
| Wielding the Scotsman's Skullcutter with weapon slot boots and a shield equipped
|
|
|
|
|
| Aanstormend met het Stormend Schild of het Schitterende Scherm
|
|
n.v.t.
|
n.v.t.
|
|
| Aanstormend met het Stormende Schild of het Schitterende Scherm en de Schotse Schedelhouwer
|
|
n.v.t.
|
n.v.t.
|
|
| Charging with a shield and wielding the Scotsman's Skullcutter with weapon slot boots equipped
|
|
n.v.t.
|
n.v.t.
|
|
| Heavy
|
|
|
|
|
| Any of the Heavy's Primary weapons spun up, except the Brass Beast
|
|
|
|
|
| Brass Beast spun up
|
|
|
|
|
| Under the effects of the Buffalo Steak Sandvich
|
|
|
|
|
| Wielding the Gloves of Running Urgently
|
|
|
|
|
| Wielding the Eviction Notice
|
|
|
|
|
| Engineer
|
|
|
|
|
| Hauling a building
|
|
|
|
|
| Medic
|
|
|
|
|
| Wielding the Overdose at 100% ÜberCharge
|
|
|
|
|
| Healing a Scout
|
|
|
|
|
| Sniper
|
|
|
|
|
| With any Rifle, except the Classic, zoomed in
|
|
|
|
|
| Charging the Classic at either zoom level
|
|
|
|
|
| With the Huntsman drawn
|
|
|
|
n.v.t.
|
| Spy
|
|
|
|
|
| Disguised as a Scout
|
|
|
|
|
| Disguised as a Soldier
|
|
|
|
|
| Disguised as a Pyro
|
|
|
|
|
| Disguised as a Demoman
|
|
|
|
|
| Disguised as a Heavy
|
|
|
|
|
| Disguised as a Engineer
|
|
|
|
|
| Disguised as a Medic
|
|
|
|
|
| Disguised as a Sniper
|
|
|
|
|
Size
A height chart for all the classes.
All classes have varying height, with the Engineer being the shortest and the Heavy being the tallest of the classes for the purposes of tracing Hitscan weapons. Classes also have various builds and general body sizes; each class has their own individual set of shaped hitboxes used for bullet-based attacks.
However, for the purposes of collisions with objects, players, melee attacks, and projectiles, all classes are considered to be the same width and height. This also means that no class has an advantage or disadvantage when it comes to navigating corners or tight spaces.
Update history
21 mei 2008-patch
6 januari 2011-patch (bèta)
13 januari 2011-patch (bèta)
- Player health increased 25%. (over normal – not the previous 100% increase)
11 februari 2011-patch (bèta)
- Restored player health to normal values.
27 juni 2012-patch (Pyromania Update)
- [Onbeschreven] Increased the running speed cap from 450HU/s to 520HU/s.
7 juli 2016-patch (Meet Your Match Update)
- Spy max speed increased to 320 (from 300).
De Heavy is de sterkste, maar langzaamste klasse in het spel. Zijn grote vuurkracht en hoge gezondheid zullen bijna altijd verzekeren dat hij aan het front gevonden zal worden als aanvaller, waar zijn Minigun overheerst op korte afstand. De Heavy is net een muur waar zijn teamgenoten zich achter kunnen verbergen en wordt vaak als een Medic buddy aangewezen. Maar zijn grootte en langzame snelheid maken hem een makkelijk doelwit, vooral voor vijandelijke Snipers en Spy's. Zijn luidheid maakt hem niet al te best voor hinderlagen. Een goede Heavy zal samen met zijn team werken om doelen te behalen.
Primaire wapens
De Minigun is als een snelle Shotgun; hij verscheurt iedereen op korte afstand, maar de grote verspreiding van de kogels zorgt ervoor dat de schade enorm afneemt over afstanden. Hoewel de Minigun een heleboel vuurkracht bezit, heeft het een normale opwarmtijd, opwarmen zorgt ervoor dat je snelheid hevig wordt verminderd. Het is beter om het altijd als actief wapen te hebben of simpelweg een ander wapen te gebruiken wanneer je tussen gebieden verplaatst. Je kan het wapen in de lucht opwarmen, waardoor je vijanden kan verrassen als je om een hoek springt.
De kogels van Natascha hebben een uniek vertraageffect dat vijanden dwingt om te stoppen en tegen je te vechten. Als je wapen is opgewarmd is, dan vermindert het de inkomende schade met 20% als je minder dan 50% gezondheid hebt, wat je plaatst in de rol van een aandachtgrijpende tank. Hoewel de Natascha nog steeds veel schade op korte afstand doet, doet het 25% minder schade en het heeft een 30% langere opwarmtijd. Hierdoor hebben vijanden genoeg tijd om te reageren. Door deze factoren is je aanvalskracht op klassen zoals de Soldier of de Demoman enorm verminderd. Een vijandelijke Heavy met een andere Minigun is dan een groter gevaar.
Het Messingen Monster doet de meeste schade per seconden in het spel, maar warmt 50% langzamer op en je loopt met een slakkengang. Om effectief te spelen moet je rekening houden met de opwarmtijd anders ben je erg kwetsbaar van elke kant. Wanneer het wapen opgewarmd is krijg je een 20% weerstand tegen alle schade als je minder dan 50% van je gezondheid hebt. Het Messingen Monster is hierom goed voor verdedigen en wanneer je weinig hoeft te bewegen. Wees voorzichtig om jezelf niet bloot te stellen, omdat je langzaam bent waardoor je een makkelijk doelwit bent voor Snipers en Spy's.
De Tomislav heeft een snellere opwarmtijd en is helemaal stil tijdens het opwarmen. Het geluid van je Minigun is een teken voor een vijand om weg te blijven, de Tomislav's stille opwarming en nauwkeurigere kogels maken het een goede keuze om vijanden te verrassen of jezelf te verbergen wanneer je een gebied beschermt. De Tomislav schiet wel 20% langzamer, waardoor het minder schade doet in lange gevechten, zelfs met de kortere opwarmtijd. Verras je vijanden om ervoor te zorgen dat de lagere vuursnelheid niet uitmaakt.
Wanneer de Huo-Long Hangijzer is opgewarmt gebruikt het 4 munitie per seconden om een vuurring om je heen te maken. In het begin is de Huo-Long Hangijzer zwakker dan de standaard Minigun, maar doet meer schade tegen vijanden die in de brand staan. De vuurring schrikt vijanden af zodat ze niet te dicht bij komen, hierdoor is het een goede keuze als je ergens staat waar vijanden ook moeten staan zoals een controlepost. Als een vijanden liever wegrennen, dan is munitie een probleem. Probeer bij munitiedozen te spelen om dit probleem tegen te gaan. Vertrouw niet te veel op je vuurring, want vijanden hebben genoeg tijd om er overheen te springen of dichtbij te komen tussen twee ringen door.
Secondary weapons

Although the Shotgun is a secondary weapon and weaker than the Minigun, it can still deal plenty of damage. Notably, it gives you a firepower option where you can still remain mobile. Use it when moving between areas, when slowing down to fire your Minigun would be inefficient.
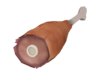
The Sandvich lets you replace a source of mobile firepower, the Shotgun, with the ability to fully heal yourself. Eating the Sandvich takes a long, loud four seconds, so make sure to begin your meal somewhere peaceful. Use alternate fire to throw the Sandvich on the ground to heal allies, particularly any Medic you may work with. Picking up any type of health kit when the Sandvich is consumed will instantly recharge it; make a small health kit more effective by recharging the Sandvich, which acts as a medium health kit when thrown.

The Dalokohs Bar heals you for 100 HP and can be repeatedly eaten to heal minor wounds. Additionally, it temporarily increases your maximum health by 50. However, it cannot heal you as quickly as the Sandvich and only heals for a small health pack if dropped for allies. The Dalokohs Bar can be beneficial if your team lacks a Medic but does have a constant source of healing from either a Dispenser or medkits.
Consuming the Buffalo Steak Sandvich does not heal you, but instead gives a special buff that temporarily locks you to your melee weapon while granting increased movement speed, guaranteed mini-crits, and increased damage vulnerability. If you seldom use your melee weapons, it is best used to move towards the frontlines quickly while your teammates keep you safe; consider using it alongside the Fists of Steel to mitigate the increased damage from ranged attacks. If you prefer to use the buff to improve your melee combat, use the increased movement speed to avoid attacks and overpower opponents with mini-crits. Like the Sandvich, it can be thrown onto the ground to heal injured teammates.

The Family Business is a faster, weaker Shotgun with a larger magazine size. While the Shotgun deals more immediate damage, the Family Business deals more overall damage if all shots hit, making it more viable for prolonged combat. It can also be used to pester opponents at a distance due to its high fire rate. Do note that due to the gun's magazine size, it takes a significant amount of time to fully reload.
The Panic Attack deploys 50% faster than the Shotgun, making it useful for a few panicked shots if you are caught off guard. However, the Panic Attack's pellet spread widely increases as you fire consecutively; you want to make the first few shots count.
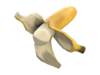
The Second Banana heals 100 less health than the Sandvich per taunt. Similar to the Dalokohs Bar, the Second Banana will only drop as a small health pack. It does, however, take nearly a third of the time it would take for a Sandvich to recharge (11 seconds compared to 30 seconds), meaning that it can heal 600 health in around the same time that the Sandvich would heal 300.
Melee weapons

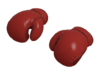
If an enemy takes you by surprise at close range, it may still be worth it to just spin up your Minigun instead of switching to your Fists; you are slow and will probably be unable to get within melee range of your foe. Still, your large health pool does give you an advantage in a melee fight against single opponents.
Obtaining a kill with the Killing Gloves of Boxing will grant guaranteed critical hits for five seconds. You're as slow as ever, so use this weapon when you have the enemy in a corner and can easily land your punches. Once you've obtained the critical hit boost, pick a weapon to rampage with. Switching to and revving the Minigun gives you only three seconds to shred nearby foes. You could also switch to the Shotgun or just continue swinging to use the boost for as long as possible. The Tomislav has a faster spin-up time and works well with this weapon.
Because you rarely engage in melee combat, you can use the Gloves of Running Urgently solely for its speed boost. The Gloves of Running Urgently drain your maximum health while active, reducing both your current health and overheal. Drained health recovers when the weapon is not equipped. The Gloves take 50% longer to holster, so give yourself some time to recover before entering combat. This makes the speed boost useful for traversing the map or retreating, but not for rushing to an active firefight.
The Fists of Steel make you very difficult to kill with ranged weaponry, but causes you to receive double damage from melee attacks. They are particularly useful when you need to cross through open areas or retreat from a firefight. You can also deploy them as you approach opponents while being protected by the weapon's ranged resistance. It takes significantly longer to switch away from the Fists of Steel, so preemptively switch to your Minigun if an enemy decides to attack you with his melee weapon; it's very possible for you to be killed before the Fists can be holstered.
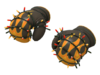
The Warrior's Spirit causes you to deal and receive 30% more damage, allowing you to defeat certain enemies in two punches rather than three. This can also affect you; for example, you now can be killed in four melee attacks, rather than five. The 50 health restored on kill compensates for the increased damage taken, provided you win. You can use the Warrior's Spirit alongside the Buffalo Steak Sandvich to further amplify damage dealt and taken for a risky, mobile melee playstyle.
The Eviction Notice swings twice as fast as the Fists, but deals 60% less damage. It also grants 15% movement speed and an additional speed boost on hit. However, your maximum health drains by -5 per second (to a minimum of 100) while this weapon is active. The increased attack speed does not fully make up for the reduced damage or the health drain, but the ability to actually keep up with an enemy in melee combat might allow you to outlast them. Outside of combat, the Eviction Notice can be used as a lower-risk version of the Gloves of Running Urgently, granting lower movement speed and draining less maximum health.
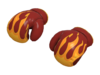
When using the Holiday Punch, critical hits or attacks from behind deal no damage but force opponents to laugh in place. Like the default Fists, the Holiday Punch is inefficient in standard combat due to your slow movement speed. If you do, however, catch a foe off-guard and force him to laugh, you can finish him off with almost any method of your choosing, including the Showdown taunt kill. Characters cannot be forced into animations unless they are grounded, so use a different weapon against a foe who insists on staying in the air or swimming in water. It is possible to sneak up and cripple an ÜberCharged enemy.
| Heavy |
|---|
| | Wapens |
Primair | | | Secundair | | | Slagwapen |
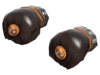
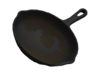
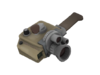
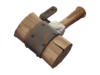
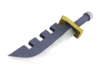
Vuisten ( Koekenpan, Saxxy, Gewetenrijke Bezwaarder, Apoco-Vuisten, Vrijheidsstaf, Helse Knuppel, Herinneringenmaker, Hamschenkel, Gouden Koekenpan, Necropletter, Verkeersbrigadier, Prinny-machete) · Moordende Bokshandschoenen · Haastige Handschoenen ( Broodbeet) · Krijgersgeest · Stalen Vuisten · Uitzettingsbevel · Feestdagenstoot | | | | | | |
| | | Vaardigheden | | | | Cosmetics | | | | Voorwerpsets | | | | Speciale Bespottingen | | | | Prestaties | | | | Personage | | | | Strategie | | | | Overig | |
|


