Difference between revisions of "Help:Cosmetic Images"
GrampaSwood (talk | contribs) (Implemented new guidelines talked about on the talk page. Weapon/taunt props and 1k pixel guideline (not rule!)) |
GrampaSwood (talk | contribs) |
||
| Line 102: | Line 102: | ||
When uploading an image with a non-stock weapon or taunt prop, include the held weapon or the taunt from which the taunt prop originates in the summary. | When uploading an image with a non-stock weapon or taunt prop, include the held weapon or the taunt from which the taunt prop originates in the summary. | ||
| − | :{{c|Note}}: Images should '''not''' be remade purely to add a fitting prop or weapon. They | + | :{{c|Note}}: Images should '''not''' be remade purely to add a fitting prop or weapon. They may be added if there is a good reason to remake the image already, but it should not be the sole reason. |
== Removing the background and uploading == | == Removing the background and uploading == | ||
Revision as of 09:57, 15 July 2024
| ||||||||||||||||||||||||||||
This Cosmetic Images tutorial will show you how to create images for cosmetics to use on the Wiki. For this tutorial, we will be putting the Team Captain on the Soldier.
Contents
Setting up HLMV
Please see the Model Viewer page for instructions on setting up your model viewer if you haven't already.
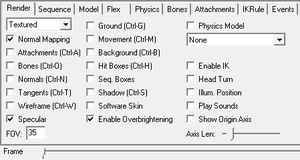
Once you have HLMV open, make sure your settings are the same as the ones to the right (setting the FoV to a lower setting makes for a nicer image).
Finding the models
Once you have the model viewer open, you will first need to locate the correct class model.
You can do this by going to file > (Steam) Load Model... and then navigating to \models\player\hwm (you should always use HWM models for cosmetic images as they are much higher quality).
 Note: The only exception to this is if you are making an image of a full-head covering cosmetic such as the Kathman-Hairdo because the face flexes wont match up with the HWM flexes.
 Note: For items that blend with the character's face texture, make sure to use standard models if they don't match the color properly with the hwm version. Some examples include Vampire Makeover, Unknown Mann, Colossal Cranium, Burly Beast and Poolside Polo.
- You may also get issues with HLMV saying it can't find a directory. To fix this, navigate to
\Steam\steamapps\common\Team Fortress 2\tf\and create the folders that are needed to get to the model you are attempting to get to. Alternatively, you can download and extract this pack, and copy the contents to\Steam\steamapps\common\Team Fortress 2\tf\custom\. This will add all the folders to load weapons, cosmetic items and player models correctly, without having any errors.
Select the Soldier model to open it up in the model viewer.
The model will most likely appear slightly off screen if this is the first time you have done this. If so, use MOUSE2 to zoom and ⇧ Shift + MOUSE1 to pan the model so that you can get a better view.
Once the model is in view, you'll need to equip the correct cosmetic.
This is done by going to file > (Steam) Load Weapon....
Valve-made cosmetics are found in \models\player\items and community-made ones are found in \models\workshop\player\items.
Since we are using the Team Captain for this tutorial, navigate to the \models\player\items\soldier folder and find soldier_officer.mdl. This will put the hat on soldier's head.
As you can probably see now, the hat is poking through the Soldier's helmet. To fix this do the following:
- Click on the
modeltab - In the first drop-down menu, select
hat - In the drop-down menu next to that, select
Submodel 1
This will hide Soldier's helmet.
Posing
Next comes the fun part... posing your model!
Choosing a pose
First of all, you will need to pick a suitable pose for your soldier. To do this, click on the sequence tab and choose an animation from the first drop-down menu.
You will want to pick a nice pose that isn't too crazy and also doesn't cover up any of the cosmetic.
For this example, we will be making him salute by using his shotgun taunt animation, which is called taunt04.
Once you choose his pose, you will notice that he'll be laying flat on the floor. This is normal, as all the taunt animations start off in this pose.
To get him to stand up, all you need to do is use the Frame slider to pick the part of the animation you want to use. Anywhere between frame 110.0 and frame 133.0 is good for this picture.
Lastly, you'll need to rotate Soldier to get a better view of the cosmetic. This is done by clicking and holding MOUSE1 in the centre of the view and then dragging the model to rotate it.
 Note: Some poses available for choosing may break some parts of the model (bones on incorrect places, certain equipment missing, certain equipment positioned incorrectly, etc.), the following table specifies which ones:
| Class | Sequence | Reason and explanation |
|---|---|---|
| Scout | competitive_loserstate_idle
|
Using this pose causes the Dogtags on the Scout model to disappear completely. Avoid using this pose when making images, however, feel free to use this pose if the Cosmetic Item in question hides Scout's Dogtags. |
| Pyro | competitive_loserstate_idle and competitive_winnerstate_idle
|
Using this pose causes the default Napalm Grenades on Pyro to be flipped on a strange orientation. Avoid using this pose, and only use it in case the Cosmetic Item being shown hides the Grenades entirely. |
| Pyro | competitive_loserstate_idle
|
Along with the issues described above, equipping a Cosmetic Item that uses the bone associated to Medals (mostly being Tournament Medals and other types of Medals), will cause the medal to float on the incorrect side, and in front of the Napalm Grenades. |
| Demoman | competitive_loserstate_idle
|
Similar to above, this pose causes the Grenades on the Demoman's chest to show all too close together. Only use this pose in case the Cosmetic Item you are showing hides the Grenades. |
| Sniper | competitive_winnerstate_idle
|
This pose does not have any visible problem at first glance, however, the bone related to Medals is incorrectly placed. Avoid using this pose when creating image previews for Medals Cosmetic Items, or for other Cosmetics that use the same bone. |
Face posing
After you've gotten your Soldier into a good pose, you'll need to pose his face to make the image more interesting.
To do this, click on the Flex tab. (If you've ever played Garry's Mod, you may recognise this next step.)
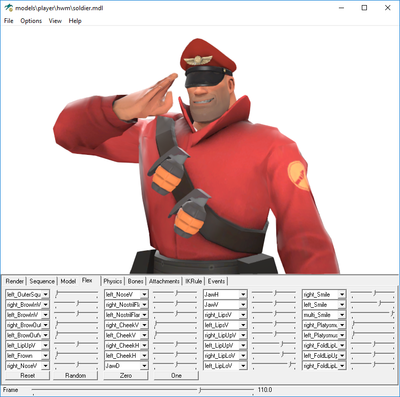
In this tab, you will find a whole bunch of drop-down menus and sliders. Each one represents a specific part of the face.
For example, right_LipUpV will set the height of the right half of the top lip.
Feel free to experiment with each one before continuing in order to get a feel for it. (Once you're done experimenting, you can press the Reset button at the bottom to set everything back to default.)
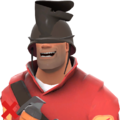
When picking an expression, try to pick one that best fits the emotions of the pose and the character you're using. For this example, we'll be giving Soldier a slight smile to make him look a bit proud.
First of all, move the right_Smile and left_Smile sliders to the right a bit to give him the smile, then use the various lip sliders to show some of his teeth.
After you're done, you should have something like the example on the right.
 Note: As a general rule, if the expression feels weird in real life, it probably shouldn't be changed.
Weapons and props
Some poses may look awkward without a weapon or prop that normally accompanies it, or they can simply improve an image. In general, Stock weapons (without any modifications including but not limited to Festivizer, a War Paint, Australium, or Festive variant) are the only ones used in images unless the non-stock weapon or taunt prop fits the theme of the cosmetic. For example, a Scout cosmetic that may fit the theme of a knight could use a Three-Rune Blade, but a cosmetic item that's a Christmas-themed hat would not benefit from the addition of a Sandman.
For taunt props, make sure that it's not large enough to take away from the main focus of the image or does not resemble anything that could be a weapon. For example, Pyro's gas canister from the Cheers! taunt looks very similar to the Gas Passer, making it unsuitable for an image. Large props, such as the ambulance from the Mannbulance taunt is too large for an image as it will distract from the purpose of the image: to display the cosmetic on the class.
When uploading an image with a non-stock weapon or taunt prop, include the held weapon or the taunt from which the taunt prop originates in the summary.
 Note: Images should not be remade purely to add a fitting prop or weapon. They may be added if there is a good reason to remake the image already, but it should not be the sole reason.
Removing the background and uploading
There are many different techniques for removing transparency. GIMP users can find a tutorial here.
Alternatively, there is a program that automatically removes it for you. The program can be found here.
After removing the background from your image, you'll want to crop out any blank space.
After cropping the image, make sure to check the width. Generally, around 1000 pixels is what is considered the maximum. Images may be wider, but if the image becomes too small when viewed in a cosmetic item's gallery or infobox then it may need to be remade to make it smaller. This can be done by changing the pose, or zooming in slightly.
Once your image is done, it's ready to be uploaded to the Wiki!
You can do this by either uploading it directly or, if it is an updated version of an old image, by clicking Upload a new version of this file underneath the image you are going to overwrite.
 Note: Don't forget to add categories to your image using the
 {{classimg}}template when uploading (check documentation for more info).
Examples
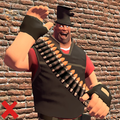
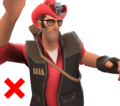
Below are examples of what to do and what not to do when making cosmetic images.
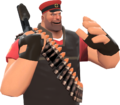
The Good
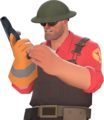
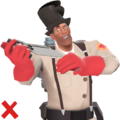
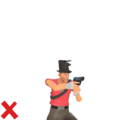
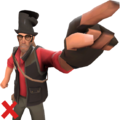
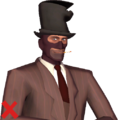
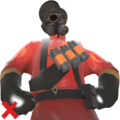
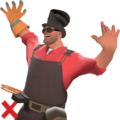
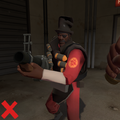
The Bad
Image uses the HWM model which clips with certain cosmetic items that show skin, use
{{Regular model}}when uploading
See also
- Painted variants (tutorial) – tutorial on taking screenshots of painted images.
- Help:Images – helpful information on placing of images.

