Difference between revisions of "Community Megaton strategy"
GrampaSwood (talk | contribs) (mc) |
(Added more stuff to the general strata page) |
||
| Line 31: | Line 31: | ||
* The vast majority of water in the map is swimmable, giving you a [[Pyro]]-resistant flank route. | * The vast majority of water in the map is swimmable, giving you a [[Pyro]]-resistant flank route. | ||
* There are multiple side buildings containing a small [[Health#Health kits|health pack]] and a medium [[Ammo#Ammo boxes|ammo pack]]. These can be retreated into while in a fight to heal up and gain an advantage. | * There are multiple side buildings containing a small [[Health#Health kits|health pack]] and a medium [[Ammo#Ammo boxes|ammo pack]]. These can be retreated into while in a fight to heal up and gain an advantage. | ||
| + | *Classes with additional movement options ([[Soldier]], [[Demoman]], [[Spy]]) will find use out of the fact you can sneak, jump onto the enemy team's roof and rain hell on them from a sneaky vantage point, just watch out for the possible [[Sniper]] or [[Gunspy]] that was up on the roof before you. | ||
==Class-specific strategy== | ==Class-specific strategy== | ||
Revision as of 19:44, 19 November 2024
| “Sun Tzu's got nothing on us!” This article is a Community strategy stub. As such, it is not complete. You can help the Team Fortress Wiki Community Strategy Project by expanding it. |
| Megaton | |
|---|---|

| |
| Basic Information | |
| Map type: | King of the Hill |
| File name: | koth_megaton
|
| Released: | July 18, 2024 Patch (Summer 2024 Update) |
| Developer(s): | Aeon "Void" Bollig Juniper Liam "Diva Dan" Moffitt Sky Freyja donhonk |
| Map Info | |
| Environment: | Tropical, island |
| Setting: | Daytime |
| Hazards: | Drowning, Nuclear bomb |
| Deep Water: | Yes |
| Map Items | |
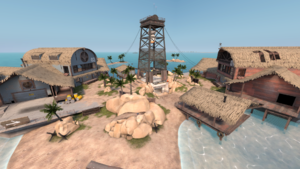
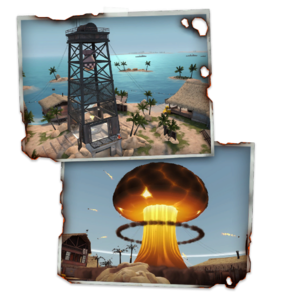
| Map Photos | |
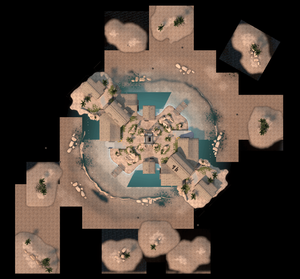
| Map Overview | |
This article is about Community Megaton strategy.
Note: It is recommended to read the main Megaton article first to become familiar with the names of key map locations used in this article.
General Strategy (All Classes)
See also: Community King of the Hill strategy
- The vast majority of water in the map is swimmable, giving you a Pyro-resistant flank route.
- There are multiple side buildings containing a small health pack and a medium ammo pack. These can be retreated into while in a fight to heal up and gain an advantage.
- Classes with additional movement options (Soldier, Demoman, Spy) will find use out of the fact you can sneak, jump onto the enemy team's roof and rain hell on them from a sneaky vantage point, just watch out for the possible Sniper or Gunspy that was up on the roof before you.
Class-specific strategy
 Scout
Scout
- The control point has two small extensions to the sides, while usually out of reach, Scouts can use a double jump to get onto the ledge and flank onto the point. This strategy goes well with the medium health and ammo pack under the point.
 Soldier
 Pyro
Pyro
 Demoman
 Heavy
Heavy
- As the slowest class in a wide open map, not getting headshot can be very difficult. Try to move erratically and juke around when making your way to the point, then use the small cover the point provides to rev up and go on the defence.
 Engineer
- Due to the uneven nature of the island's terrain, it can be difficult to place a Mini-Sentry in a hurry. Plan ahead of where to place your Mini-Sentry to not be caught off-guard by another player.
- The Stilt House can be used to put a sneaky Teleporter exit, allowing for your teammates to come from an unexpected angle.
- A hidden nest can be made at the large side exits out of the Big Houses, which have an extended platform right outside to the left.
- The open nature of the map makes Snipers sniping your Sentry Gun from outside its range a real concern, try to either use cover or place a Sentry in an enclosed space.
 Medic
Medic
- Similar to Heavy, you are very prone to headshots. Move erratically around the map to prevent Snipers from spotting you and try to stay in cover as much as you can.
 Sniper
- The roofs of the Big House, as well as the Walkway, are great spots for sniping as they offer a view of the entire map. Be careful of flankers coming from the side, however, as they can have easy access to the Walkway or Roof.
 Spy
Spy
- The small size of the island and the closeness of the spawns means the spawning outline around teammate may reveal you if you uncloak near the Big House. Consider uncloaking on top of the roofs then dropping down on the opposite end of the enemy spawn to backstab enmies that are unlikely to look back.
- The large side exits out of the Big Houses have an extended platform right outside to the left that allows for relatively safe decloaking.

